3DPrinting

16540 readers
421 users here now

3DPrinting is a place where makers of all skill levels and walks of life can learn about and discuss 3D printing and development of 3D printed parts and devices.

The r/functionalprint community is now located at: or [email protected]

There are CAD communities available at: [email protected] or [email protected]

Rules

If you need an easy way to host pictures, https://catbox.moe may be an option. Be ethical about what you post and donate if you are able or use this a lot. It is just an individual hosting content, not a company. The image embedding syntax for Lemmy is ![](URL)

Moderation policy: Light, mostly invisible

founded 2 years ago
MODERATORS
901
29
submitted 1 year ago* (last edited 1 year ago) by [email protected] to c/3dprinting


UPDATE:

Never before have I seen an entire maker community go "WTF are you doing you MANIAC! Just frigging buy it instead". I'm impressed :-) Normally I have to solicit such a strong response, this was pure ignorance.

I don't know whether we'll go forward with the 3d-printing part of this project anymore. If we do, I do hear you on the PETG, and it's not out of the running anymore. I may take the project on in a much smaller scale, on my own dime, so I can still try out some exotic materials (ie not pla).

In response to the cost per wand. I've found mailbox red TPU72d from kungfuflex for about 43USD per kg. I made a mock-up of the wand with 2mm walls, and at 220mm length it comes out to about 54g per wand. That's about 2.5USD - if nothing goes wrong and I don't waste a spool by printing unattended.

I think there's still something to be said about being able to form the wand to fit snug on the specific flashlight. Maybe the solution will be purchasing wand attachments and making an adapter for them.

ORIGINAL POST:

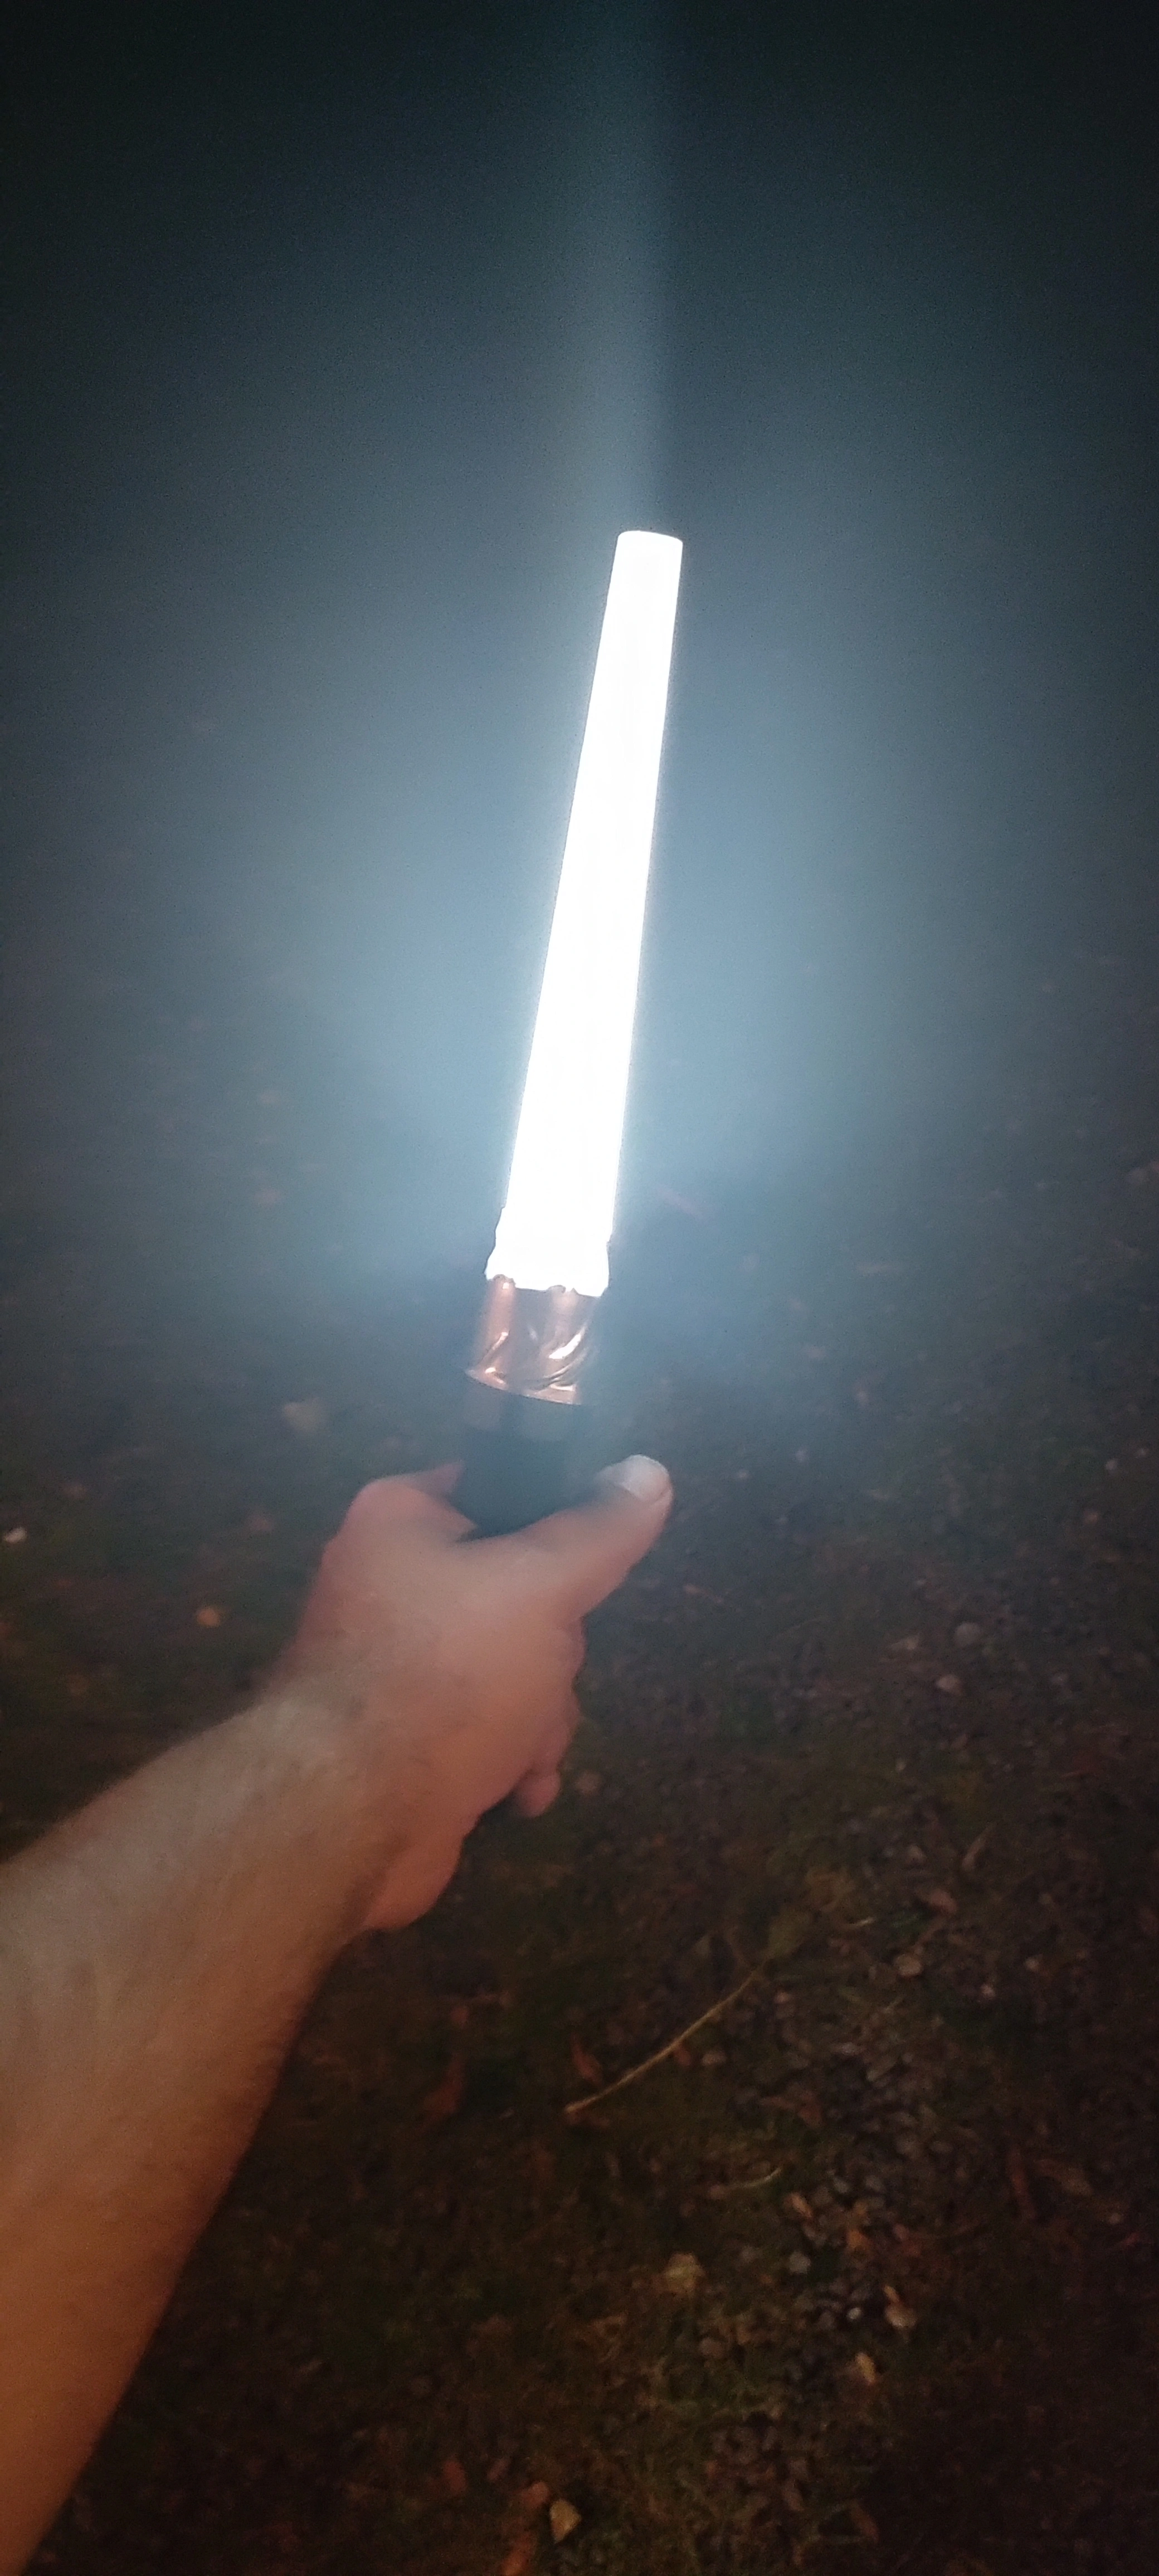
I'm designing a wand attachment for a flashlight. The wand attachment will be about 170-200mm long, slightly cone shaped, and fit securely onto a given flashlight. When attached to the flashlight and the flashlight is turned on, the flashlight will illuminate the wand giving of a red glow.

The purpose of this is to use the wand for directing traffic at night. Don't worry, we're licensed to do so and typically asked by the police to do it.

See the picture for an idea of what I'm trying to explain. Disregard the tape and the fact that it's white PLA. The white PLA is what I had open and the flashlight is not the same as will be used with the final device.

The attachment will be produced in 70-150 copies and handed out to volunteers of my national guard company. The final attachment must therefore be able to take a beating, ie scratches, impacts, temperatures and various rough handling.

I have at my disposal a pool of +10 Cr6-se, one ultimaker s5 and one stratasys uprint se plus.

I'm considering a couple of material choices. TPU or PETG in a couple of the cr6s or PC in ultimaker. The uprint strictly uses some proprietary ABS spools, and all the filament I've got for that is ivory white. A buddy of mine has offered to print a release candidate in flexible tough resin. But I don't think that he has any idea about the scale of the project. So it really narrows down to TPU, PETG or PC. If I'm going to make this rigid I'm going to go for PC, for durability, or TPU for flexibility and durability.

I've found a source for PC in transparent and white and TPU (72d, 95a and 98a) in transparent, red or white.

I like the TPU72d in red, but is it the right material? I can't find anything on the translucency of opaque TPU. In the picture it's just 1 mm of opaque white PLA, but what about 2 or 3 mm of TPU? Should I just drop the illusions of red opaque TPU and print in clear PC and spray a coat of red paint on the inside? Or clear TPU?

WYD?

902
71
submitted 1 year ago* (last edited 1 year ago) by [email protected] to c/3dprinting


I do a lot of soldering and for the last few years have been using SMD components. Up until recently I was buying short pieces of tape with a few dozens or a hundred components. The amount that I do has really increased and running our of components began to irritate me so I started buying them on commercial rolls of 4,000 or 5,000 components.

The full rolls are unwieldy so what I really wanted was a cartridge that was small enough to have a bunch of them in a drawer or plastic storage box but big enough to hold a fair number of components.

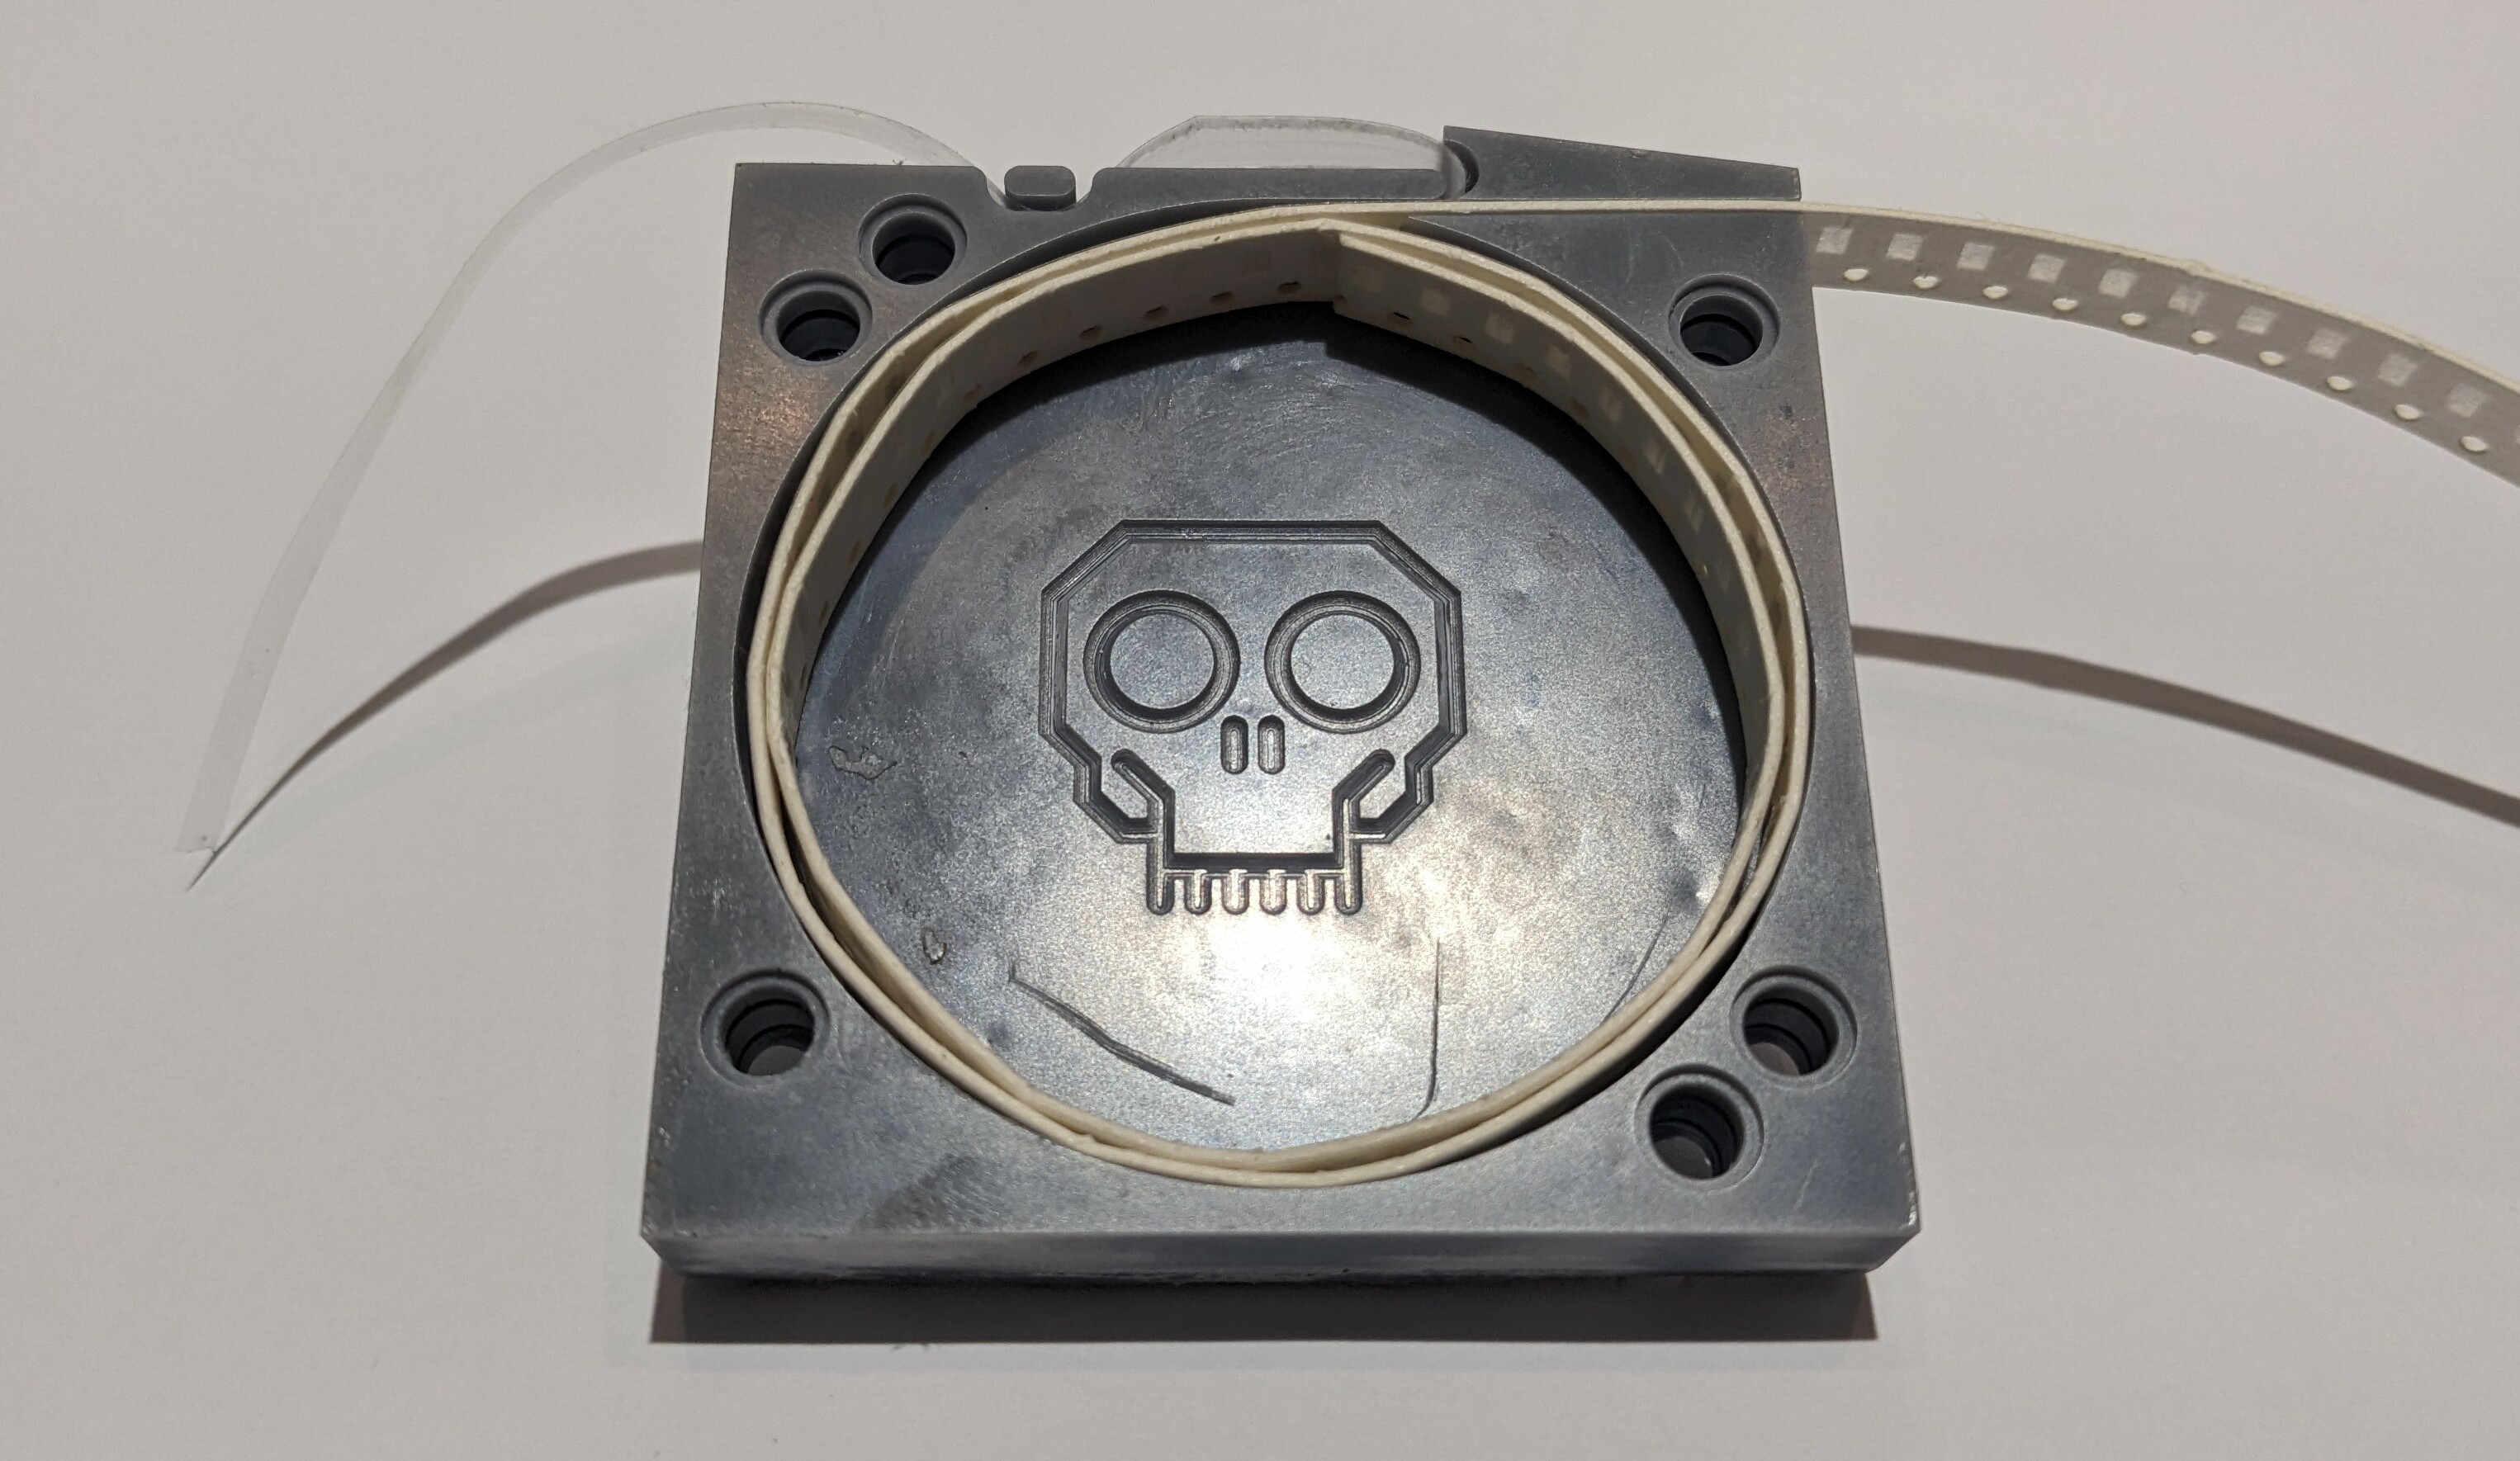
So...I designed this.

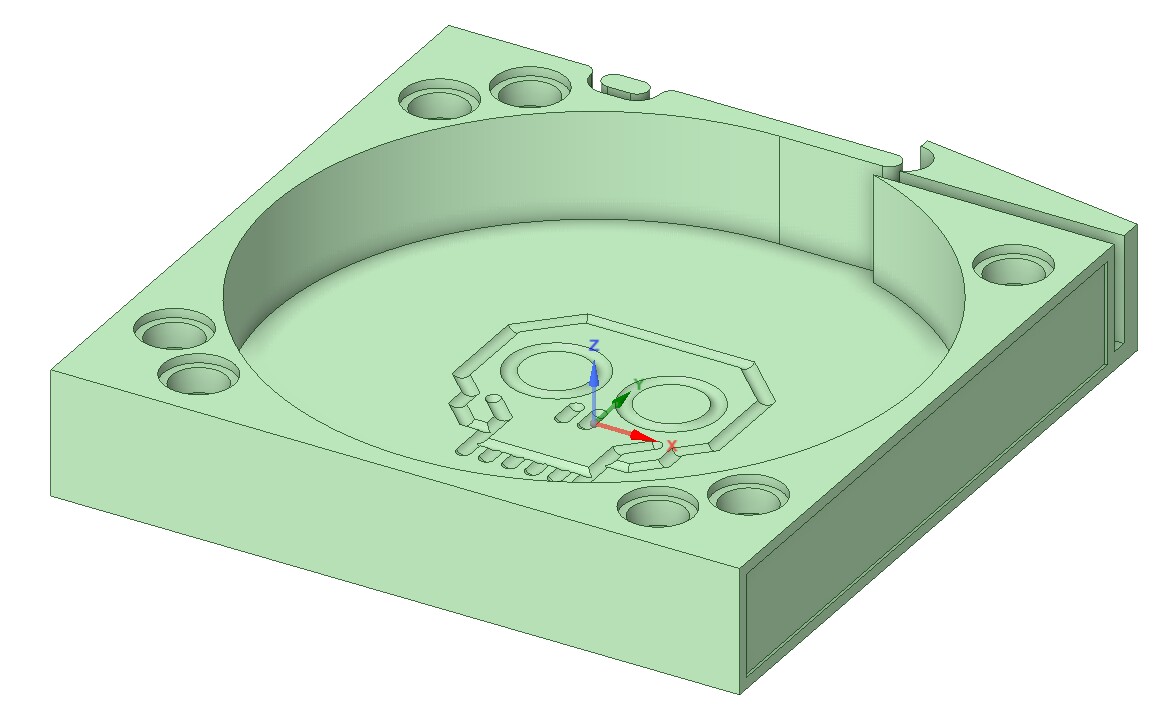
It's 60mm x 60mm x 11mm and is designed to dispense standard 8mm x 1mm component tape. I've got other versions for wider and thicker tape. It will hold a good 2m or tape which is around 1,300 components. The paper tape with the components comes out the straight slot while the clear plastic cover tape turns back out of the curved slot. The little tab holds the cover tape back so it doesn't get in your way. The splitter between the straight slot and the curved slot keeps the components from falling out until the tape emerges from the straight slot.

I think that the coolest feature of this design is the holes around the corners of the cartridge. They allow you to gang cartridges together into stacks using standard LEGO Technics connector pins. The cover also uses connector pin like projections to attach to the cartridge. With the cartridge being only 11mm thick you can't put two pins end to end so I needed two holes so that the pins in adjacent connections can alternate which hole they use. On 16mm and wider cartridges I could have used a single hole but will keep the two holes for compatibility with the narrower cartridges.

This is a rough prototype to test the fit of the tape. It seems to work quite well.

903


This one didn’t print right but I’m gonna try it again later I might change up the color too

904


We meet "Steamboat Ed" at this year's Maker Faire Bay Area, a veteren machinist who has taken to designing shop tools that anyone can 3D print! From a simple drill press to die filers and alignment clamps, Ed's enthusiasm for making shop tools accessible is infectious! Plus, he shares with us his modular motorised rowboat project made using his printed tools.

Find more of Steamboat Ed's projects at: https://www.patreon.com/Steamboat_Ed and on Printables at: https://www.printables.com/@SteamboatEd_265391/models Maker Faire Bay Area 2023: https://makerfaire.com/bay-area/

I like those clamps, especially.

905
32
submitted 1 year ago* (last edited 1 year ago) by callcc to c/3dprinting


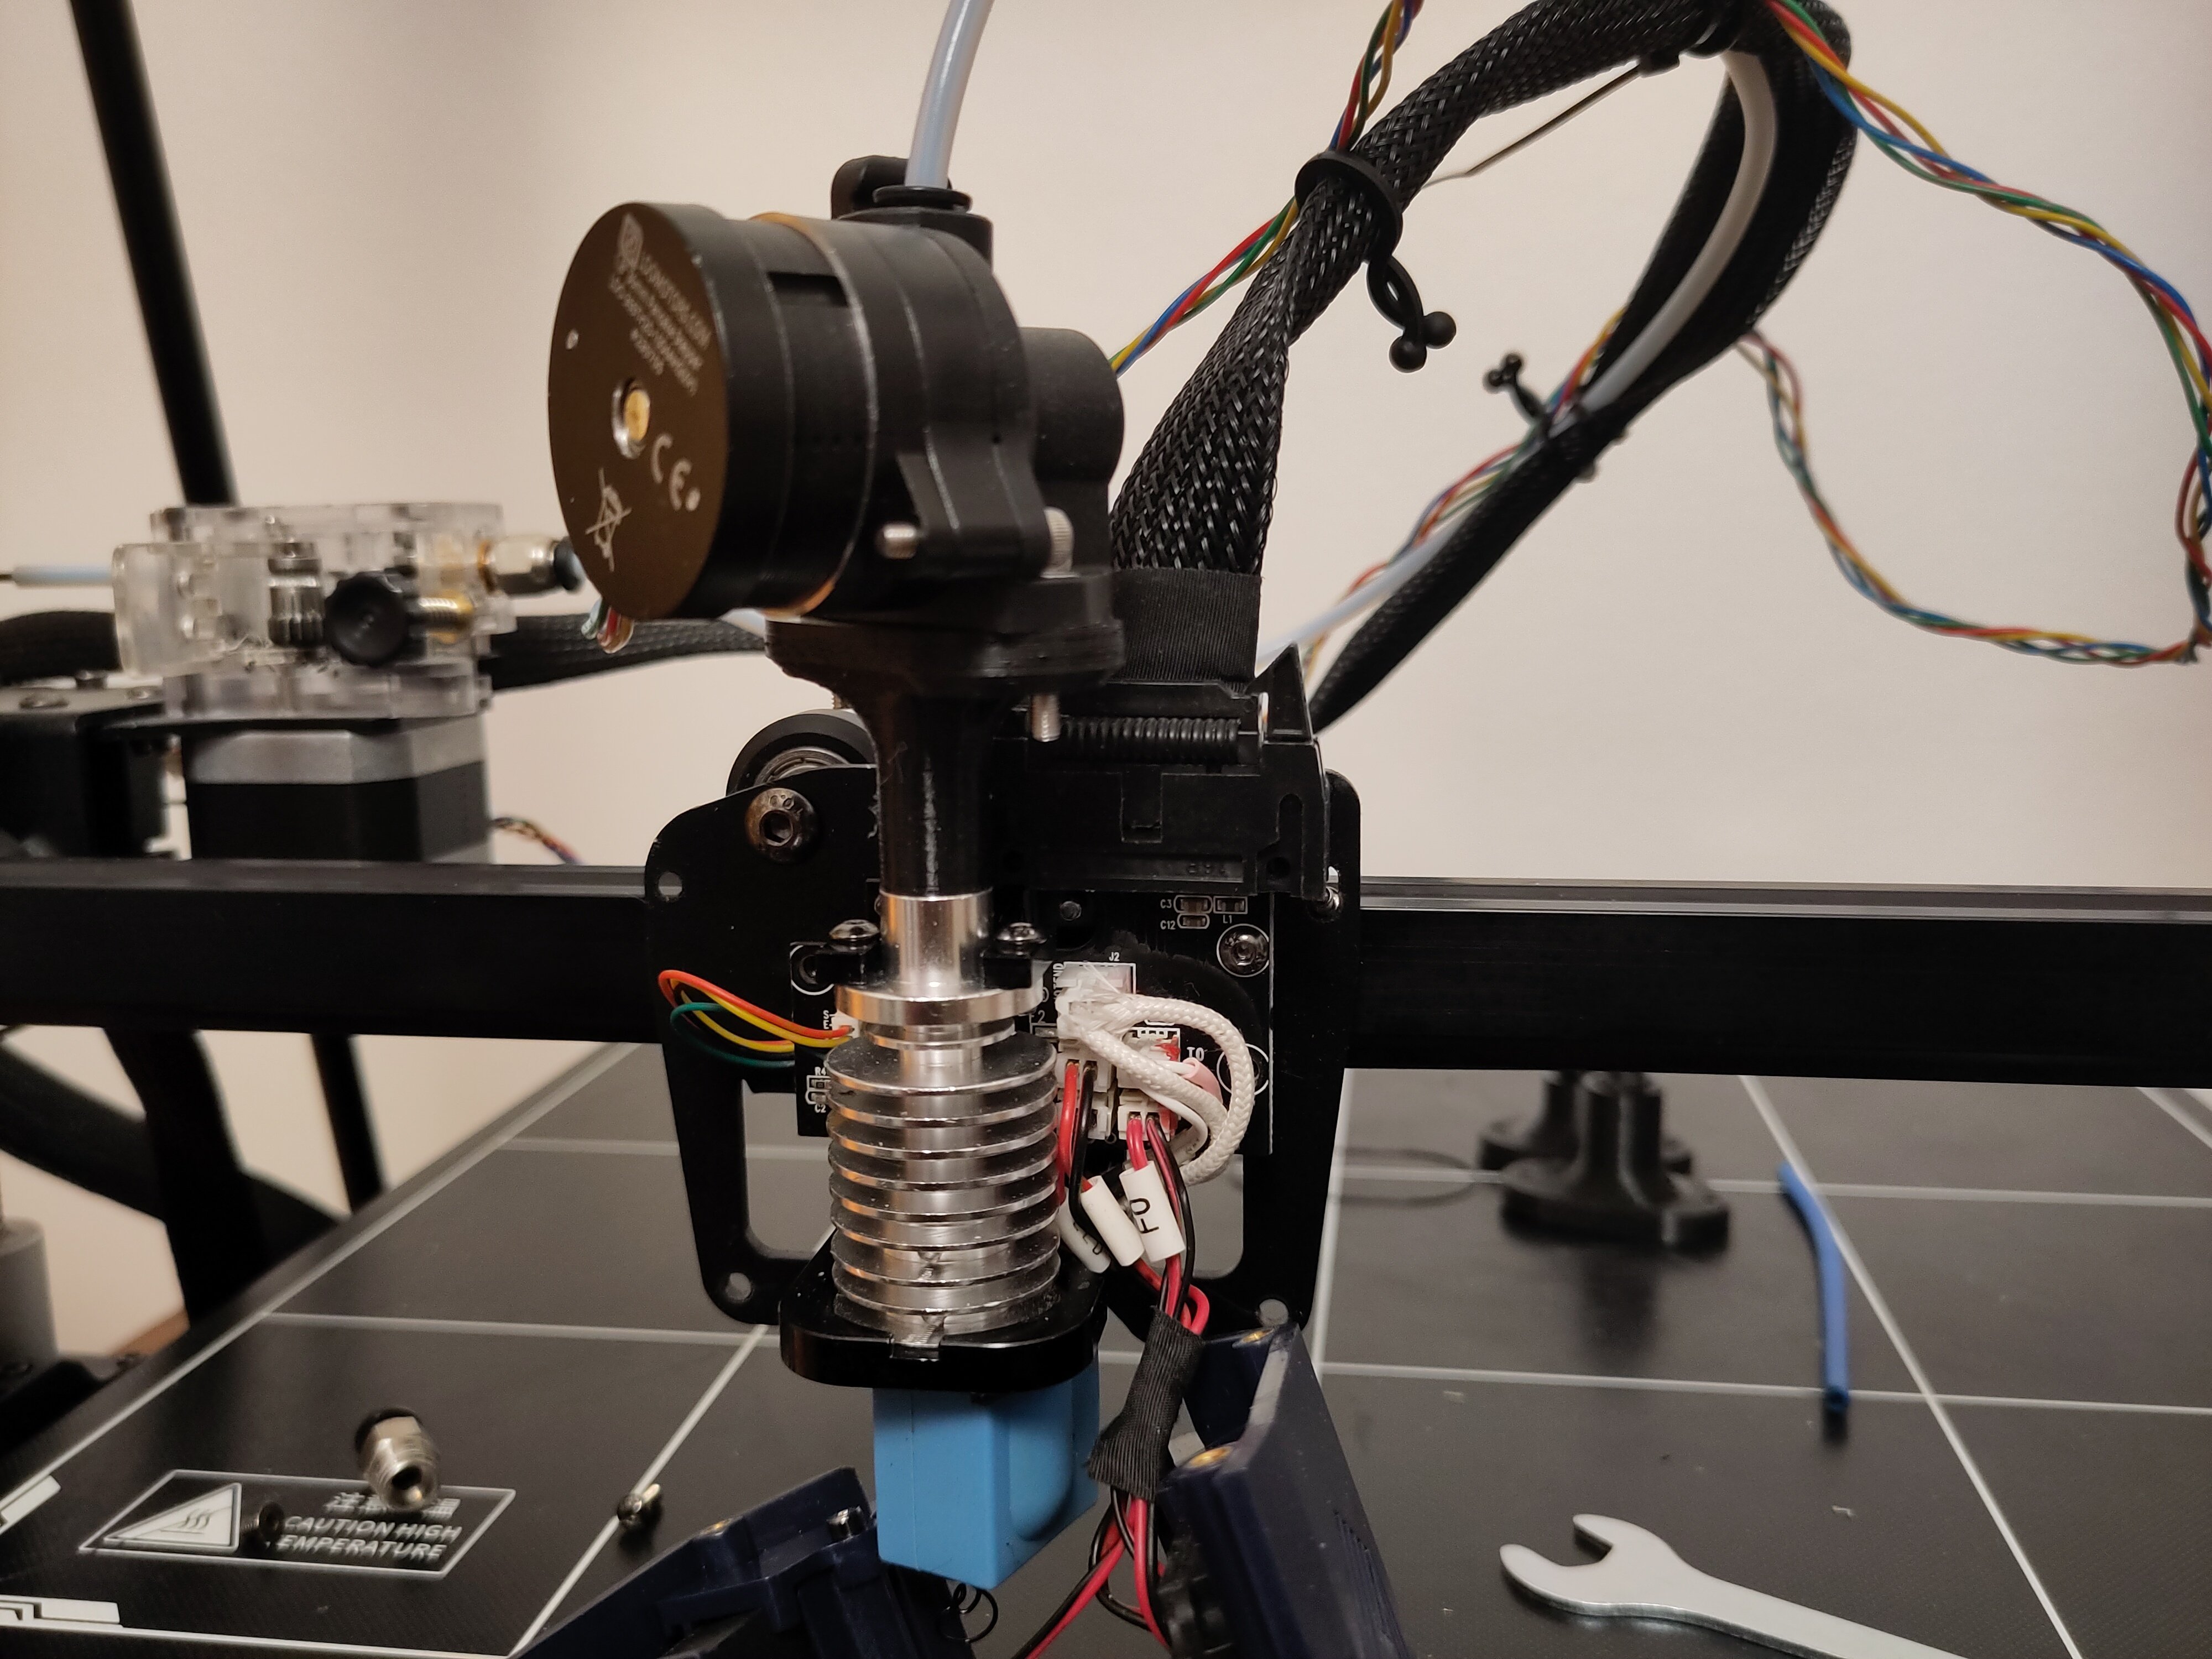
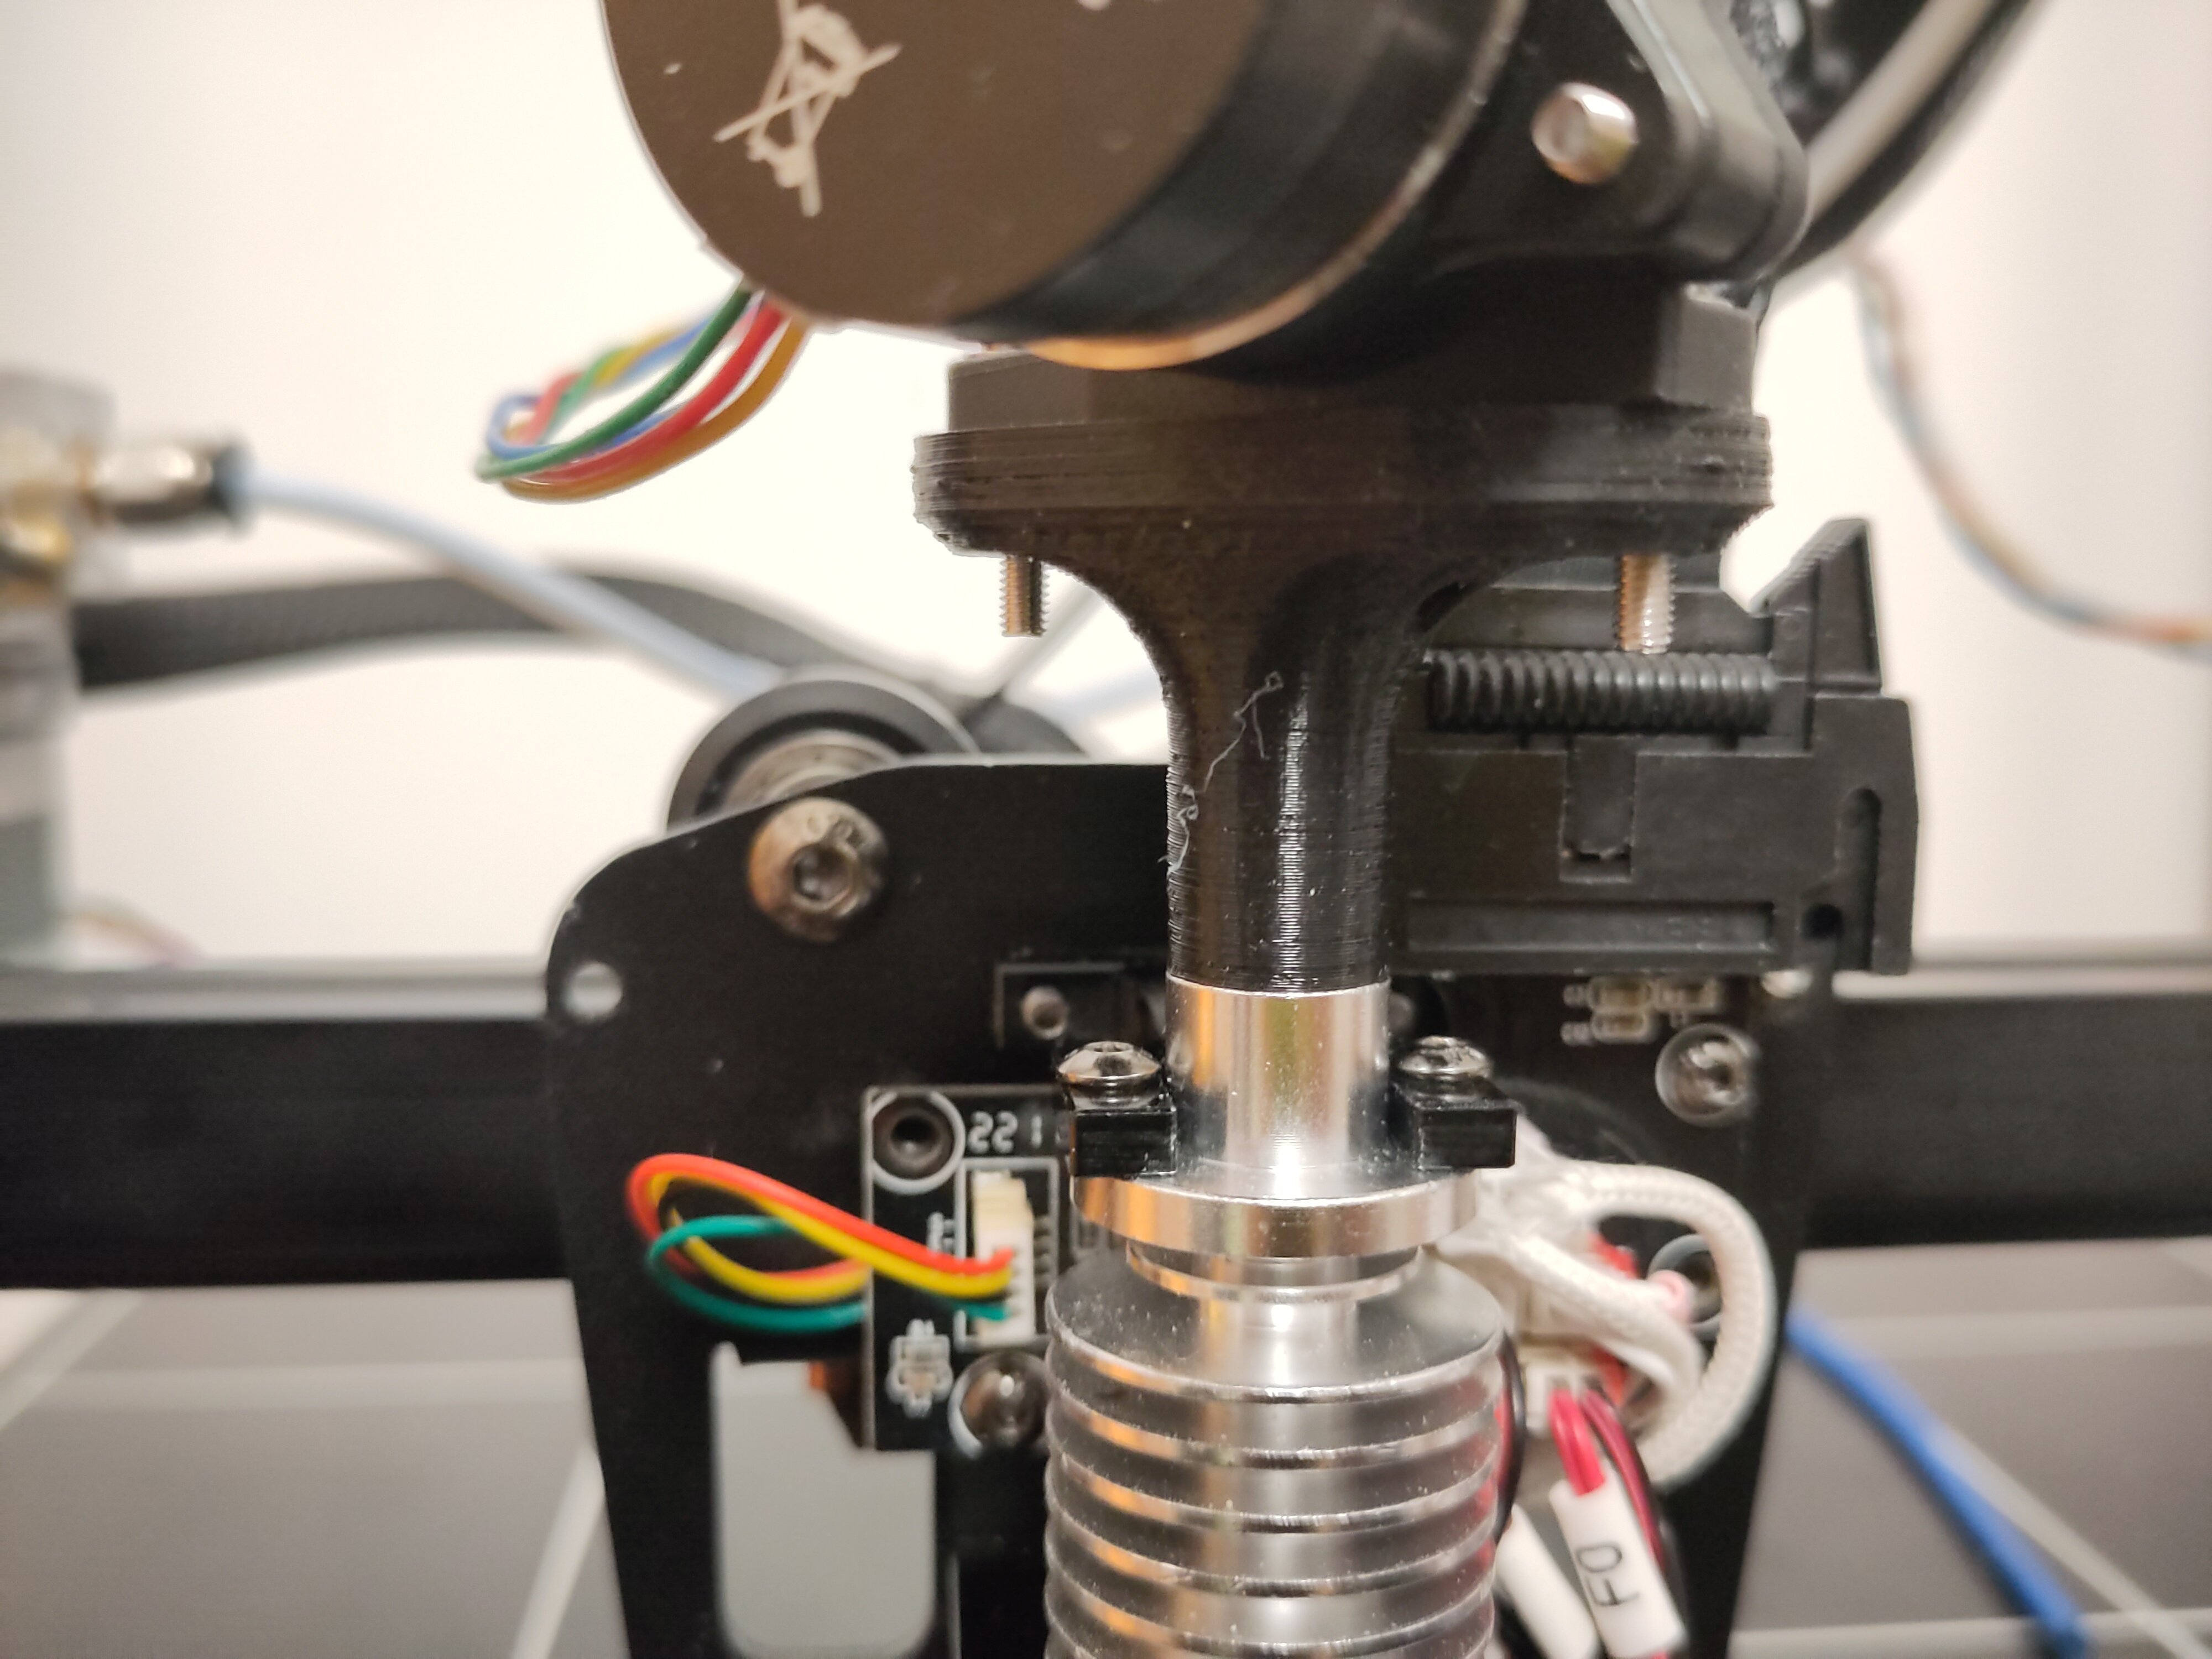
In my last post I described how I mounted the Orbiter v2.0 to a Kobra Max in a makeshift fashion. This time I show you how the finished mounting looks like.

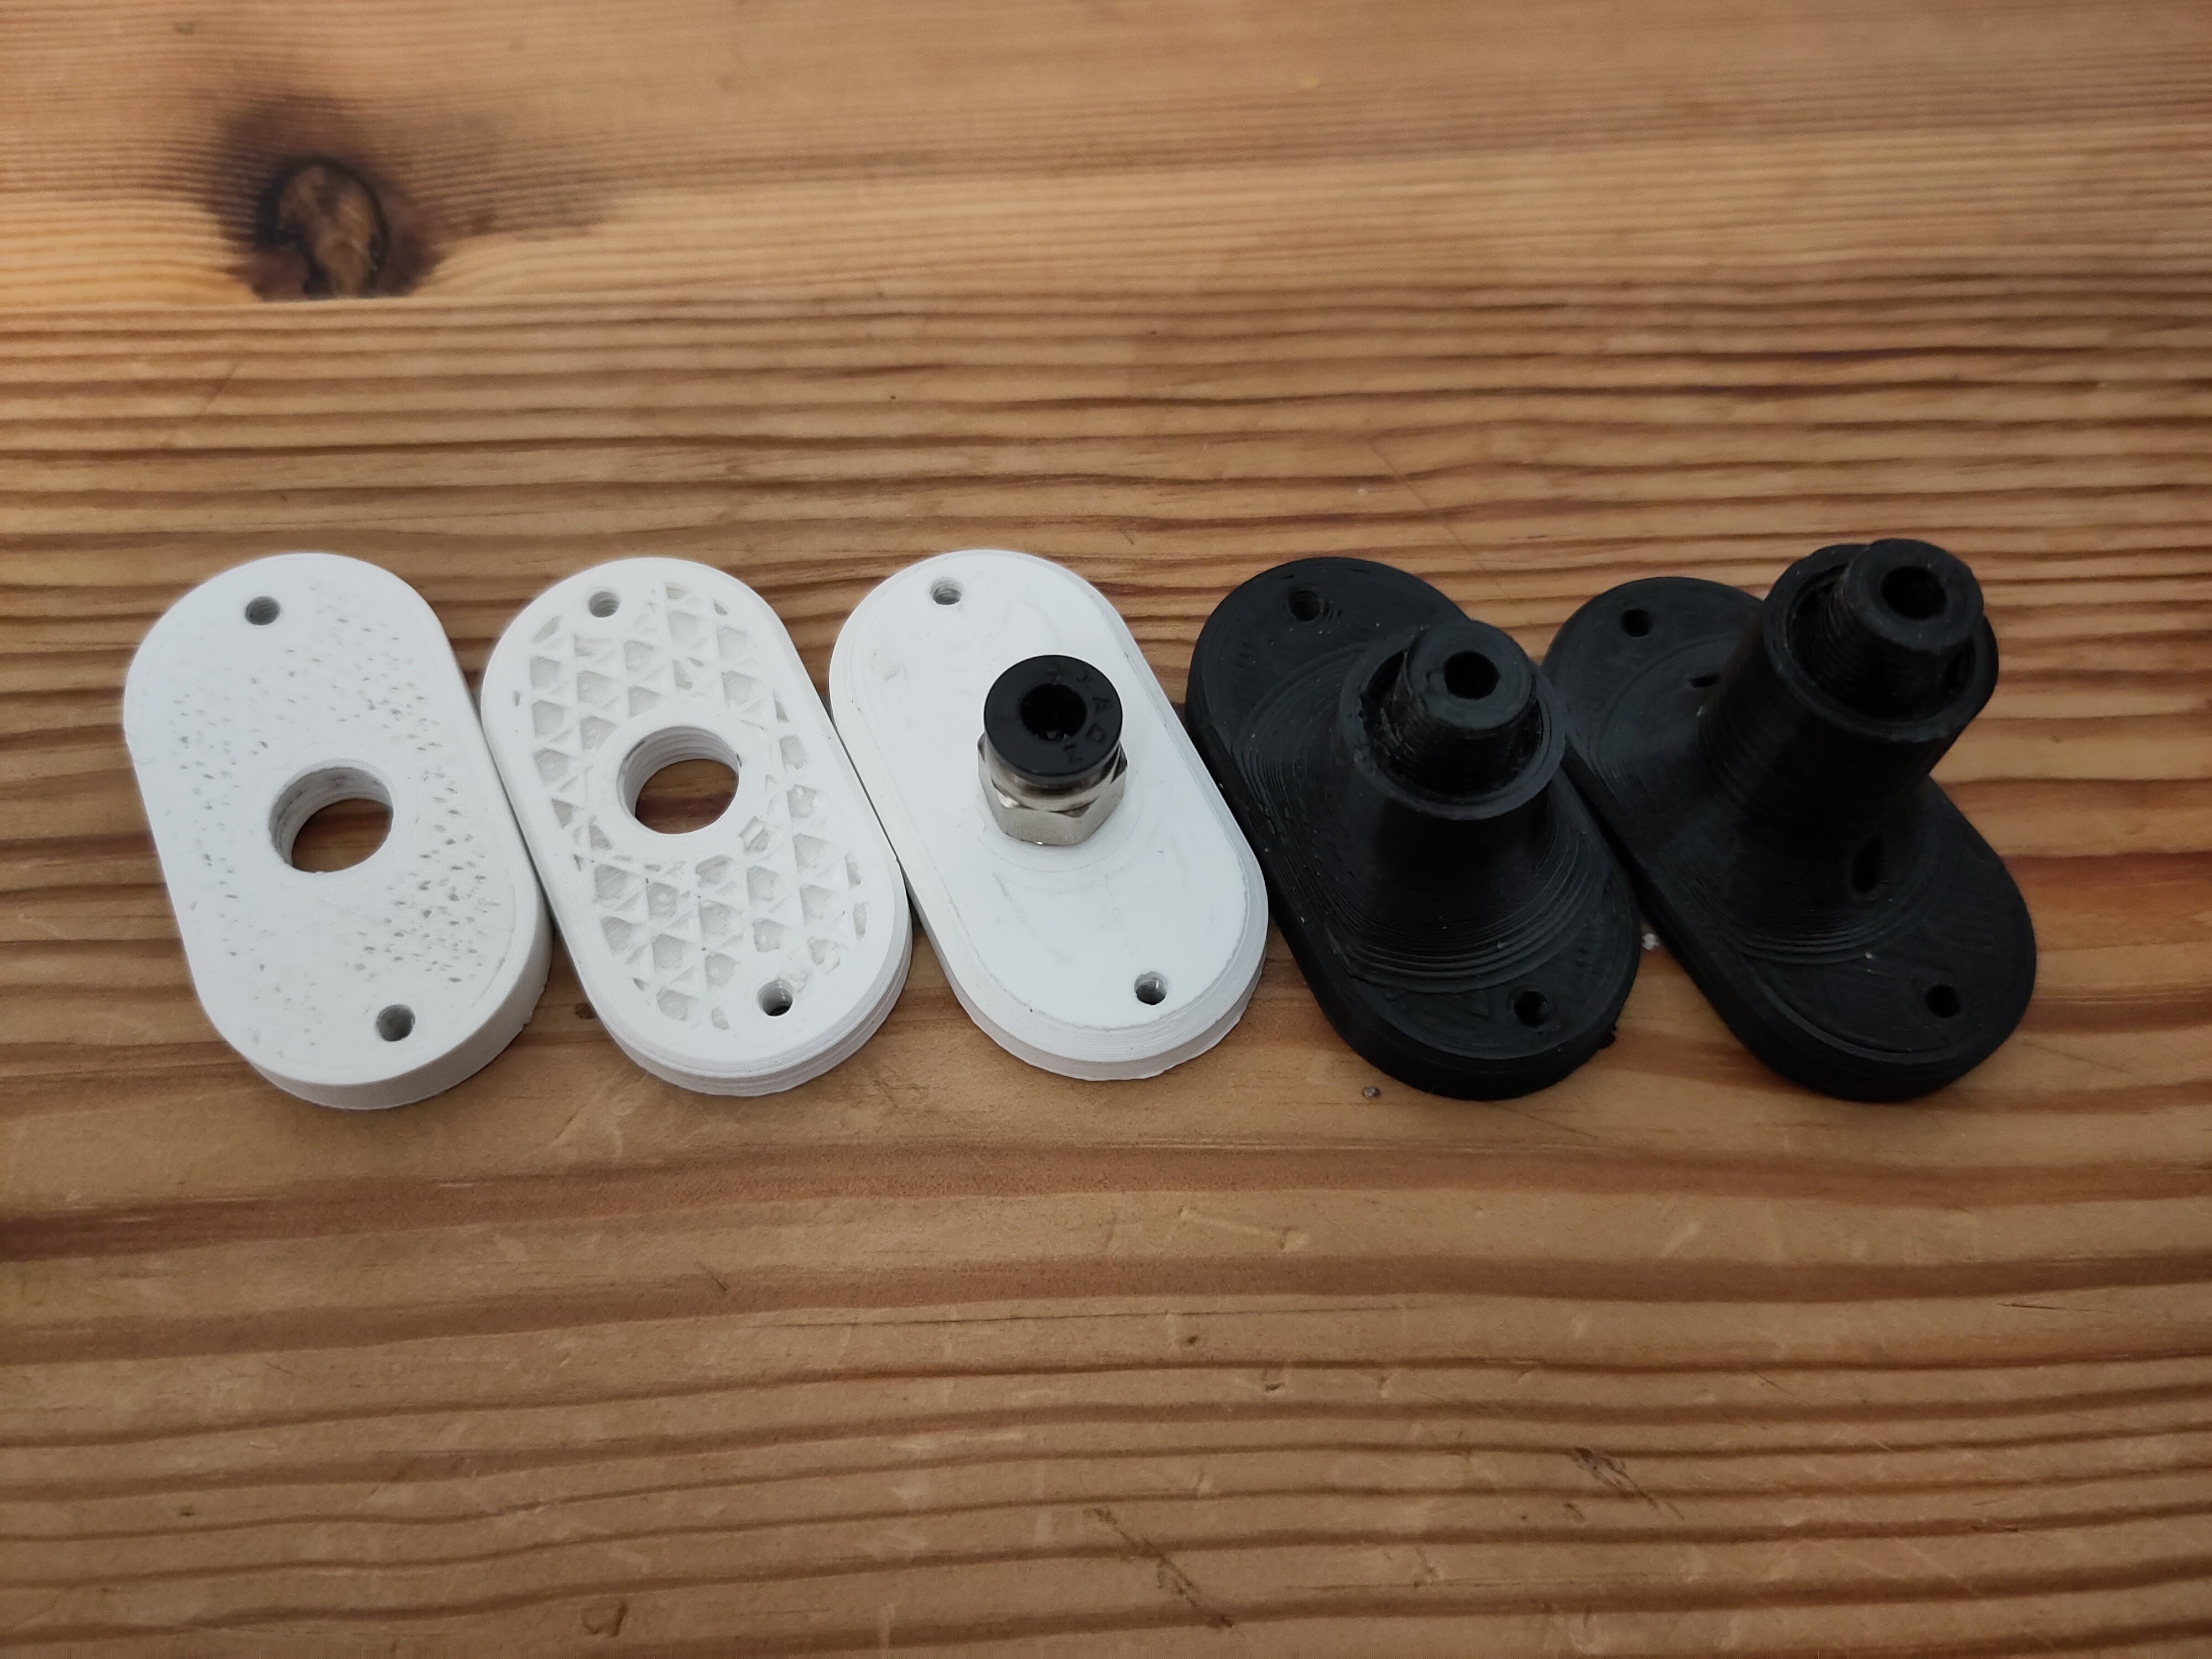
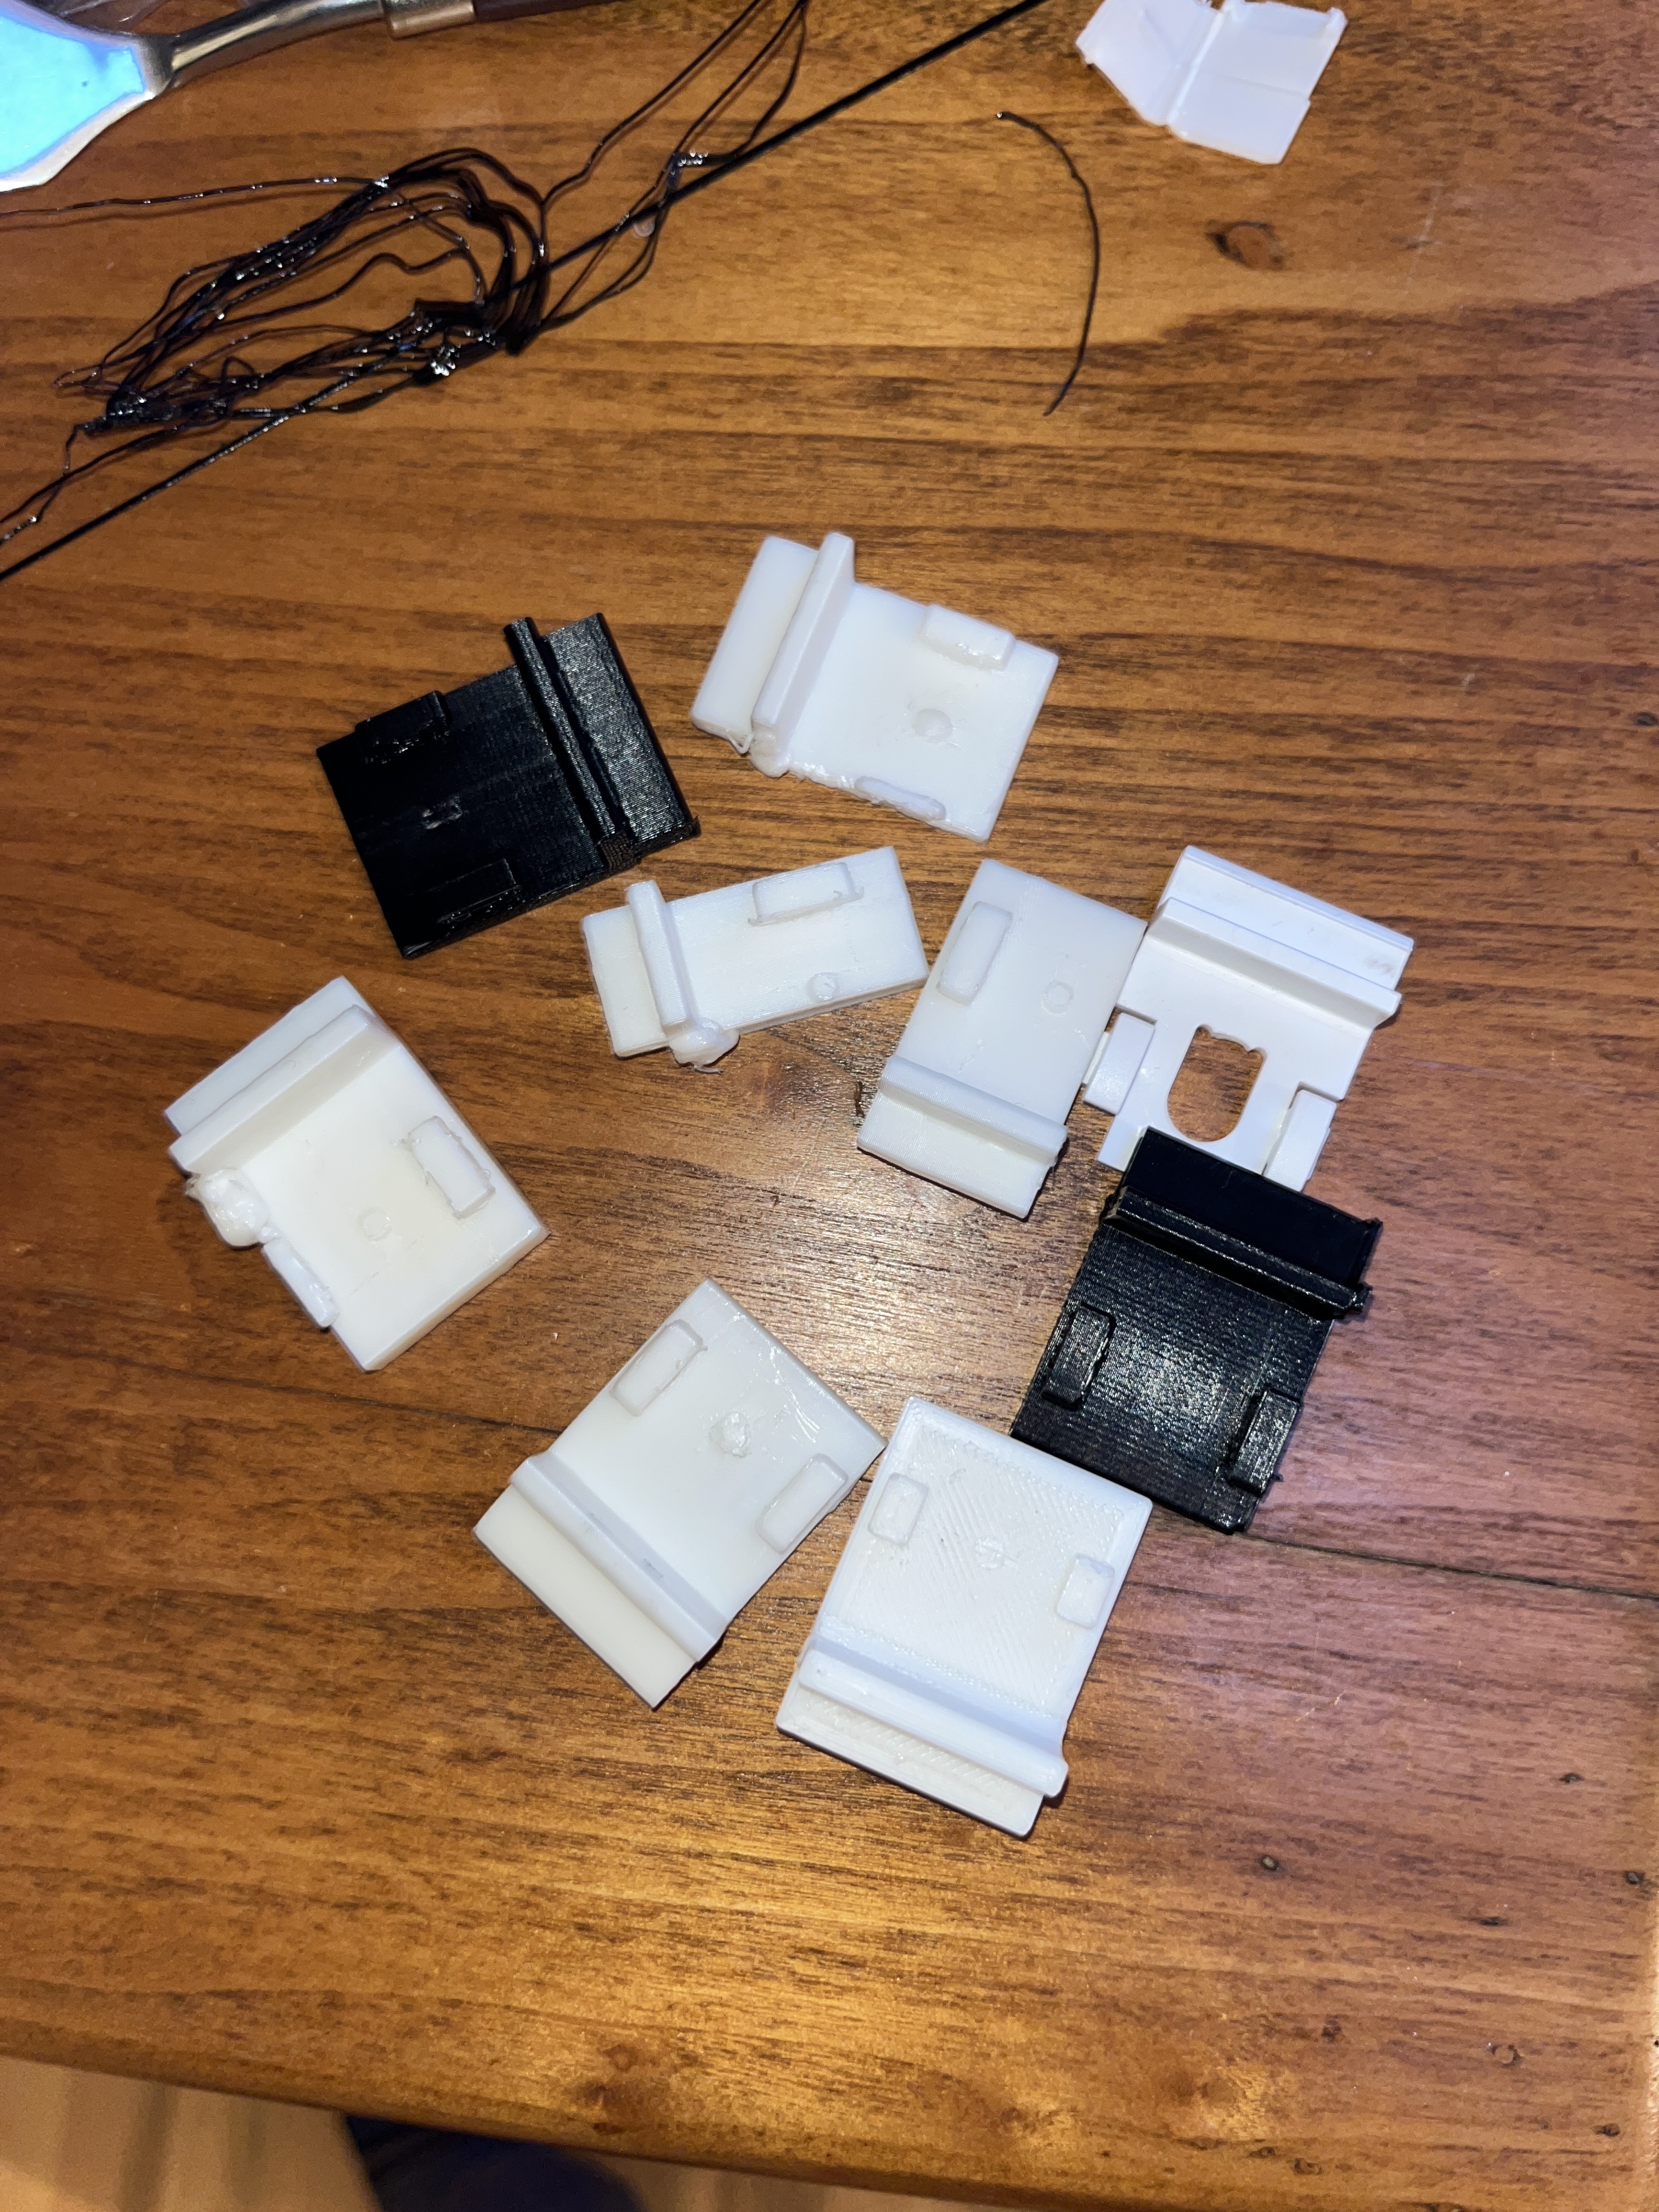
Previous attempts. The ones in white worked but had the extruder dangle, the black ones failed to be mounted for various reasons.

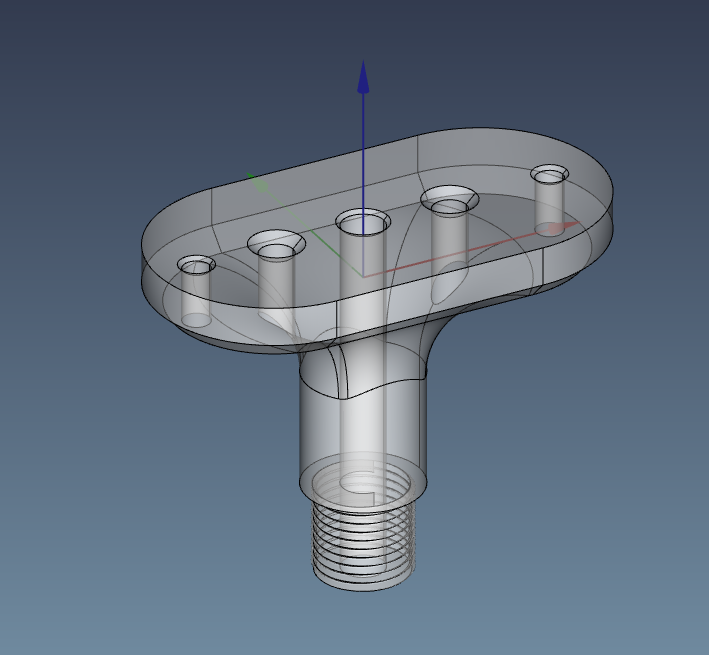
Find the stl and Freecad file here.

906


I made the "voronoi halloween pumpkin" off printables, thought it turned out nice:

https://www.printables.com/model/606949-voronoi-halloween-pumpkin-tealight-cover

Scaled the Z up to 115% since I thought the proportions looked better. Prusament galaxy black pla on my MK4 with organic supports on the top area.

907


This is so awesome. 1) Amazing in concept (CPU cooler on a 3d printer) 2) the clear plastic bits are so neat to see it working 3) the nostalgia for 90's clear plastic gadgets.

908


I'm considering pulling the trigger on an X1C but the waste is a huge turn-off. I know there are options for purging to infill or a sacrificial object, but last I heard there's still a considerable amount of purge/prime. Can someone who's played with the settings tell me honestly how much progress has been made in reducing waste?

909


I understand the intent, but feel that there are so many other loopholes that put much worse weapons on the street than a printer. Besides, my prints can barely sustain normal use, much less a bullet being fired from them. I would think that this is more of a risk to the person holding the gun than who it's pointing at.

910


Finally got my hands on a Raspberry Pi 4. I installed MainsailOS and I followed this guide and got Klipper set up and running in a few hours.

I literally doubled my print speed in the slicer settings, which is giving me a 30-40% reduction in print times and the print quality is actually better at the same time... The only concern I have now is how the whole table vibrates when printing so fast 😅

Managing the printer through the moonraker interface on Mainsail is really nice. I also set up Obico for remote monitoring away from home with an old webcam.

The issues I had during setup were pretty few, but I'll list them here:

  • The USB webcam I had did not work at all out of the box, but that was quickly fixed by installing Crowsnest - after install the camera (Logitech C270) was working perfectly
  • After installing Crowsnest, the camera worked, but the web interface was no longer connecting to Klipper - I found out this was because I set up my Raspberry Pi with a non-default username, and the Crowsnest installation had apparently updated my moonraker.conf to look for Klipper in the default location. Just had to update klippy_uds_address: /home/pi/printer_data/comms/klippy.sock to have my username instead of pi
  • The last problem I have is that I'm having so much fun printing at turbo speed through the slick web interface that I'm burning through my filament too fast and I need to order more soon.

Next on the list is a Raspberry Pi cam (the Logitech C270 is on its last leg) and some LED lighting to get a better view of the prints.

It really feels like I got a whole new printer. I am really impressed with it and I would definitely recommend to anyone with a cheaper Marlin printer and at least a little bit of Linux experience.

911


So, mainly just a writing a PSA for any fellow printers out there using klipper with the octoeverywhere service. Updated both of my pi's yesterday that run two printers. Tried to access both through octoverywhere today and neither would connect.

Had to ssh into each unit and run 'bash <(curl -s https://octoeverywhere.com/install.sh)'

But as soon as each installer completed the connection was re-established and working.

The updated version of octoeverywhere that seemed to cause this is version 2.7.33-0-g4cb12230.

Just letting you guys know in case you run into this issue.

912


Does any of you have any experience with this? I'm looking at the Felfil Evo pellet extruder which seems like an acceptable option. One thing I don't understand. Why are the shredder and spooler so ungodly expensive?

I mean, can't you just use an old blender to grind pieces down far enough for the pellet extruder? The finer the better no? Airborne microplastic may be a concern at some point.

Also the spooler. Is that more complicated than a stepper motor that runs at a certain RPM spinning the spool around? With perhaps a mechanism that slows down a bit after X rotations to compensate for the spool getting thicker. Nothing an Arduino can't handle. Also don't grip the spool that tightly so pull strength is more or less equal.

Both the spooler and shredder individually cost more than a pellet extruder does..

913


cross-posted from: https://lemmy.world/post/6872403

Spoolman Logo

What if your Klipper printer could keep track of which spool is loaded and how much filament is remaining?

  • Do you wish your printer could keep track of the filament remaining on each spool automatically for you?
  • Do you want it to automatically switch to the correct spool when you load one?
  • Do you wish your printer would warn you when you have PLA loaded and try to print an ABS gcode?

Does that sound like something you need? Read on below:

Spoolman is the project for you!

It was created by Donkie (not myself) and it has official support in moonraker. Additionally the Fluidd, Mainsail and KlipperScreen UIs also integrate its functionality. Octoprint is not supported at the time of writing. Even without a compatible UI spools can be selected using macros or calls to the moonraker API.

Installation is fairly straight-forward, but some Klipper users may not be familiar with docker so it can seem rather intimidating.

I've written out a short guide to help you get started:

Setup

I don't think the spoolman software is very resource-intensive, but I personally installed it on a separate system from my pi.
You will likely be fine to install it on the pi in most cases though.

To begin, you need to install docker/docker-compose:

sudo apt update
sudo apt -y install docker-compose

Then create a directory for spoolman:

mkdir ~/spoolman
cd ~/spoolman

Create a docker-compose config:

nano ~/spoolman/docker-compose.yml

docker-compose.yml:

version: '3.3'
services:
  spoolman:
    image: ghcr.io/donkie/spoolman:latest
    restart: unless-stopped
    volumes:
      - ./data:/home/ubuntu/.local/share/spoolman
    ports:
      - "7912:8000"
    environment:
      - TZ=America/New_York # Optional, defaults to UTC

You may want to change the timezone. A list is available here Then run:

sudo docker-compose up -d

You should now be able to access the interface at http://ipaddress:7912 (replace ipaddress with your pi/host's ip address)

Create your first Vendor, Filament, and then Spool in the UI there. When I tried to configure moonraker in the next step it failed without an initial spool existing in the database, so I wouldn't skip this.

Configuration

Now we need to configure moonraker to use spoolman.

Pop open your moonraker.conf file and add the following:

# enables spool management
[spoolman]
server: http://ipaddress:7912
#   URL to the Spoolman instance. This parameter must be provided.
sync_rate: 5
#   The interval, in seconds, between sync requests with the
#   Spoolman server.  The default is 5.
``` Once again, we need to replace `ipaddress` with the ip address of the host system. If it is the same as the pi (the one running moonraker) you can also simply use `localhost` instead

Restart moonraker and reload Fluidd/mainsail/etc and you should now see a `spoolman` section on the dashboard.
You can also verify in your `moonraker.log` file, look for a line like this:
```2023-08-08 10:53:43,664 [server.py:load_component()] - Component (spoolman) loaded```

Remember, even without using a compatible UI, Klipper/moonraker will still track filament use against the last spool selected.

We can also add commands that allow us to select the spool regardless of the UI:

**printer.cfg**:
```ini
[gcode_macro SET_ACTIVE_SPOOL]
gcode:
  {% if params.ID %}
    {% set id = params.ID|int %}
    {action_call_remote_method(
       "spoolman_set_active_spool",
       spool_id=id
    )}
  {% else %}
    {action_respond_info("Parameter 'ID' is required")}
  {% endif %}

[gcode_macro CLEAR_ACTIVE_SPOOL]
gcode:
  {action_call_remote_method(
    "spoolman_set_active_spool",
    spool_id=None
  )}

These commands can be used like SET_ACTIVE_SPOOL ID=5 and CLEAR_ACTIVE_SPOOL to select (or clear) the spool. Spools are selected by spool-id, which you can see on the spoolman UI where you create new spools. These commands can even be used in your "Custom Filament Gcode" in the slicer to allow filament profiles to select spools automatically.

Mainsail/Fluidd allow for integration with the klipper/crowsnest webcam to scan qrcodes from spools and automatically select the proper spool at the start of a print/etc. QRcodes can be printed from the spoolman web UI.

If you are not using mainsail/fluidd or you want it to function without the UI, I wrote a small script that will scan qrcodes from klipper cameras and command spoolman to select the spool it identifies.

This can be triggered from a macro which allows you to put it in your start gcode.

The code and instructions are below:

Scanning Spool QRcodes

This functionality requires you to install the zbar-tools package for scanning codes and the gcode_shell_command Klipper extension to allow klipper to trigger shell scripts.

# Install zbar-tools for reading qrcodes
sudo apt install zbar-tools
# Install gcode_shell_command to run scripts from klipper macros
cd /home/pi/klipper/klippy/extras/
wget https://raw.githubusercontent.com/th33xitus/kiauh/master/resources/gcode_shell_command.py

Then we add some config to our klipper config file:

printer.cfg

[gcode_shell_command qrcode_qrscanner]
## NOTE: Change the path below if your klipper config is not in the default path ##
command: sh /home/pi/printer_data/config/qrcodespoolman.sh
verbose: True
timeout: 2.

[gcode_macro QRCode_Scan]
gcode:
    RUN_SHELL_COMMAND CMD=qrcode_qrscanner

And create a shell script:

qrcodespoolman.sh (place in your config folder next to printer.cfg)

#!/bin/sh

########################################## WARNING: ##############################################
### This script assumes you are using a crowsnest webcam on the same host and the first camera ###
###      Adjust the paths and addresses below as needed to work with your configuration        ###
##################################################################################################

## Capture a snapshot from the camera and store it in a jpg file
wget http://localhost/webcam/?action=snapshot -O /home/pi/printer_data/gcodes/qrcode.jpg

## Read any QRcodes from the image and strip just the spool-id from the data in the code
SPOOLID=$(zbarimg -S*.enable /home/pi/printer_data/gcodes/qrcode.jpg | sed 's/[^0-9]*\([0-9]\+\).*/\1/')

## Return the spool-id in the console (this is mostly for debugging purposes)
echo $SPOOLID

## Make an API call to spoolman selecting the spool that matches the spool-id
curl -X POST -H "Content-Type: application/json" -d "{\"spool_id\": \"$SPOOLID\"}" http://localhost:7125/server/spoolman/spool_id

Please read through the comments in those snippets, particularly if your klipper config is not located in /home/pi/printer_data/config or your camera is not connected to the same machine. You may need to make adjustments to fit your machine.

The paths and addresses used in the example should work for anyone using a pi with a single printer and the first/only camera configured in crowsnest.

If all goes well you should now be able to trigger this action with the following command:

QRCODE_SCAN

You can place that in your start gcode to have it triggered at the start of every print.

The command does the following:

  • Triggers the qrcode script, which does the rest:
  • Asks moonraker for a snapshot from the webcam
  • Locates and scans any qrcode in the image
  • Strips out any data in the qrcode except for the spool id
  • Tells moonraker to tell spoolman to select that spool id

Updating Spoolman

To update your spoolman instance, assuming you have installed in ~/spoolman, you can use the following command:

cd ~/spoolman;sudo docker-compose stop;sudo docker-compose pull;sudo docker-compose up -d

NOTE: Avoid using docker-compose down as it will wipe out the storage volumes, likely taking your spool database with it.

You also may want to consider using watchtower to automatically keep docker containers updated, but that is outside the scope of this guide.

Bonus screenshots

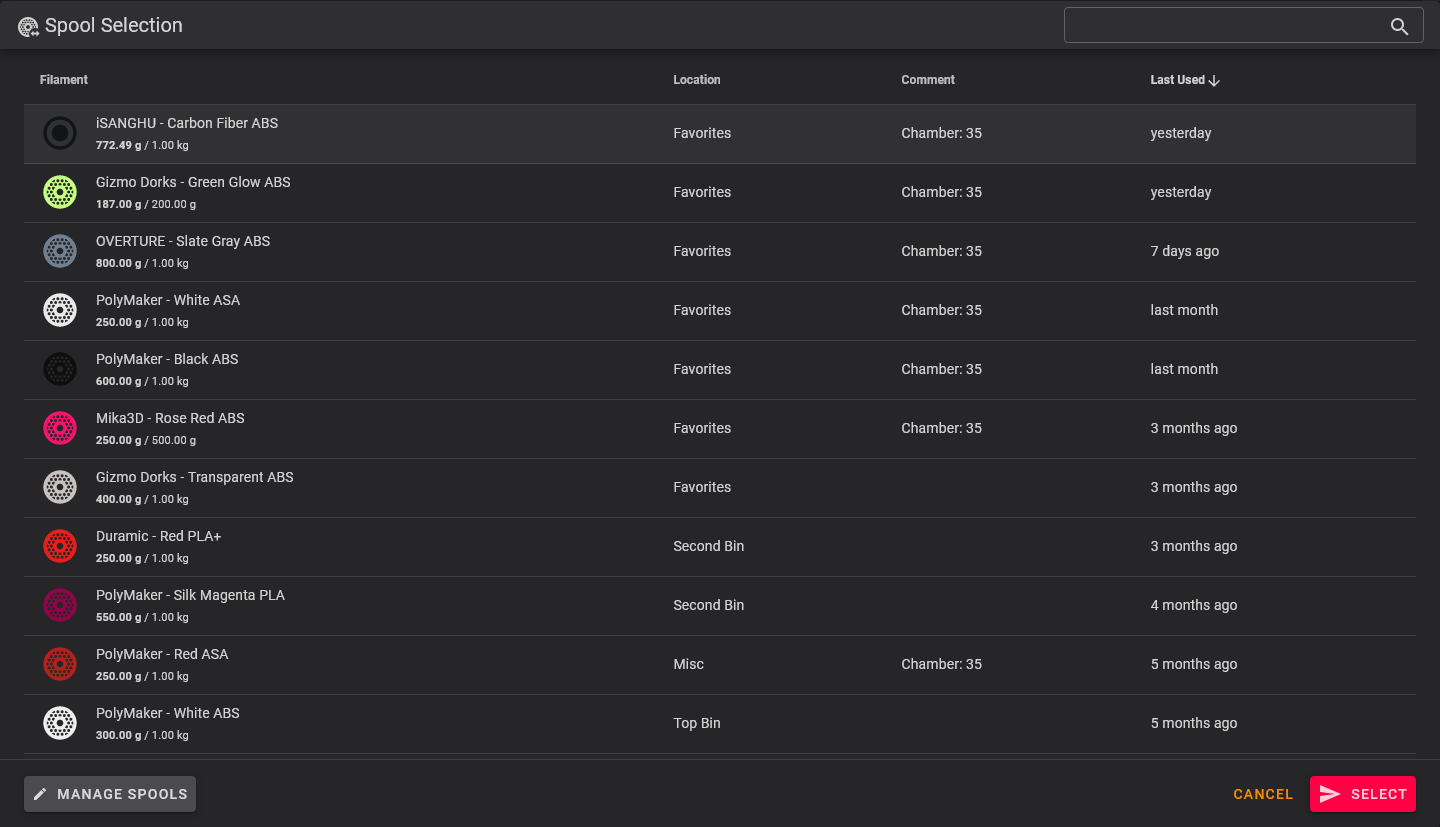
Spoolman UI - Spools A screenshot of the UI from spoolman, show a list of spools configured in the database
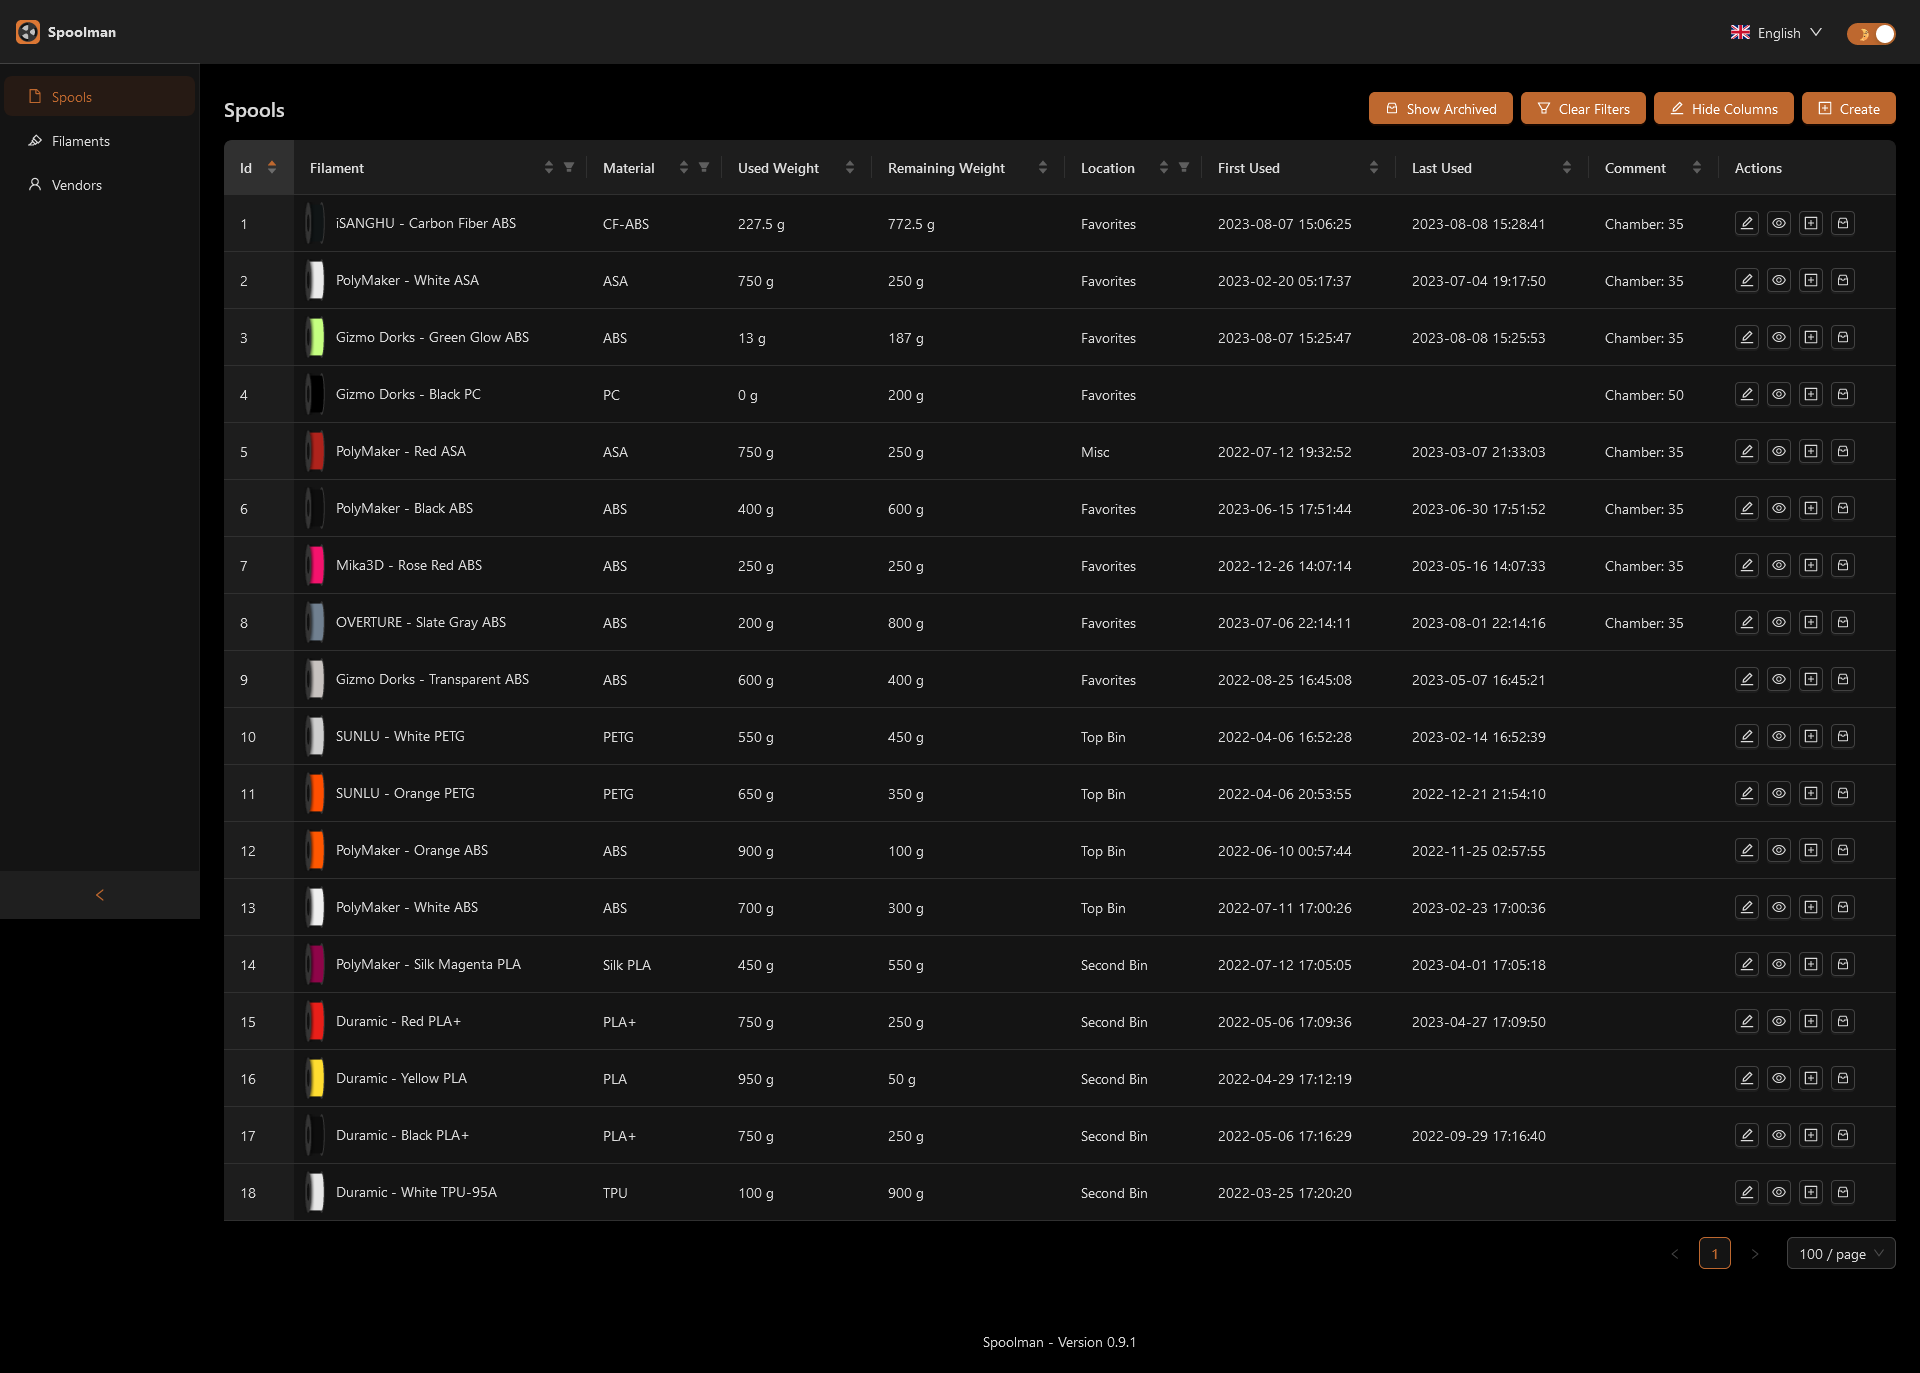
Fluidd UI - Spool Widget A screenshot of a widget from the Fluidd dashboard showing the currently selected spool in an image and some stats about it as well as a button to change spools

Fluidd UI - Spool Selection Dialog

A screenshot of the spool selection dialog which shows a list of spools that can be selected from to choose the one used for filament tracking. Details of each spool are shown including an image with the color, the storage location, and the last used date-time

Conclusion

I hope this little guide helps anyone interested in trying out spoolman, its a great tool that fulfills a function in Klipper that I've been looking for for a while, and it does so very well!

I just want to reiterate, this is not my project. I am just a Klipper fan who wanted to get the word out on what I think is a really great project that a lot of Klipper users may like.

That said, I hope my guide can help those users give it a try!

And if you have any trouble, or just questions/concerns, leave a comment below and I will do my best to help!
914
449
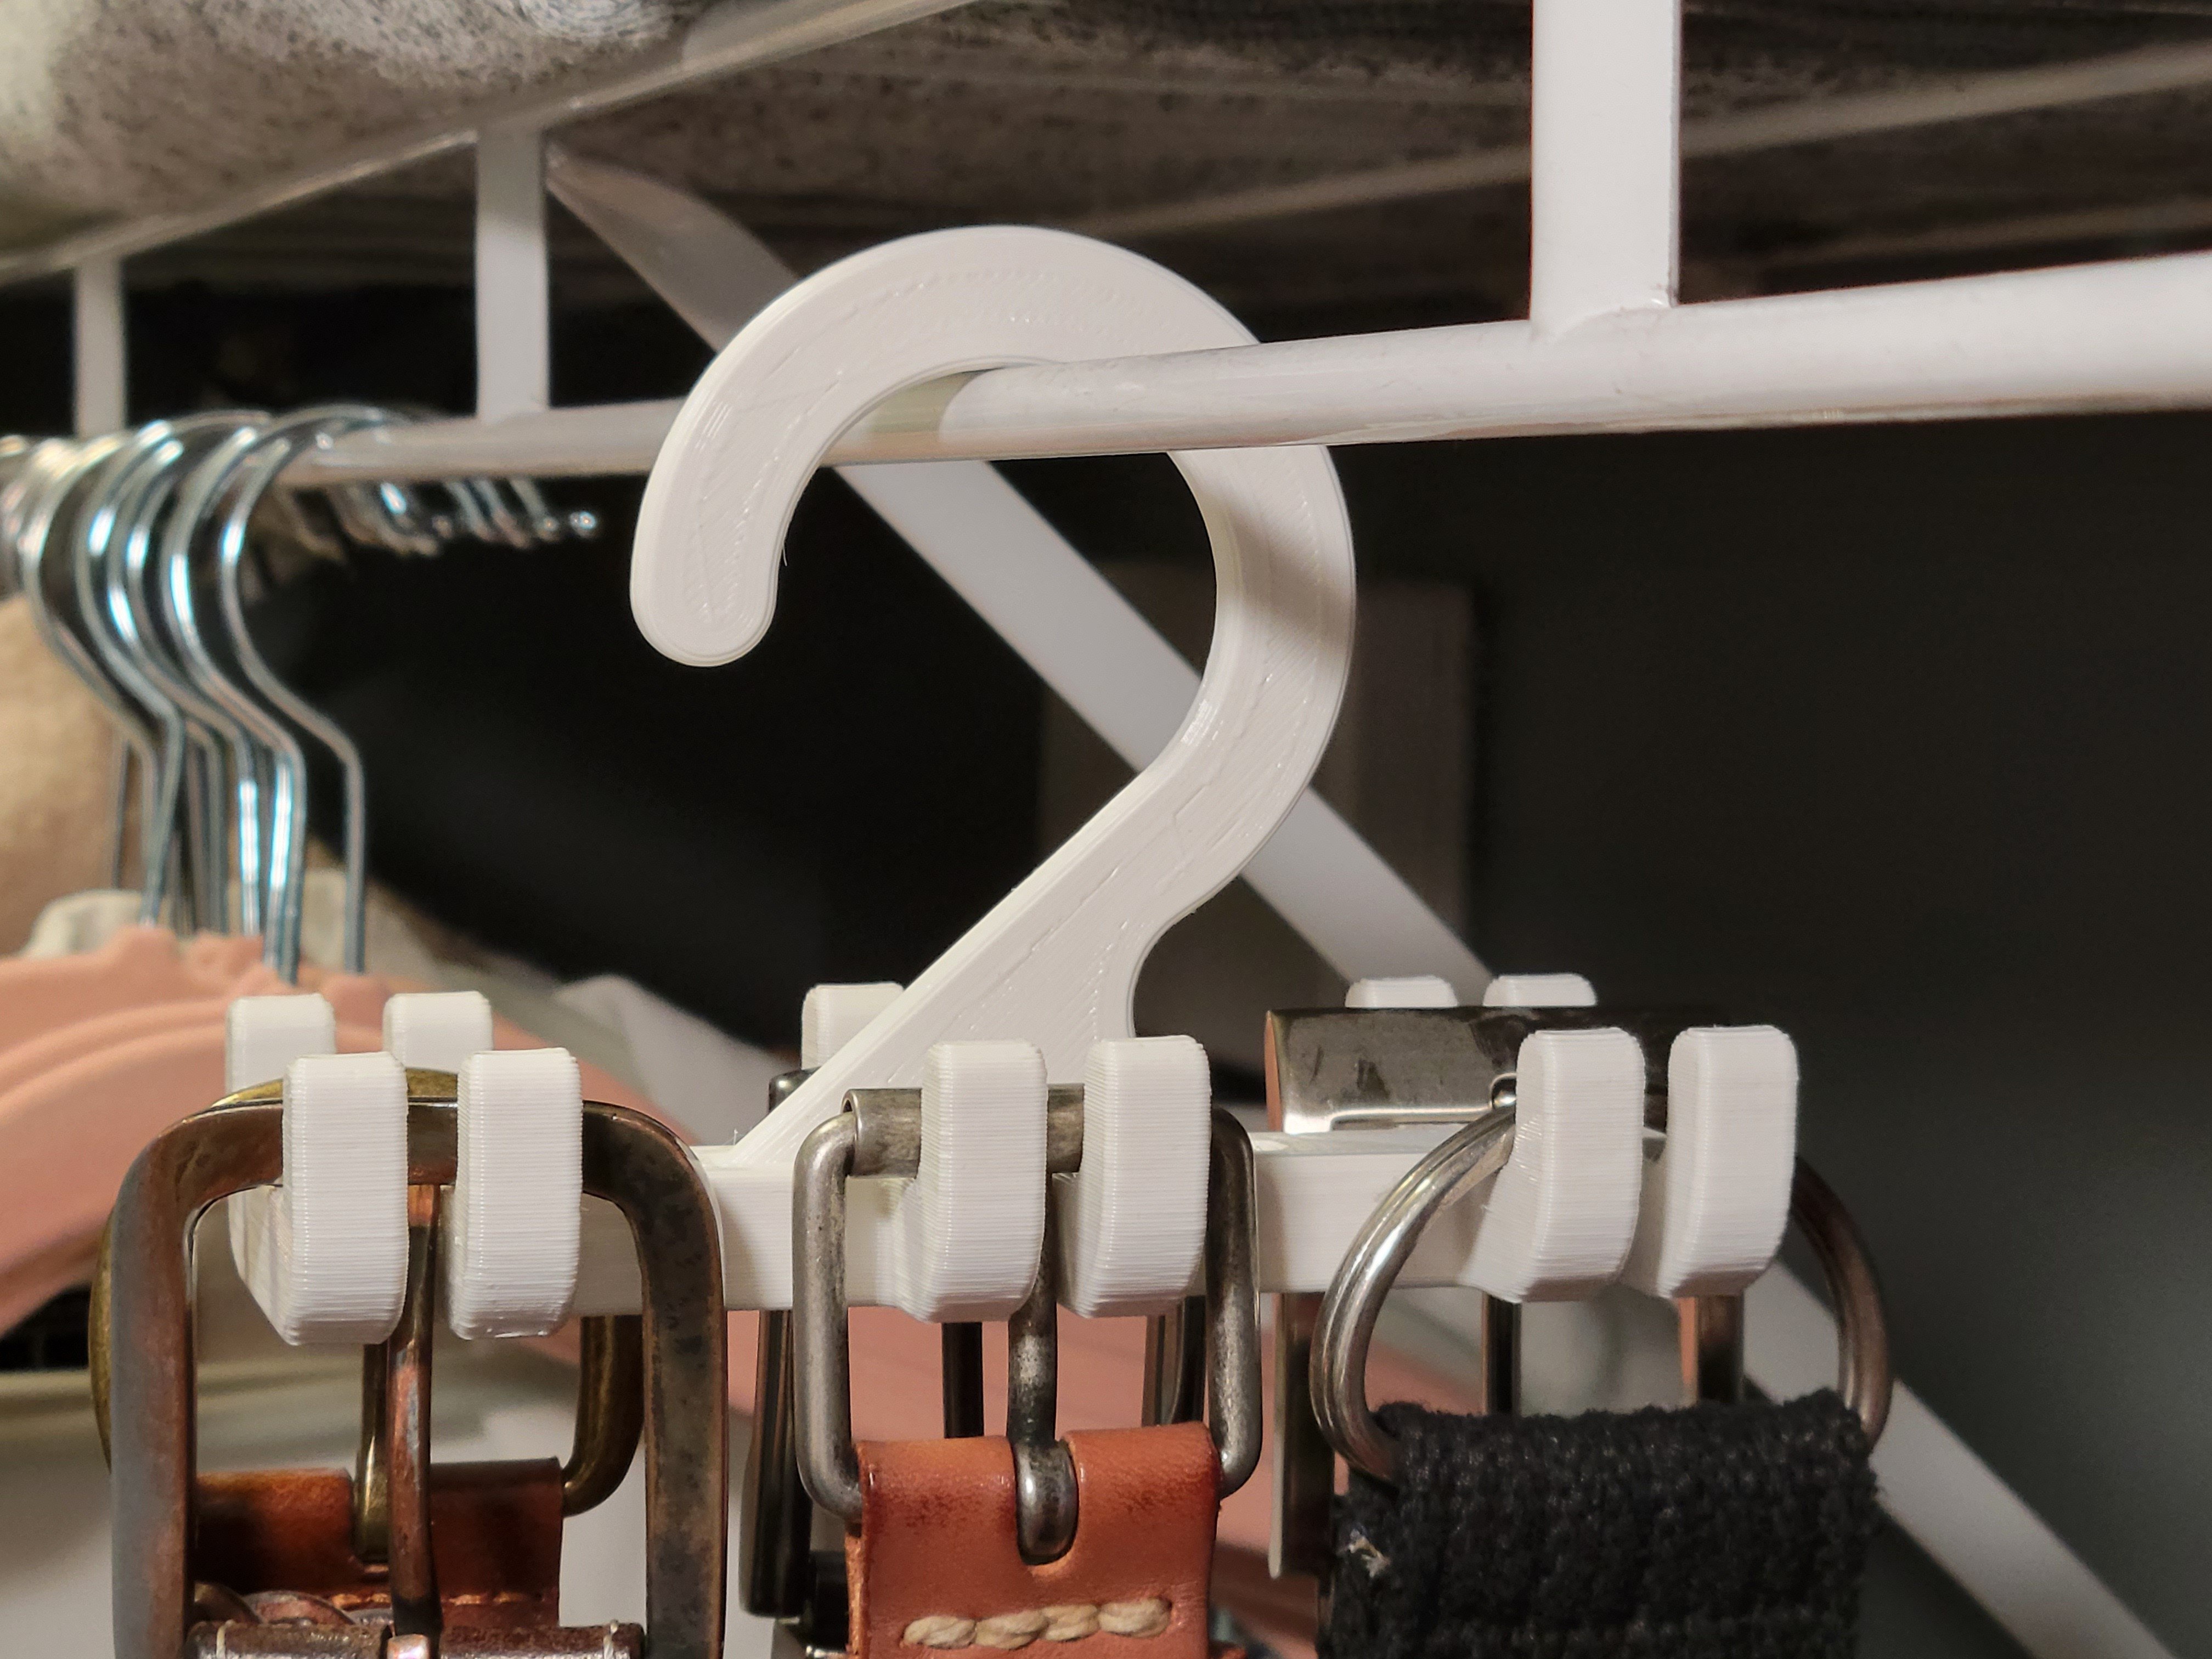
Belt organizer (lemmy.world)
submitted 1 year ago* (last edited 1 year ago) by thenewred to c/3dprinting
915
71
submitted 1 year ago* (last edited 1 year ago) by thenewred to c/3dprinting


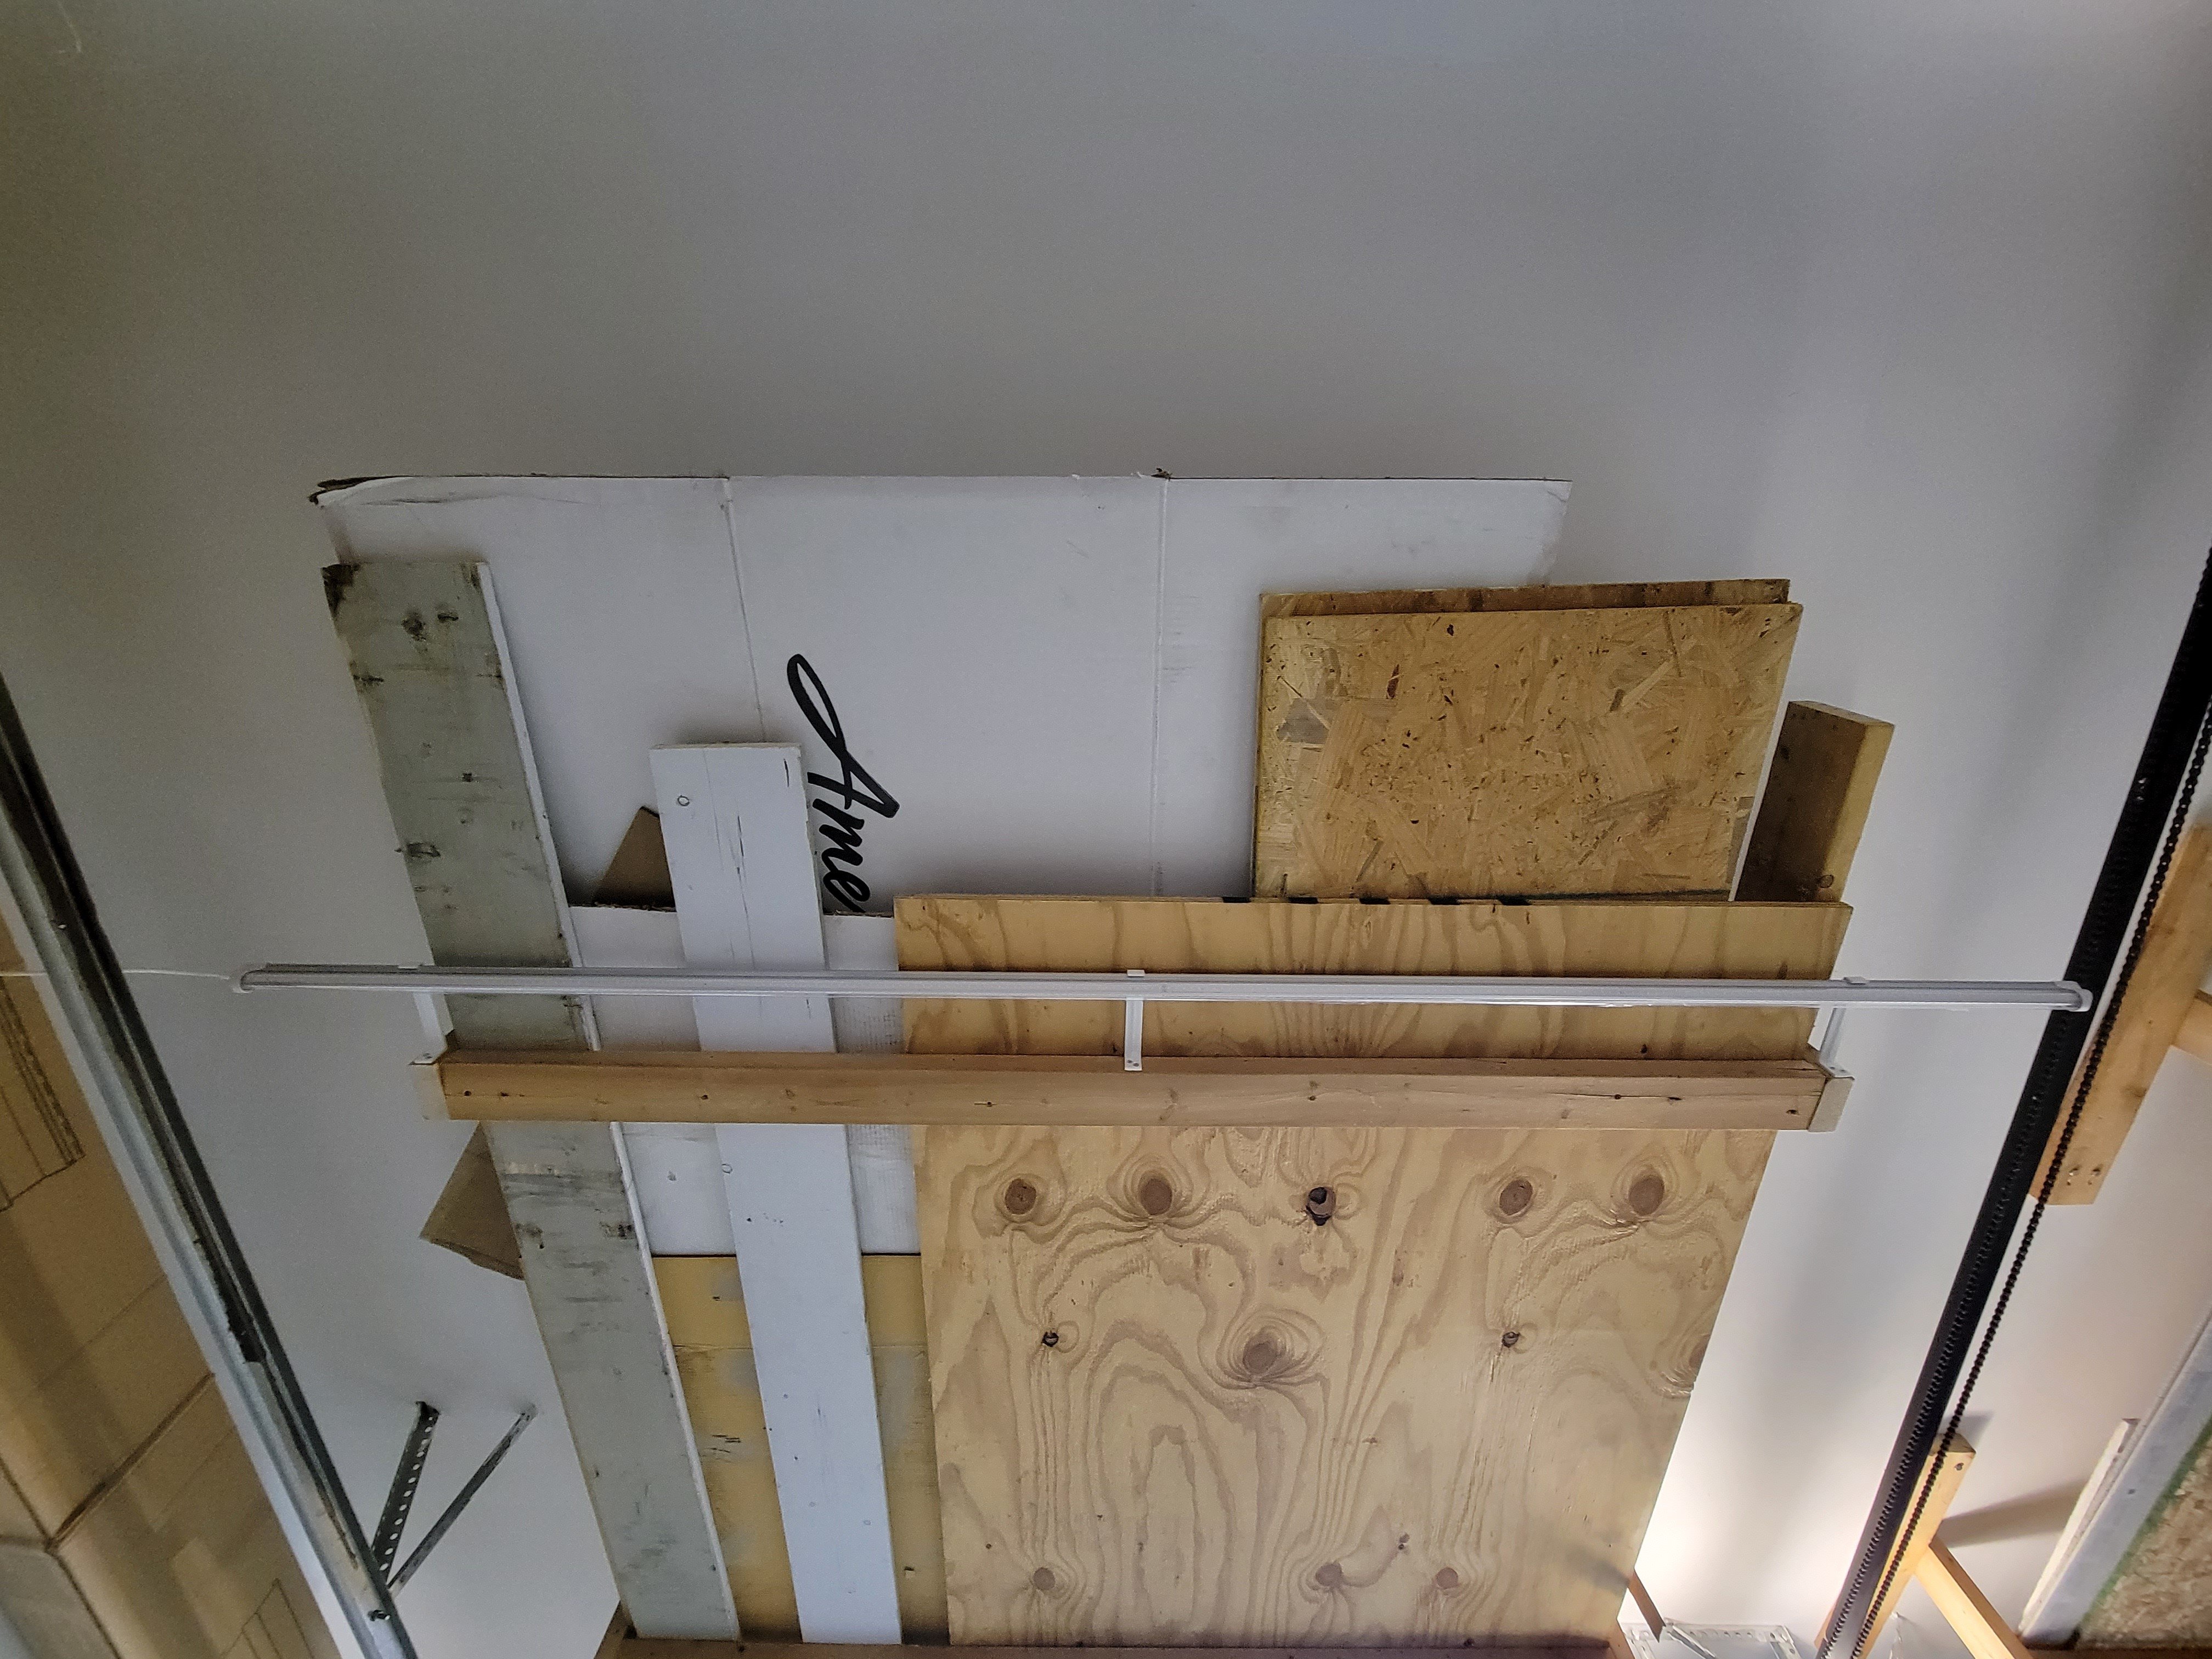
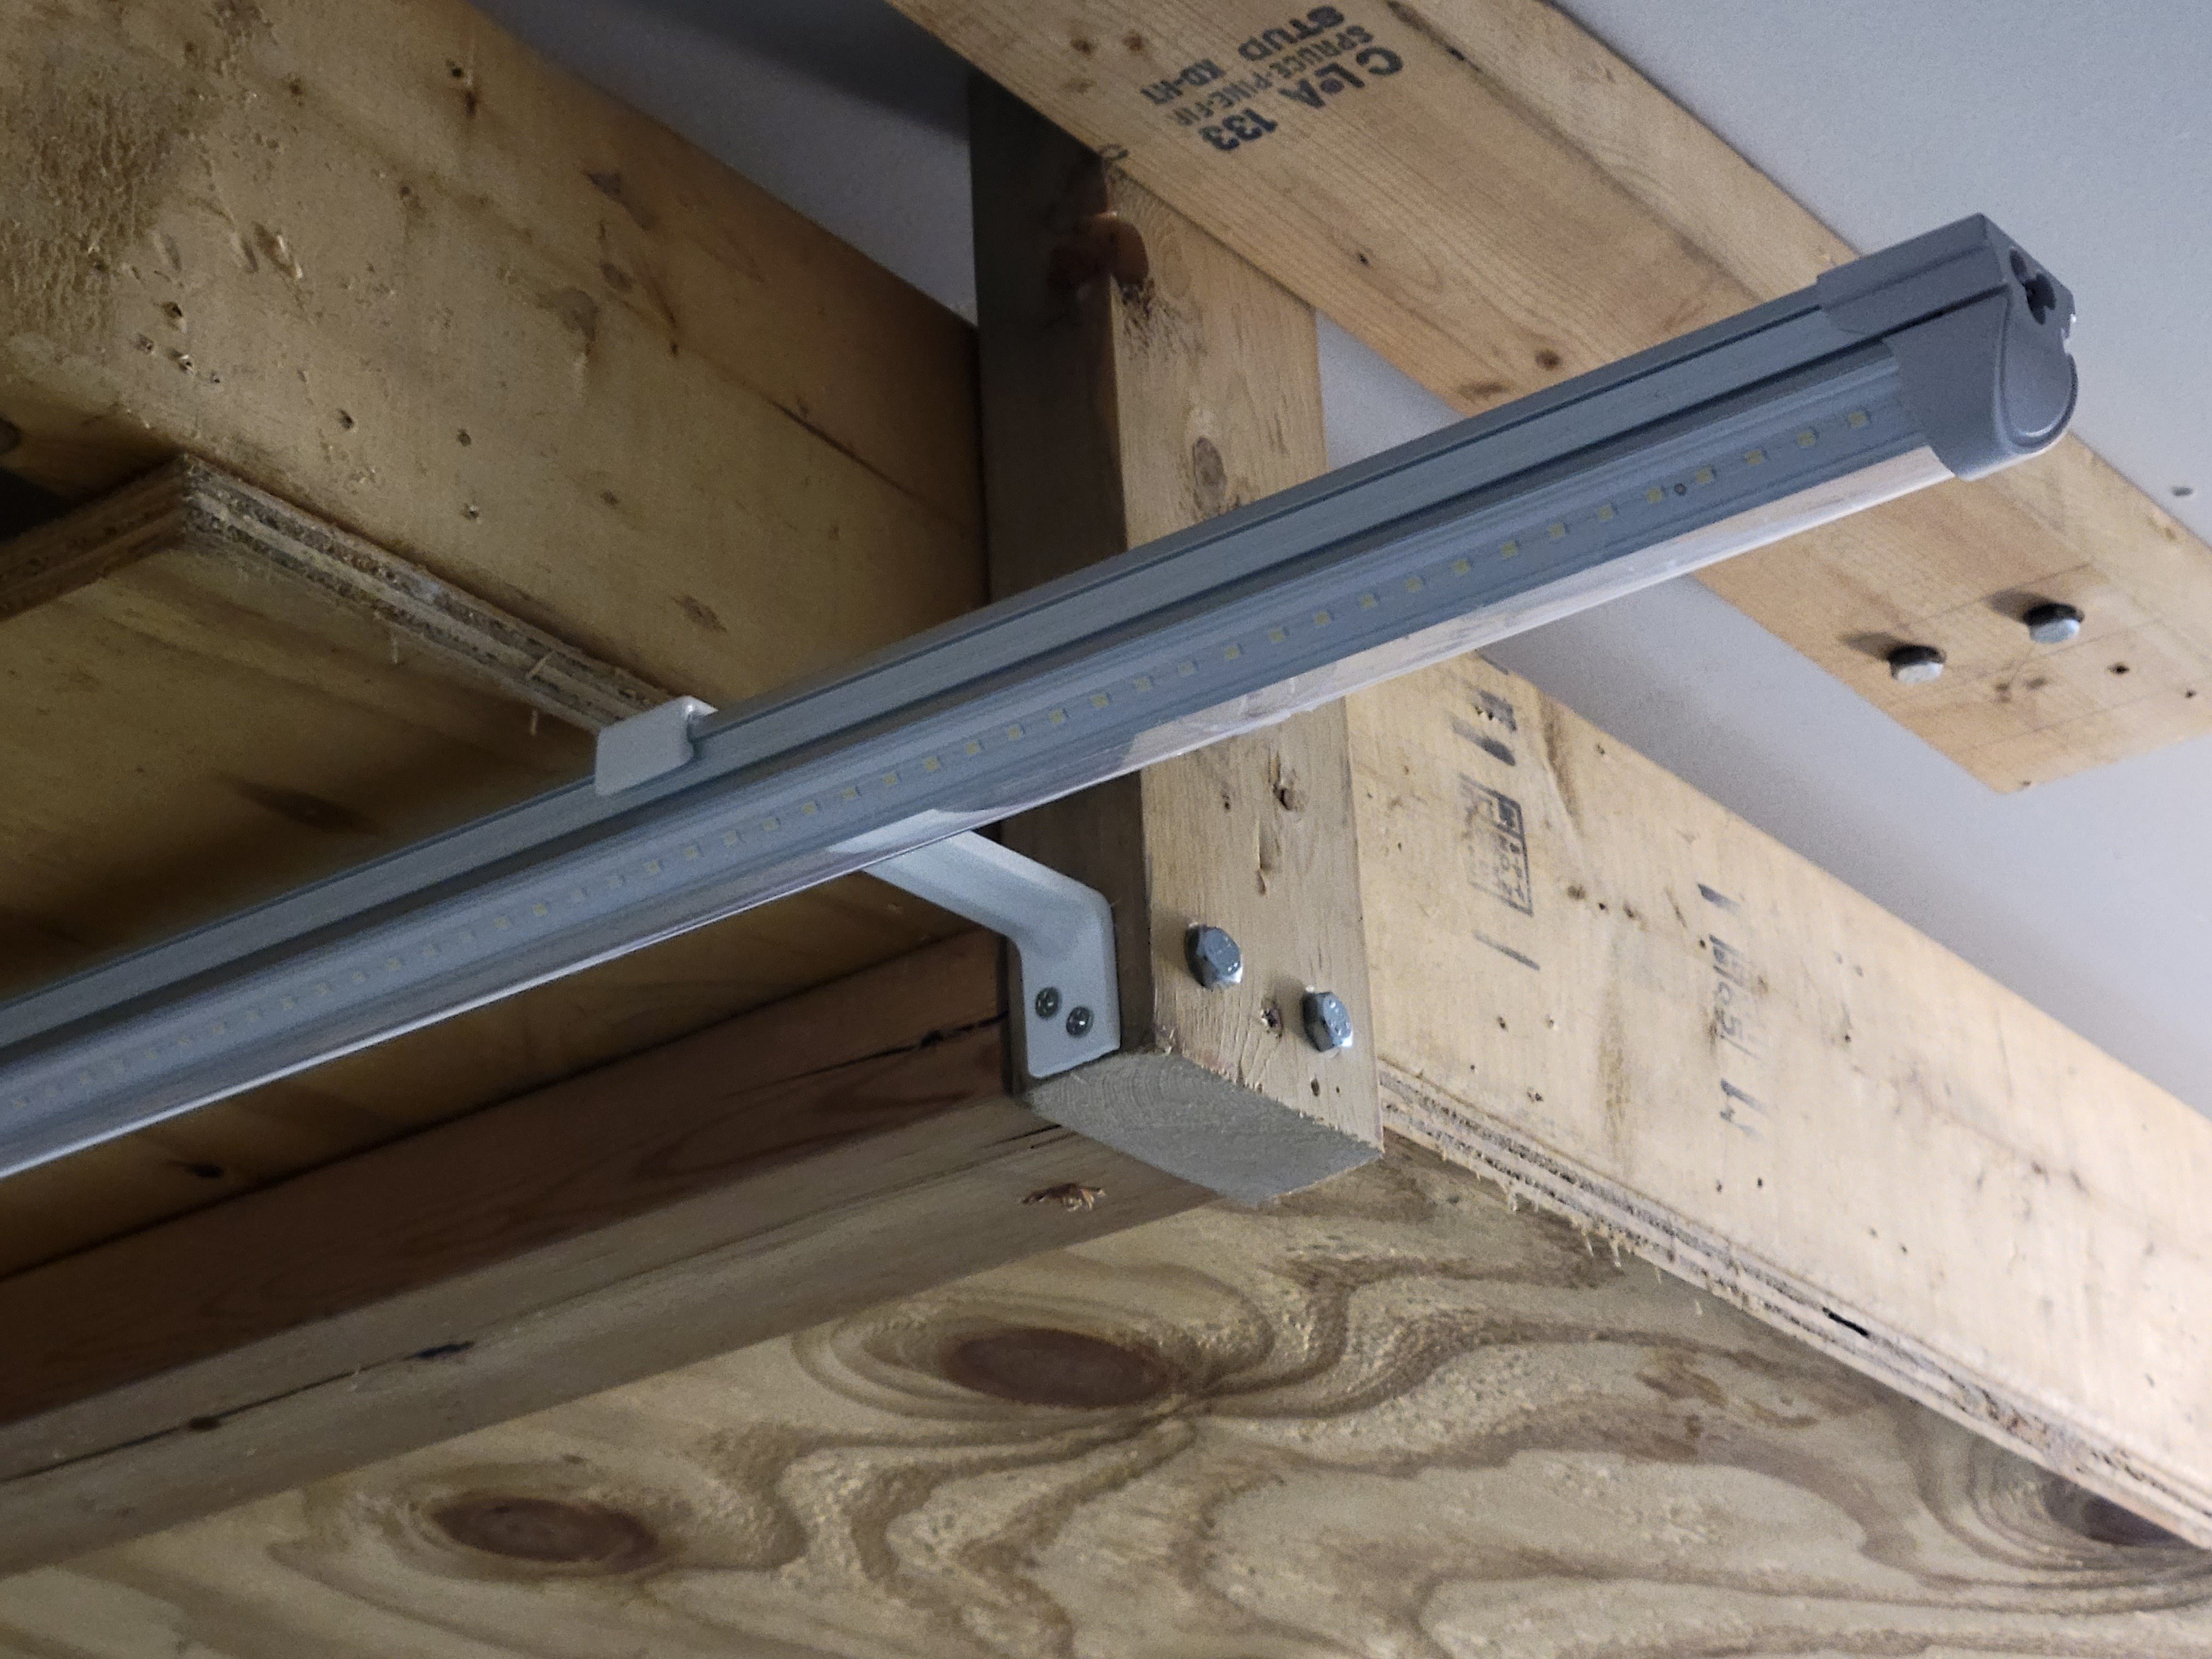
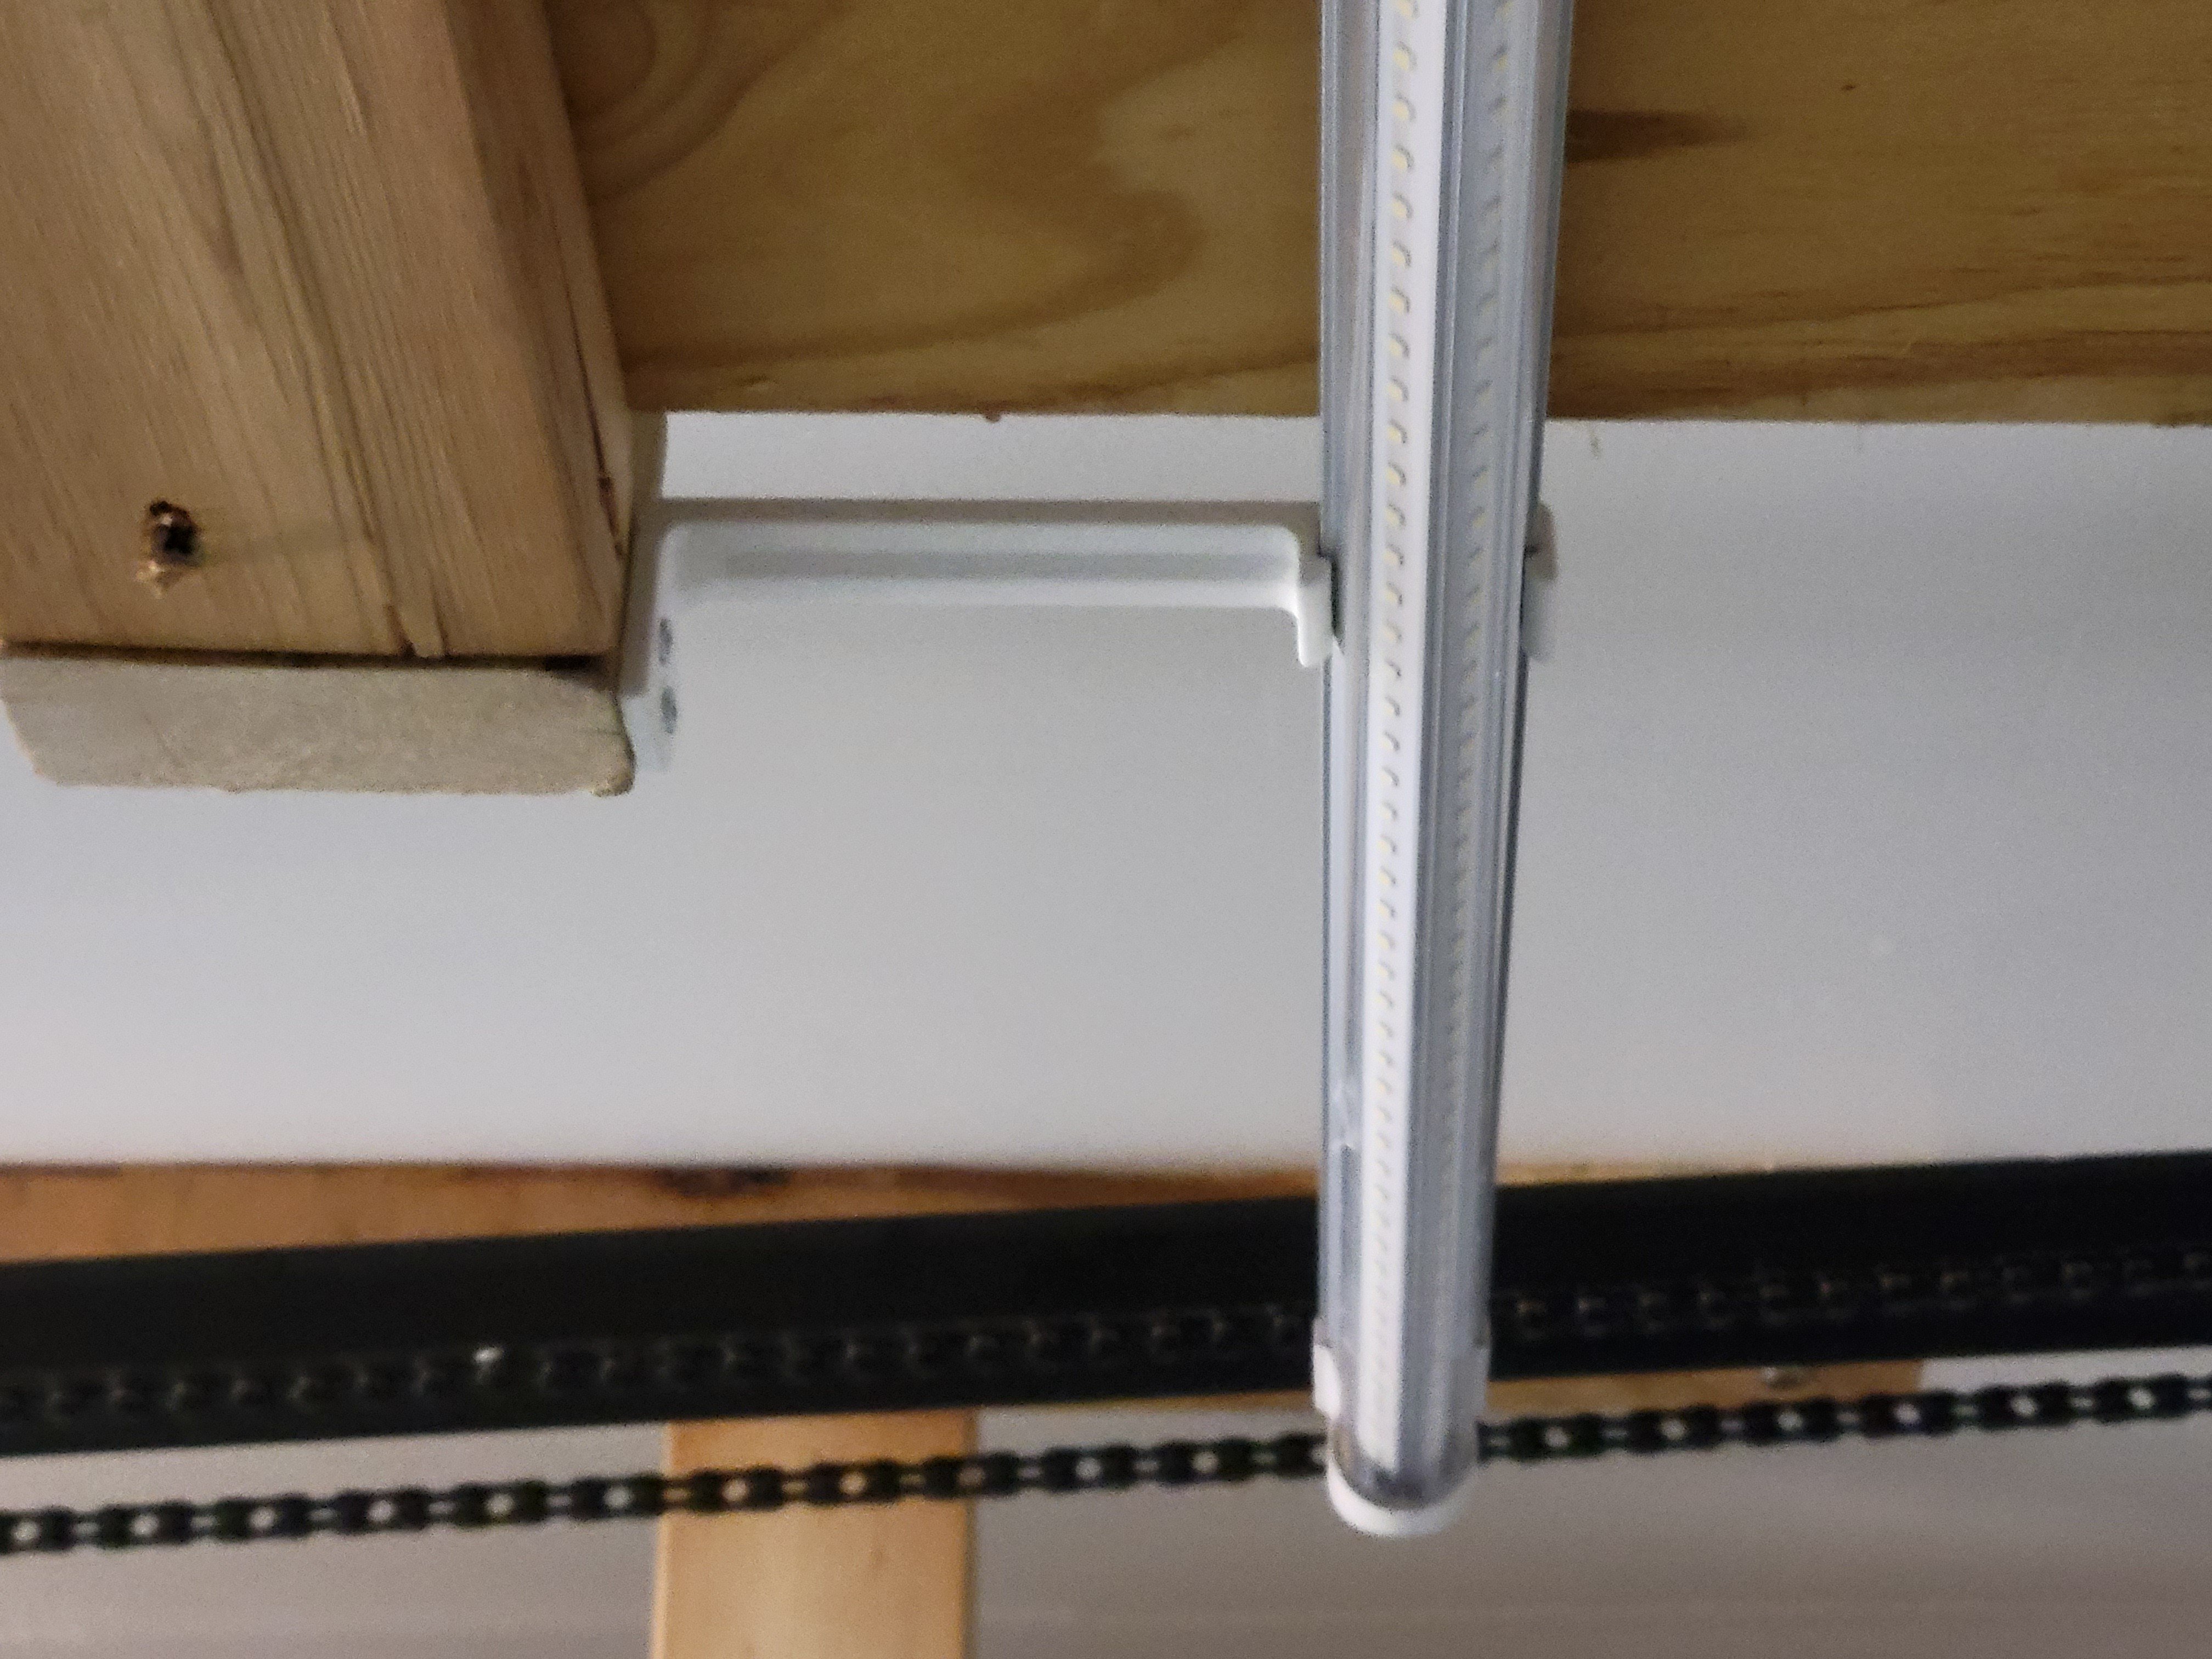
Had minimal clearance between these overhead shelves and the garage door, and the perfect light spacing was a few inches away from the cross bars. So I designed these snap fit brackets to offset the lights inline.

The lights make a huge difference, much more pleasant to work in the garage.

What I learned:

  • there is some sag because the screws aren't at the top of the bracket. I would add a tab that protrudes on the side so I could add a screw higher.
  • the screw face split on layer lines on a few of these. Still works but not perfect, so I would make the screw face thicker.

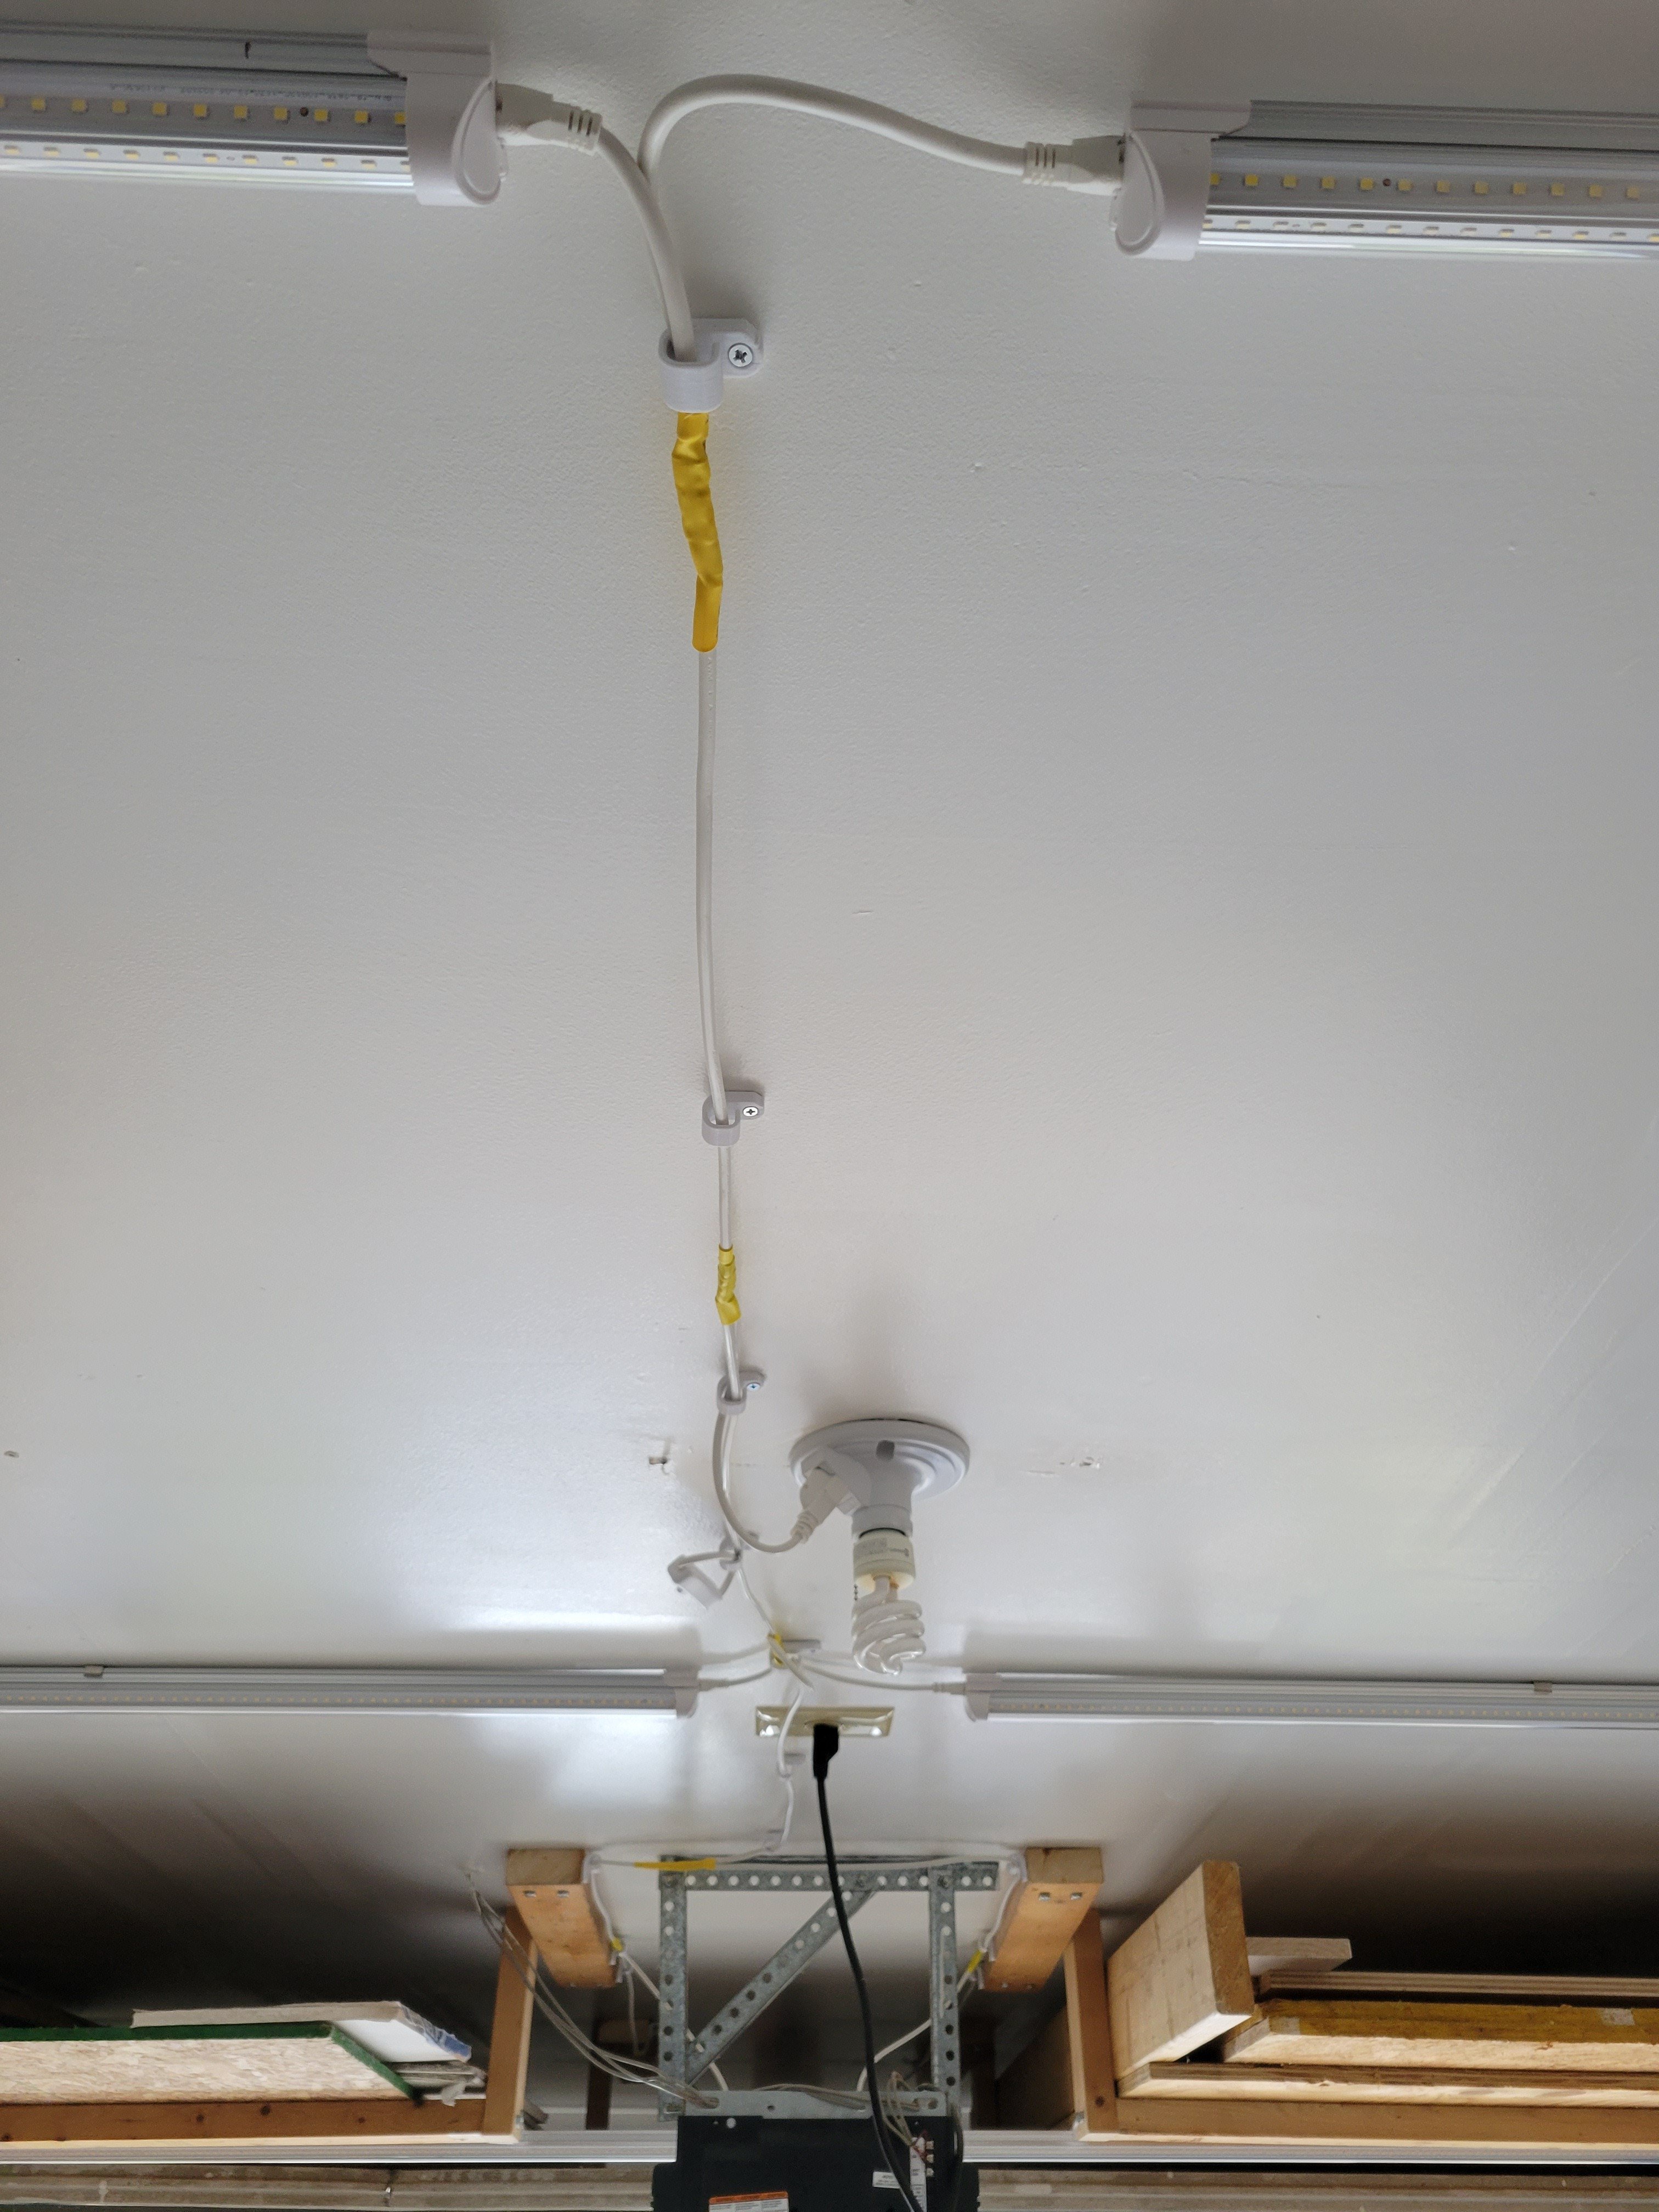
Also printed cable management clips

916
42
submitted 1 year ago* (last edited 1 year ago) by [email protected] to c/3dprinting


Background:

I am running a mostly stock flsun Super Racer, which had been running pretty well on Marlin. I was having a few problems with print quality at high speed, and in an attempt to improve this I bought the flsun Speeder Pad, flashed it with stock klipper, and got it all up and running. So far so good.

I have been trying to get rid of an annoying stringing issue that I never really had on Marlin, and the more I try to remedy it, the worse it's getting.

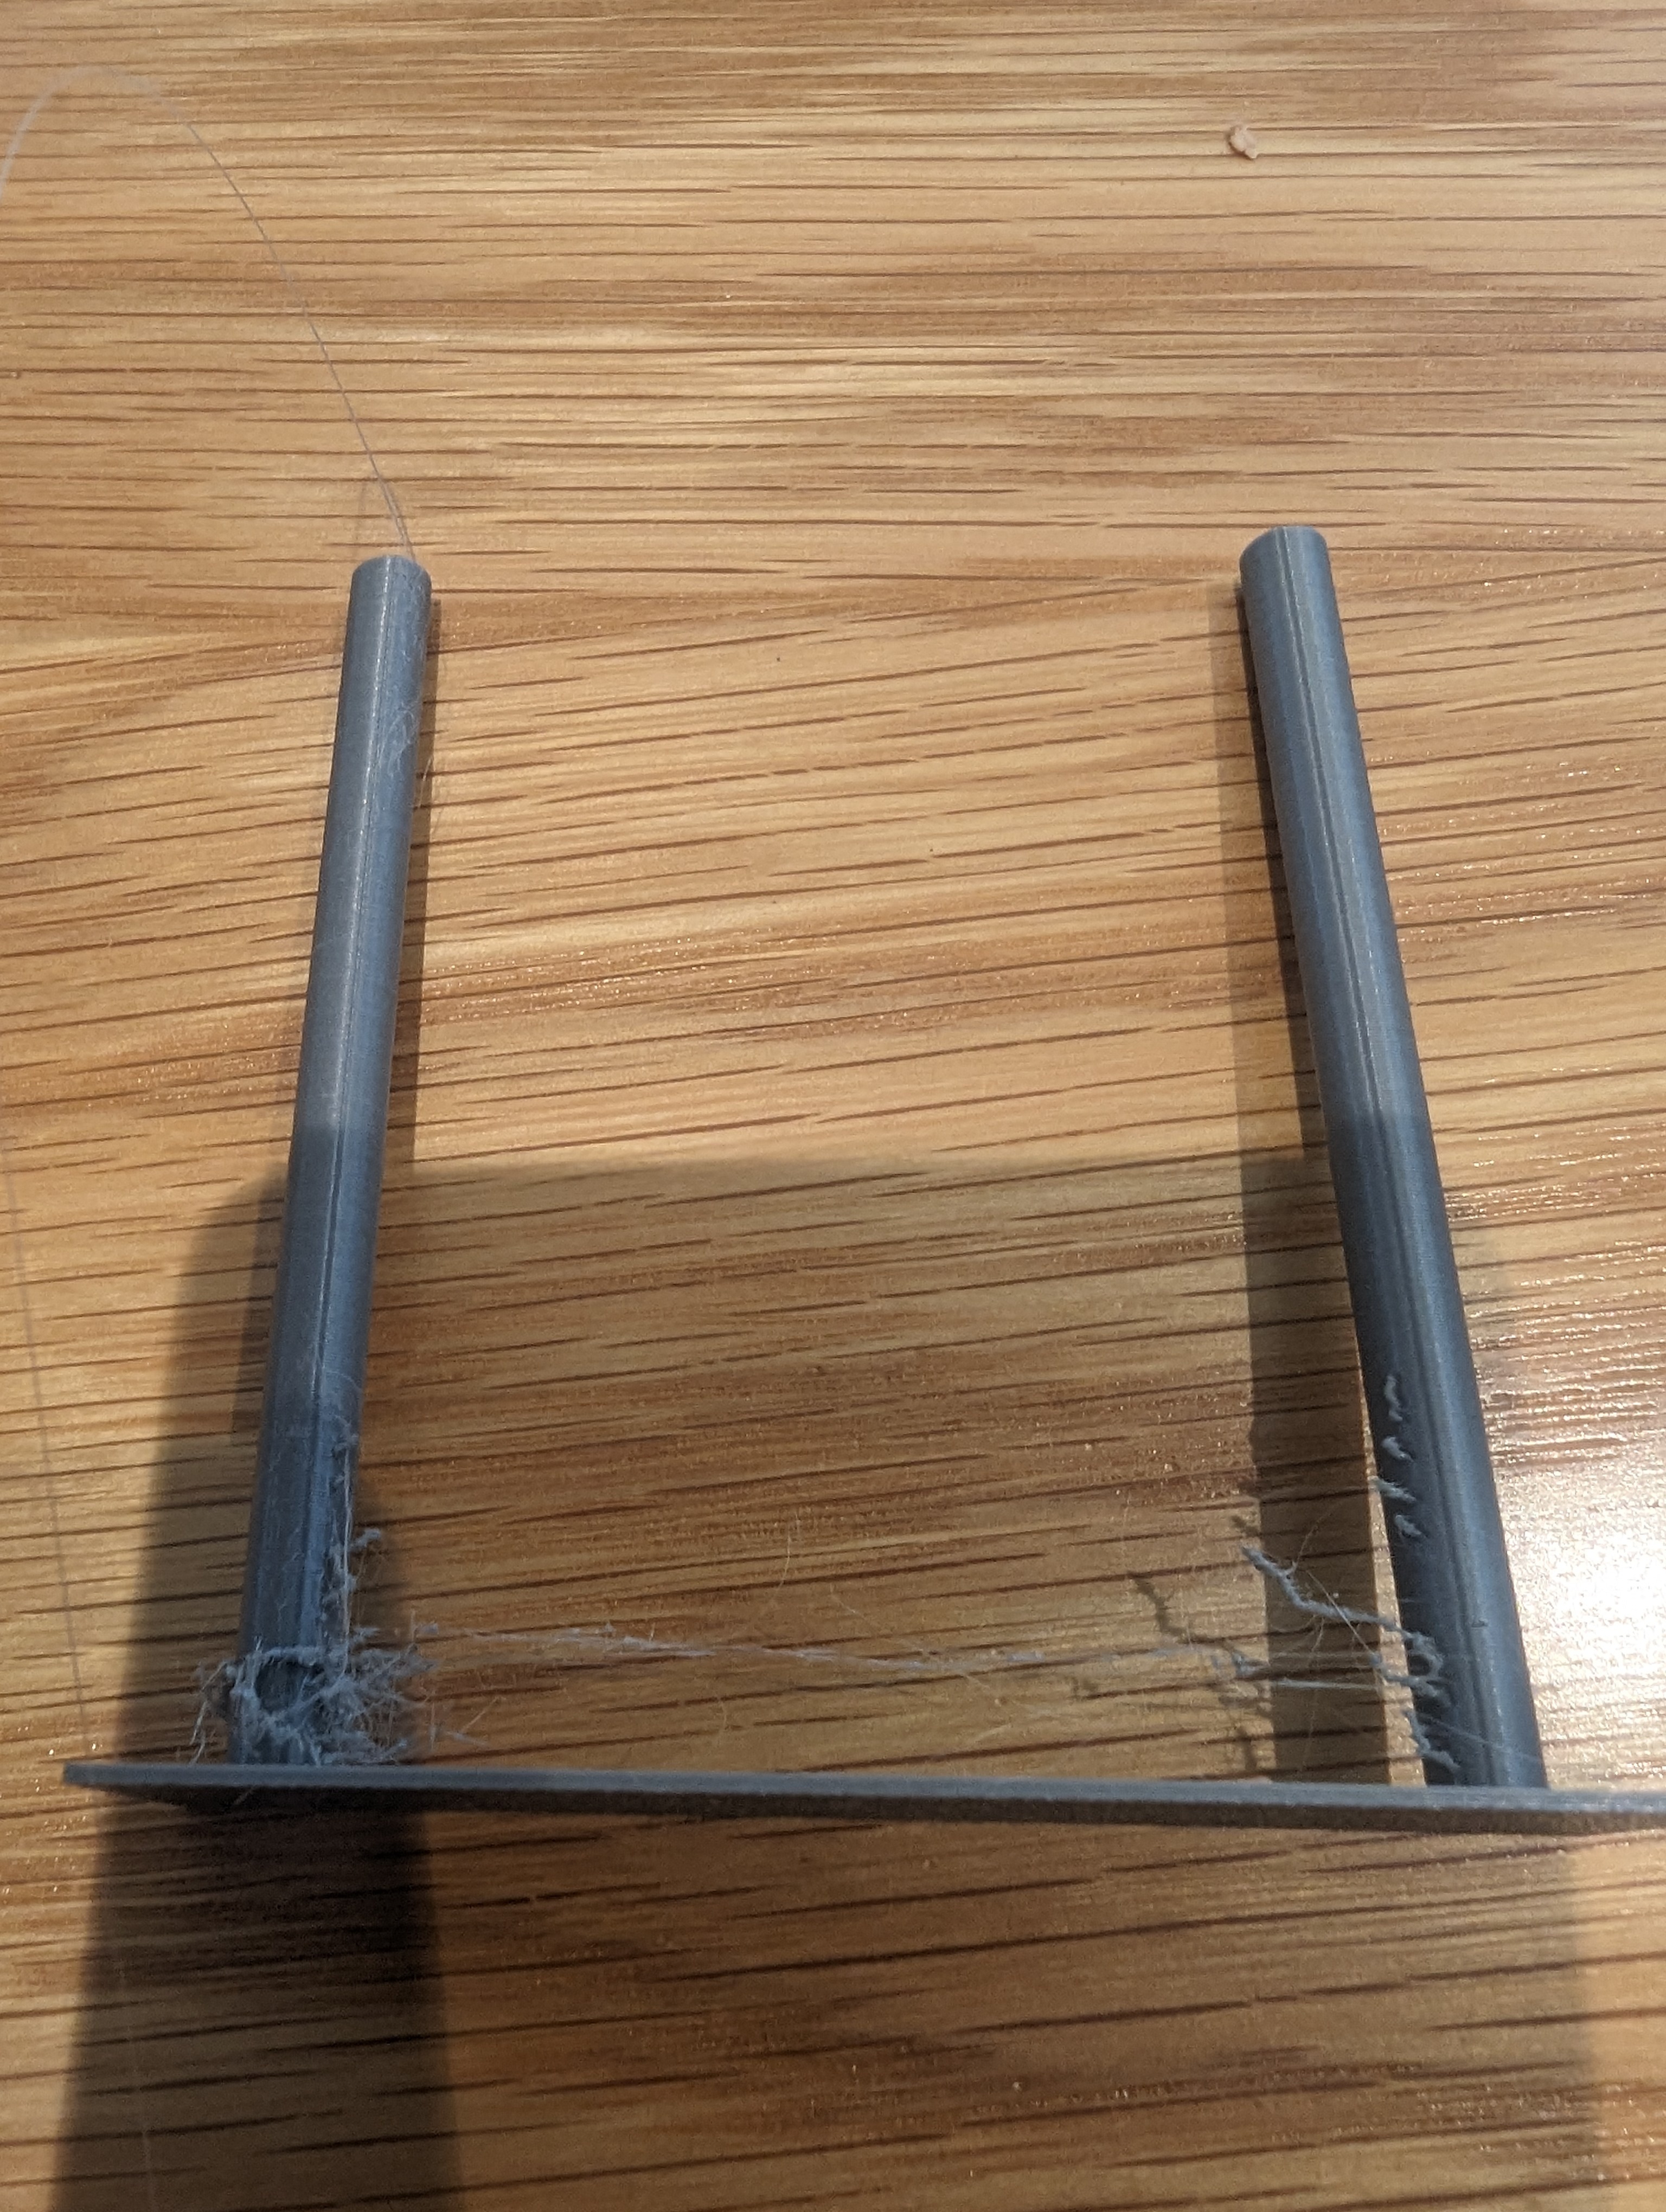
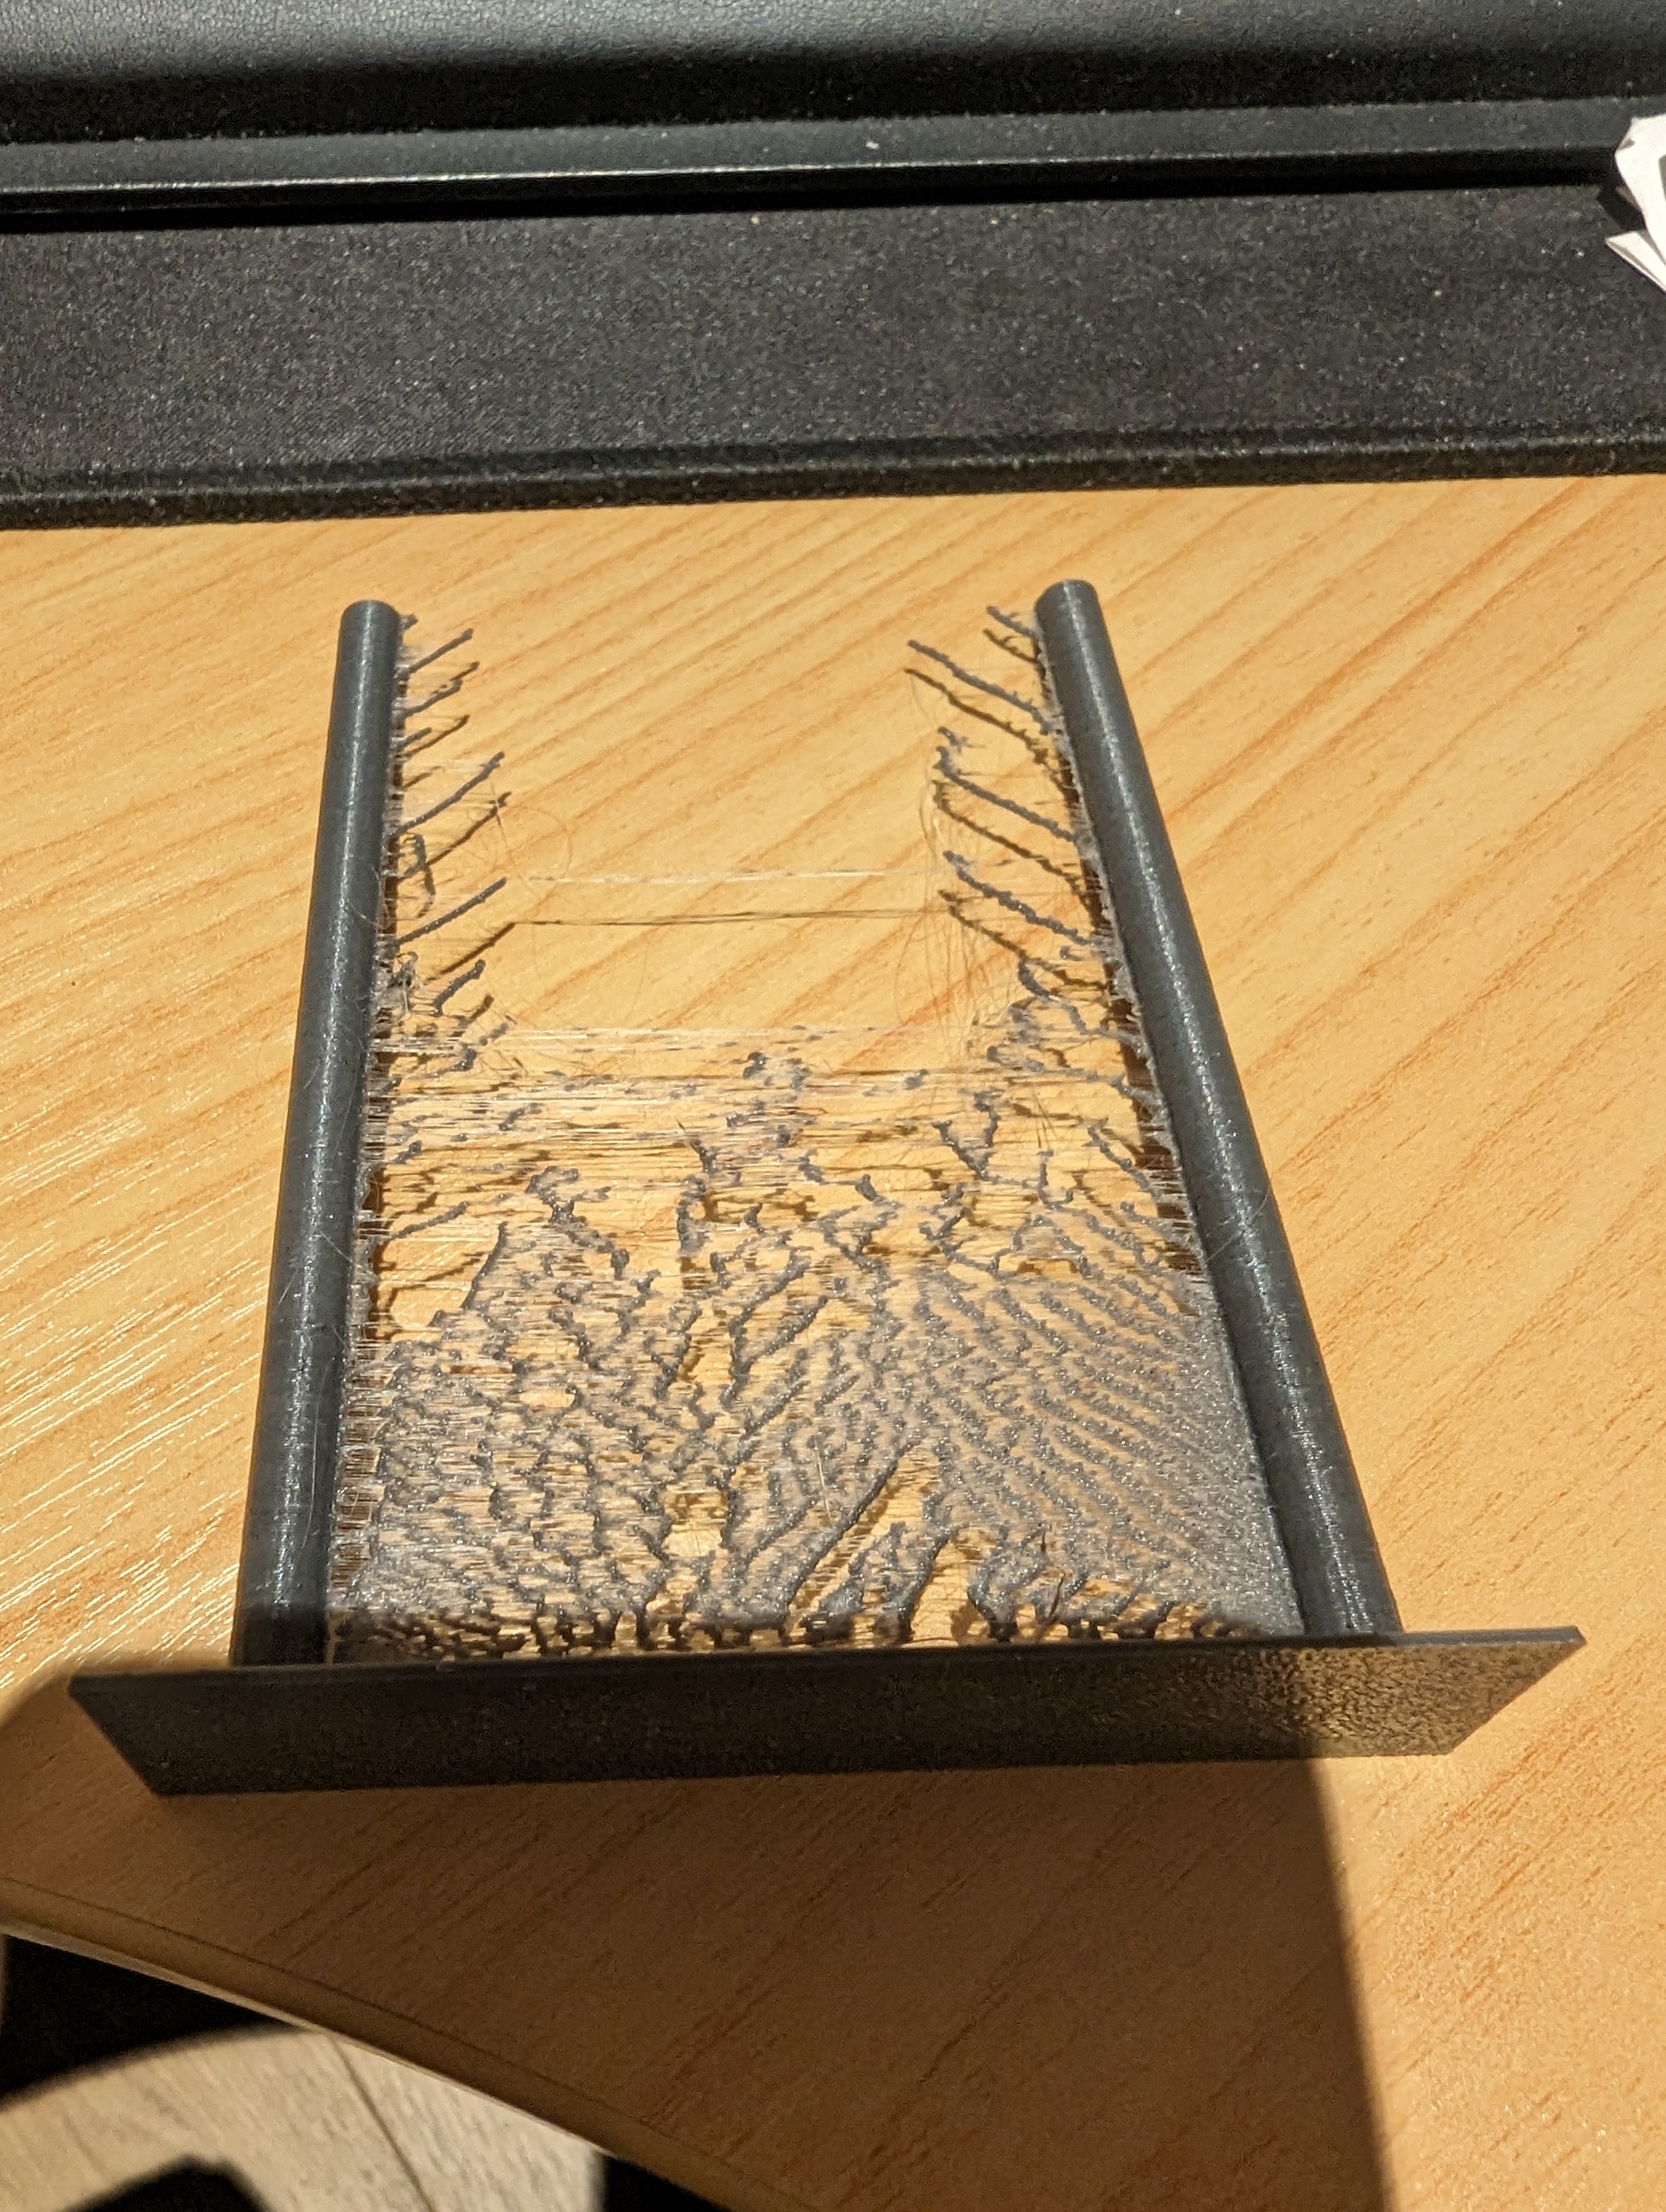
The image is from my latest retraction tower test after re-calibrating pressure advance and rotation_distance. I'm really not sure where to go from here.

Settings from the above test:

  • Esun PLA+
  • 220C (for maximum flow)
  • 1000mm/s acceleration (low for a delta)
  • 0.1mm z-hop on retract
  • Firmware retract control running in test tower mode, 0mm start, 0.1mm factor
  • Pressure advance of 0.236

Upgrades from stock:

  • Lighter hotend housing
  • Deported fans
  • Fan ducts

Any advice is greatly appreciate!

UPDATE: It was the filament. I grabbed a spool of grey from my drying cabinet, and only later (after much hair pulling!) realized it was the budget filament I'd bought to try. Switched it out to some good quality esun PLA+ and the stringing practically vanished! See image for final stringing test.

Final retraction settings: 3.5mm at 35mm/s.

I would like to thank everyone for their help! Lemmy is always the best place to get advice!
917
15
submitted 1 year ago* (last edited 1 year ago) by callcc to c/3dprinting


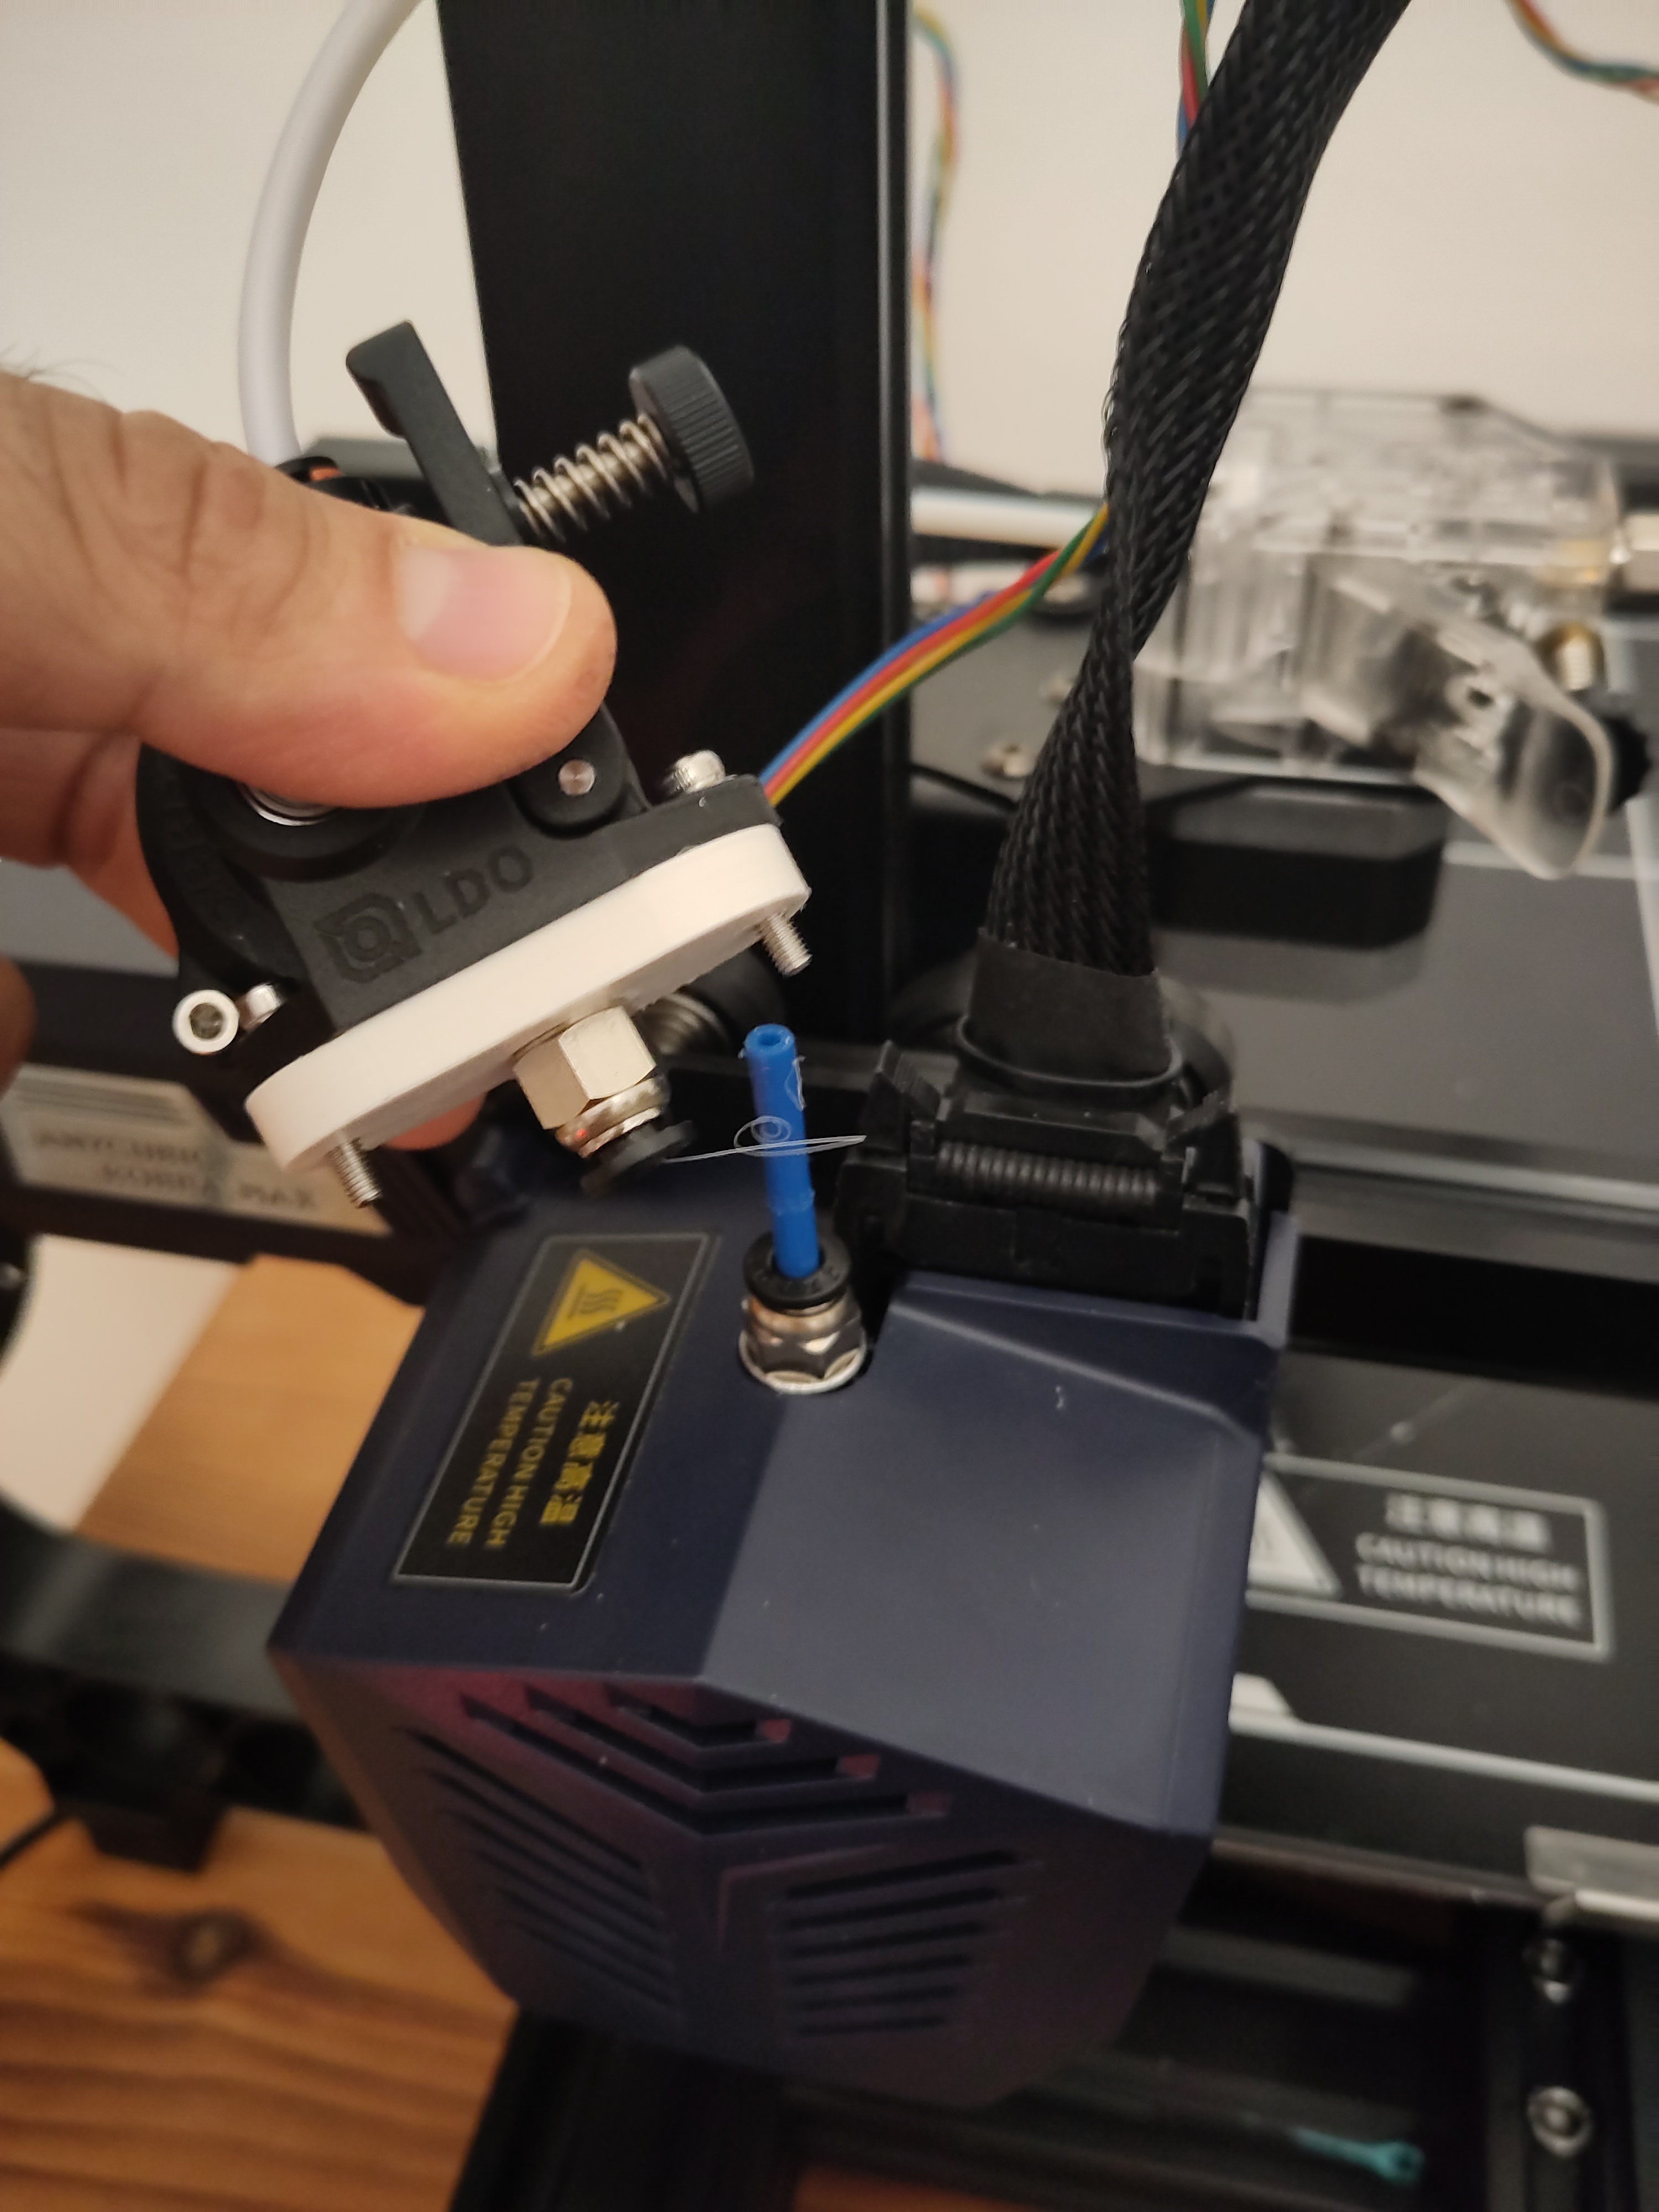
I've been looking to switch the bowden extruder for a direct drive type on my Anycubic Kobra Max. I've always hated the blobbing and stringing due to the bowden mechanism. After having received an LDO Orbiter v2.0 today and a bit of tinkering, I now have what I was after :).

The easiest way to install the new extruder was to simply attach it on top of the existing hotend via a small bowden tube and a coupler. I had to design a little adapter flange that attaches to the extruder and accepts a tube coupler. The extruder now dangles in the air. For now this didn't seem to cause any trouble. In the future I might install it using a fixed bracket though.

While I was at it, I also added some additional insulation to the bed (300x300mm in size, so I had to cut a bit). I'm not sure if it really helps a lot but the bed now heats up from 20° to 60° in 3:40 instead of in 4:00. The printer also seems to consume 100mA less (very inaccurate mental averaging of power meter).

Bonus: First functional part printed with new setup, rectifying some of the original parts issues.

Up next: Get a second Orbiter and have it feed a mixing hotend. My goal is to make nice Lampshades.

918


I want to print a simple mechanism to adjust the distance between two pieces with a screw that can't come out of its socket on either end. What's the easiest way to model this?

919
15
submitted 1 year ago* (last edited 1 year ago) by [email protected] to c/3dprinting


Hey folks! Today I got my first spool of TPU. I was quite excited to replace the cap of a controller's joystick. But now I am looking for ideas what to print next.

...I was expecting more of a "rubber-ish" feel, when I ordered TPU. It's a lot more sleek? than I expected. Or is that, because I ordered transparent "High Speed TPU"?

edit: Forgot to mention it's 95A

920
34
submitted 1 year ago* (last edited 1 year ago) by Gorroth to c/3dprinting


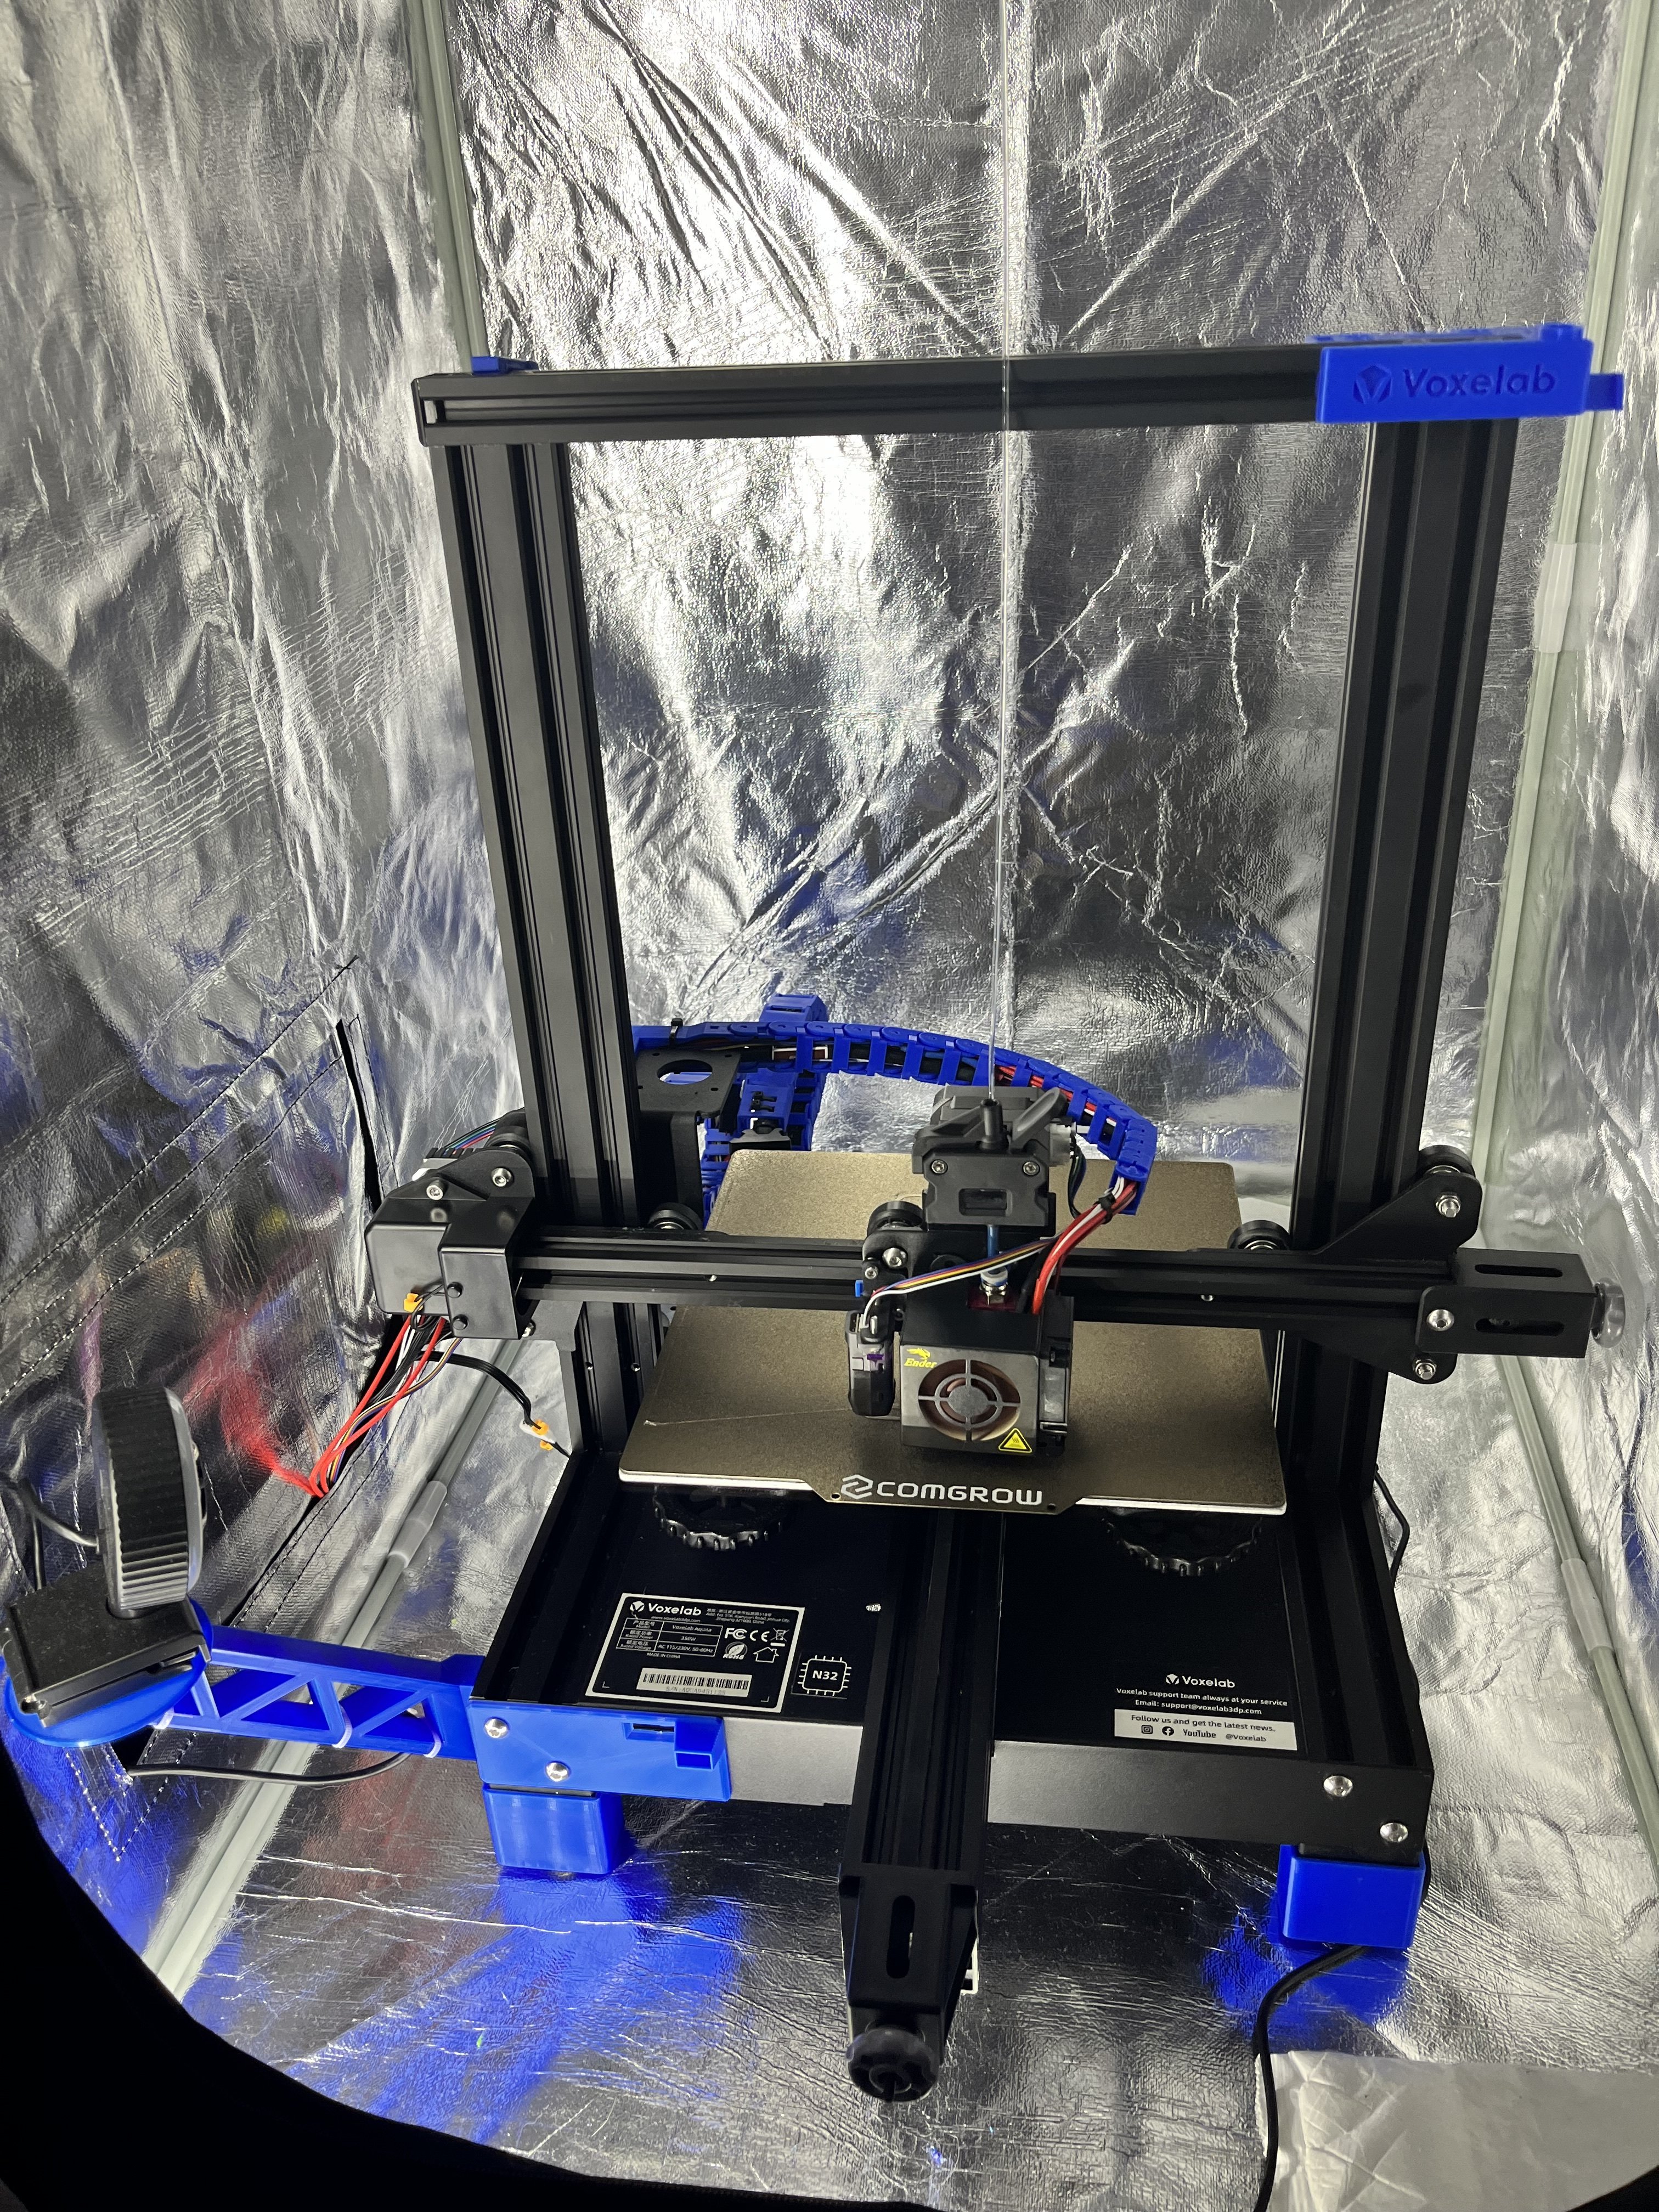
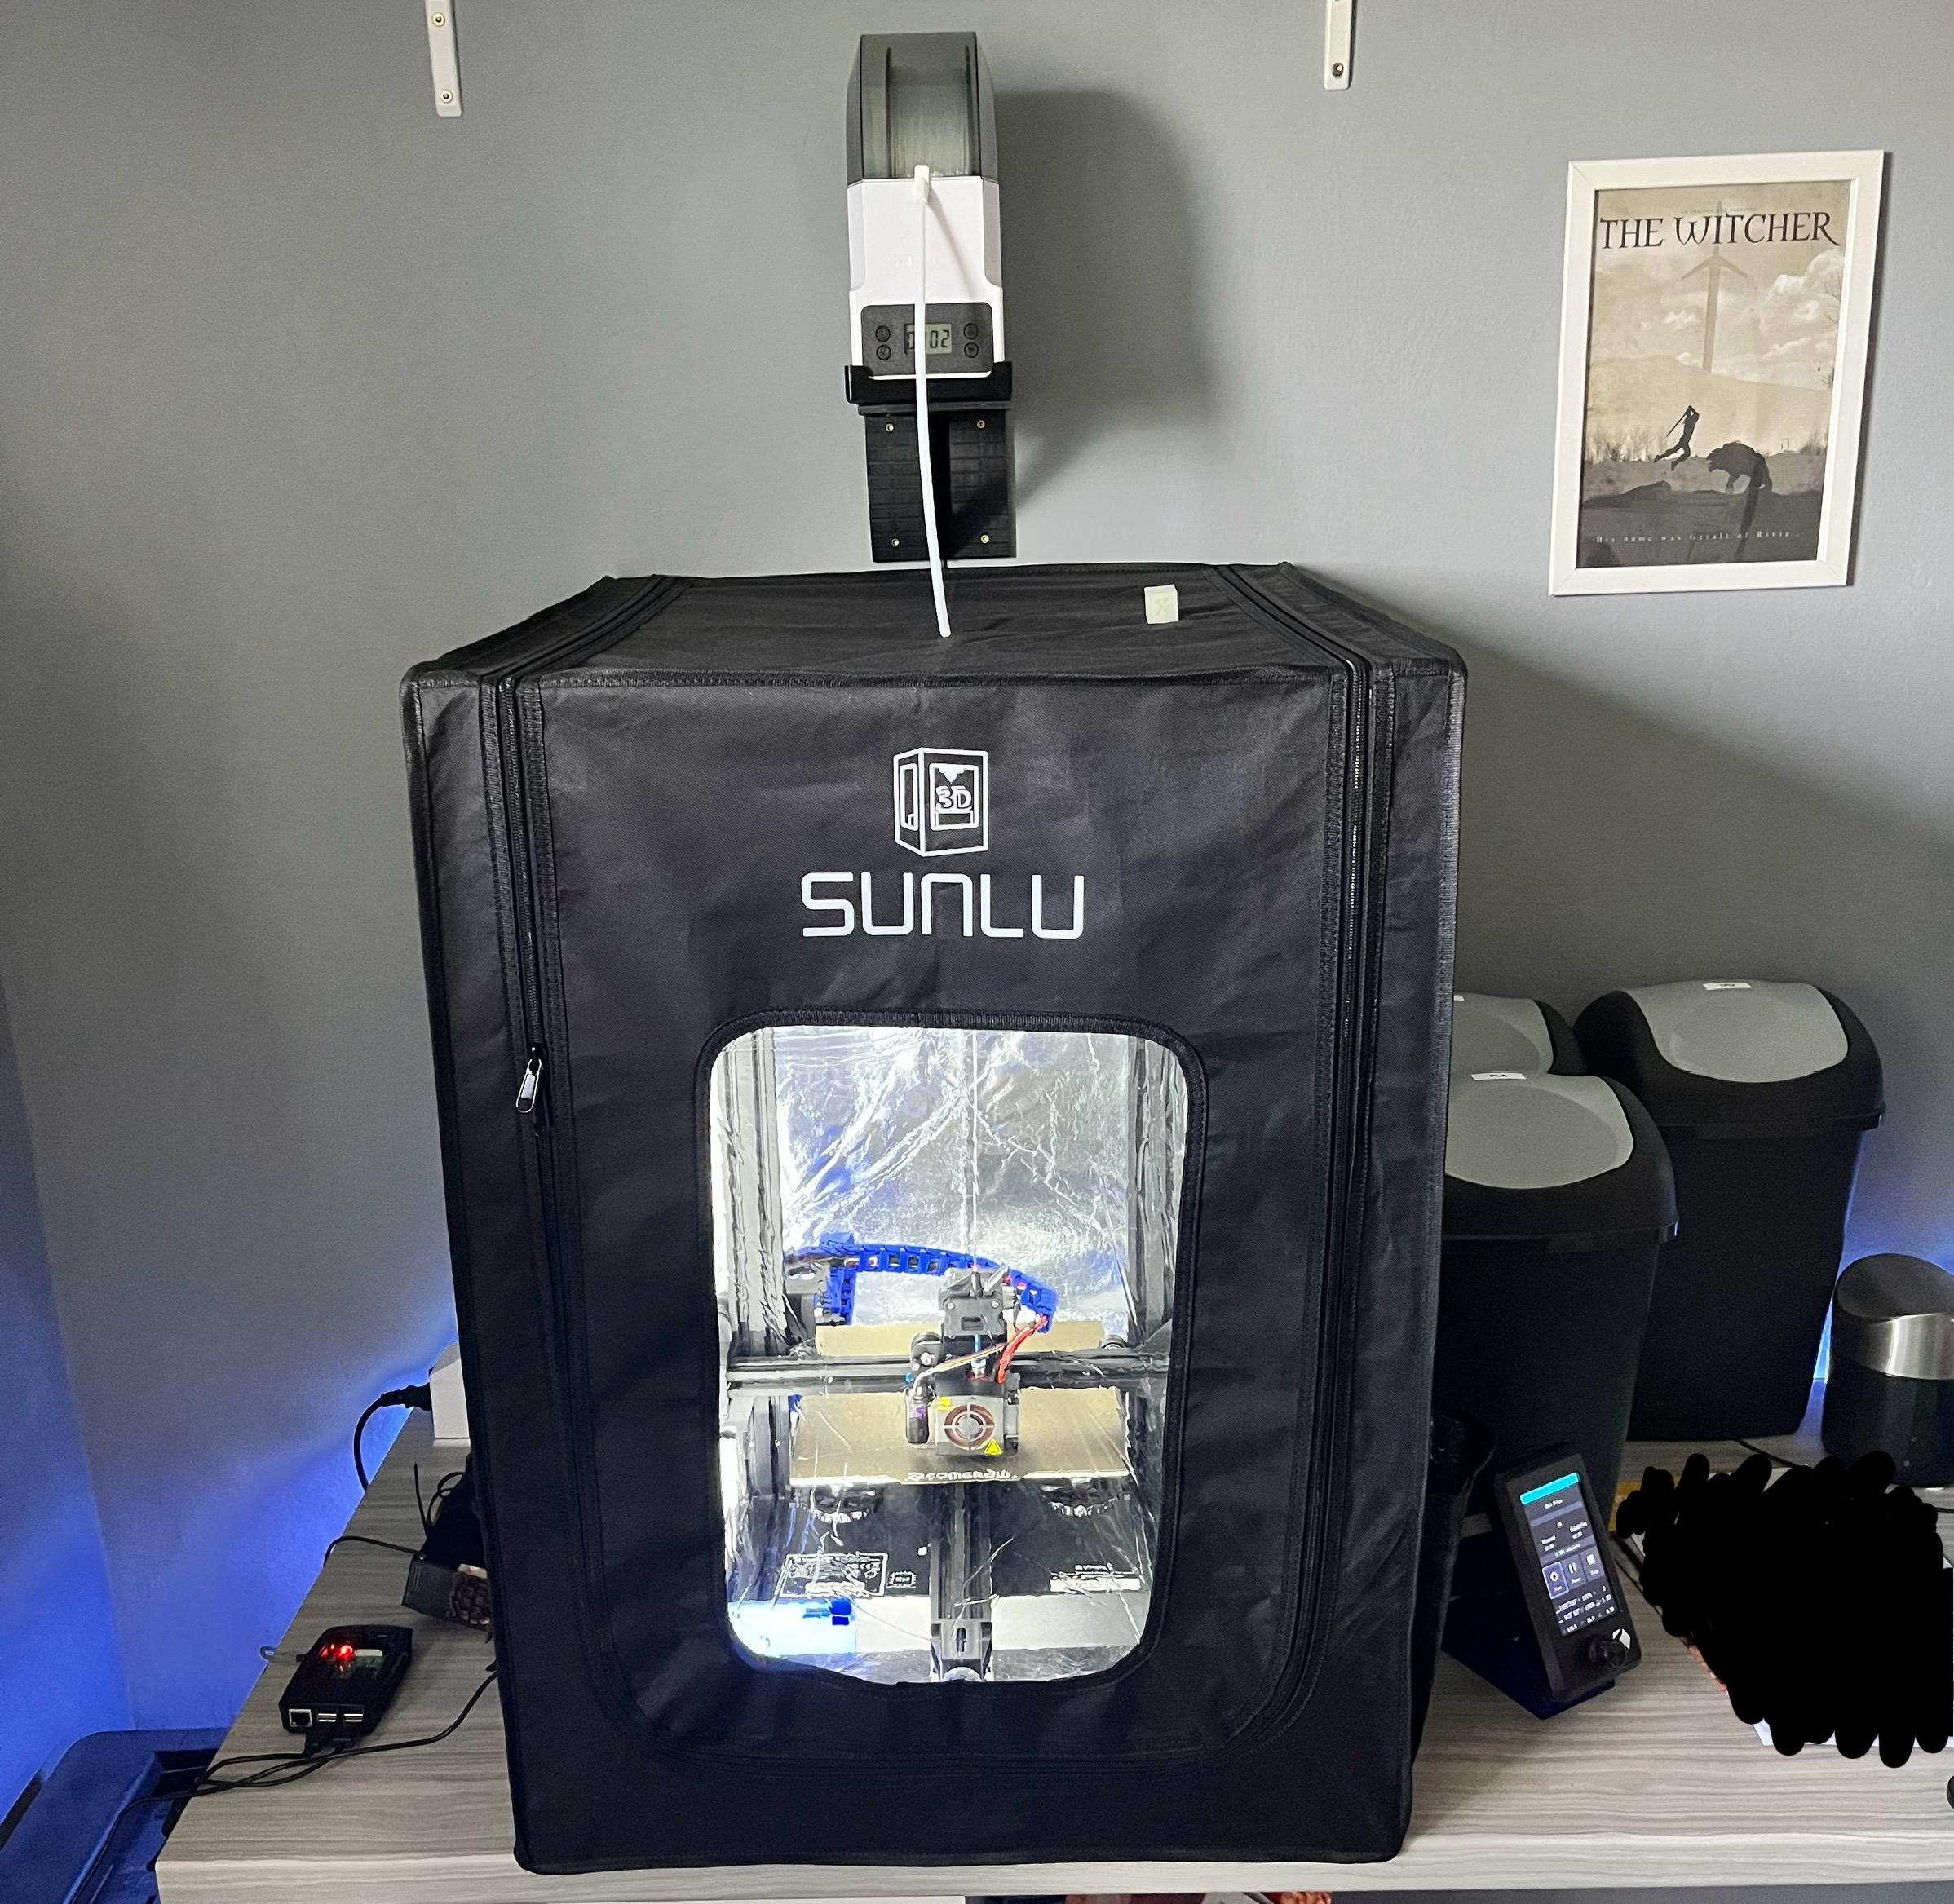
I thought it might be interesting for anyone planning to upgrade their standard Voxelab Aquila to see what I did to mine. Print quality increased much, even though there are printers that are even better (of course).

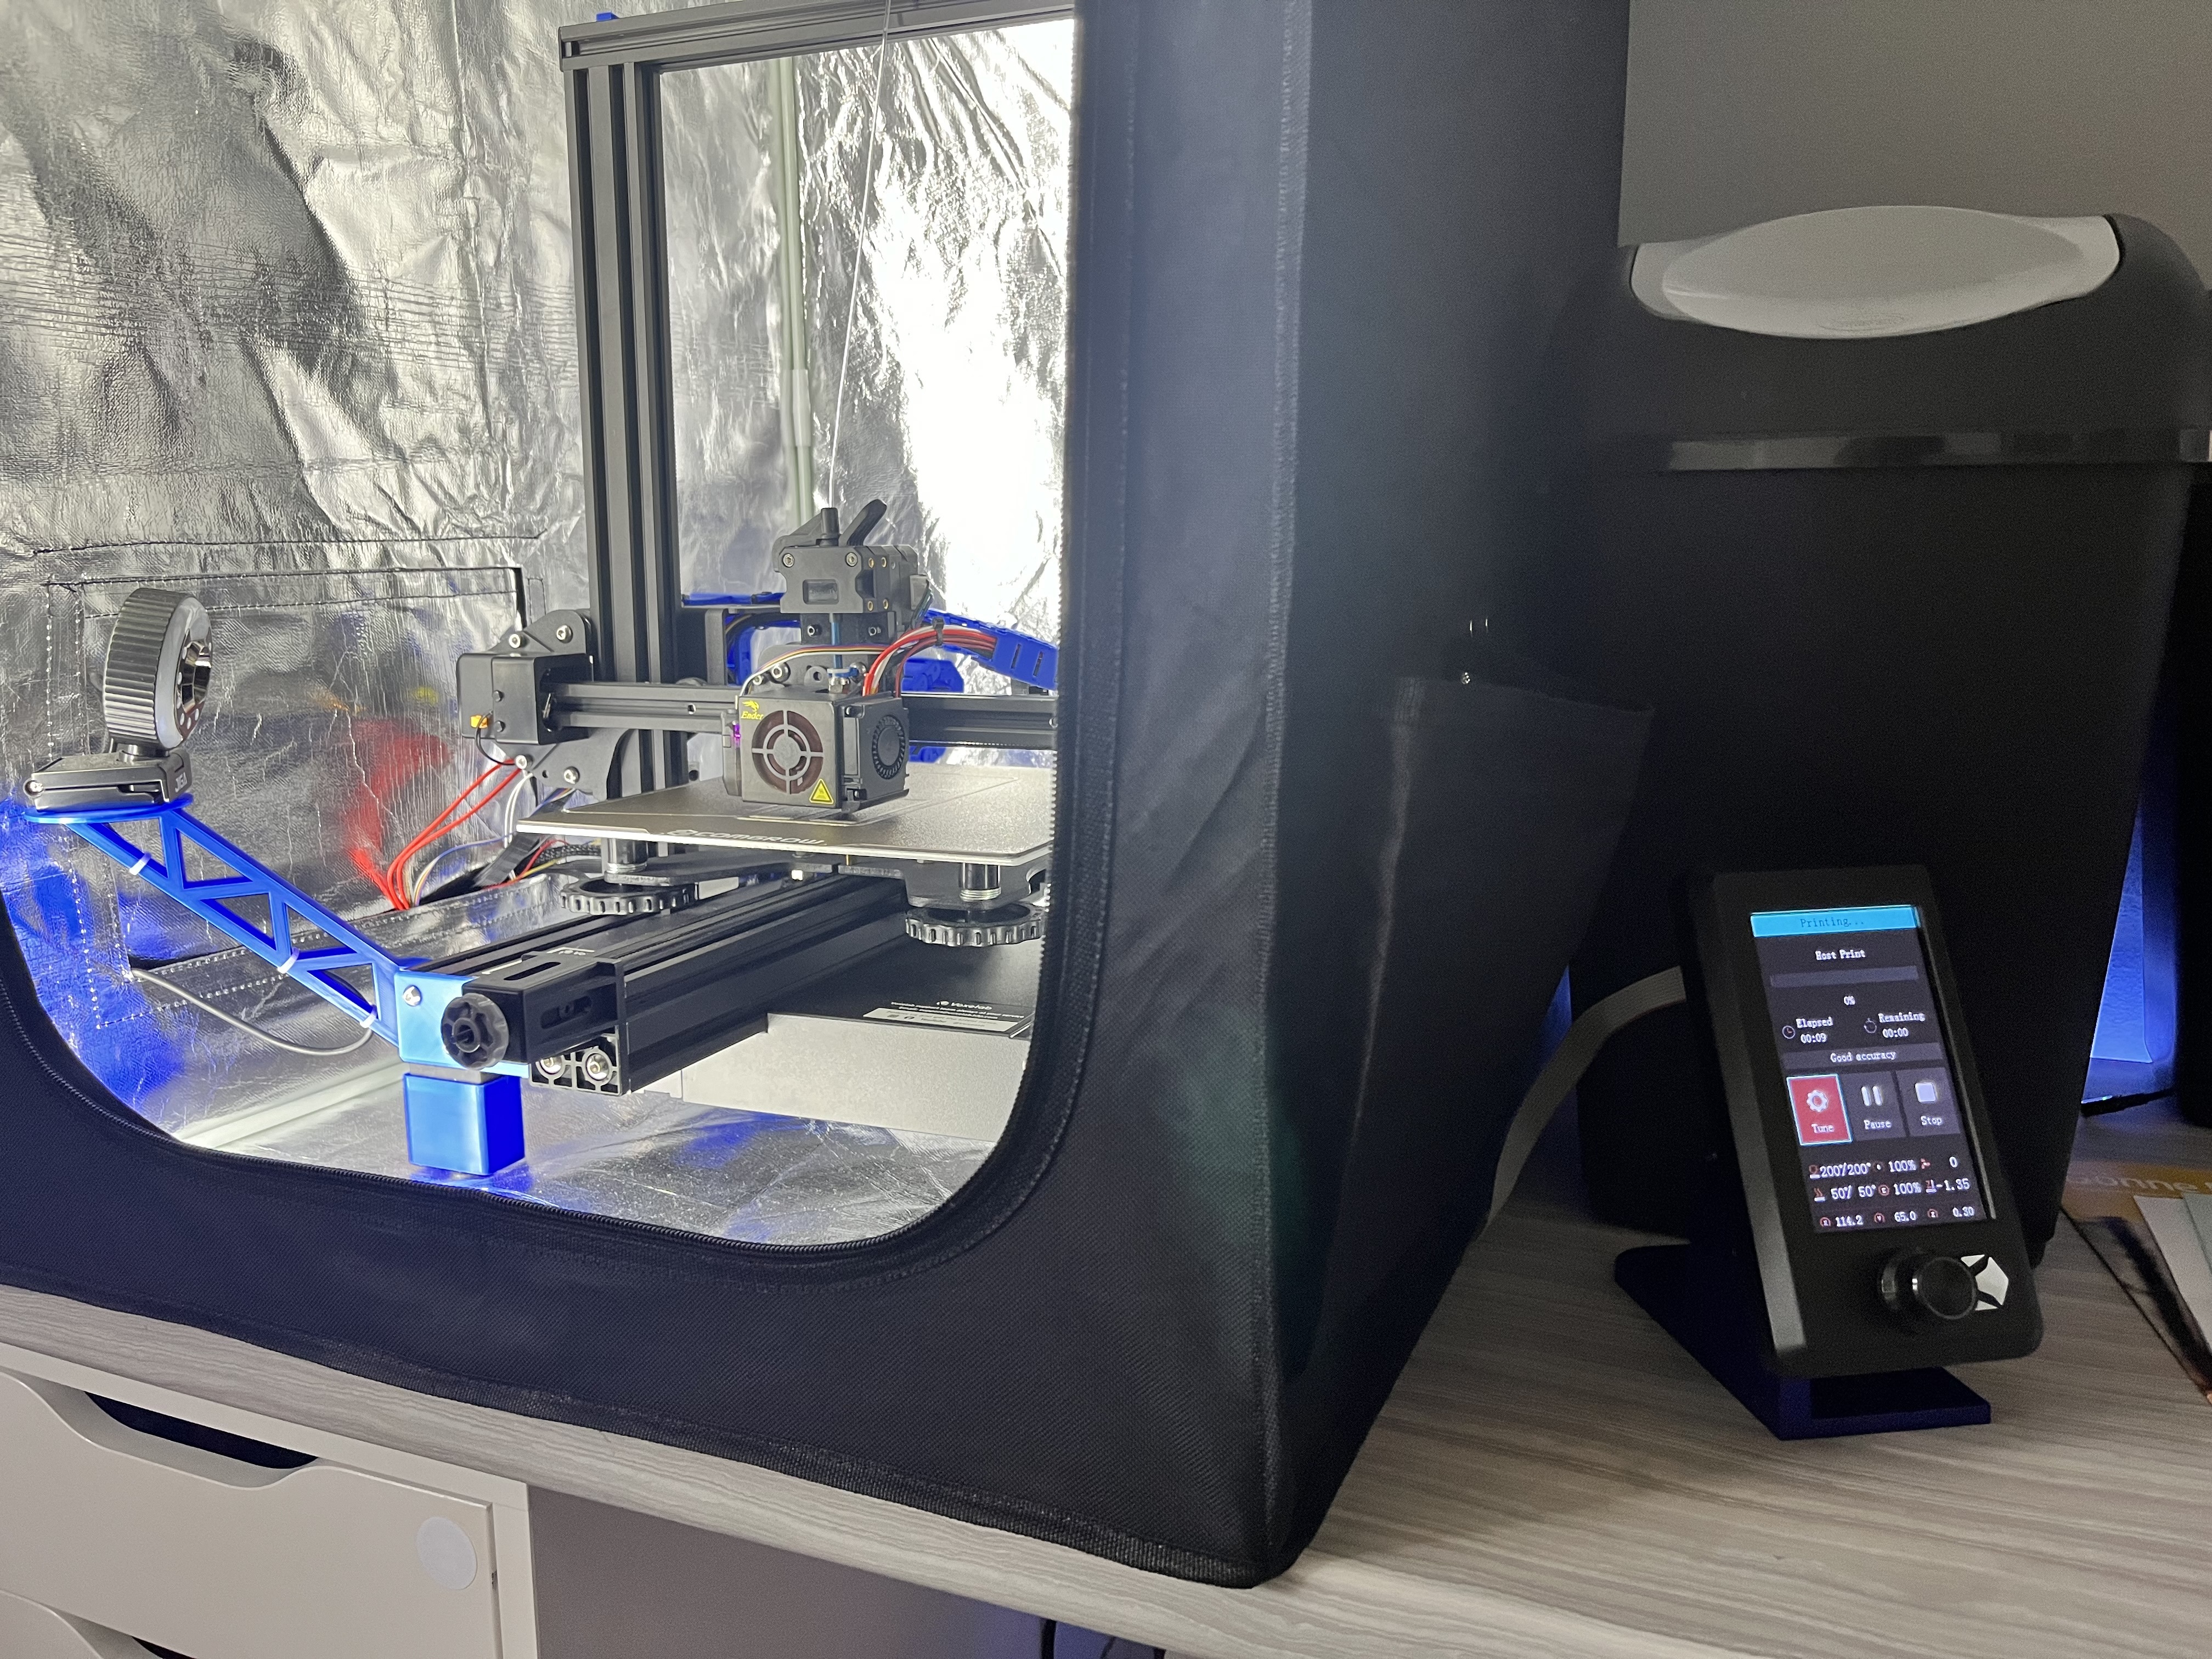
I got this one back when it was on sale at amazon for around 150€. I wasn’t planning on getting a 3D printer and had absolutely no idea what rabbit hole I am going to fall into. I just got a bonus at work at that time and thought „why not“. Since then I thought about upgrading to a better printer a few times, but as I became father two times in the last two years I always decided on saving the money and just go with some improvements for my Aquila. So over time it transformed into what you can see here.

I will try to list all of the upgrades, but I might forget some. So if you have any questions, feel free to ask.

Upgrades:

  • DirectDrive

Creality Offiziell Sprite Direct Drive Extruder SE für Ender 3/Ender 3 V2/Ender 3 Pro/Ender 5/Ender 5 Pro/CR-10, Edelstahl Dual Gear Upgrade Ender 3 Extruder, Unterstützt die Meisten Hotend https://amzn.eu/d/1lhH7JU

  • Ender 3 Pully Backplate with official Ender 3 Hotend Kit (got this one as I had some serious trouble with my Hotend not extruding anymore as filament got stuck. Turned out I have to leave the enclosure open for PLA… But I just leave it as it is now)

  • Enclosure

SUNLU 3D-Drucker-Gehäuse, konstante 3D-Drucktemperatur für ABS 3D-Drucker-Filament, Ender 3/3 PRO 3D-Drucker-Gehäuse, bietet viel Platz, feuerfest, Größe 650 * 550 * 750mm https://amzn.eu/d/eHXB8Kb

  • Filament Dryer as direct Feed

eSUN Trockenbox für 3D Drucker Filament, eBOX Lite 3D Drucker Hält das Filament Trockenbox, Staubdicht und Feuchtigkeitsdicht, Kompatibel mit 1.75mm, 2.85mm, 3.00mm Filament https://amzn.eu/d/idSAFa2

  • PEI printed

COMGROW PEI Sheet 235x235mm, Pei Druckplatte for Creality Ender 3 Pro/Ender 3 V2/Ender 3 S1/Ender 3 S1 Pro/Ender 3 Neo/Ender 3 V2 Neo/Voxelab Aquila 3D Drucker https://amzn.eu/d/0GWosXC

  • Placed the display outside the enclosure using an enlargement cable

POPESQ® 1 STK. x IDC Verlängerungskabel 10 polig 50cm 2.54mm Verbinder / 1 pcs. x IDC Extension Cable 10 Way 50cm 2.54mm Connector #A1917 https://amzn.eu/d/iPmrouH

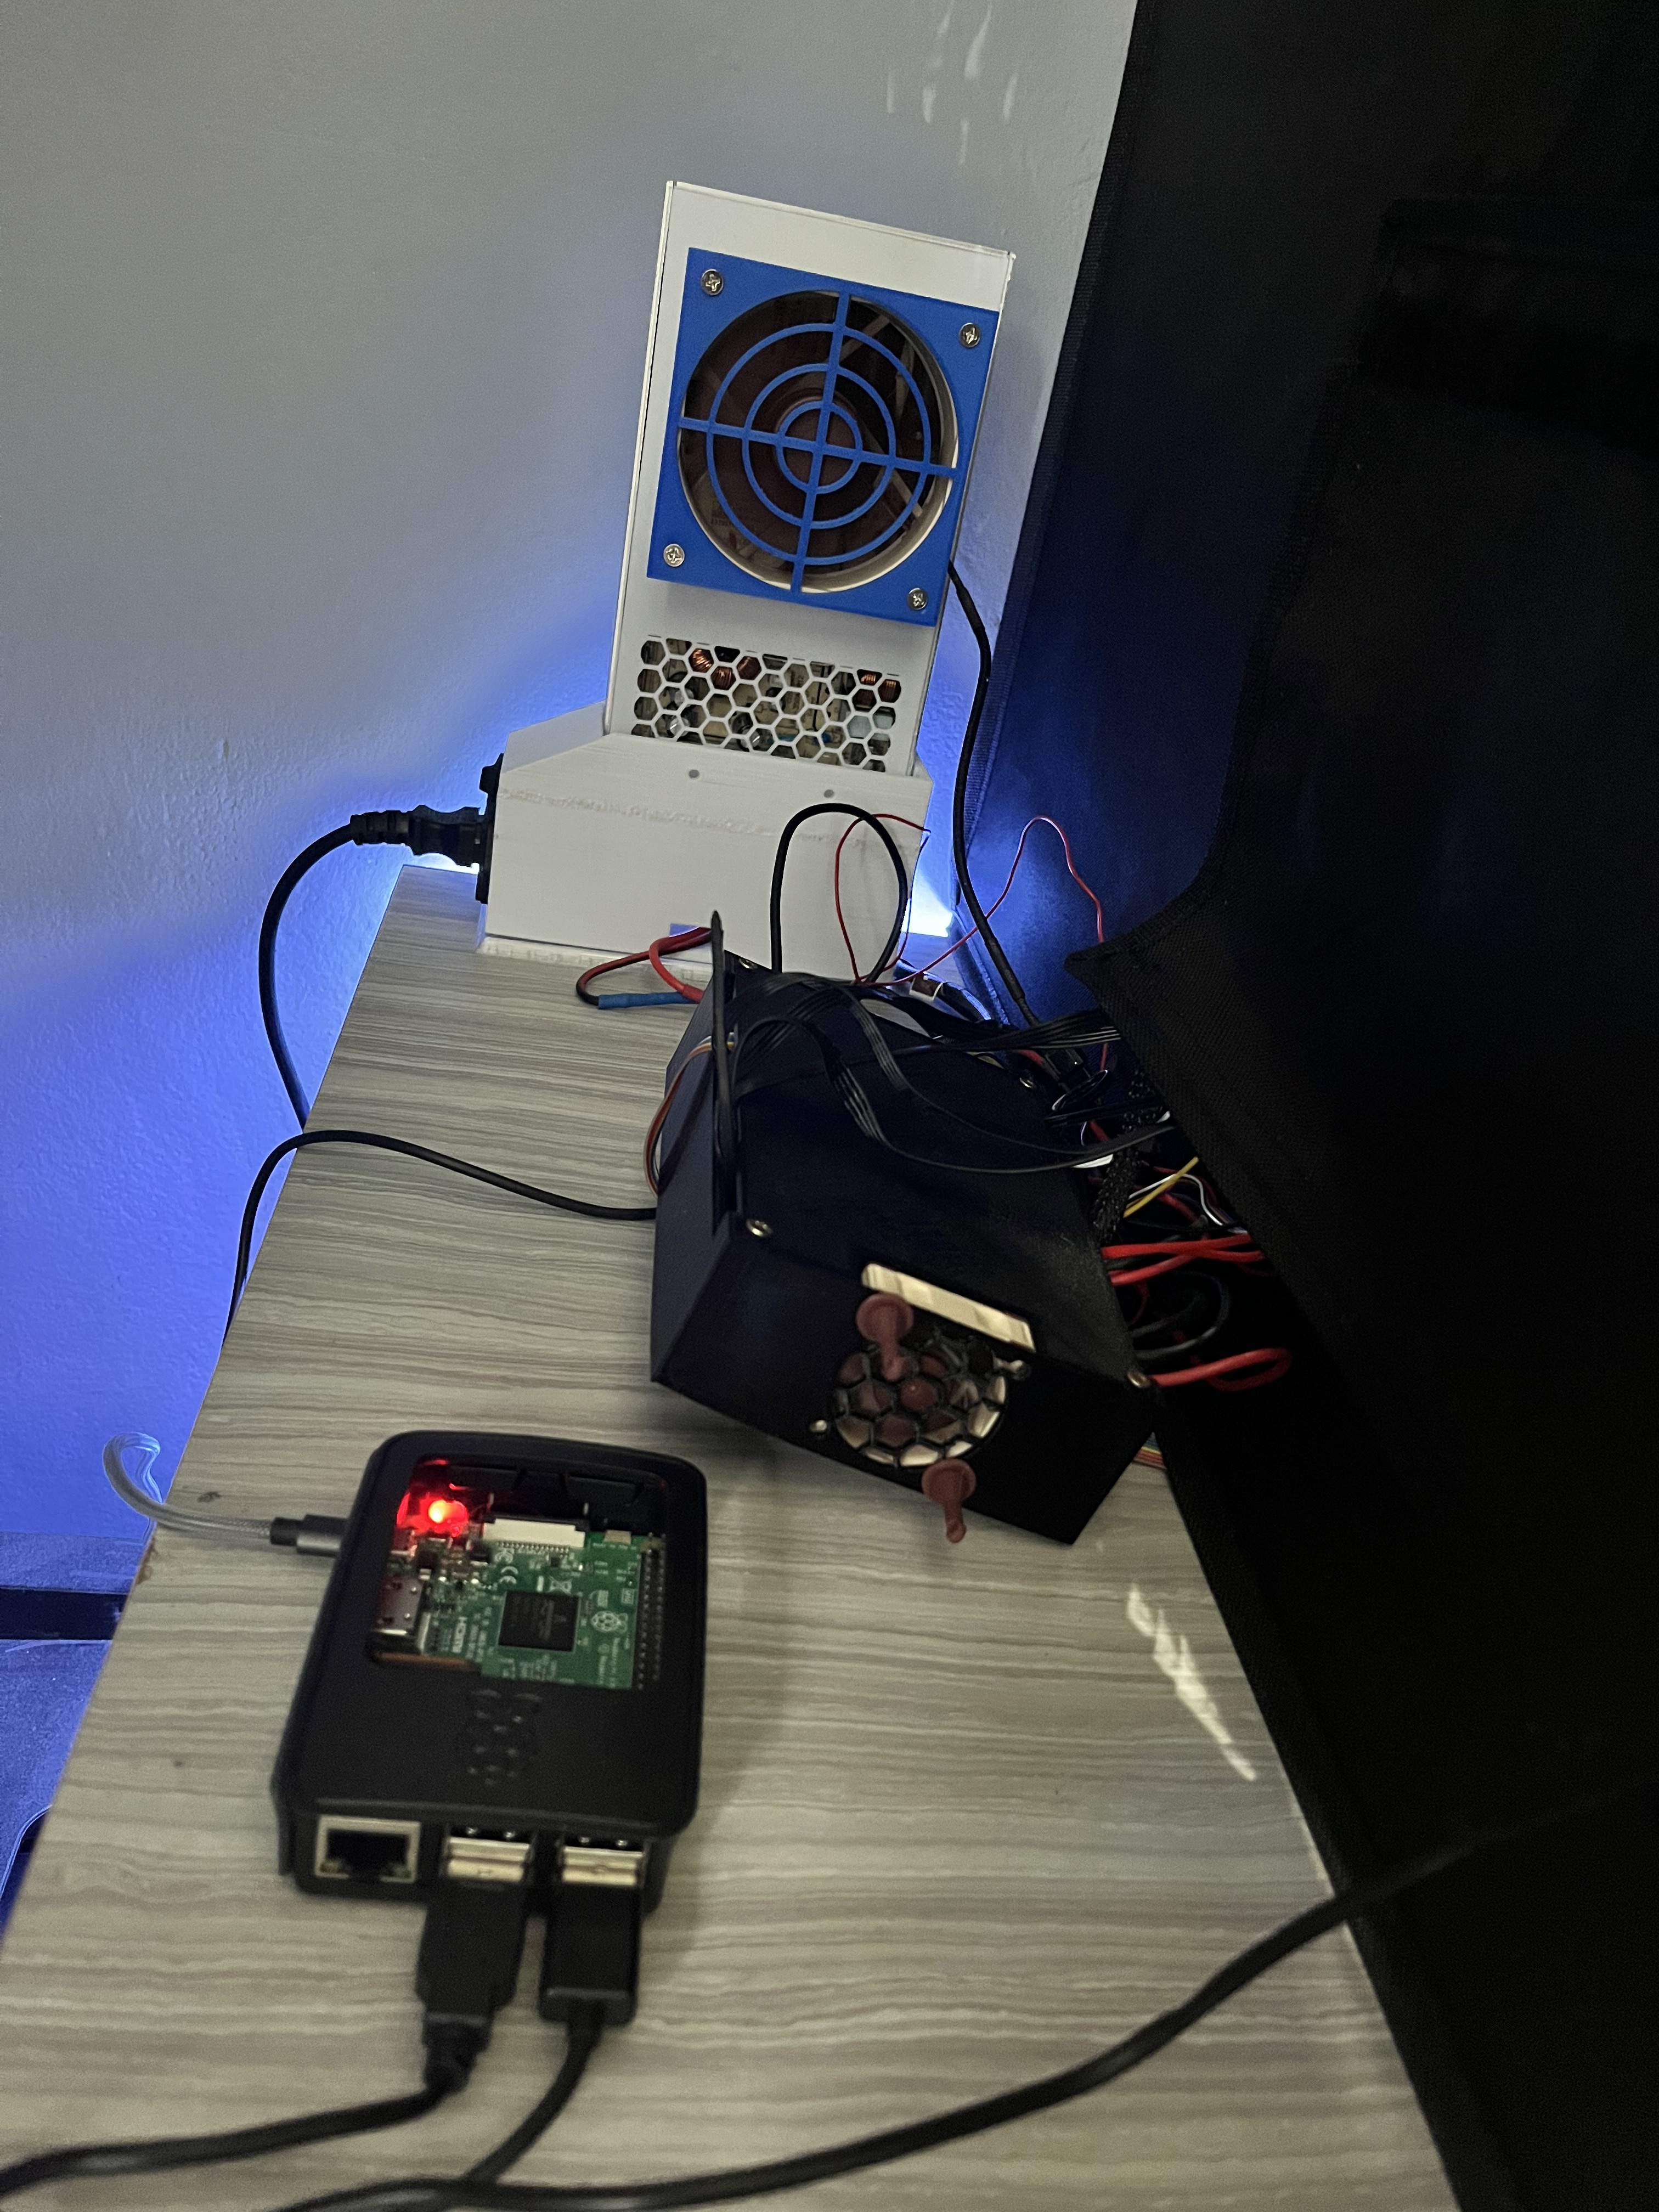
  • Placed MainBoard and PSU outside the enclosure using some printed parts to protect them (and myself because I tend to touch it accidentally)

  • Raspberry Pi 3B+ running Octoprint

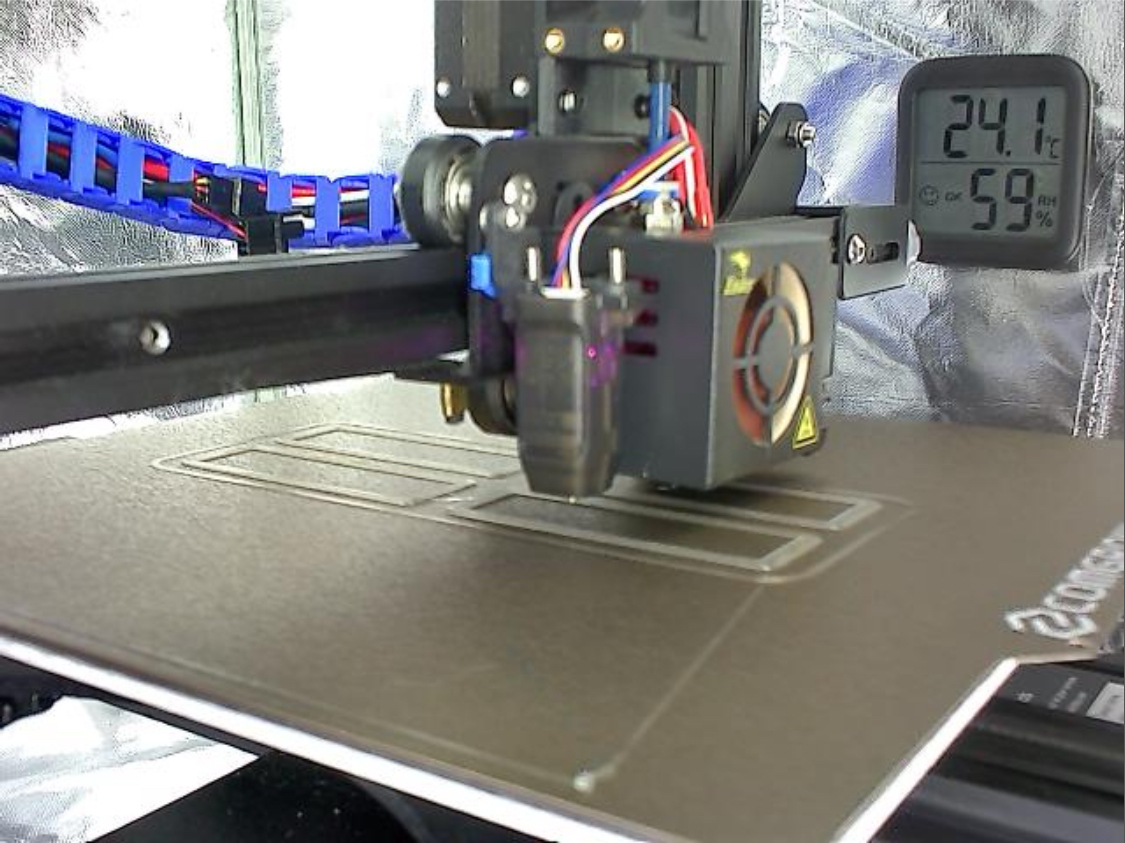
  • Some cheap webcam to have an eye on my prints using Obico with Octoprint

  • Temperature and Humidity Sensor I placed inside the enclosure to have an eye on it over the webcam

  • 3D Printed parts

Riser feet for better airflow (might be outdated because of the electronics now being placed outside the enclosure). Webcam Mount, cable chain, LCD mount, Filament Dryer shelf, MainBoard and PSU enclosures.

Here are some additional more detailed pictures:

The webcam view:

I am not happy with how the electronics are placed outside right now as it looks kinda improvised (what it is…), but I didn’t want to enlarge all of the cables. Maybe that’s work for future upgrade time.

So as I said, if there are questions I am happy to try to answer as helpful as I can :)

921
 
 
922


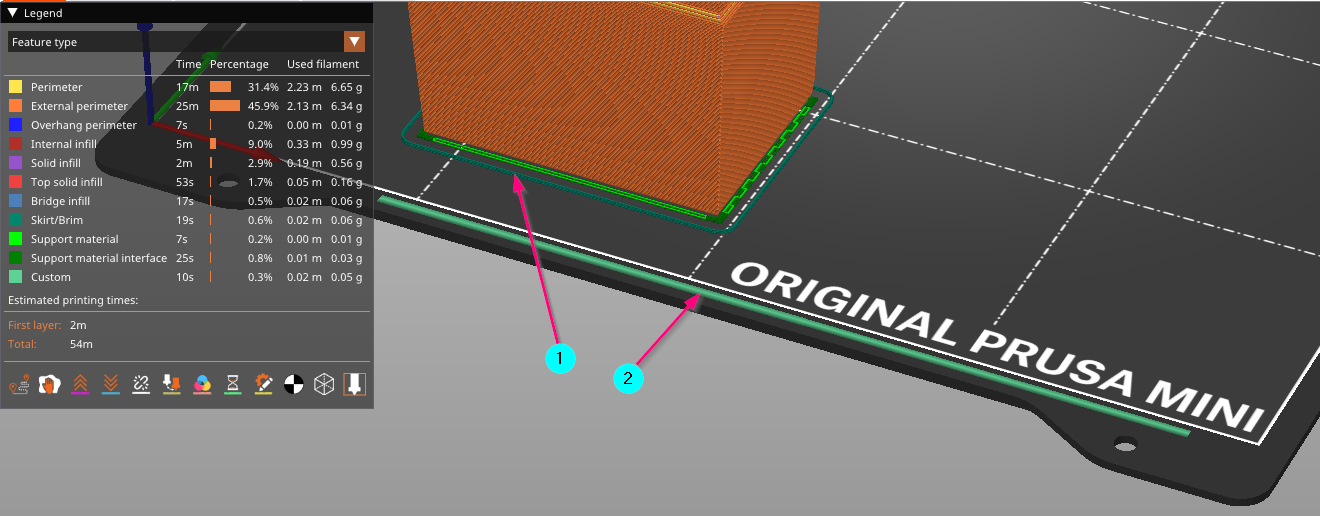
My printer (well, PrusaSlicer) always starts with a line around the object I am printing. See (1) in the image. --Why? What does that do?

There is also this line (2) at the front of the bed. --Why? What does that do?

923


geteilt von: https://lemmy.world/post/6685982

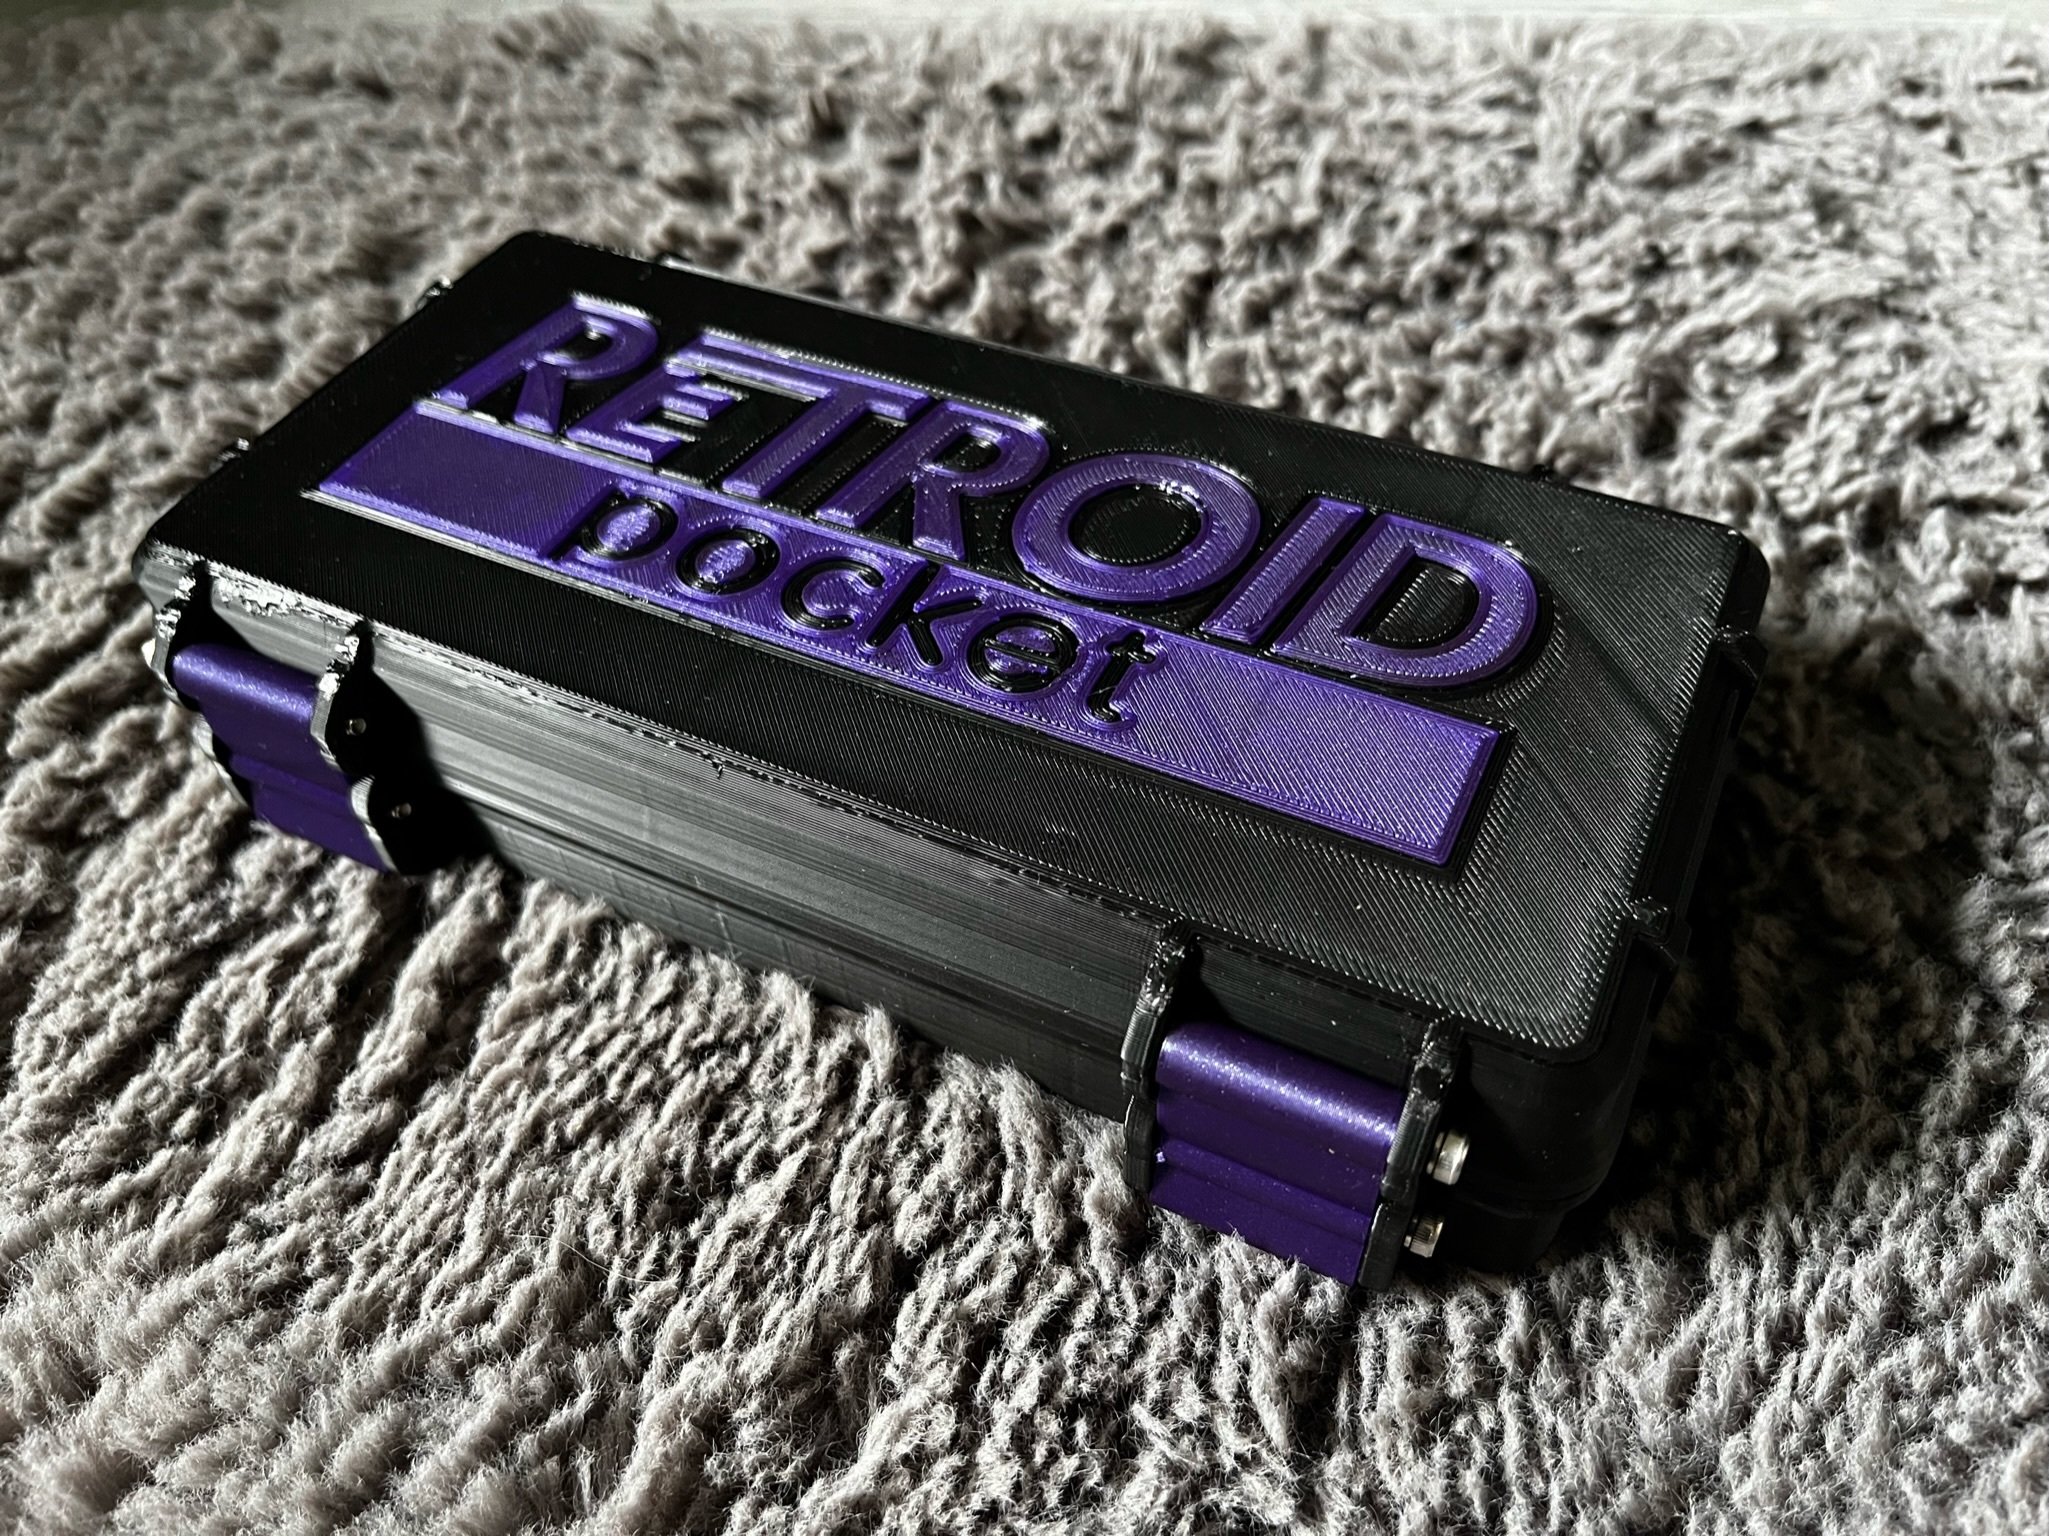
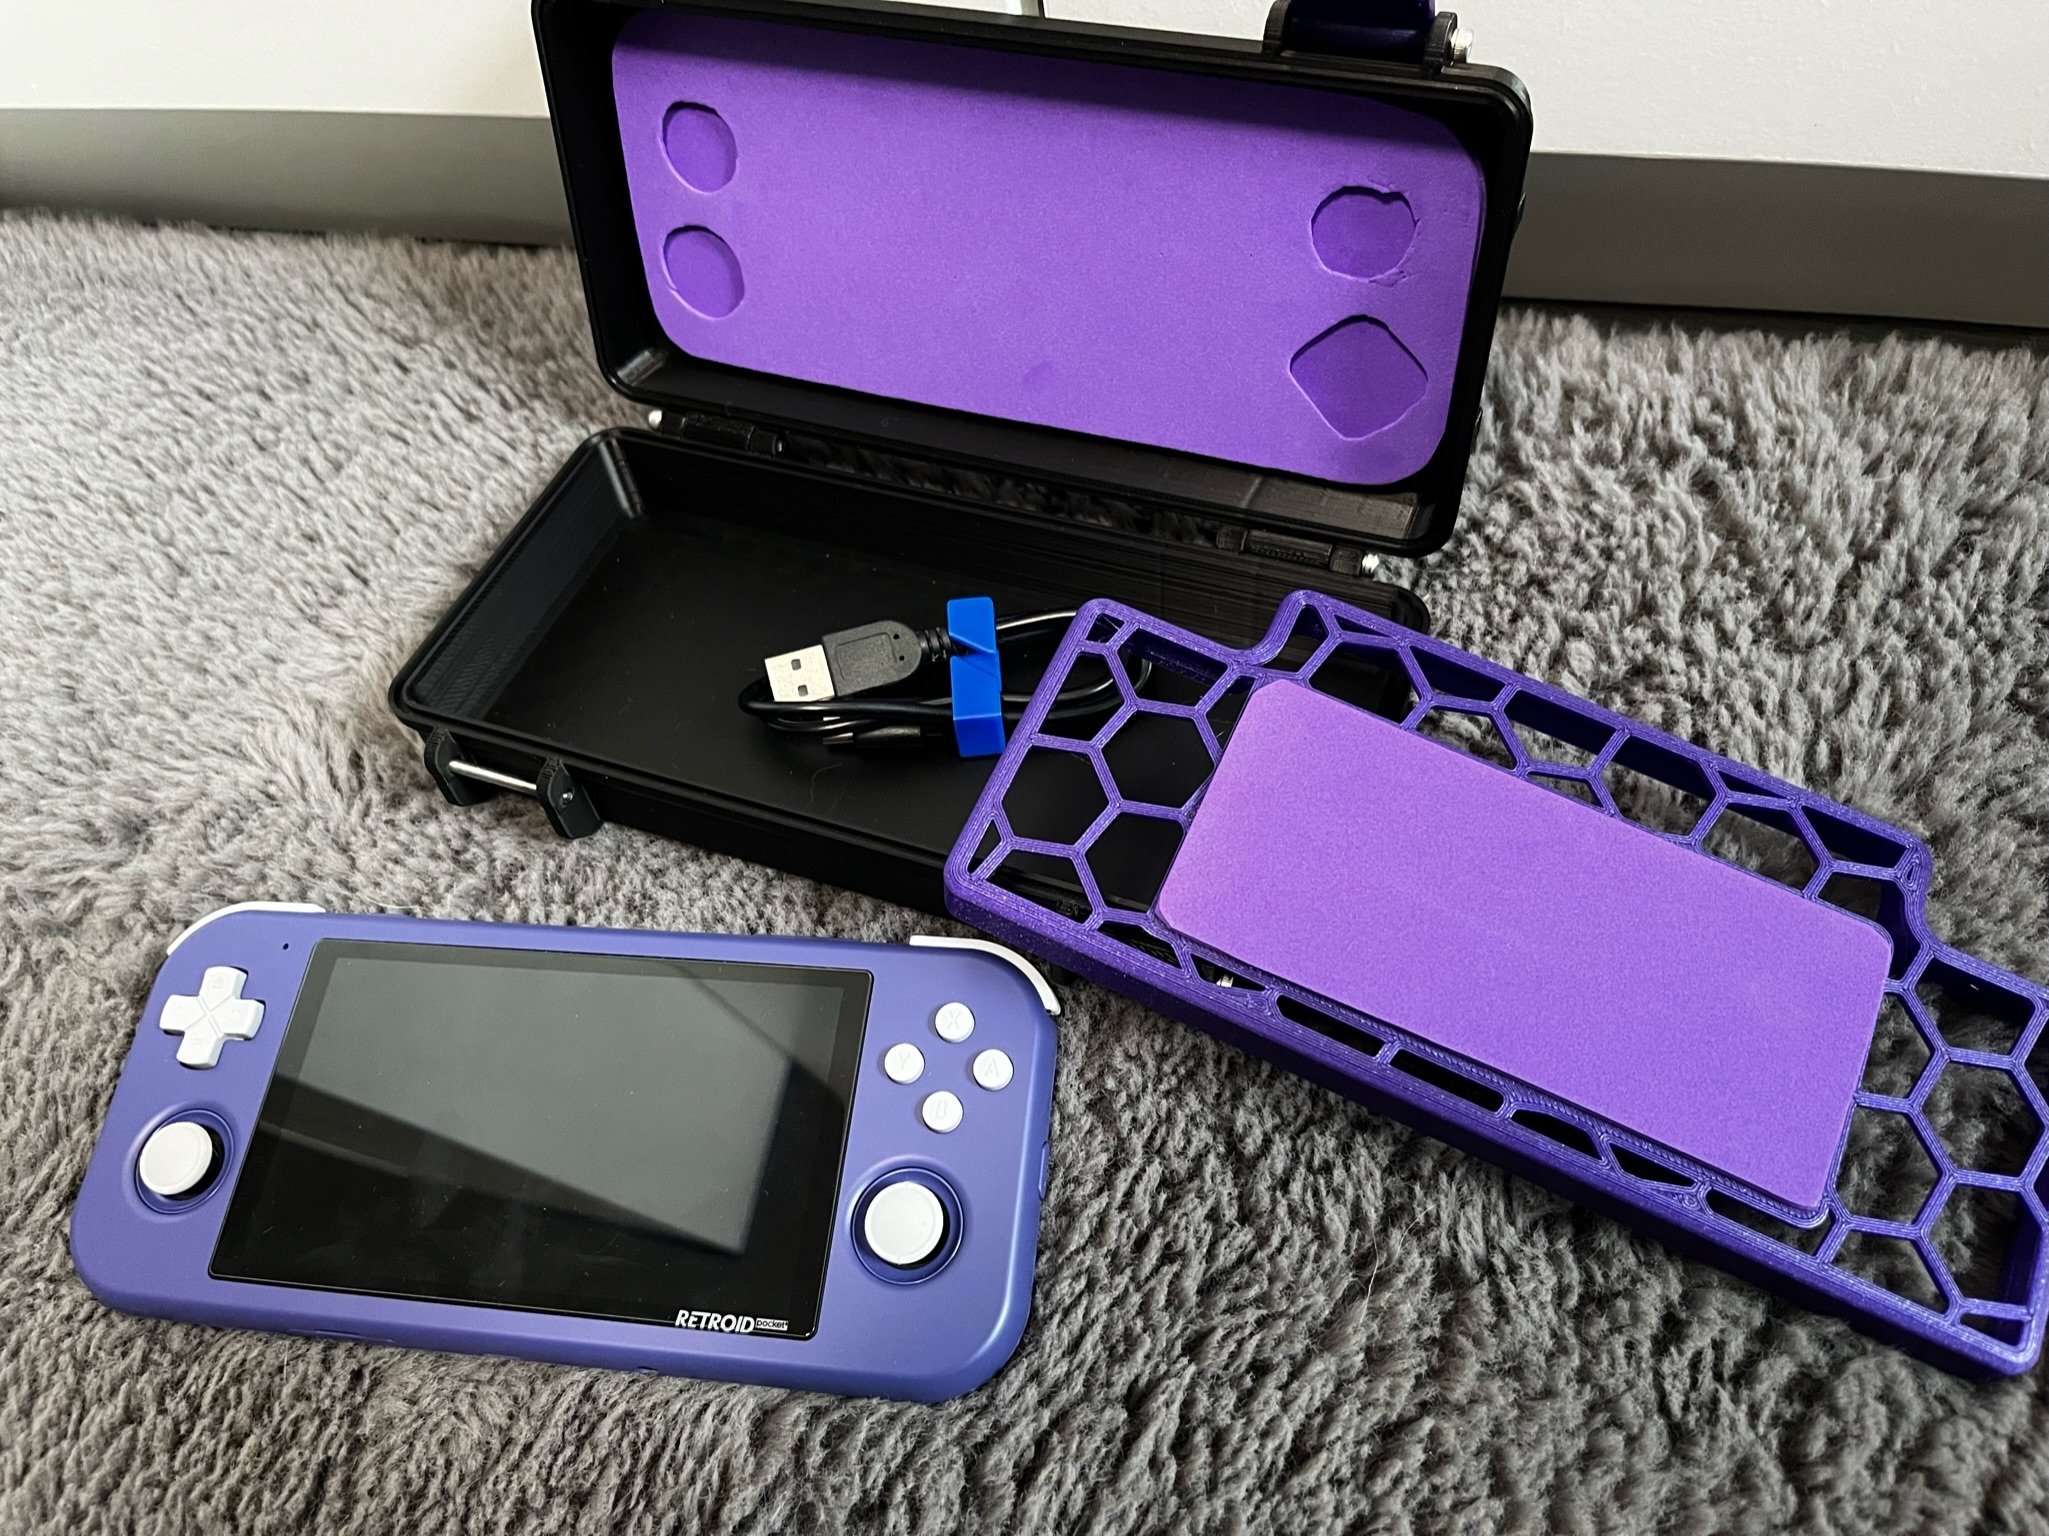
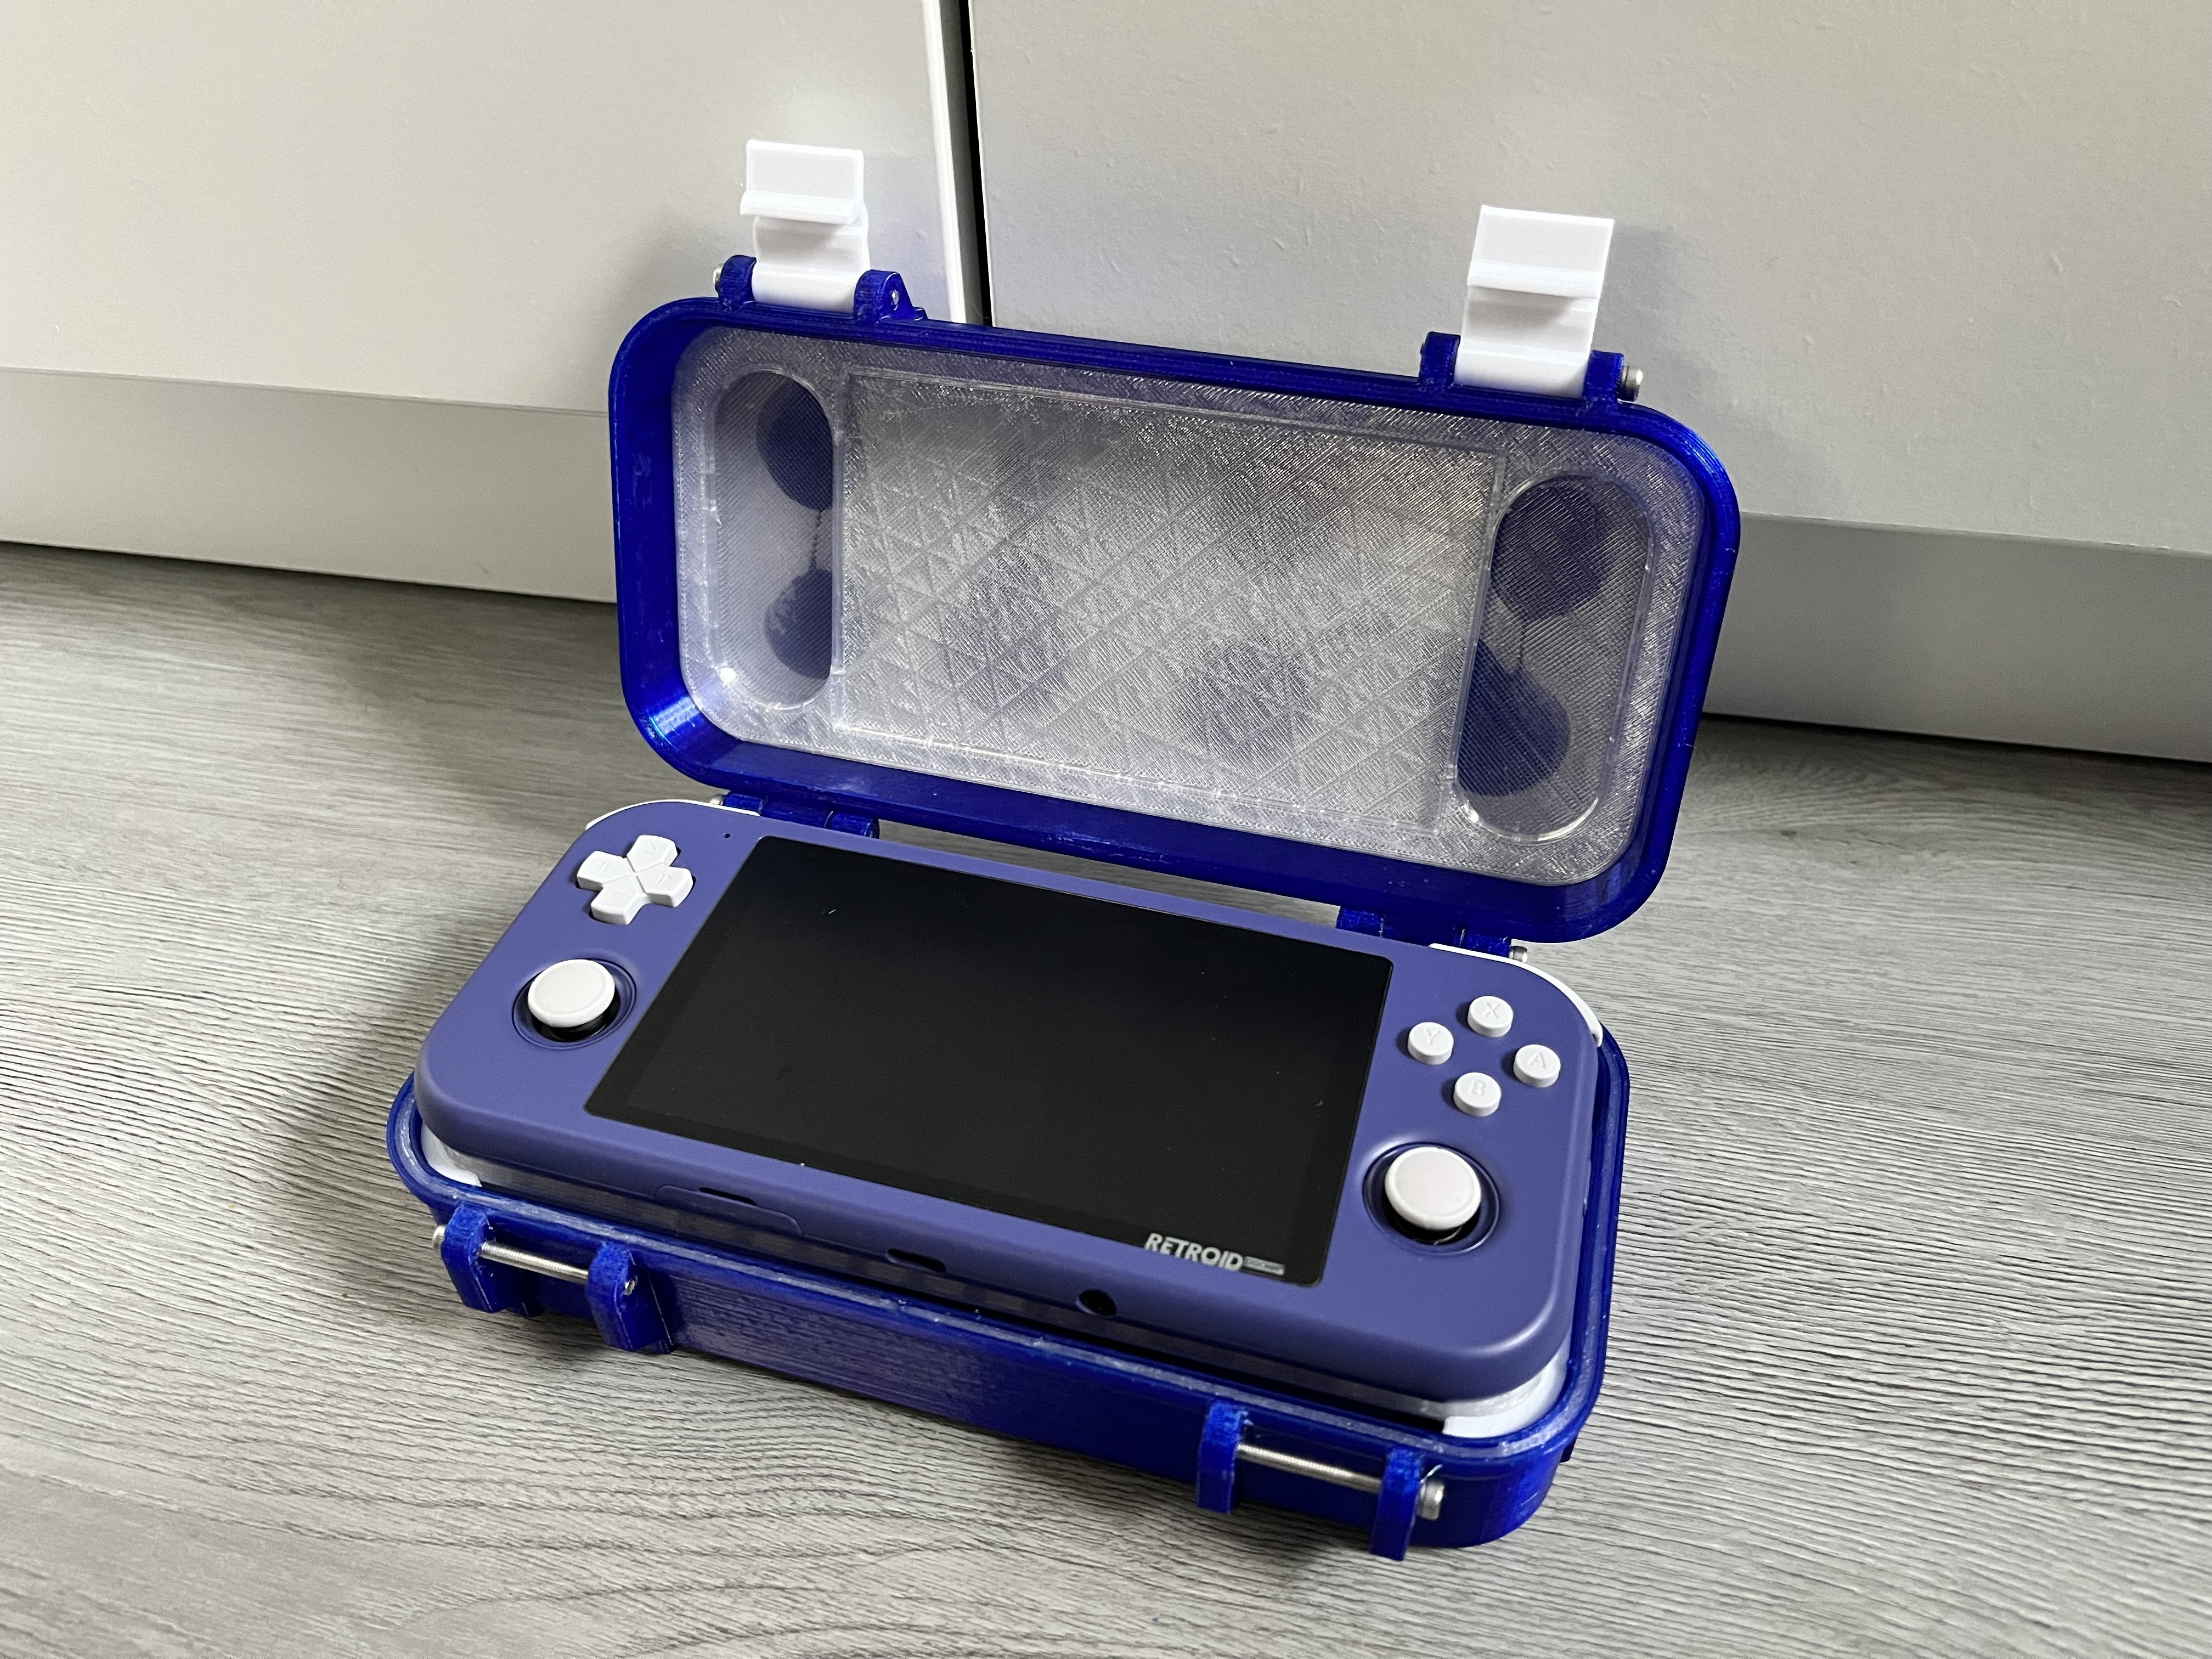
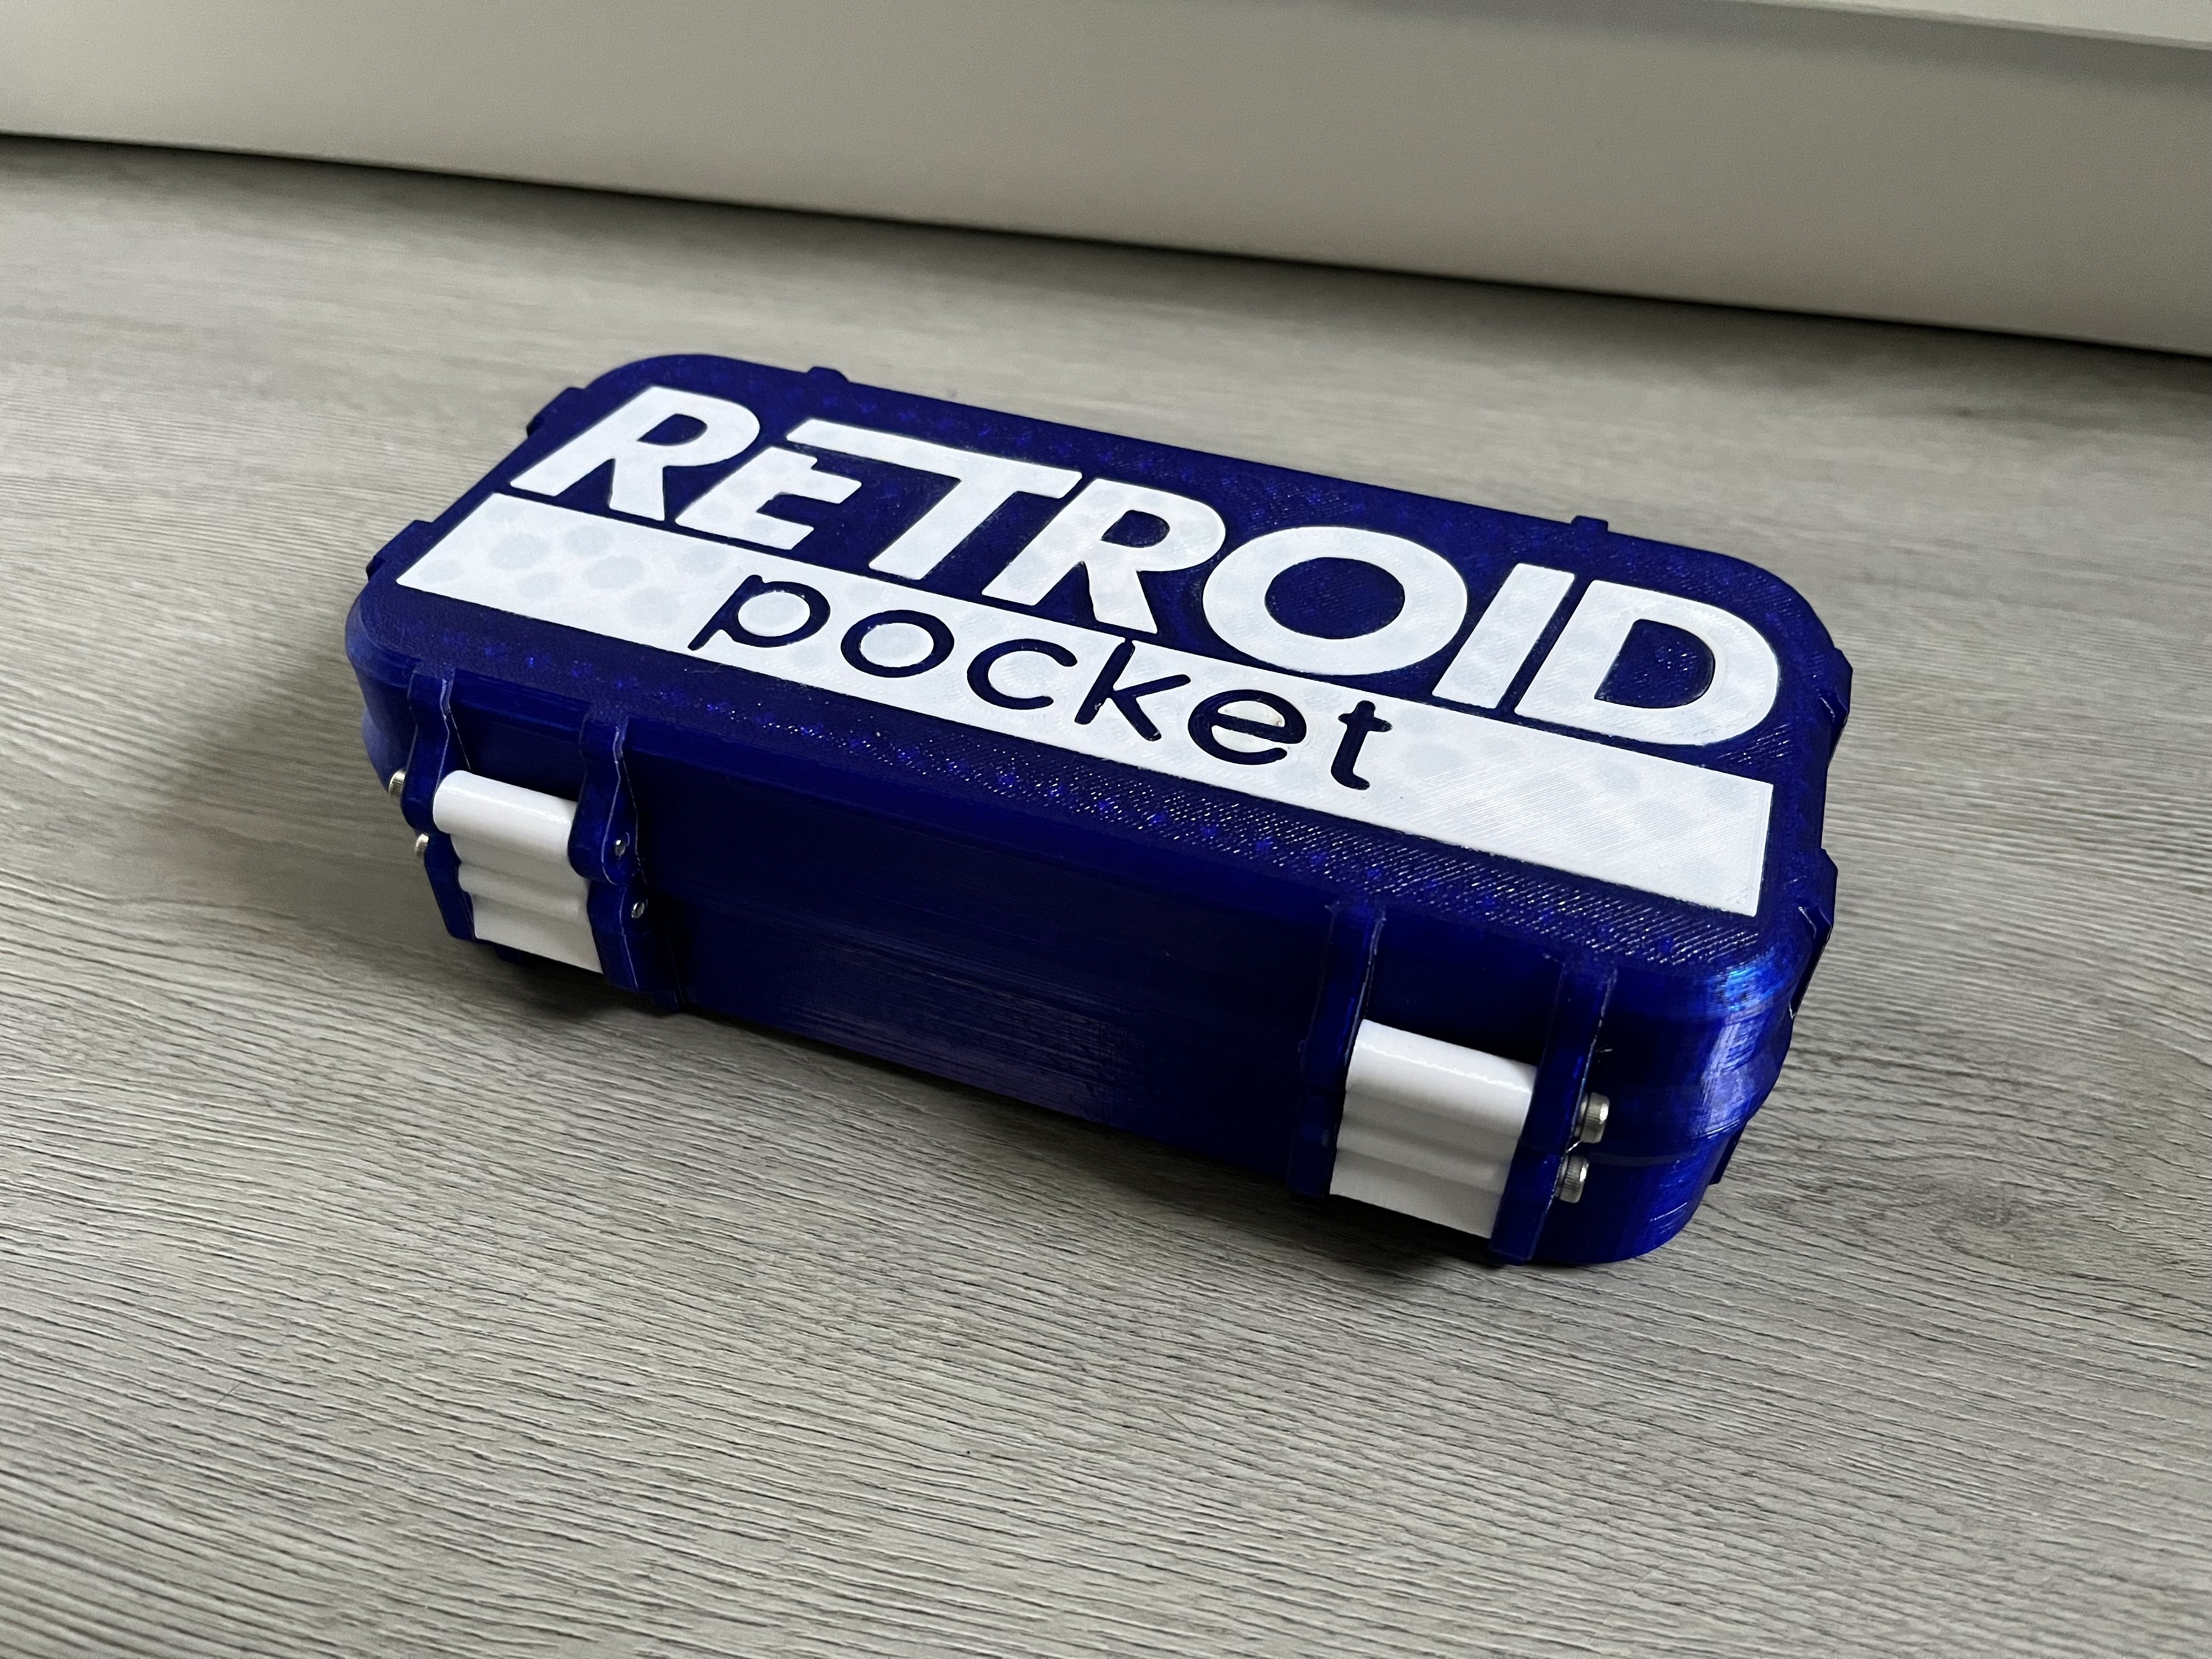
So a while ago, right after I ordered my Retroid, I quickly realized that there are no boxes available that fit my needs, so I decided to make one using my 3D printer. This was the result:

But since then I got some accessories for it and wanted it to have a bit more space for those, plus I upgraded my printer to now be able to print TPU Inserts, so I took the chance to renew my old design. Here are the results:

Here a comparison in thickness between the two:

If you are interested in printing your own. Both versions and all the files with instructions are available for free on my printables:

https://www.printables.com/de/model/470203-retroid-pocket-3-rugged-travel-case/comments

924


After my last printer broke, I am considering getting this one for it's high precision, vibration stabilisation, and other good features, but wanted to check your experience with it before going ahead.

925


Trying to design and print a clip for my crisper drawer, learning something new with every print.

Good thing they are only 5 grams of filament each…

The sv06 is a champ

view more: ‹ prev next ›