851
3DPrinting
16540 readers
230 users here now
3DPrinting is a place where makers of all skill levels and walks of life can learn about and discuss 3D printing and development of 3D printed parts and devices.
The r/functionalprint community is now located at: or [email protected]
There are CAD communities available at: [email protected] or [email protected]
Rules
-
No bigotry - including racism, sexism, ableism, homophobia, transphobia, or xenophobia. Code of Conduct.
-
Be respectful, especially when disagreeing. Everyone should feel welcome here.
-
No porn (NSFW prints are acceptable but must be marked NSFW)
-
No Ads / Spamming / Guerrilla Marketing
-
Do not create links to reddit
-
If you see an issue please flag it
-
No guns
-
No injury gore posts
If you need an easy way to host pictures, https://catbox.moe may be an option. Be ethical about what you post and donate if you are able or use this a lot. It is just an individual hosting content, not a company. The image embedding syntax for Lemmy is 
Moderation policy: Light, mostly invisible
founded 2 years ago
MODERATORS

853
Hey everyone.
I built an mk3s+ from its kit form successfully, tested a few PLA prints with the stock 0.4 nozzle.
I've set prusaslicer to use a 0.6 nozzle now that I've upgraded, and am using PETG. Prints look pretty bad, in spite of calibrating z-offset etc.
If you were doing something like this for the first time, what would your setup steps be like?
To be specific, using a diamondback 0.6 nozzle, matterhackers PETG at 235c.
Issues I'm seeing are a really bad loss of detail, lots of stringing, etc.
eta: added a photo of a moderately post-processed part. Notice how rough the top surface looks, there's a disconnect between perimeter loops, etc.
854
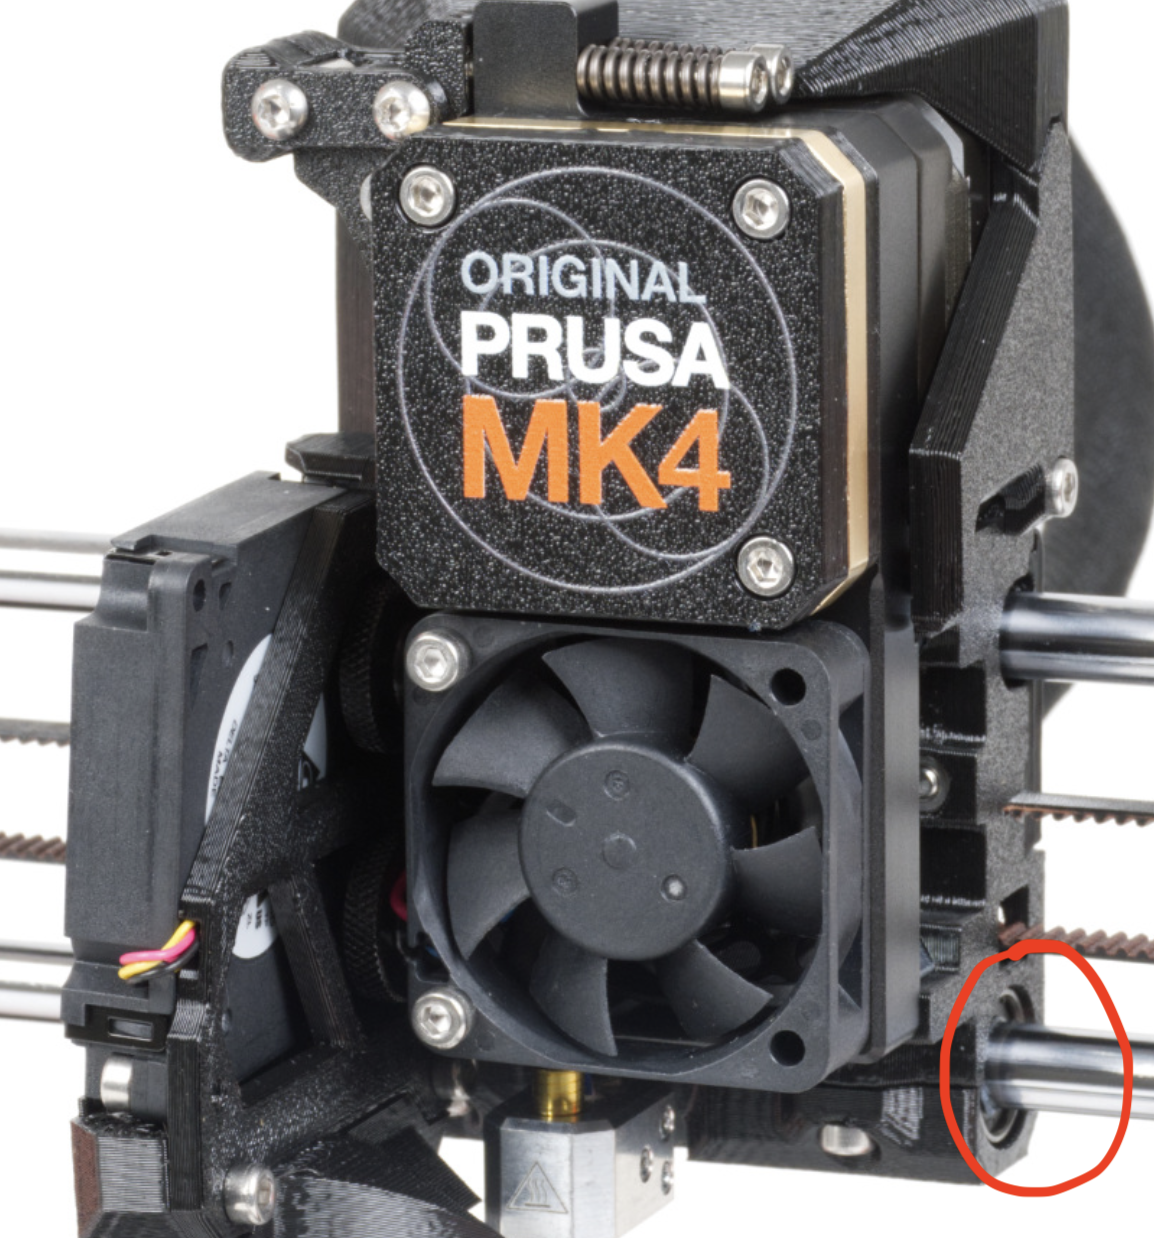
I ran a selftest and the manual test and the X-axis keeps failing. I don't know why.
I tried:
Re-lubing
adjusting the X-axis belt
Adjusting the cables
I've had no luck with anything :/
Edit: I've watched a video and the extruder just hangs on the left side it for most the time it doesn't go left then right, right aaway
Edit 2: I found the issue that I completely overlooked cuz I was annoyed...the bearing was sticking out somehow
855
856
Its printing PLA and you could smell it very strongly and was super cool to see

857
858
859
861
https://twitter.com/CNC_Kitchen/status/1720374528985973115
Toooons of waste. 2.5/1 waste/print ratio. wow.
timelapse: https://twitter.com/CNC_Kitchen/status/1720410680736489913

862
863
864
865
866
867
868
869
870
871
872
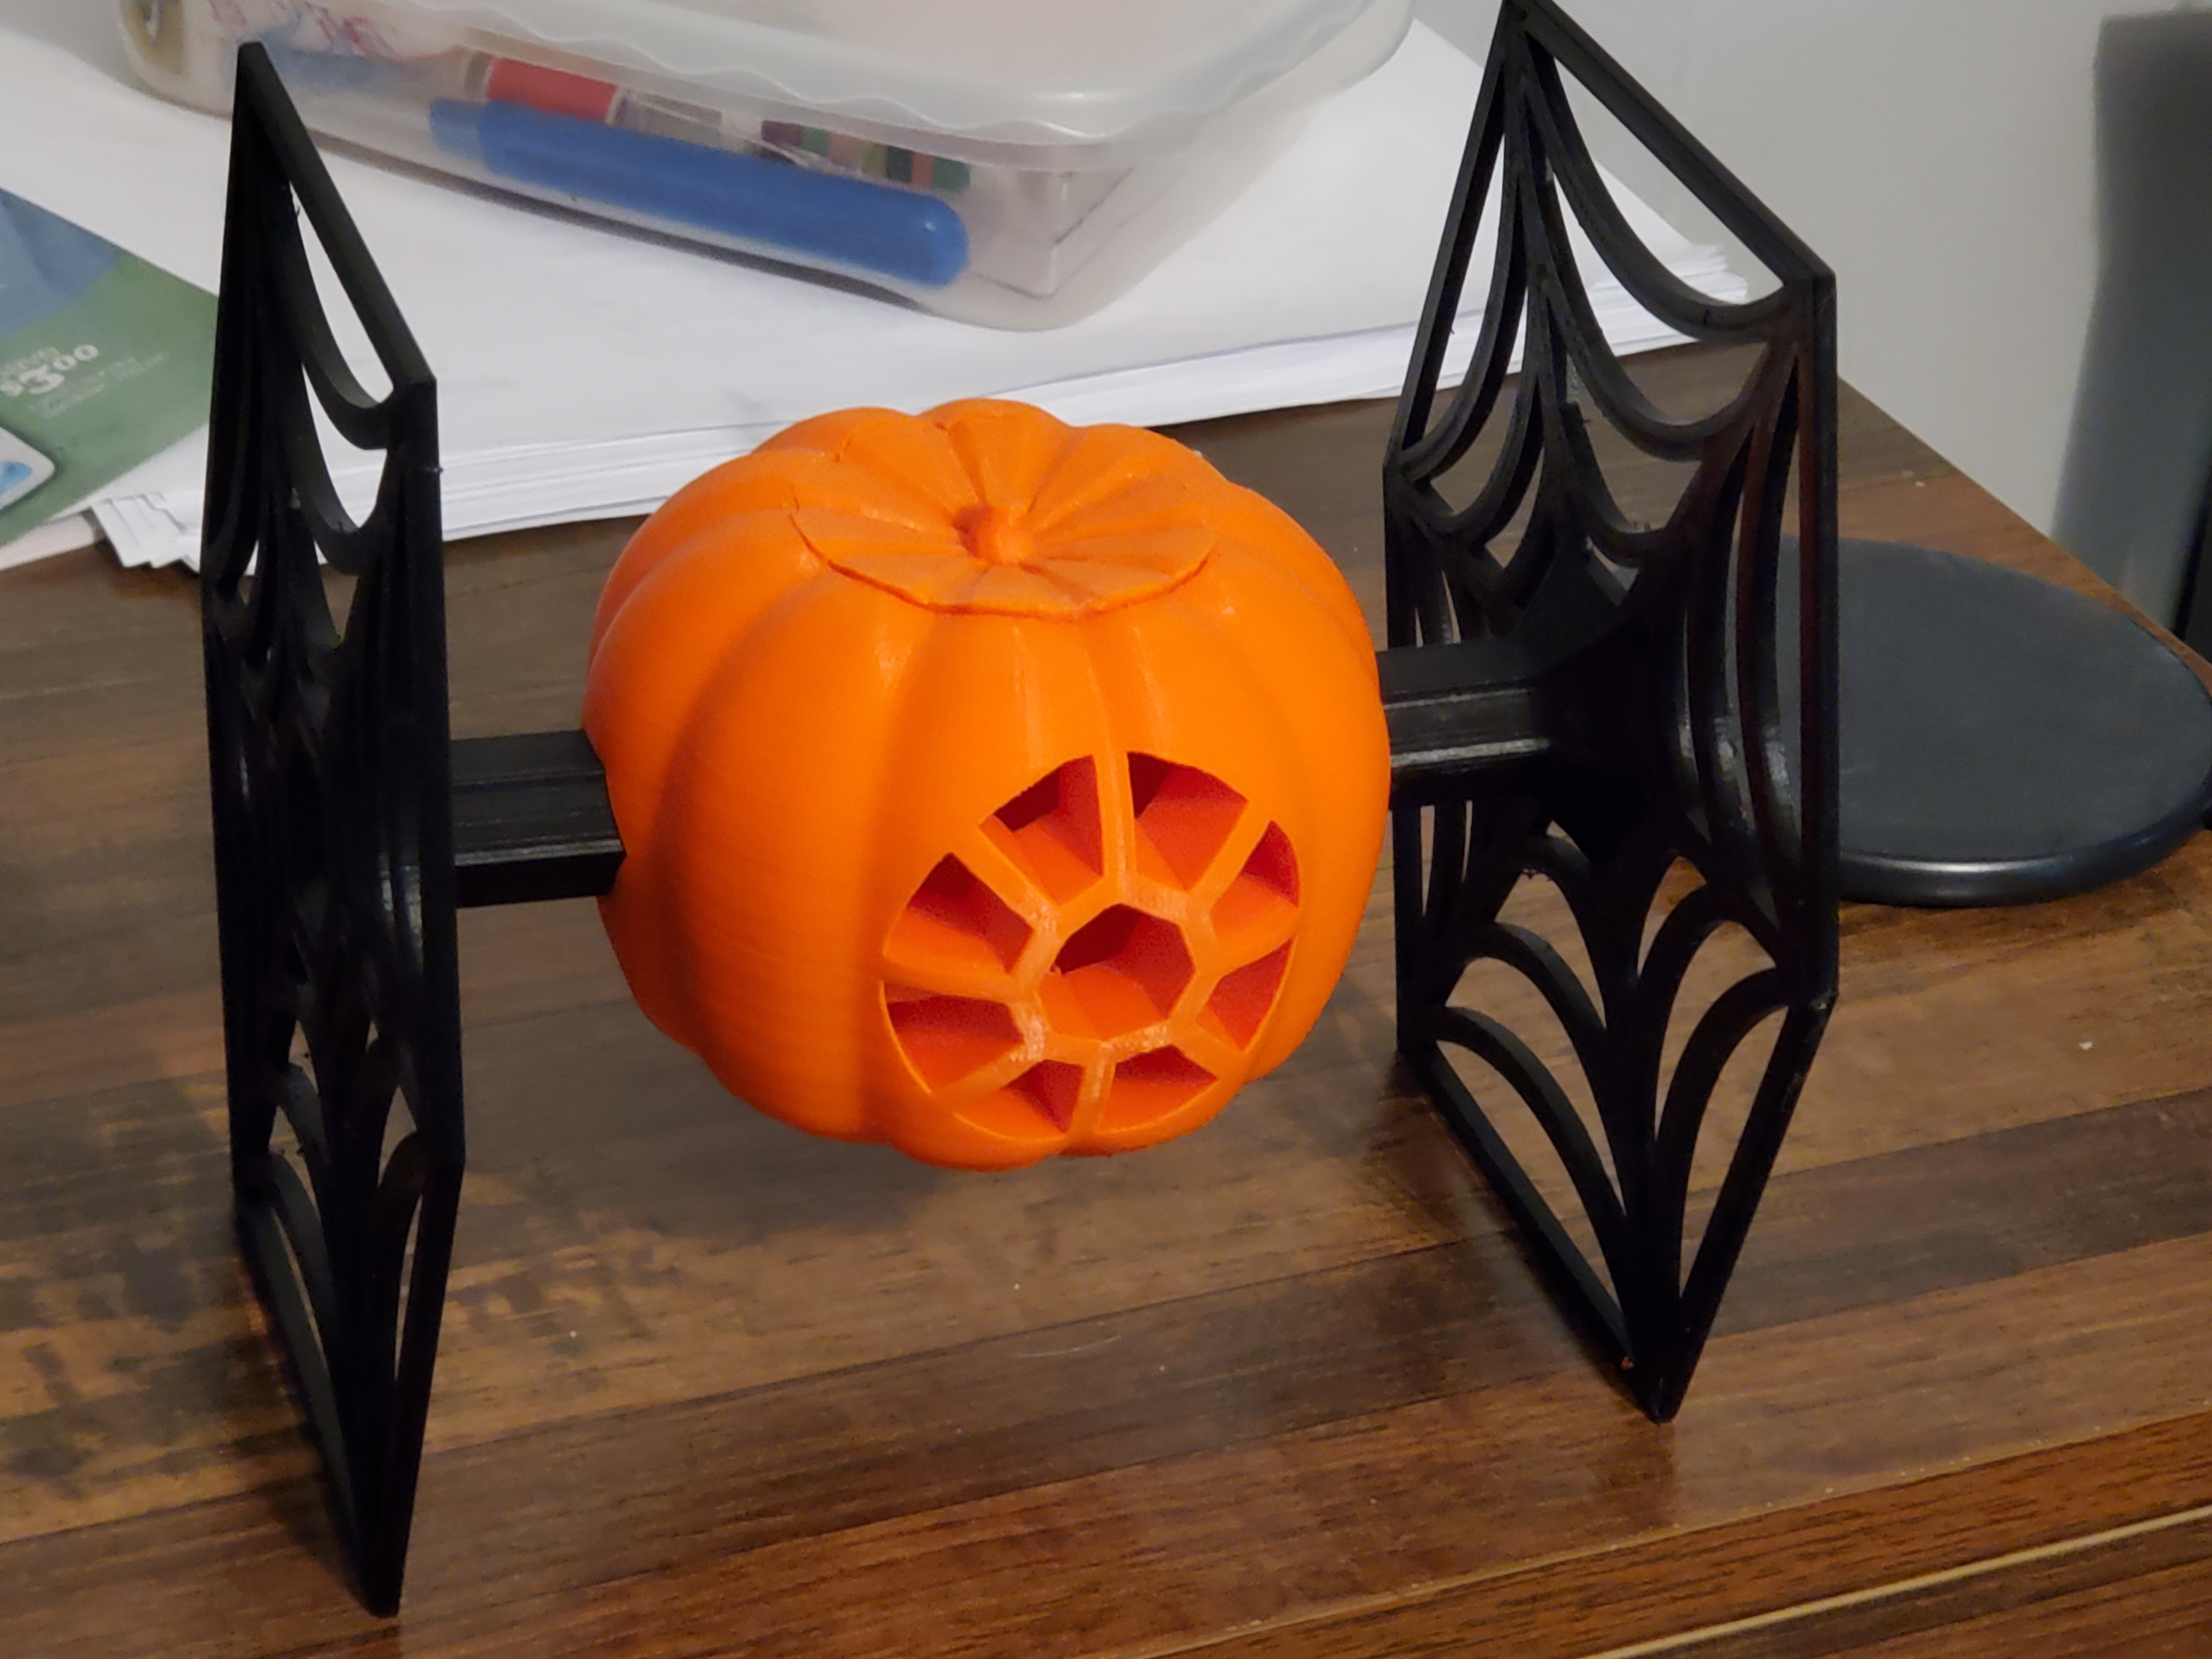
Printed a pumpkin tie fighter. Designed by fixumdude https://printables.com/model/297574-pumpkin-pie-fighter-halloween-themed-star-wars-tie
874
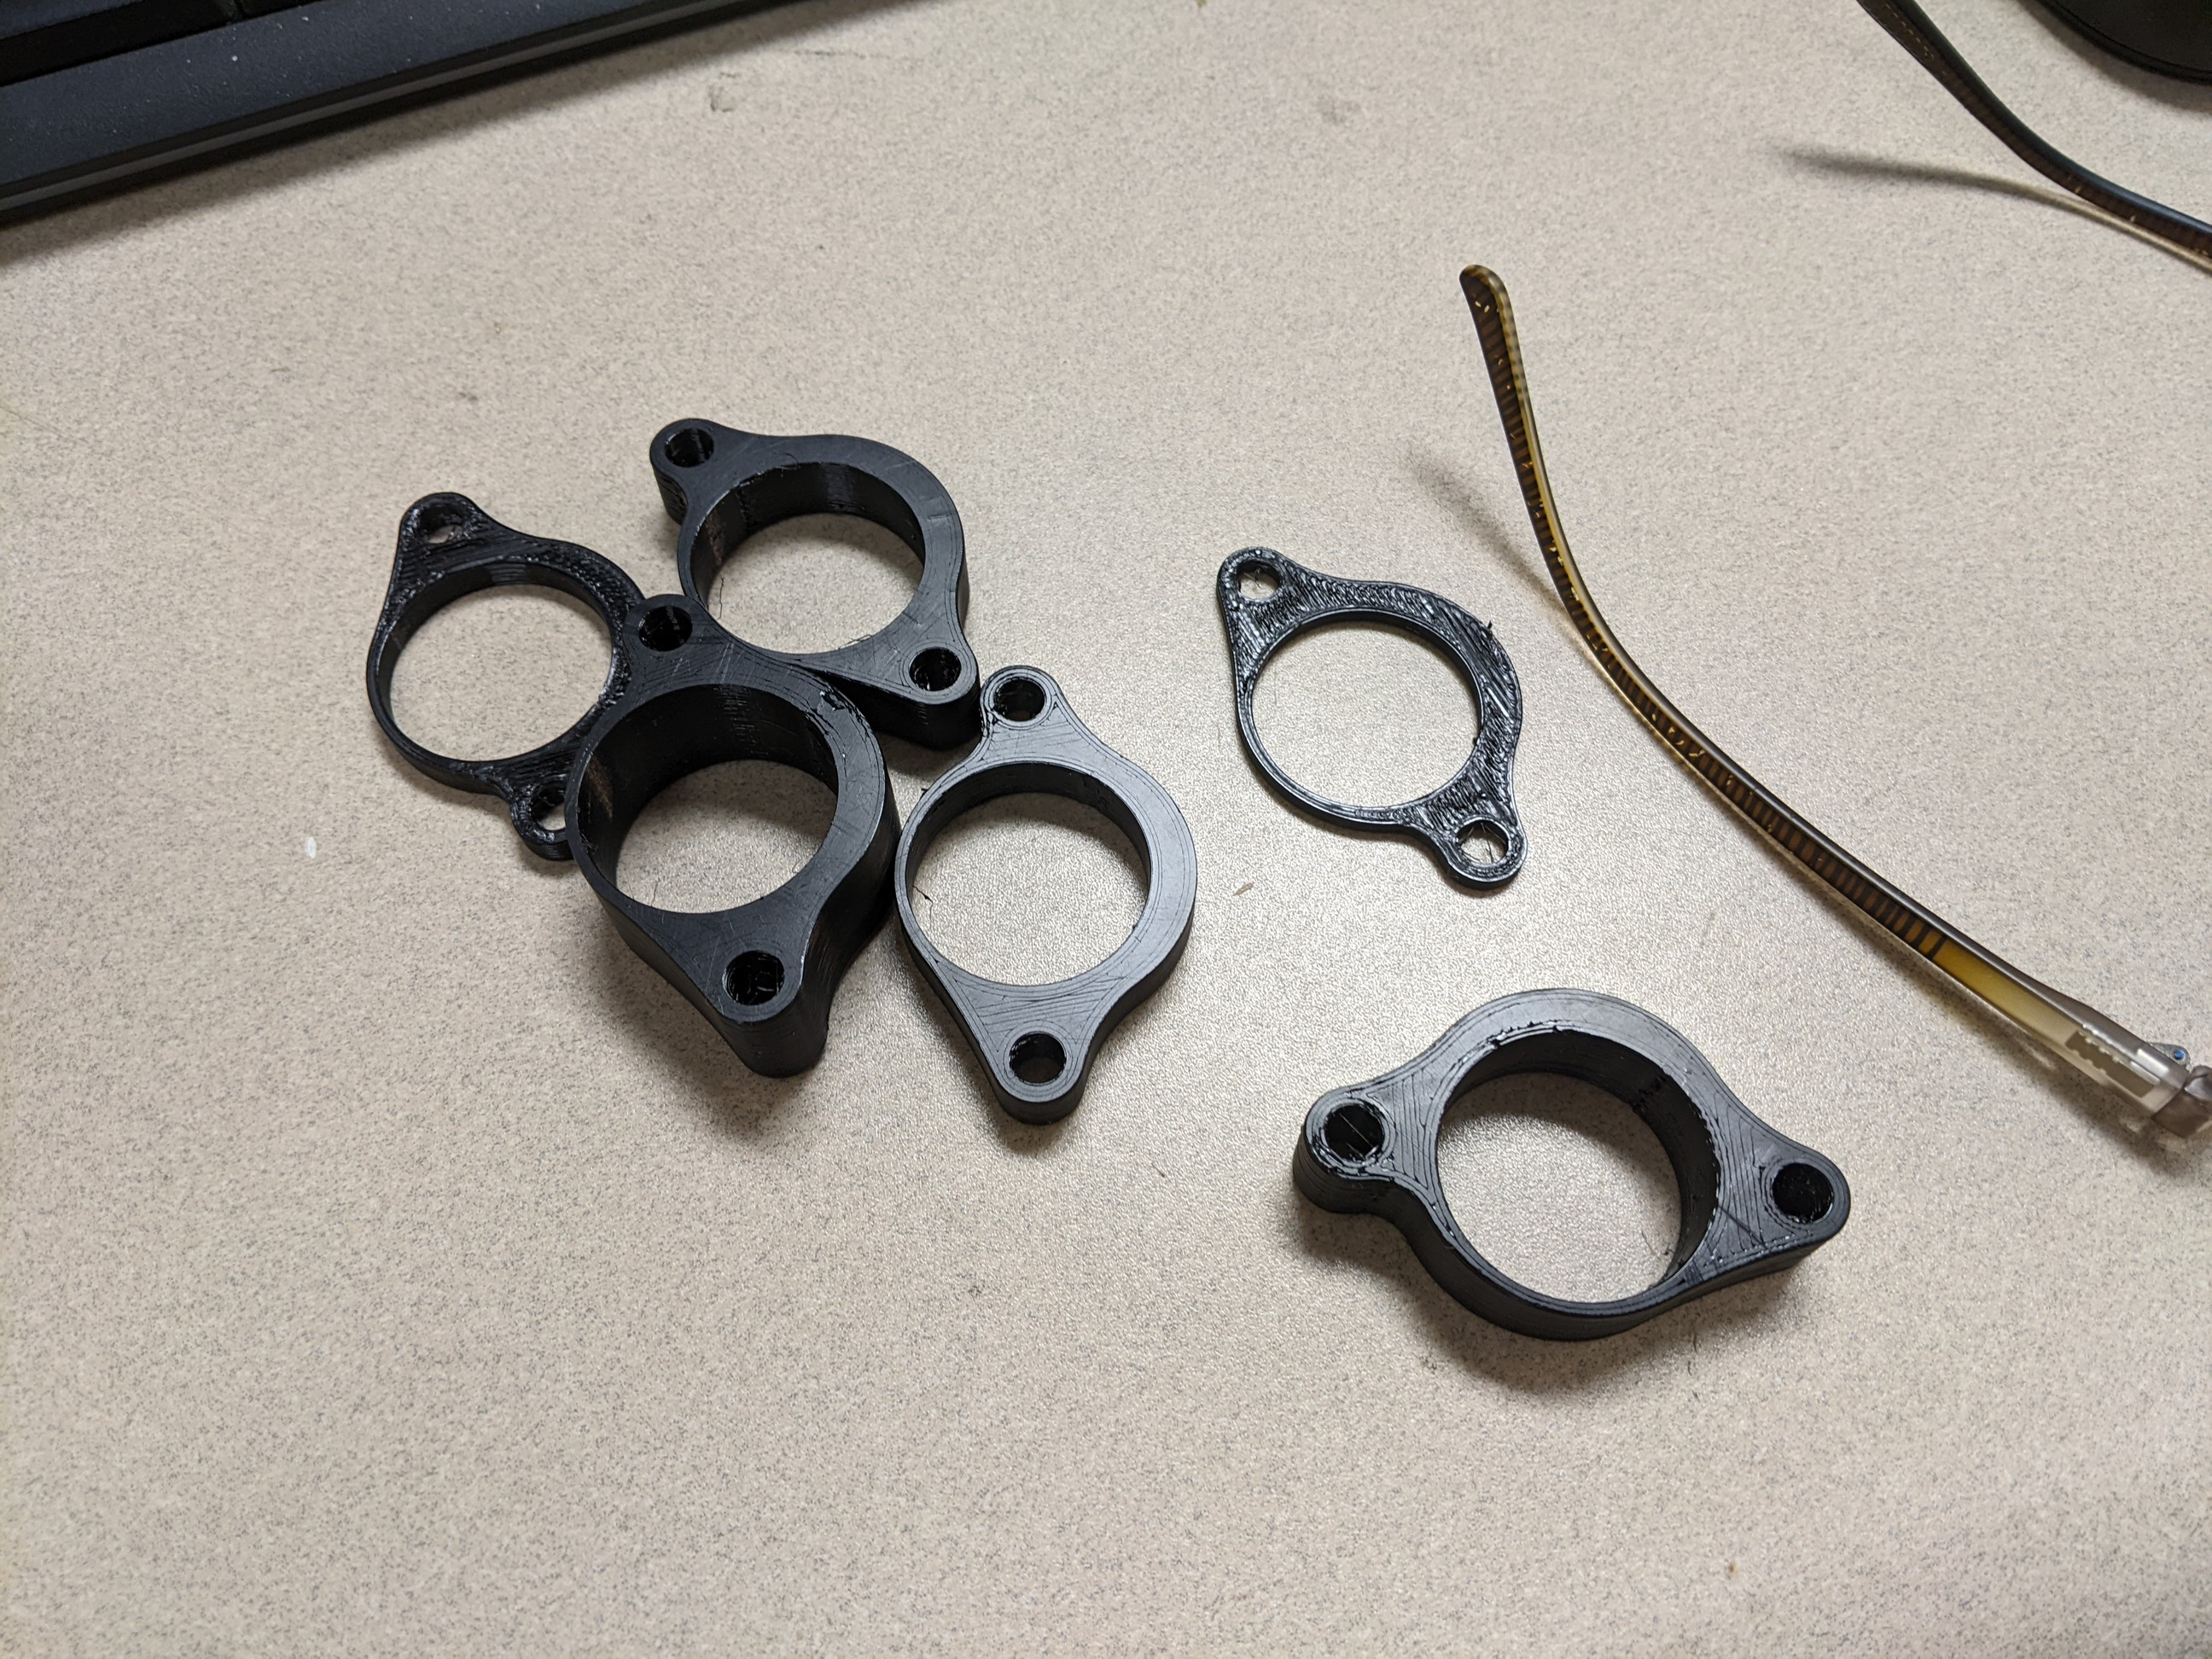
I have a Sapphire Plus printer which I have heavily modified (out of the box it is a piece of junk). After finally changing the mainboard and installing Klipper I got it to print reliably. Of course the next thing I wanted to do was print fast. It quickly became apparent that the E3D V6 hotend and the anemic 3010 fans severely limited said goal. So I got myself a Dragon HF hotend, a 5020 blower and printed this print head. From the get go I had massive problems with retraction, even after calibrating pressure advance the retraction towers I tried in Orca Slicer where all stringy messes. I kinda got it under control by severely slowing the retraction speed to 25mm/s with a 0.4mm retraction distance with nozzle wipe.
But now I'm sometimes getting these weird stringing artifacts on prints. Not on every print and not on every part, it's just certain seams that get them. I'm currently printing with a 0.6mm CHT nozzle and a fresh roll of Elegoo PLA. Does anyone have any idea what could be the culprit? It ruined the finish on a few otherwise perfect prints.
I even tried out this print: 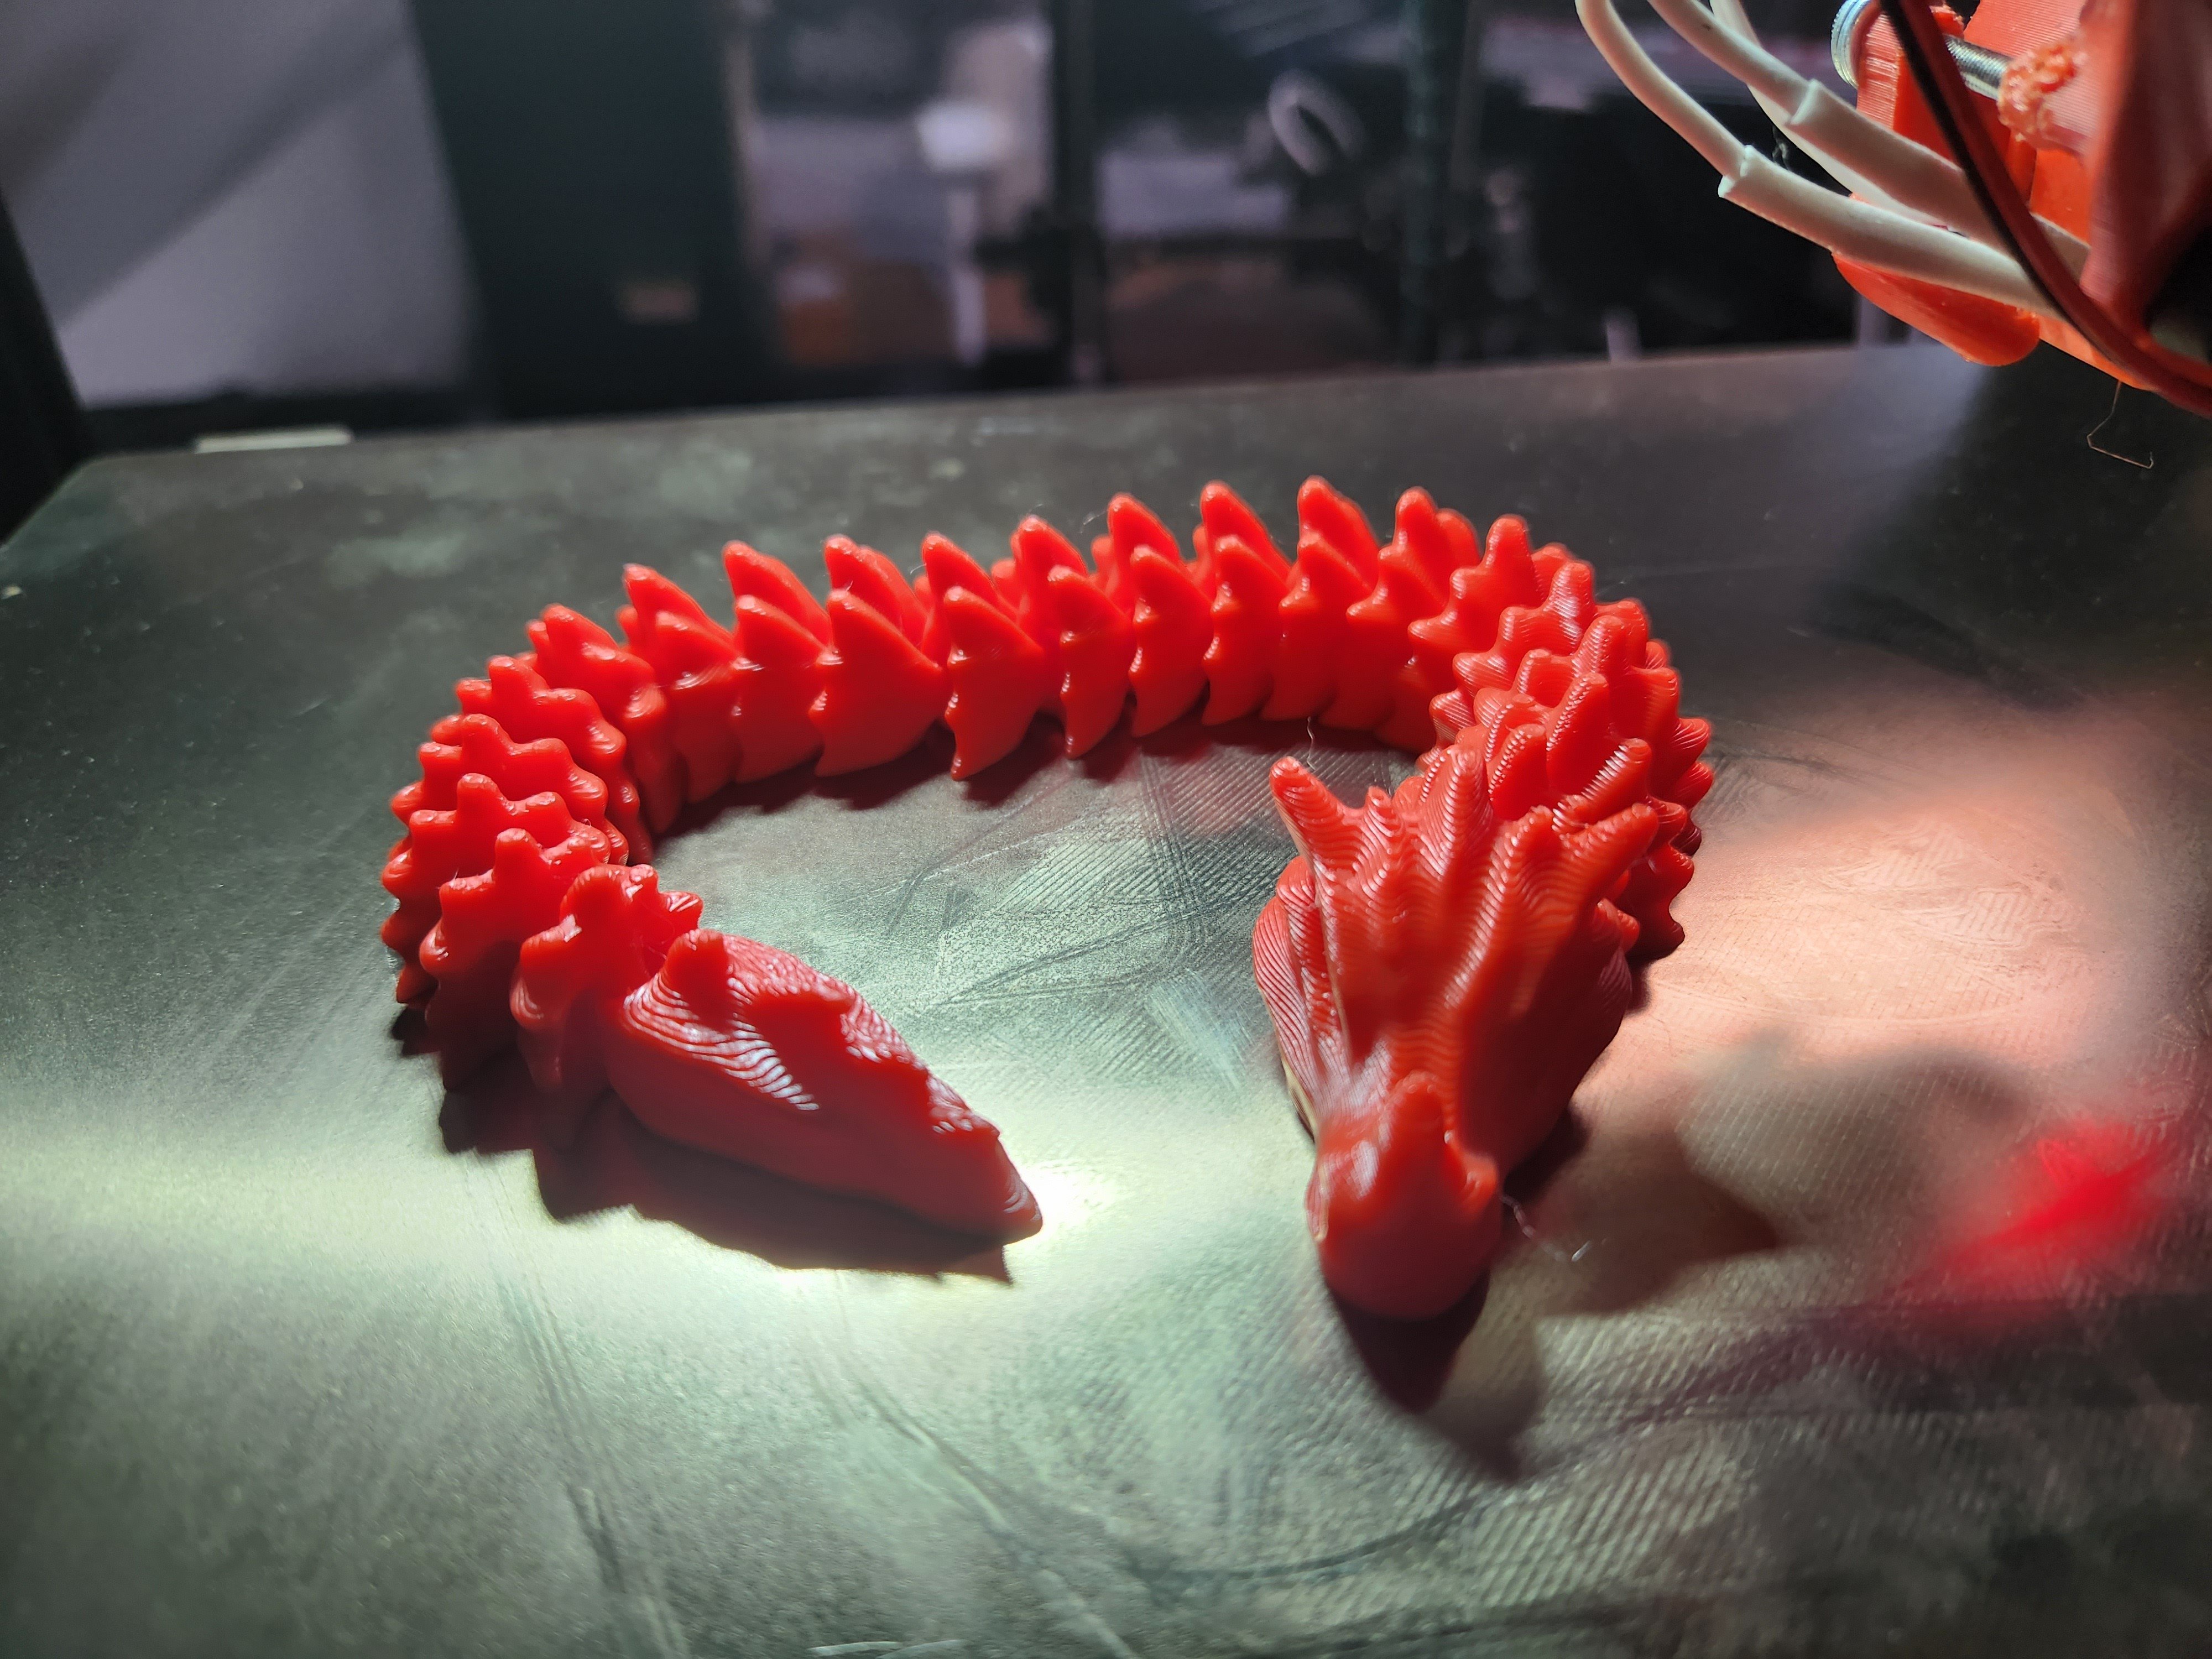 since it has a lot of retractions, but of course that one turned out perfectly apart from a few tiny whisps.
875
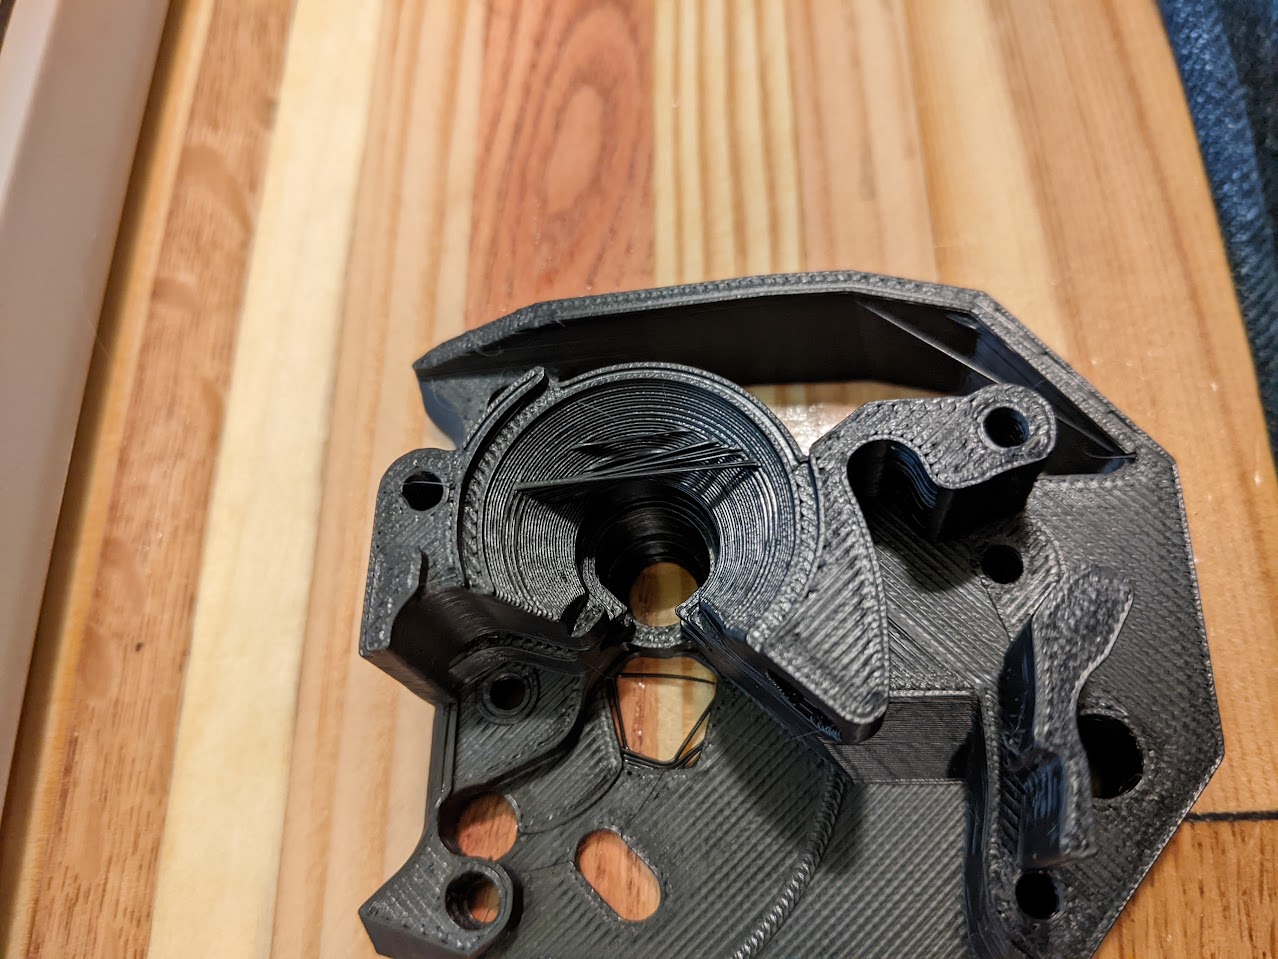
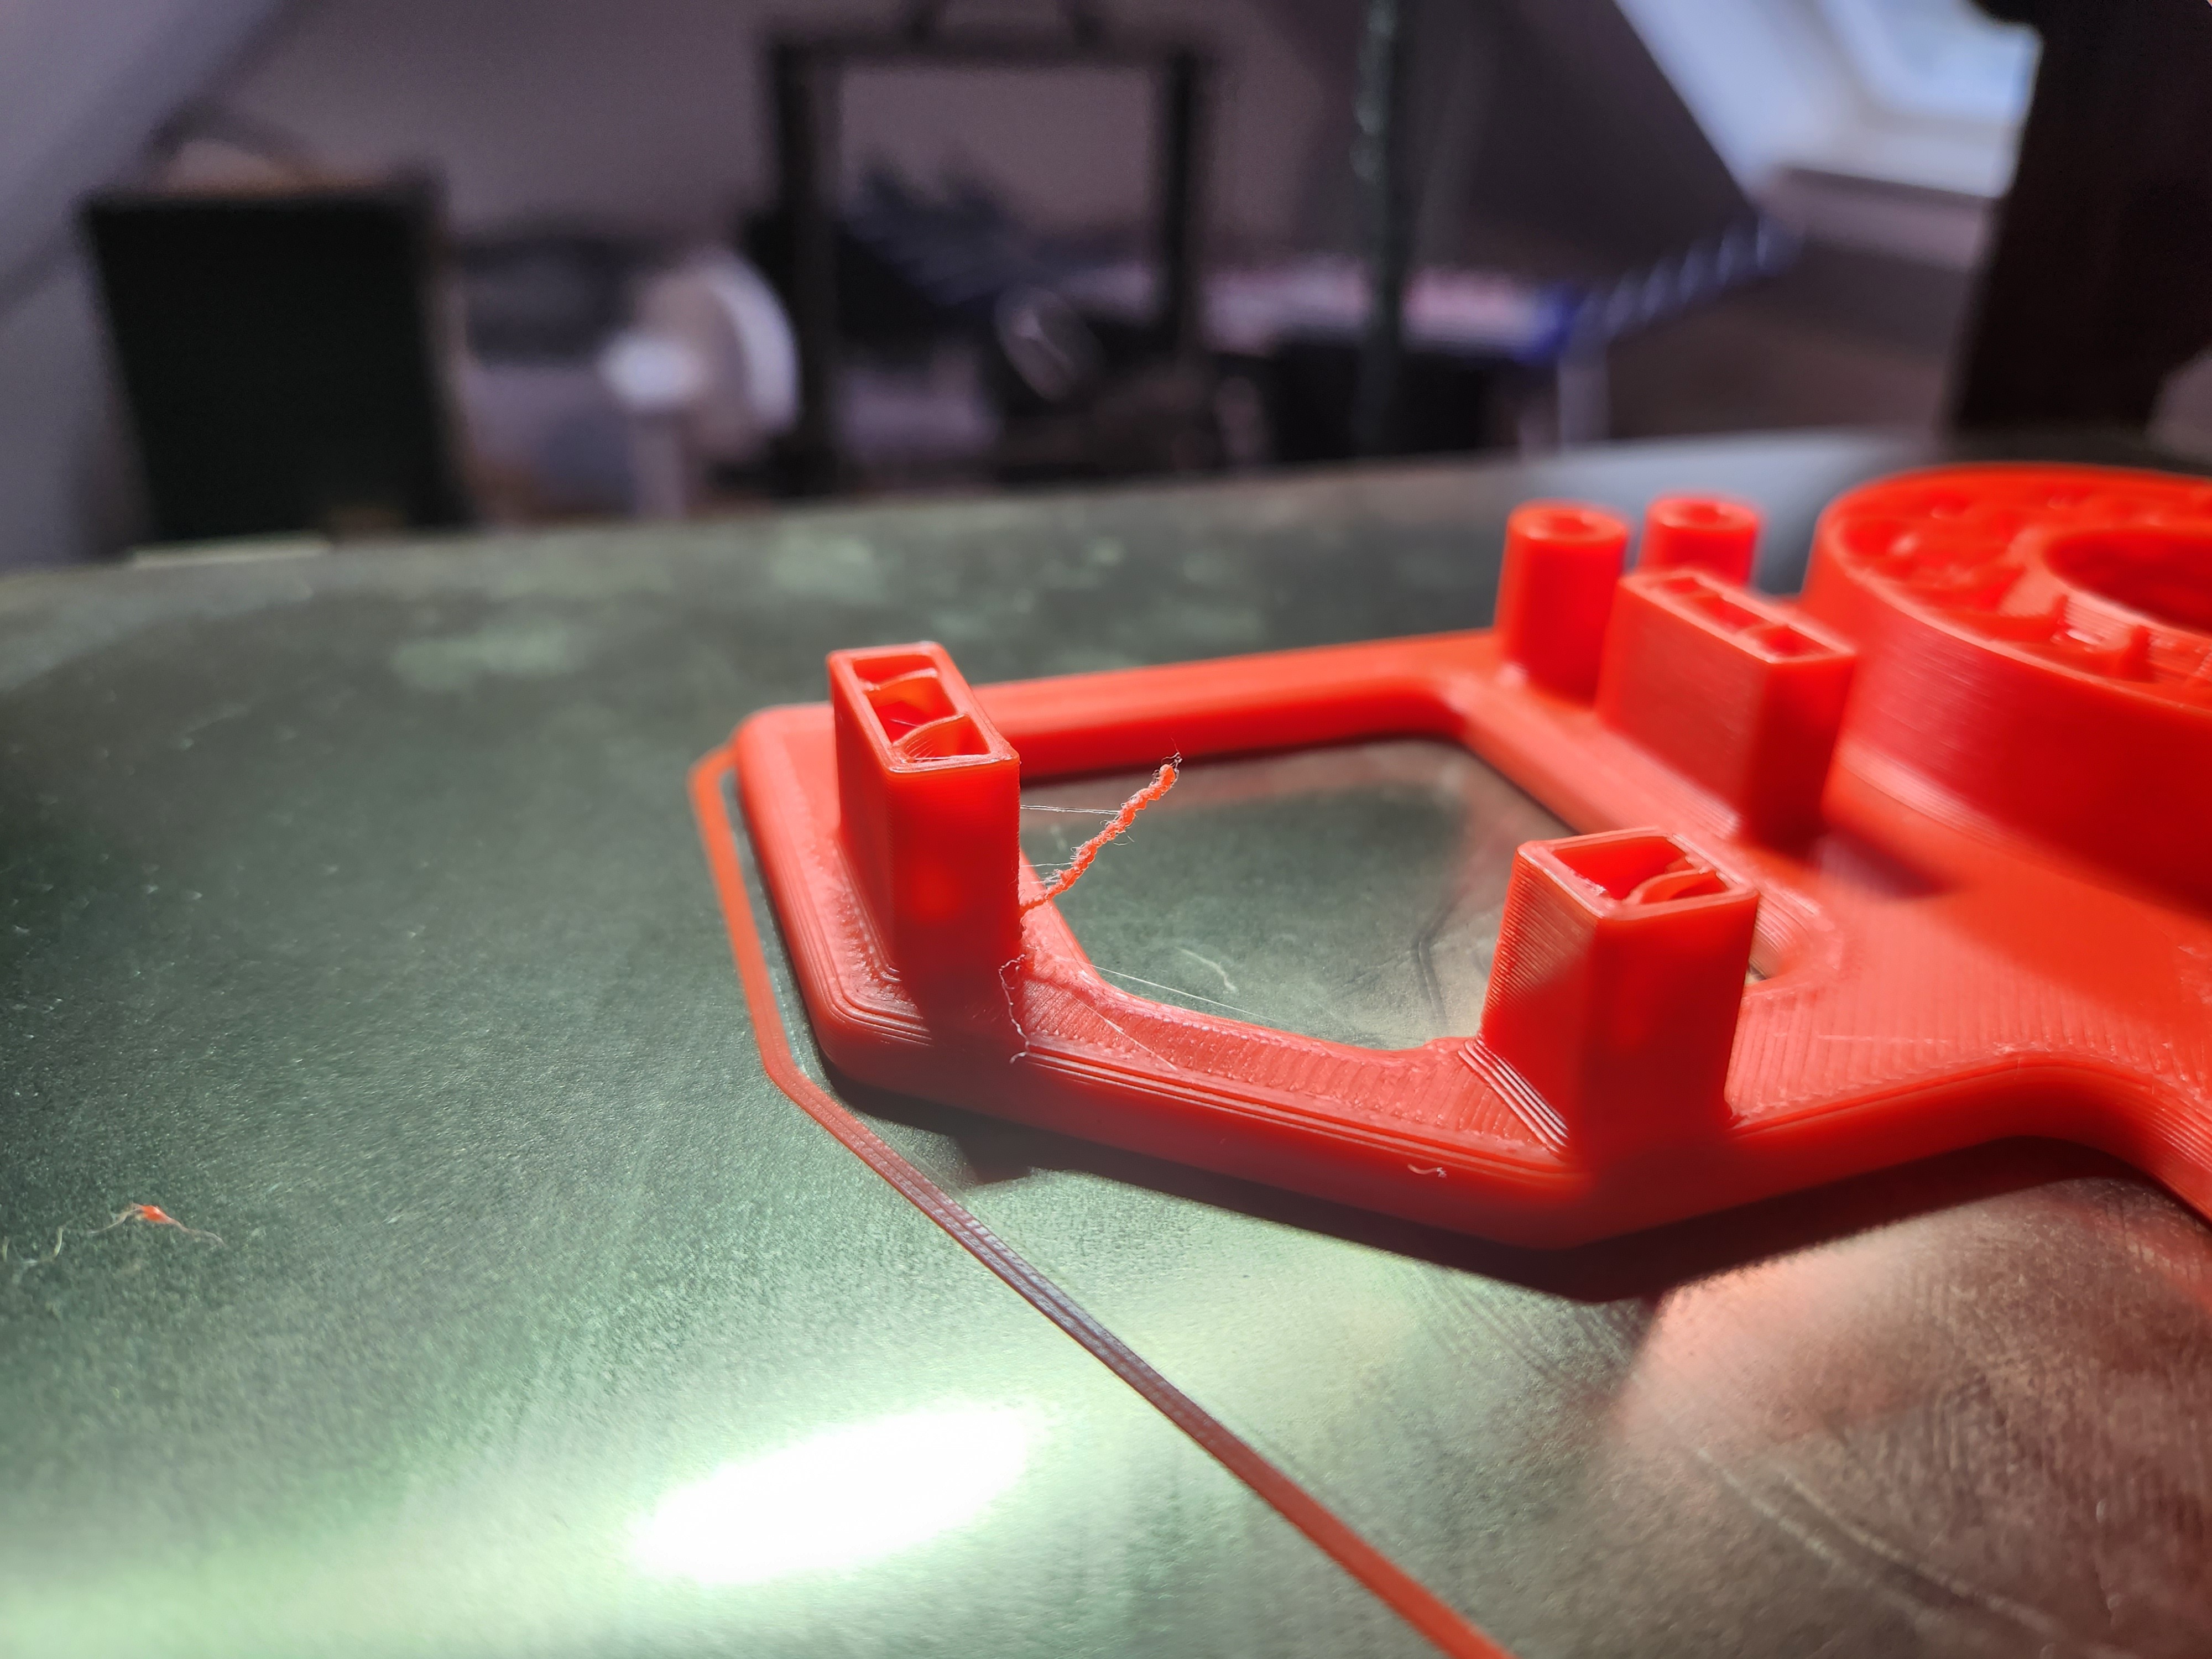
I ran into this on one of the models for the Voron's Clockwork 2 (specifically, this one ).
The sliced preview shows the error, which printed... very dutifully as instructed.
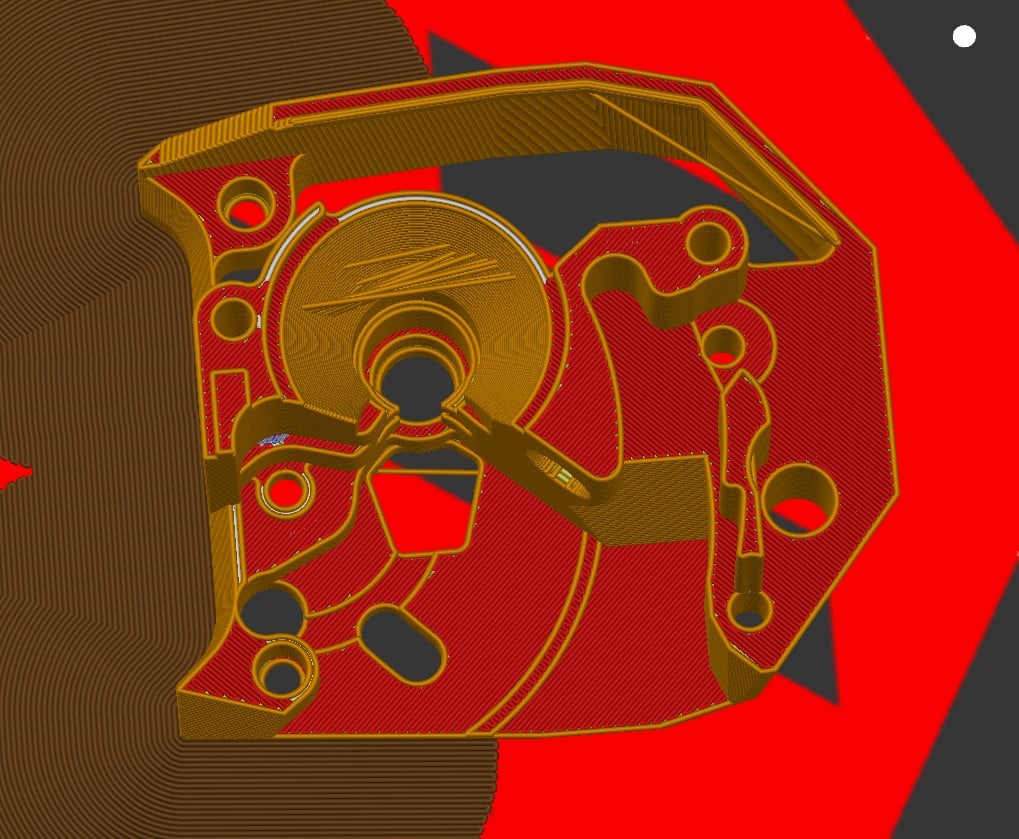 .
.
The print was easy enough to clean up, but now I have one of my own designs and the same thing is happening :(
Any ideas to fix it? My model was straight from Fusion 360 and appears manifold. I'm pretty sure the Voron components are also modeled in Fusion 360.
Edit / small update: it looks like the error is specific to SuperSlicer. I tried the same model in PrusaSlicer and didn't have any issues.