376
3DPrinting
16180 readers
468 users here now
3DPrinting is a place where makers of all skill levels and walks of life can learn about and discuss 3D printing and development of 3D printed parts and devices.
The r/functionalprint community is now located at: or [email protected]
There are CAD communities available at: [email protected] or [email protected]
Rules
-
No bigotry - including racism, sexism, ableism, homophobia, transphobia, or xenophobia. Code of Conduct.
-
Be respectful, especially when disagreeing. Everyone should feel welcome here.
-
No porn (NSFW prints are acceptable but must be marked NSFW)
-
No Ads / Spamming / Guerrilla Marketing
-
Do not create links to reddit
-
If you see an issue please flag it
-
No guns
-
No injury gore posts
If you need an easy way to host pictures, https://catbox.moe may be an option. Be ethical about what you post and donate if you are able or use this a lot. It is just an individual hosting content, not a company. The image embedding syntax for Lemmy is 
Moderation policy: Light, mostly invisible
founded 2 years ago
MODERATORS
377
378
Quick question to the community, does anyone have some good tools to sculpt stls or step files?
Context, I'm working on some decorative keychains and have a vector image and text I want to add to the base object. I've used aolidworks for both in the past with alright results but I've switched over to freecad this year, haven't had a lot of luck adding in there, vector image is a tracing of a dog that I was provided, it's simplified but still has a lot of components.
I did look into blender but be honest I'm totally lost using it and have no clue what I'm doing coming from parametric modeling, I'm not an artist at all, my comfort zone is functional parts usually, but was approached by a friend. I did do some mockups in prusa/superslicer where I've added my image and text as negative volumes and merged into a single part. It works but it feels like a really hacky workaround (relevant XKCD) and would prefer to do it right. Any suggestions or resources would be appreciated!
If interested, here's the mockup that I've done a few test prints on, found I needed to change the line width of my vector a few times and made some features exaggerated so they'd come out more. I've (poorly) covered some identifying text on the back, left the rest as to get a feel for what I'm trying to do, did do some rough sanding on the below pictures. There's a pocket on the top edge that accepts a keyring, it's kinda chunky, about the size of a pog slammer or a thicker poker chip.


379
380
"You need to buy this special heater pad to break the screen adhesive!"
No, I think you will find that in fact I don't.

381
No banana for scale, but let's say that it's not too big and not too small. The dimensions are 295mm tall, 270mm wide, and 240mm deep. If I had to do it again, I would be tempted to go a bit wider and touch less deep. It's probably better to be large in one of these dimensions as opposed to both of them.
Here's the top. It has a jack for charging, a connector to program the DSP, a switch to turn it on and off, and a battery gauge.

The speaker also has a built in handle that's way chunkier than it appears, but is still particle.

The big BOM pieces are a Dayton Audio LBB-5Sv2 for the BMS (battery management system), a Dayton Audio KABD-250 2 x 50W for DPS, amplification, and Bluetooth, a Peerless by Tymphany BC25SC08 tweeter, and an Italian-but-made-in-India woofer (a Coral PRF 165).
The print itself is three pieces: the bottom bit (black), the middle bit (white, blue, and white again thanks to not having enough white left to do it all in white), and the black top. Here's a CAD view that more clearly shows the three pieces:

the three pieces are held together with heat-sets and m3 bolts. There's also a tong and groove like joint to help the enclosure leak less air. I haven't noticed any evidence of air leaks while listening.

The amplifier and battery board mount to the bottom like so:

The middle was printed with some supports for the driver overhangs, but the ports and everything else were designed to print in place without supports.


This is certainly not meant to be audiophile build, but it's surprisingly decent. This isn't my first blue-tooth speaker, or even my first printed loudspeaker enclosure, but it is the first that was somewhat intentionally designed to have OK bass response while also being reasonably compact.
It measures fairly well. Frequency response, along with harmonic distortion, is pretty good. There's zero windowing or smoothing on this plot. I suspect the distortion spikes at 1 kHz, 2 kHz, etc are induced by the Bluetooth stack the board is running since they've shown up in multiple different enclosures and with multiple different drivers.

There's no nasty ringing, caused by either the drivers or the enclosure, so life is pretty good:


382
Hey guys I got the bambu P1S a couple months ago because it was recommended. I'm super new to 3d printing. This is my first one. I'm not new to electronics or computers. I ran a few of the built in prints, a dinosaur puzzle and this scraping tool but both came out fuzzy and in poor build shape. What can cause this? Shaky table? Cold temps (the printer is in my insulated garage getting around 65 degrees at the moment inside)? Is the stock bed bad? The filament it came with bad?
Thanks for any advice. 


384
385
386
387
388
Don't think I've seen this before. Don't even think the author has things for sale from what I can tell. Couldn't find an obvious option on any of my models to toggle this either.
Anyone know what's going on?

389
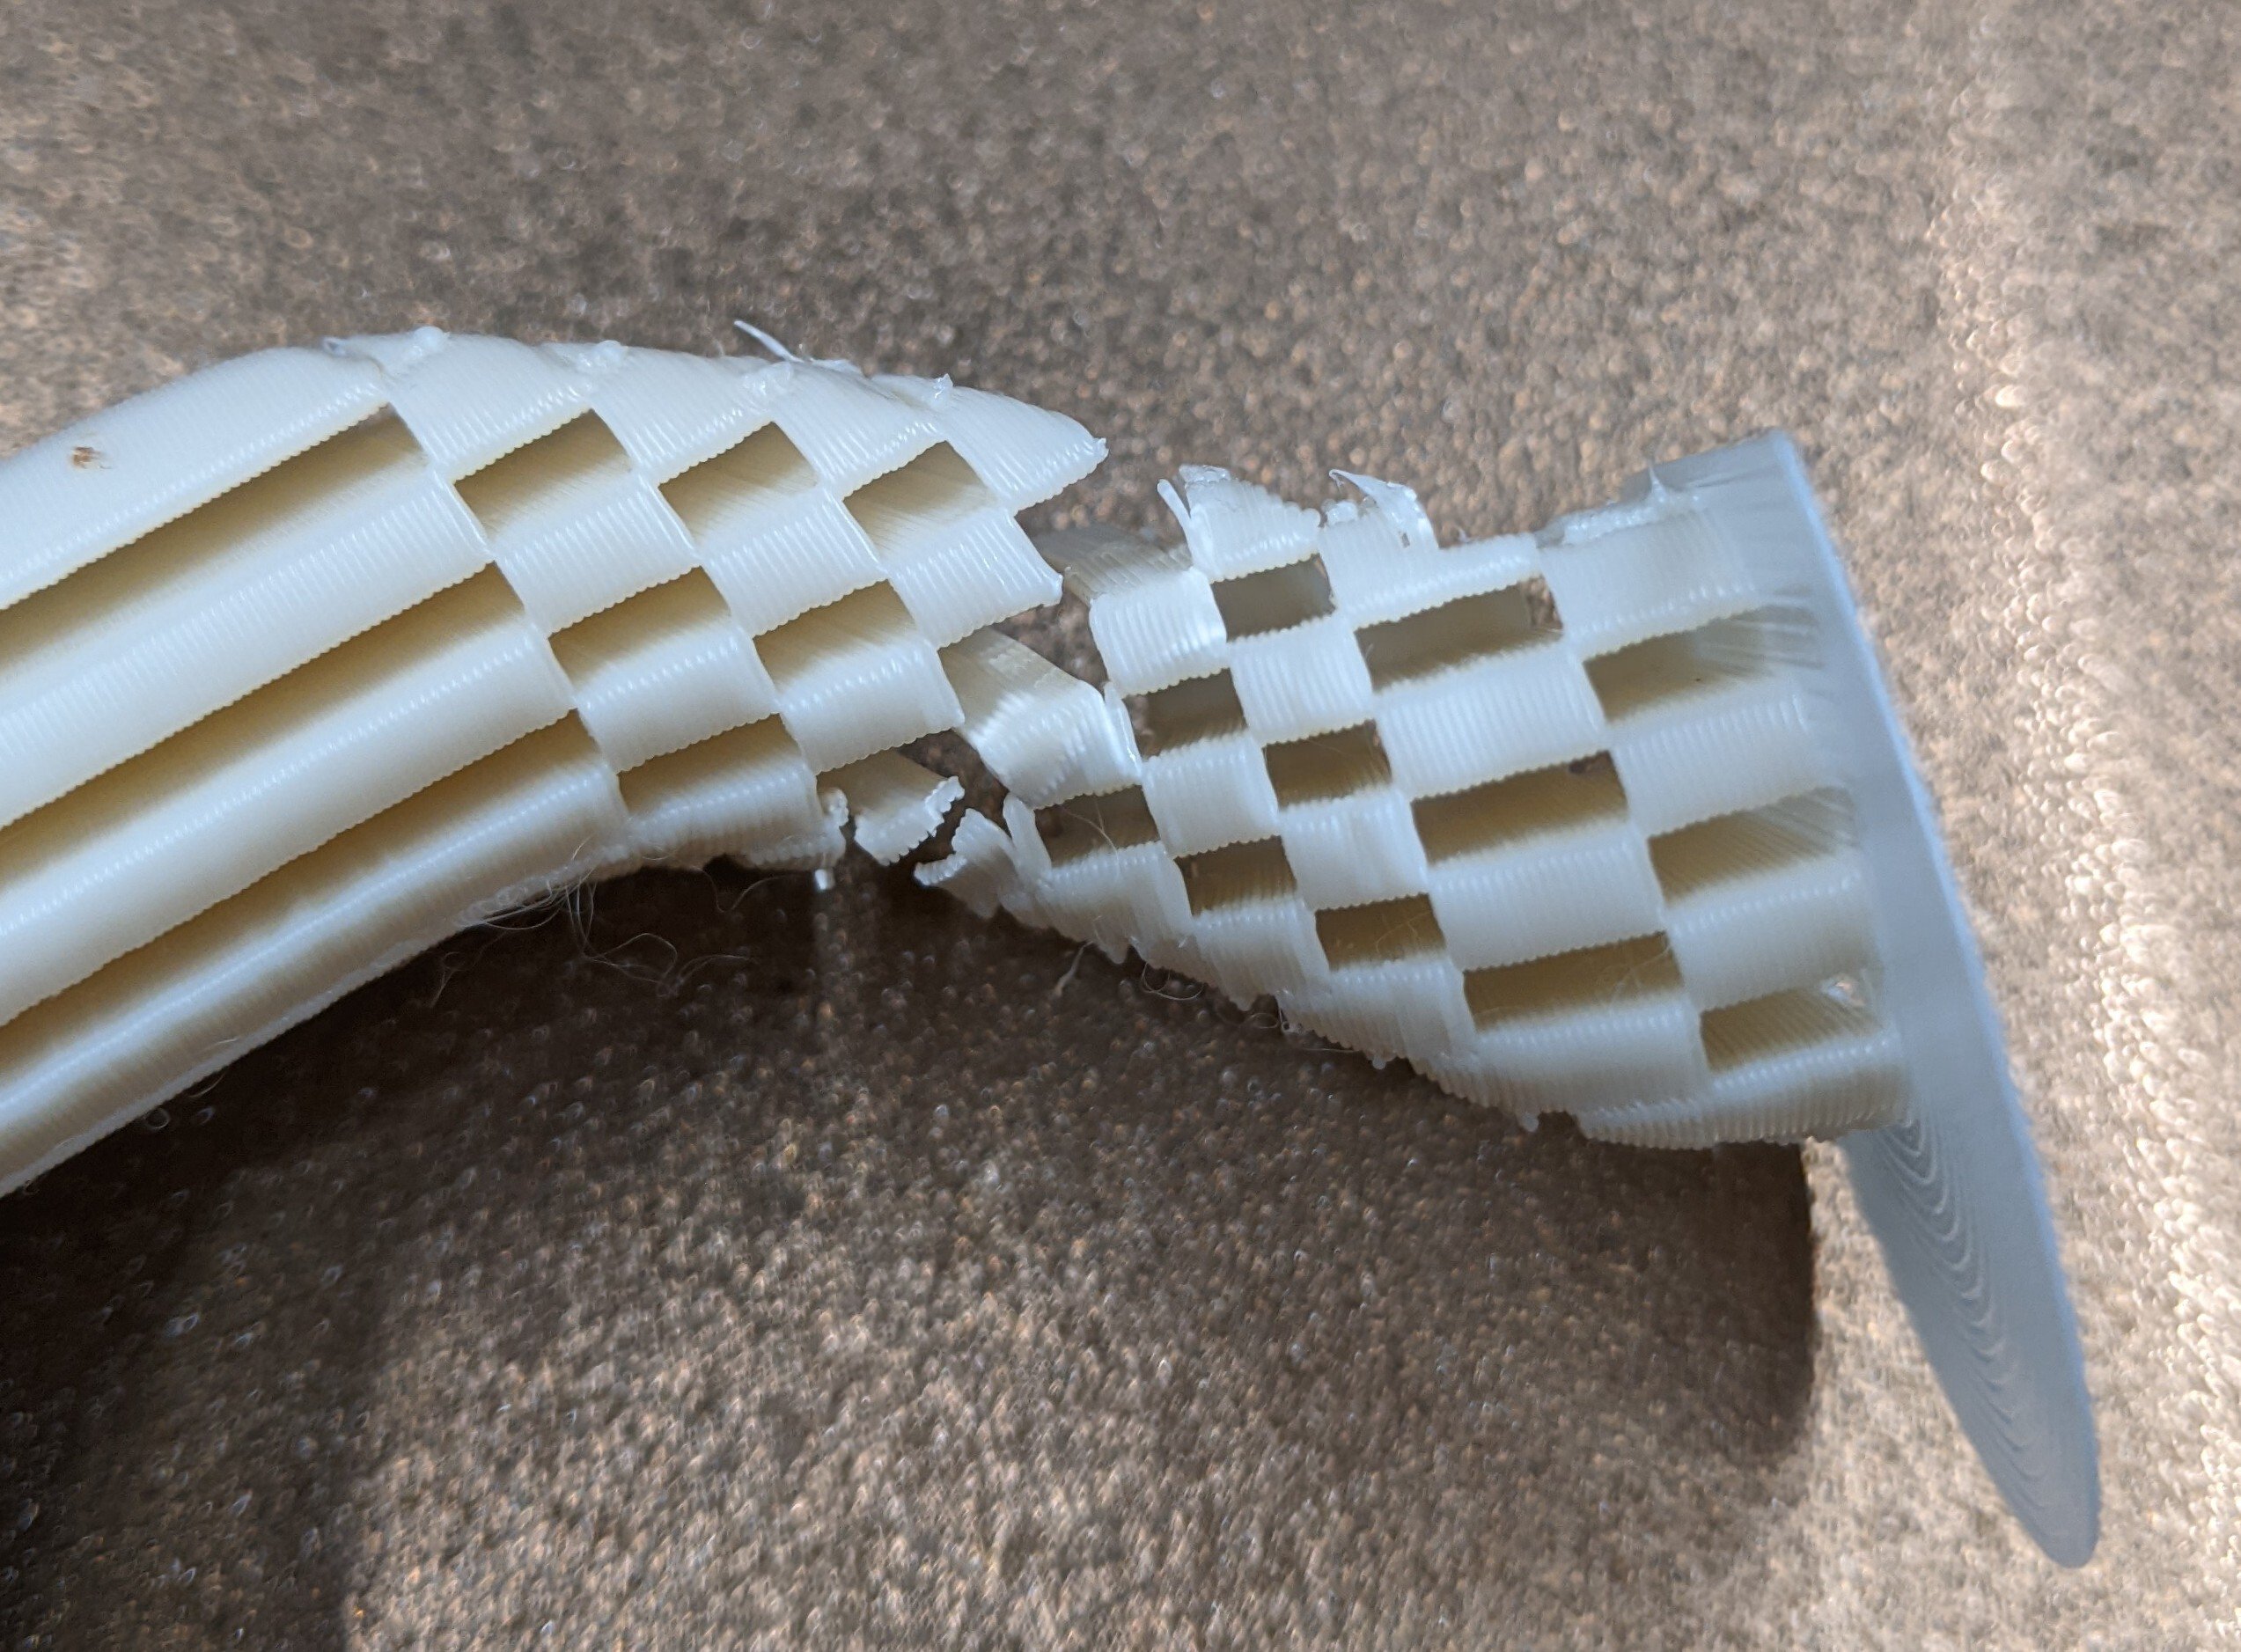
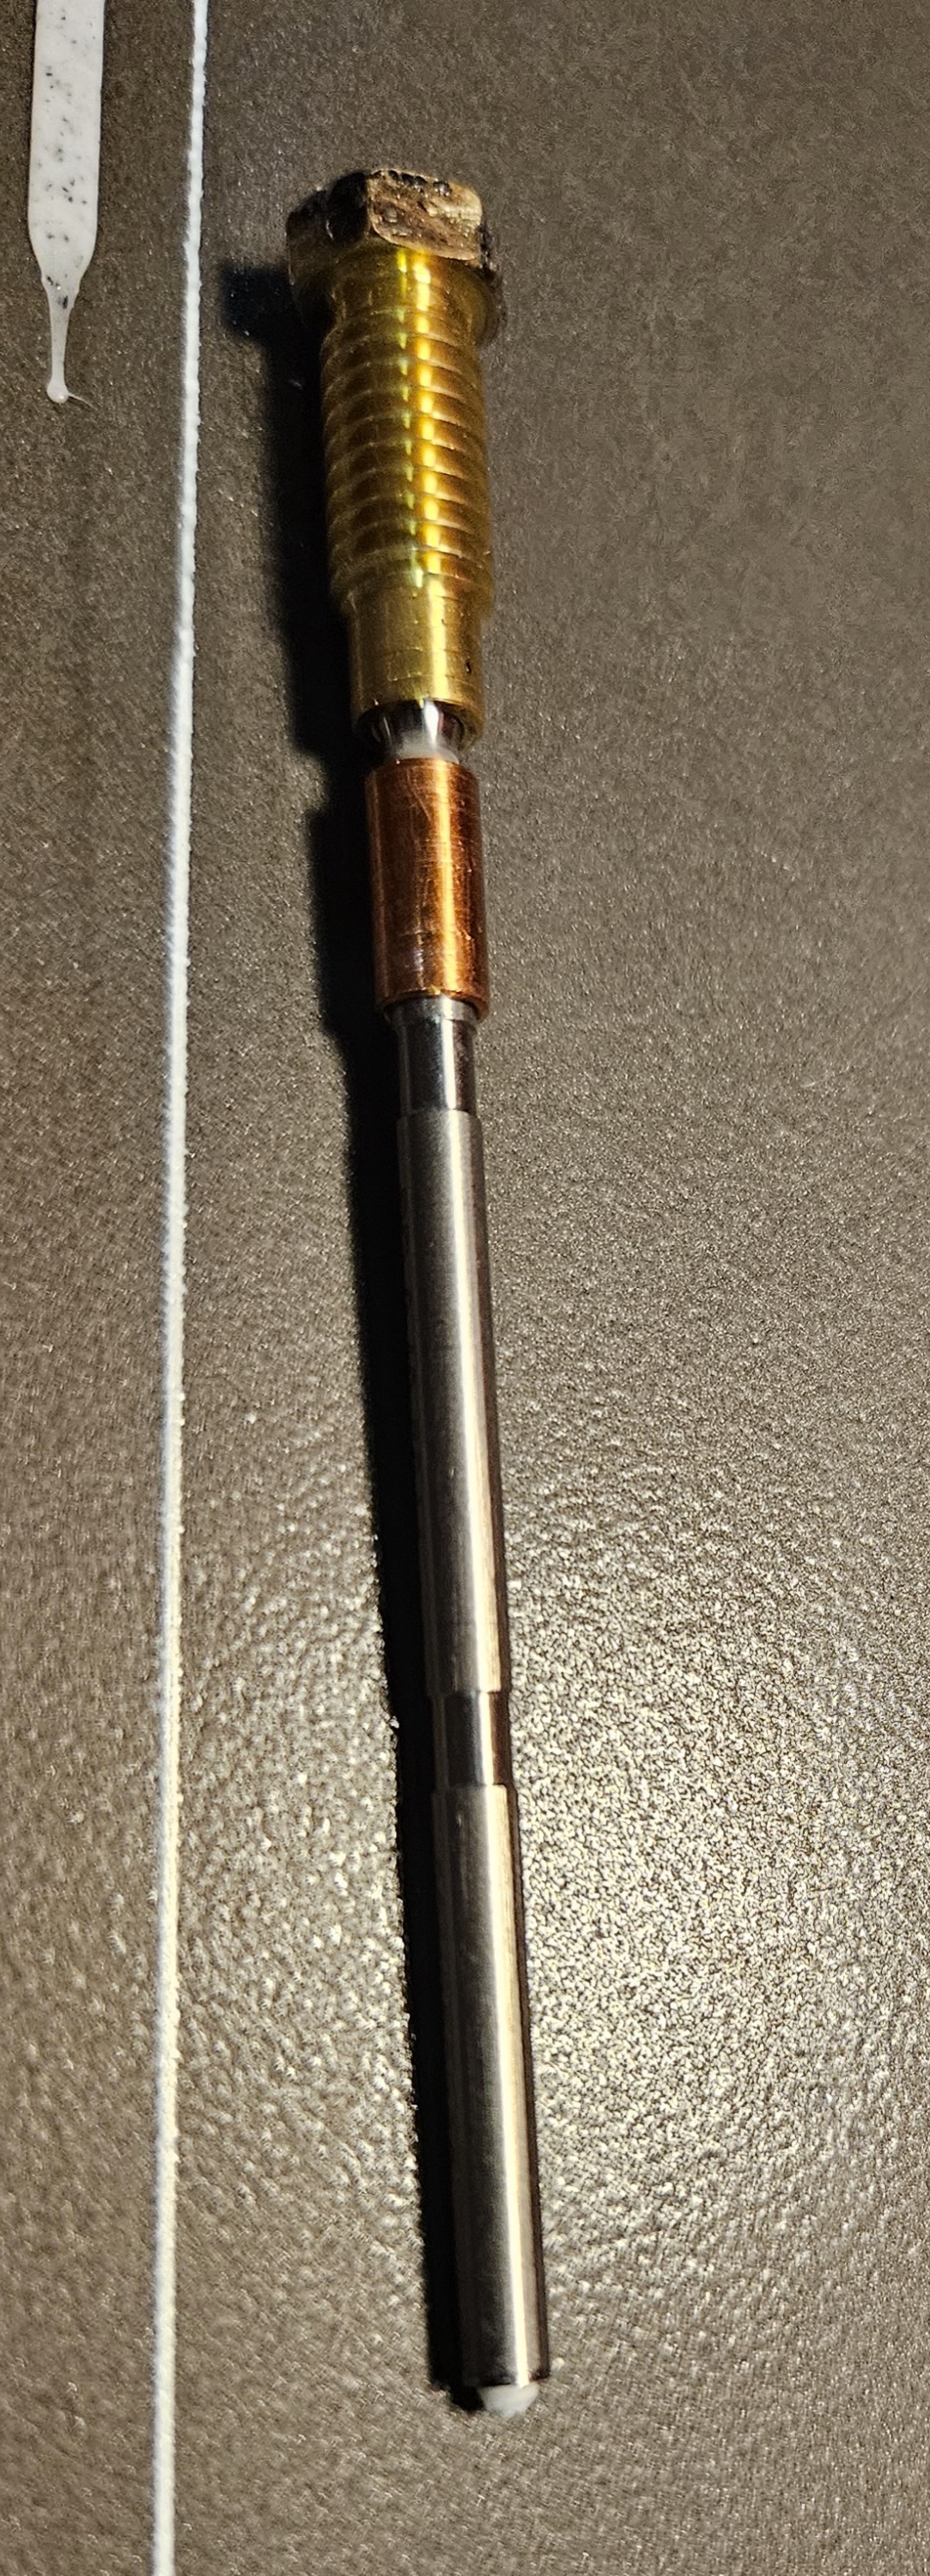
Total clog with prusament pla in line. Can't feed anything through even at high heat. Cold pull not possible / filament not making it into hot end to do this.
You can see little bit of filament sticking out in photo, but with pliers this just tears.
Should I try heating up the whole hot end tube with a soldering iron to see if I can liquify the clog out?
Any other ideas? I can't find many good resources about what to do in this situation online.
Also, obviously needs to get cleaned up a bit, but does picture of my hot end tip look pretty ok? Do I need to bite bullet and get a new hot end? If so, are Amazon off brand replacements ok, or do I need to wait for one to get shipped from prusa?
Thank you

390
391

392
135
Was trying out a new stitch to attach leather to my 3D Printed part. I love the results
(lemmy.world)
Here is the reverse side:

For the long and short of what this is. I make 3D Printable e-reader cases that are held together by stitching cloth or leather. Up to now the cover had the magnet as a part of the design, but with no way to upgrade or change it out. This is my solution for that.
With 8 screws and a tight fit, the cover can be swapped out when you upgrade or change out your e-reader. That way you can keep the case itself and just upgrade the components you need when you need it.
Still testing it, but very happy with how it turned out.

393
I've been looking into this material due to the really nice surface finish and clean look (actually purchased some already 😅)
However I recently came across a video by CNC kitchen where he raised some potential health concerns relating to the fibers specifically inside the filament. One of the commenters mentioned they couldn't wash the fibers off their skin, and another likened it to the "3d printing equivalent of asbestos"
I don't plan to print with it just yet due to needing a hardened nozzle, and spare extruder parts. However when I do, i'm feeling a little worried about how safe it is - mainly whether the final printed part is fine for occasional skin contact, or whether this material should ideally be left to just cosmetic parts.
P.S. image not mine, taken from here
394
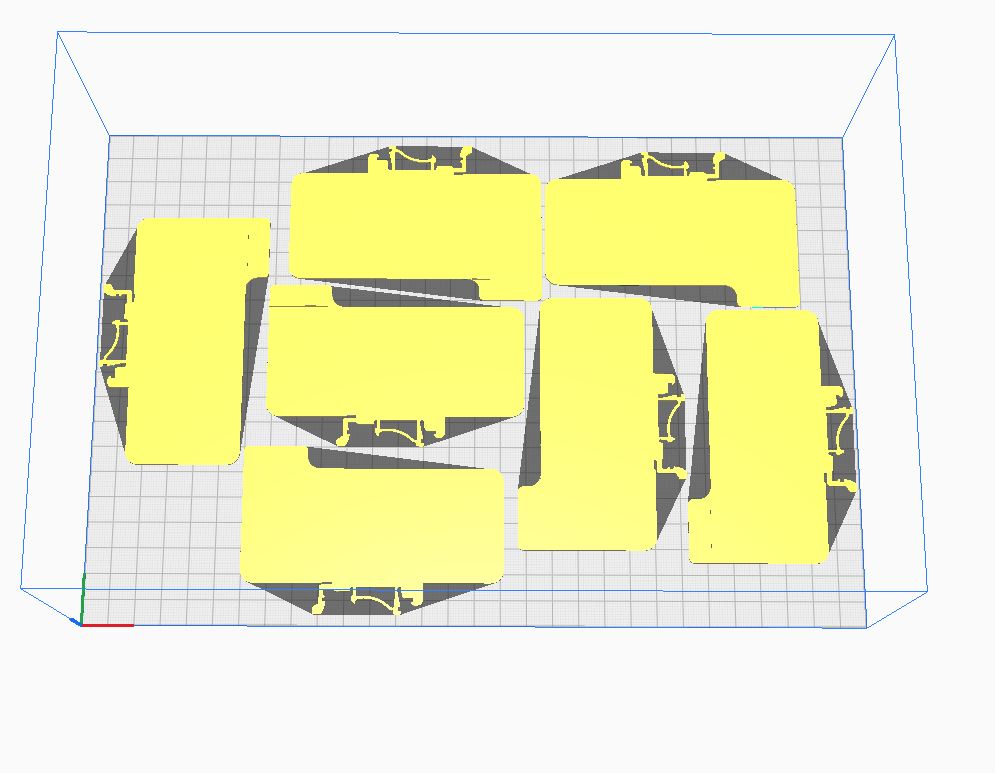
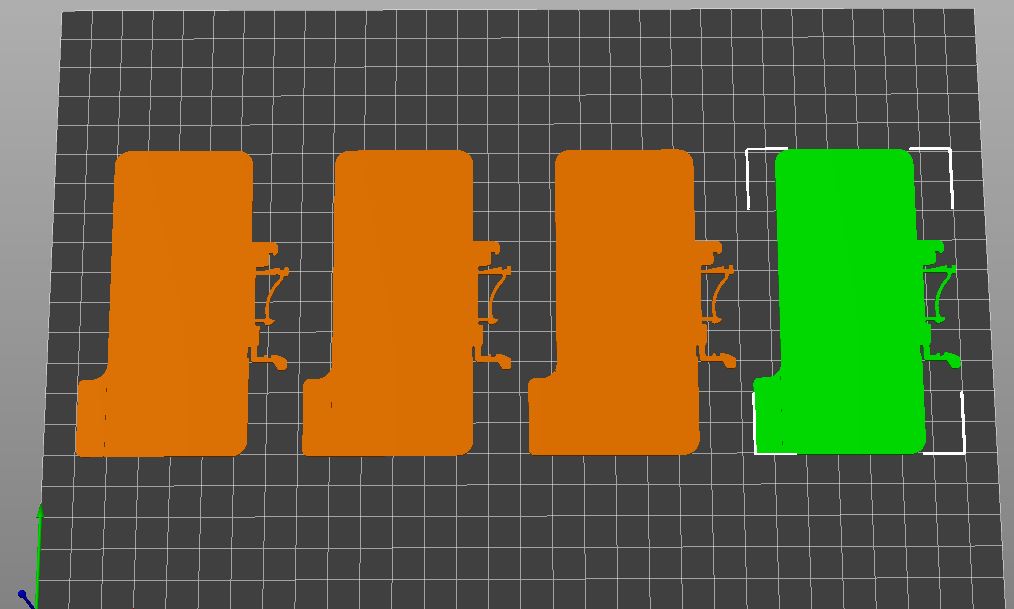
Short overview of how good the nesting capabilities of various 3D slicer are.
The task is simple: placing as many of these shapes on a 200x300mm printed as possible. Manual (quick and dirty for reference): 6 pcs.
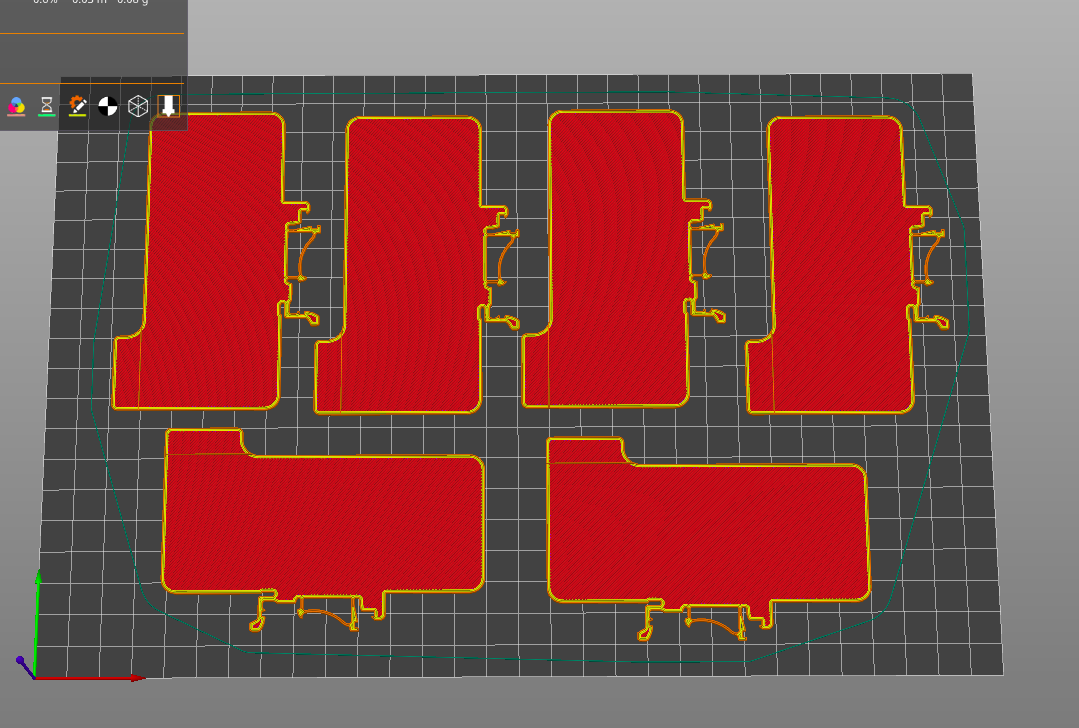
Ranking:
- Ultimaker Cura: 7 pcs.
- human (me): 6 pcs.
- Orca slicer: 5 pcs.
- PrusaSlicer & BCN3D stratos: 4 pcs. By switching (for this particular part) from the worst (Prusa) to the best (Cura) slicer the nesting performance improved by a whopping 75%!
Ultimaker Cura:
Prusa:
BCN3D Stratos (forked from an old version of Cura):

OrcaSlicer:

395
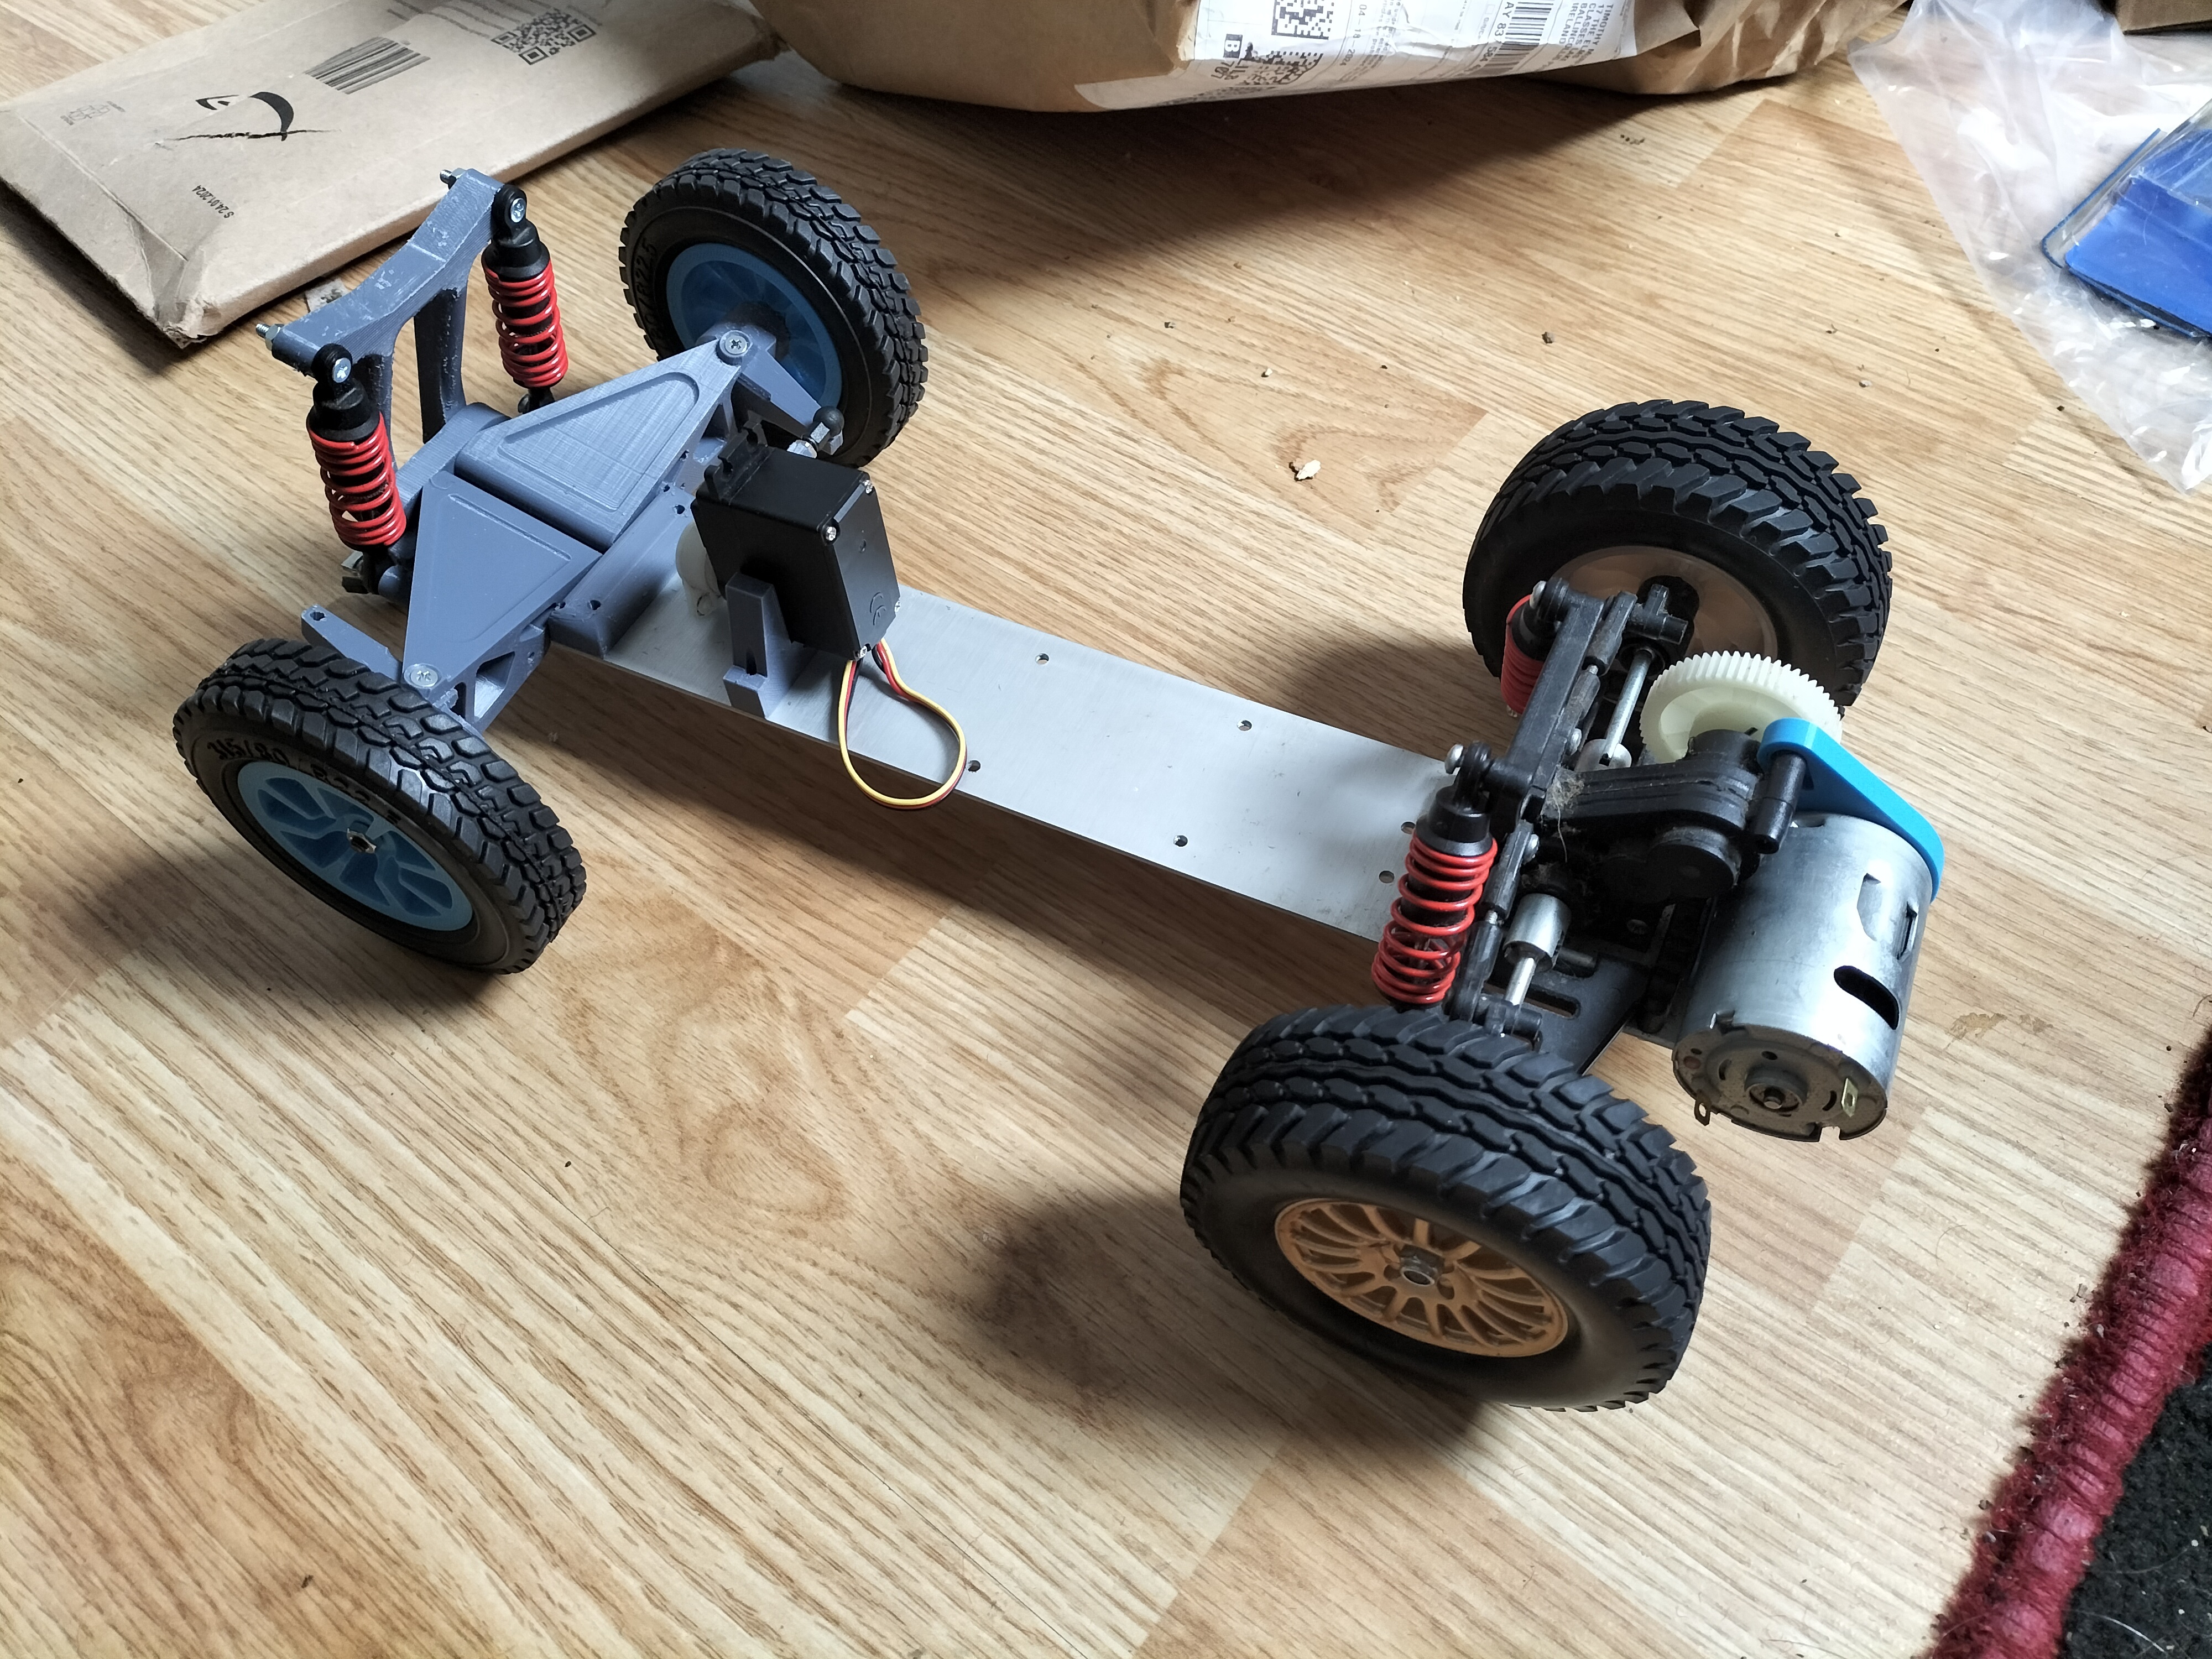
cross-posted from: https://sh.itjust.works/post/19906943
Had some left over rc junk, challenged myself to make it go without my usual over designing/thinking/planning procrastinating until I never even start. happy how it turned out! reminds me of a tyco bandit, probably shorten v2 even more and stick that bandit body on.
396
397
398
399
15
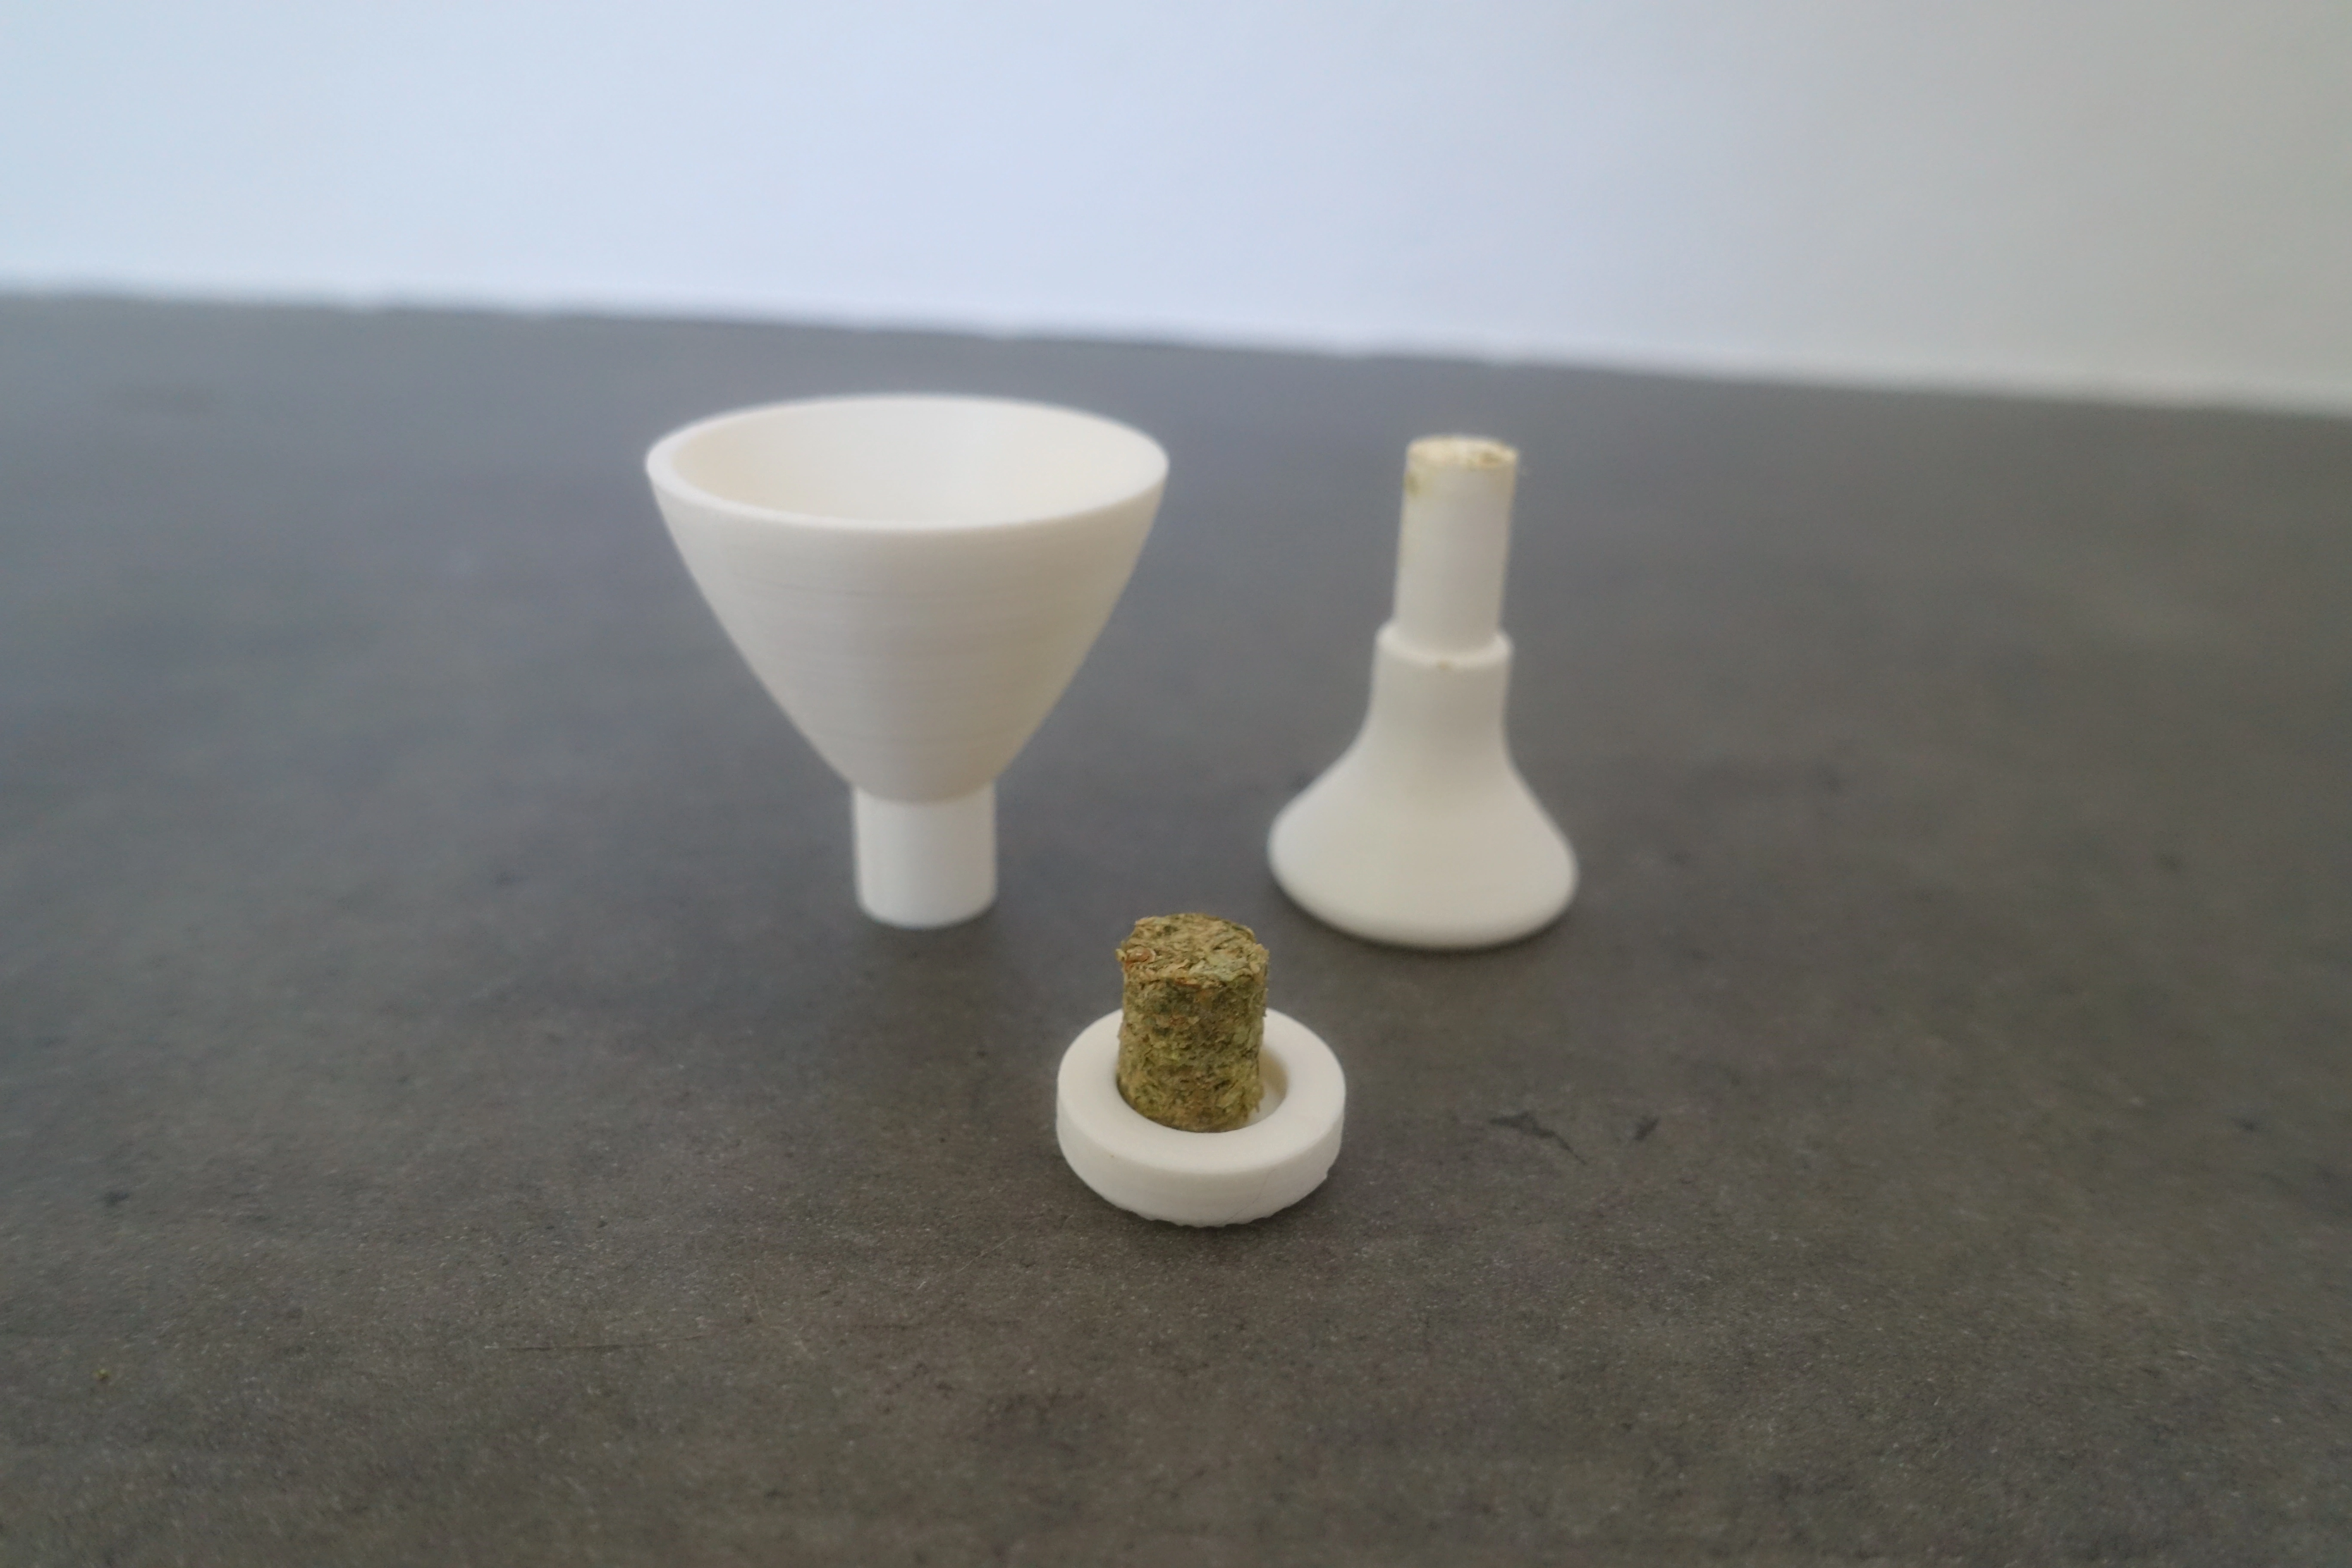
cross-posted from: https://slrpnk.net/post/9706069
More images, description and print files: https://www.printables.com/de/model/885862-pellet-press-funnel-for-dry-herb-vaporizers
400
At least so far. The first go round had the nozzle crash into the tree support, resulting in a layer shift. The good news is that the print stayed very firmly stuck to the bed.
I've reset, lowered my extrusion multiplier a smidge, switched to a more traditional support pattern, and am going for it again. Wish me luck!