3DPrinting

16479 readers
172 users here now

3DPrinting is a place where makers of all skill levels and walks of life can learn about and discuss 3D printing and development of 3D printed parts and devices.

The r/functionalprint community is now located at: or [email protected]

There are CAD communities available at: [email protected] or [email protected]

Rules

If you need an easy way to host pictures, https://catbox.moe may be an option. Be ethical about what you post and donate if you are able or use this a lot. It is just an individual hosting content, not a company. The image embedding syntax for Lemmy is ![](URL)

Moderation policy: Light, mostly invisible

founded 2 years ago
MODERATORS
476


cross-posted from: https://lemm.ee/post/29388765

I wanted a shelf to hold the EIBOS 3D Series X or whatever on top of my SV06 Plus. It's not a great dryer, I don't recommend it, but it's what I have. It works… kinda.

PS, you can use this as a base to hold nearly anything up there. Snaps on. Modify as you wish.

477


The other reason is because I got the Kobo Clara 2e to make a e-reader case for it, which I did. And now I don't need it any more, but I'd like a stand in for it just in case, I need to test fit and finish.

Now I can sell my old 2e!

If you too need a Kobo Clara 2e stand in... for whatever reason. You can download them here

Thingiverse: https://www.thingiverse.com/thing:6577515

Printables: https://www.printables.com/model/842520

478


Guide to use RTMP cameras, OBS and Youtube to make a nice 3d Printer Monitor

479
46
Table lamp (lemm.ee)
submitted 10 months ago by [email protected] to c/3dprinting


First time I printed something made in FreeCAD. It's a table lamp for our balcony, more like a mood light than a real lamp hehe. Its made from 3 parts (base, tube and a hat). Base and tube are CA glued and I used some insulating tape to fit a hat tightly. The lamp is about 240 mm tall and its powered from 9V battery. Battery case and steel weight are glued with some blue tack (white tack lol) to hold it in the place. There are 2 LEDs and resistor soldered together in series. I might replace the leds with lower powered ones if battery goes out too fast, but time will tell. Im also thinking about different hats, but first iteration was quick and dirty, I love it!

More pics:

480
43
submitted 10 months ago* (last edited 10 months ago) by UnH1ng3d to c/3dprinting


When I do an overhang test, I always have this problem at about 35°. Does anyone have a suggestion what could be causing it?

  • Slicer: Orca
  • Layer height: 0.2mm
  • Infill: 0% (this has improved it a lot, I think the infill was causing bulging)
  • Outer walls: 2
  • Overhang speed: 10 or 20mm/s (both look the same)

Solution: I mistakenly thought overhang speed in Orca was based on overhang angle, it is percentage instead (which makes much more sense for different layer heights). My 10-25% overhang speed wasn't set to slow down and that must translate to about 35° at 0.2mm layer height. I now have it set to 30mm/s and it now looks great 👍 And sorry, I was wrong when I stated the overhang speed 😅

481
 
 
482
39
submitted 10 months ago* (last edited 10 months ago) by [email protected] to c/3dprinting


This looks right in my price range for my next upgrade. I want a core xy, I've been on bed slingers, so this looks good.

Important information needs no excessive words. See the picture. 👇 So, about the early bird price for SV08... ❓ 👉https://landing.sovol3d.com/8XS

https://twitter.com/Sovol3d/status/1777627355554381942

https://www.sovol3d.com/products/sovol-sv08-3d-printer

483


Contemplating getting a K1 or K1C in the nearish future as it looks to be the most cost-effective core-XY platform that allows open-source firmware. All I've found are compensated reviews so far so, figured I'd see if anyone on Lemmy has a less biased experience.

Any thoughts on these or suggestions for alternatives. Would like to move away from bed-slingers.

484


Can someone explain or point me towards a good tutorial that explains how to match complex curves, like the PS5 side panels?

I want to make a controller stand that sits on top of my PS5 in it's horizontal position.

I'm most familiar (but still very beginner) with Fusion 360, but I'm open to trying other software if there's some killer feature that makes this easier.

Any tips appreciated, thanks.

485
90
It fits! (lemmy.world)
submitted 10 months ago by IMALlama to c/3dprinting


Pardon the brim remnants. Not pictured: the many prior iterations. This started as a head on photo that I imported into fusion 360 and scaled after some measuring with calipers. It's not perfect, but it's rapidly approaching good enough. The square indent is to help with orientation - although the part obviously is not symmetrical, it's much harder to judge the home.

486


Building a 3D printer is easy. Getting the details right to build a great 3D printer is hard, as this is where most companies fail. Why?

For example, on this printer, the bed is a three-point mount (two wheels for adjustment at the front of the printbed) and the printer's bed levelling dialogue doesn't show the height difference that needs to be adjusted (which most 3D printers do). It does show how much it needs to be turned, and the bed levelling wheels have 1/8th turn indicators, making it easy to get it perfect.

In short, instead of an arbitrary number like 0.3mm that has no meaning to the user, they tell the user to turn this knob 1/4 of a turn. An instruction the user can follow.

** Why is this so outstanding? It doesn't cost much, but it improves the user experience. Are companies blind to these improvements because the engineers are experienced, or is there a lack of testing during development?**

By the way, years ago I did such a fix/modification myself on a Tronxy XY2 pro by adding indicators on the wheel for 0.2mm height difference so I could convert the number to rotation: https://www.printables.com/model/301670-replacement-bed-leveling-wheel

487


cross-posted from: https://lemm.ee/post/28863694

Video https://www.youtube.com/watch?v=O1p7Sn1eMmE

I didn't know about this command. I was trying to create an assembly. I knew that Solidworks had mating commands in the assembly, but I couldn't find them in Fusion 360. (I refuse to call it just Fusion, that's stupid.) So, watching assembly tutorials, I found this. I never knew the Align command existed or what it did. Sigh.

PS DAPTeach or dapteach9020, your video is great, I wish I could tell you but you have comments turned off and no way to contact you and no videos in 3 years.

488


Here's the carnage! Was running a long print and saw this when I went to check on it. Was running the stock Ender 3 hotend with a Capricorn tube fix for nearly 5 years. Served me well. I haven't yet been able to remove the white PLA. To see the full damage but, I'm pretty sure that the threads are gone.

Guess it's time to upgrade the hotend.

489
15
Weird Underextrusion (self.3dprinting)
submitted 10 months ago by wccrawford to c/3dprinting


On the bottom of my prints, there's an area of underextrusion and I can't figure out what's causing it.

I first noticed it when I switched back to a textured PEI bed while trying to print ASA. It's on 20x20mm squares, and it's on the test print for setting up pressure advance... But only on the left-most object.

It's the same even if I add 2 lines of skirt or not. (In addition to my KAMP Voron purge.)

It happens everywhere on the bed that I've tested. It happens to PLA, but it harder to see. For ASA, it's very obvious. For PLA, it's almost as smooth as the rest of the surface, but it's there if you know what you're looking for.

I've only been printing PLA for quite a while now, so I don't know when this started.

I've got an LDO Voron 2.4 with Tap, KAMP, Revo hot end. I've calibrated pressure advanced and changed the value, and I've tried different z offsets with the textured bed, which doesn't change it. (But does change how good the rest of the bottom surface looks.)

Anyone got any ideas?

https://imgur.com/a/ggaZDMY

490
491
17
submitted 10 months ago* (last edited 10 months ago) by [email protected] to c/3dprinting


I just sent this email over to elegoo official, so either way I'll update this post with their response for a community reference point:

"Hello, I'm having issues with my Elegoo Neptune Pro 4. I've tried following the official documentation and other resources to help fix my issue to no avail, so I am reaching out as a last ditch effort.

My issue mainly pertains to PLA prints consistently being ruined partway during printing after a few months of use and operation.

Specifically, my print will successfully complete the first few layers. Then, at some point, the print will somehow 'grab' or 'catch' the print base and drag it around the print bed, ruining the print and causing a large build up of filament at my hotend. This then requires cleaning.

From what I have seen, this can be caused by issues with the print bed not being clean or the temperature of the bed in relation to the fan speed. For example, having a low fan utilization at the beginning, then ramping up later in the print is supposed to help this issue. However any fixes I tried returned null results.

Some background info, I purchased the printer on preorder and received it in September 2023. I have kept up with maintenance. Namely, keeping stepper motor tracks cleaned and greased properly, belts tightened, the print bed is wiped down with 90% ISO alcohol between prints. I have replaced the hot-end when I first started experiencing print issues, and again during the troubleshooting process to further diagnose the problem.   My Z offset seemingly is "correct". I followed the mfg instructions closely, and before this issue, my prints were coming out beautifully.  

Print Settings: Using Elegoo brand PLA 1kg filament rolls. Default Elegoo Cura print settings applied for temperature, speed, fan speed, nozzle size, etc. Supports or No supports didn't make a difference during my troubleshooting. Brim printing mode is my default.

For the 4-5 months that I've had the Neptune Pro 4 has been absolutely amazing. Fantastic quality, consistent, very easy to use and maintain. The issues I'm experiencing are beyond annoying and I can't seem to figure it out myself.

Is this issue known? What are the recommended solutions?"

  • Let me know if any of you have experienced something similar to this and how you addressed it!

EDIT: This is likely solved. There are many issues that can contribute to this issue but TLDR quadrouple check your z offsets. Read the thread for other good info.

492
 
 
493
494


[email protected]

I'm gonna need help, y'all. I'm a single-part amateur hack with a penchant for anything cheap. I don't know enough to make it what you'll want it to be, but I am very interested in the broader industry and also its impact on maker hobbies. You want Solidworks advice? To gripe simultaneously about enshittification and the limitations of free tools? Need to dive into Lasering or Machining or CNC'ing stuff and don't feel like the 3D printing community is quite the right place? Come on over.

I will keep posting stuff that I find interesting, and I will mod as long as doing so doesn't make me hate life, but if nothing else the name is now parked with an active user.

495


Hi folks, this is a follow-up to my previous post here.

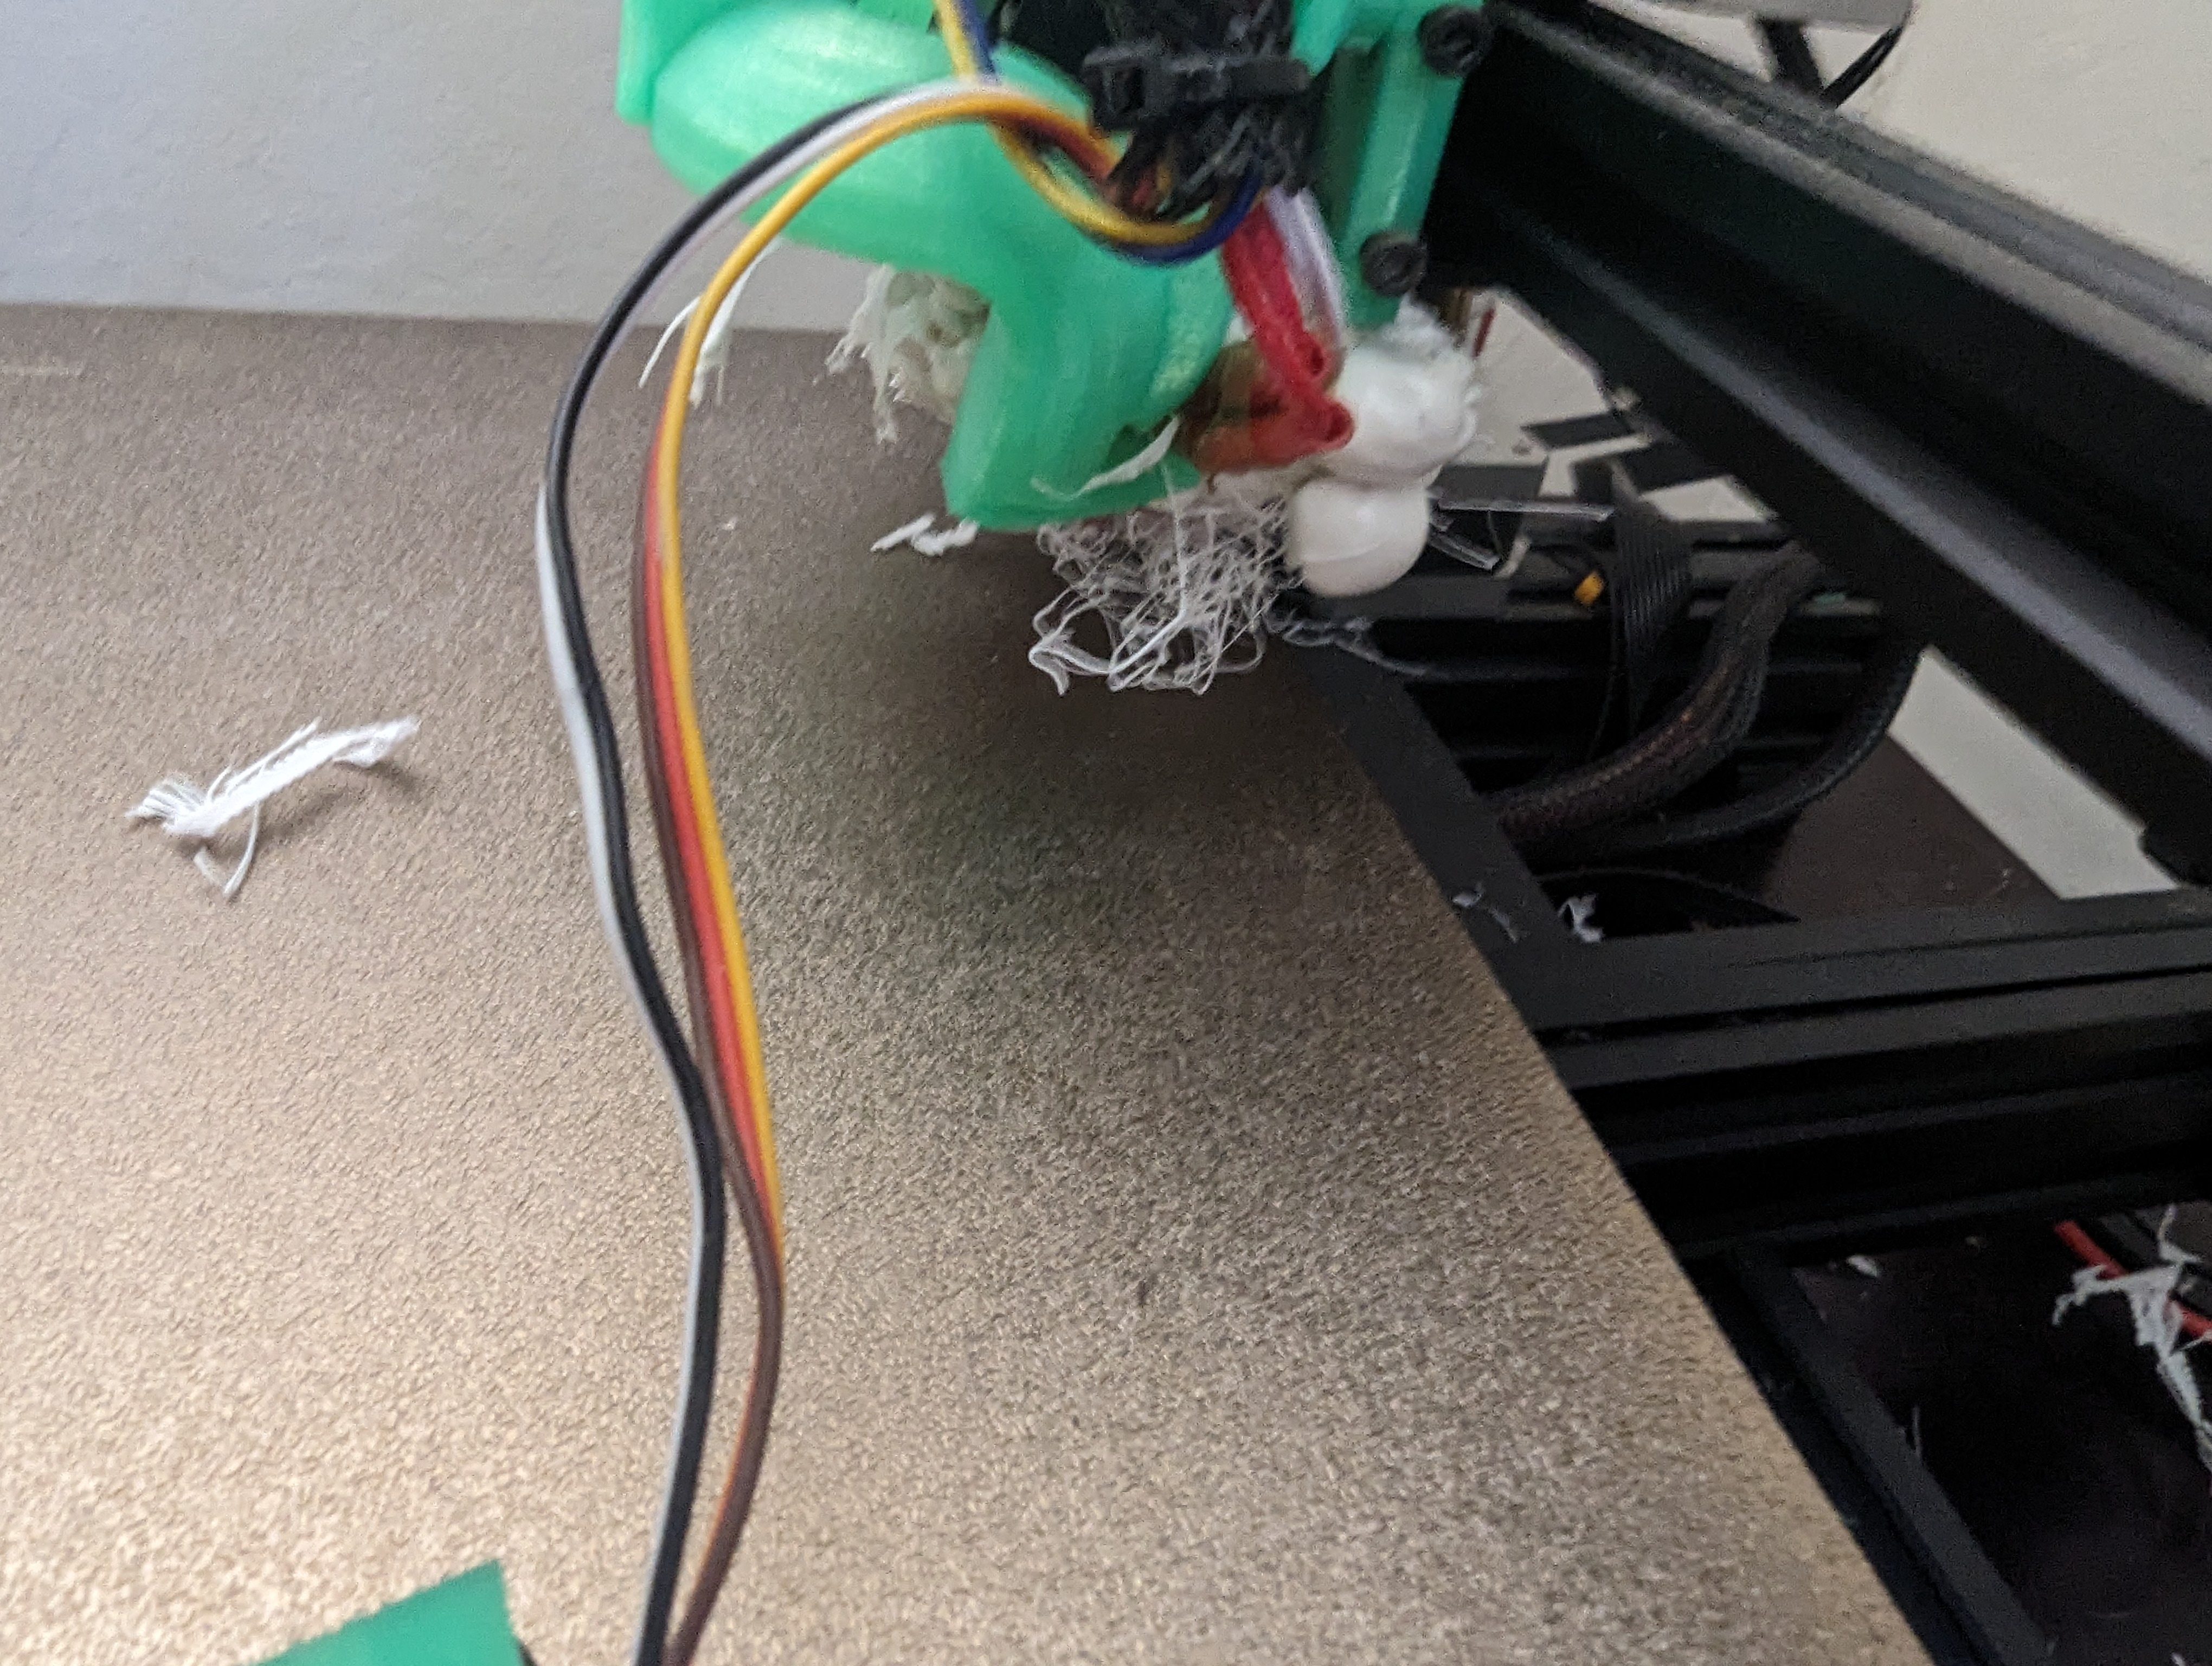
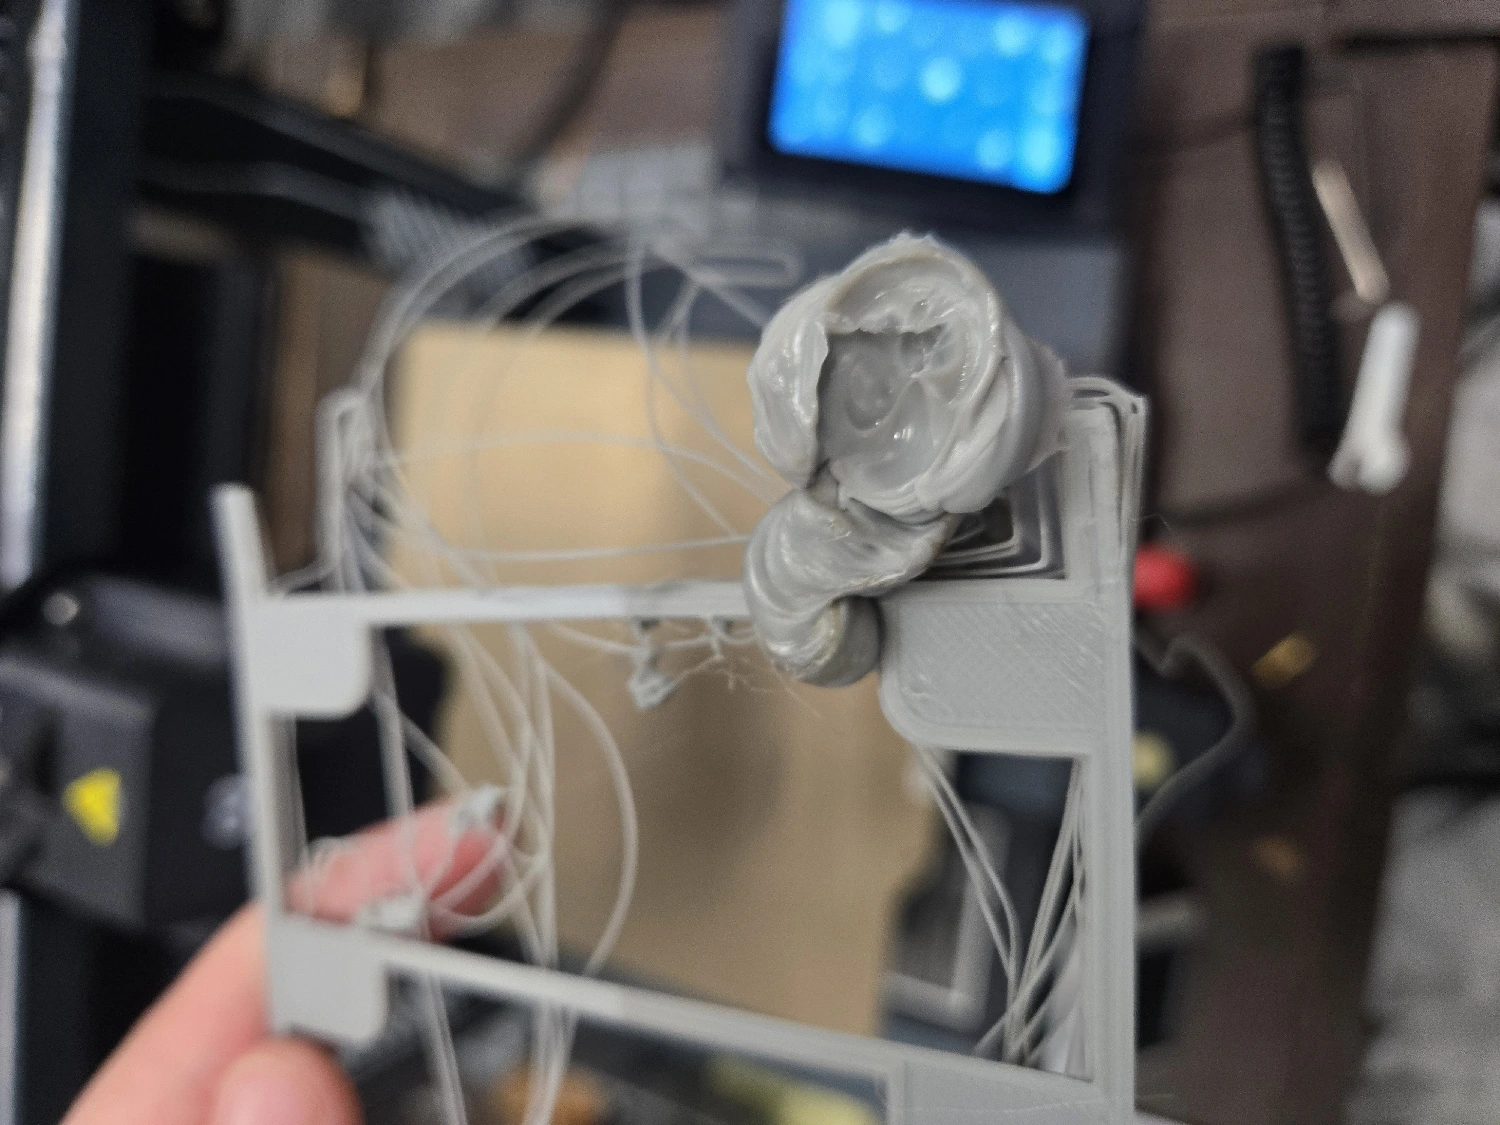
To briefly summarize, when upgrading Cura from 4.12 to 5.6, my printer and slicing profiles seemed to transfer over automatically, but when I tried to slice and print, I encountered a strange issue: It no longer heats the extruders or the bed. It just starts "printing" immediately with stone-cold extruders and bed.

Thanks to some suggestions under that post, I've narrowed down the problem to a couple of lines of in the start gcode (located in Settings > Printer > Manage Printers... > Machine Settings).

Cura start gcode:

M140 S{material_bed_temperature, initial_extruder_nr} T0 ; set bed temperature
M134 T0 ; stabilize bed temperature
M104 S{material_print_temperature_layer_0, initial_extruder_nr} T{initial_extruder_nr} ; set left or right extruder temperature
M133 T{initial_extruder_nr} ; stabilize left or right extruder temperature

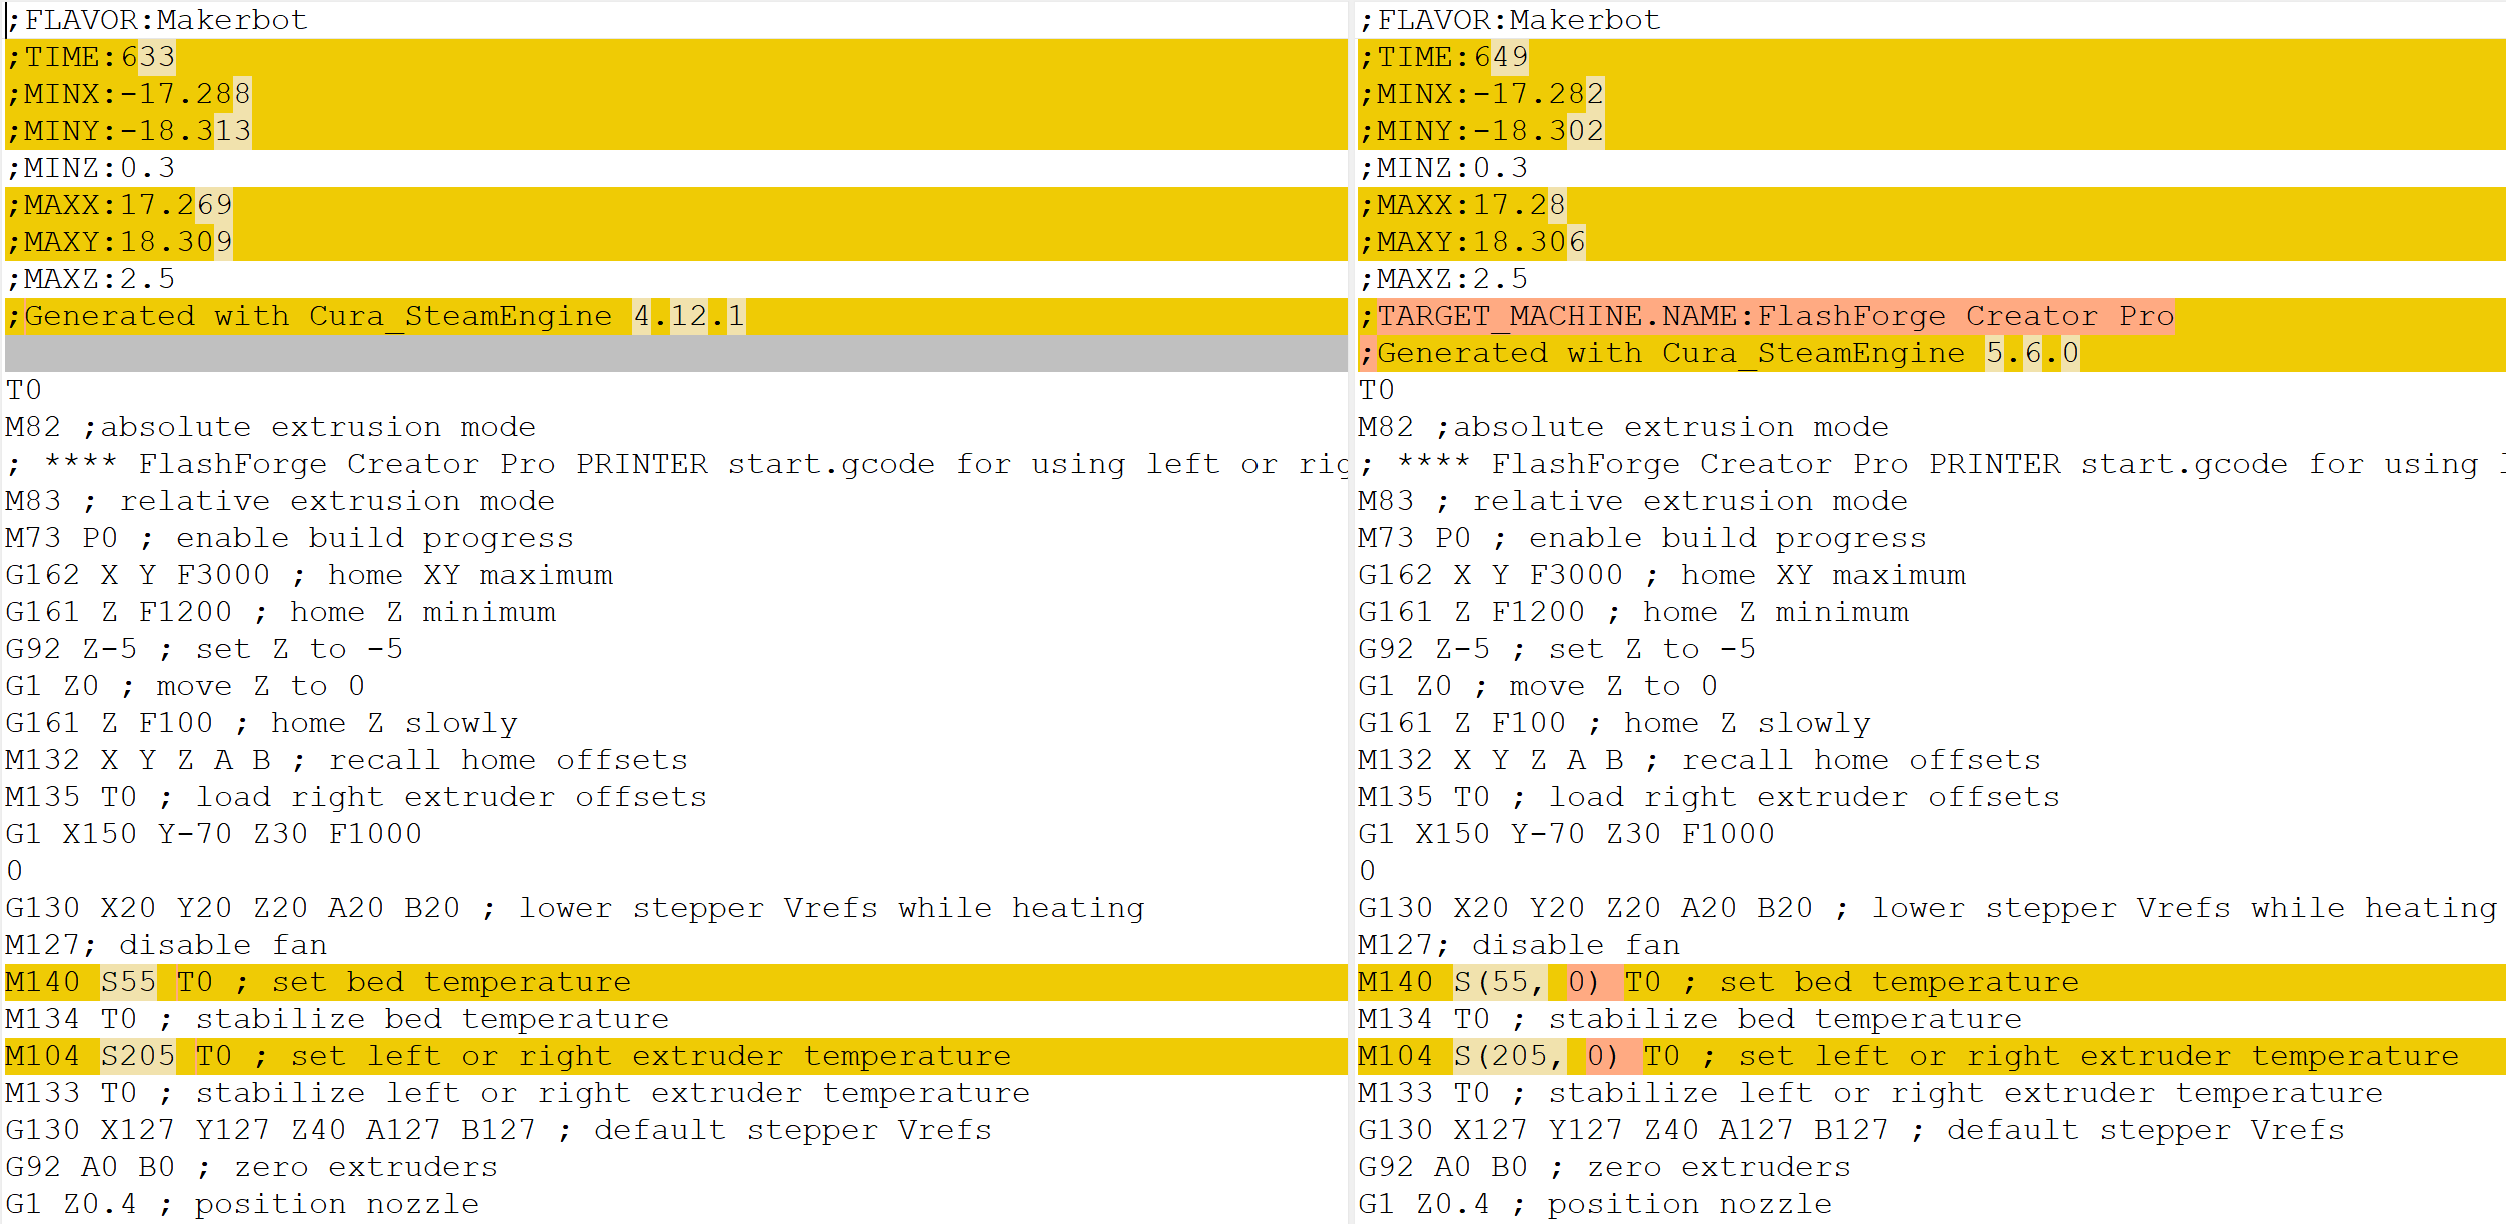
While the start gcode is identical between 4.12 and 5.6, it seems to be written differently in the output file.

Cura 4.12 output gcode file:

M140 S55 T0 ; set bed temperature
M134 T0 ; stabilize bed temperature
M104 S205 T0 ; set left or right extruder temperature
M133 T0 ; stabilize left or right extruder temperature

Cura 5.6 output gcode file:

M140 S(55, 0) T0 ; set bed temperature
M134 T0 ; stabilize bed temperature
M104 S(205, 0) T0 ; set left or right extruder temperature
M133 T0 ; stabilize left or right extruder temperature

I think I've identified the problem, but don't fully understand the reason. Cura 5.6 seems to copy both the temperature and initial_extruder_nr values, and places them in parentheses.

Could this discrepancy be the cause of the bed and extruders not heating?

What is initial_extruder_nr, and what does it do?

According to the fieldofview Replacement Patterns site, it is "the first extruder train used for the print". This doesn't sound like it is related to bed temperature.

Can I delete them from the temperature lines in the start gcode, or could this cause other issues?

Thanks in advance!

Edit: Whoops, this is embarrassing.

I just realized that sawecw commented two months ago on my original post and came to similar conclusions. I'll try Cura 5.7.

Edit 2:

I have upgraded to Cura 5.7, and can confirm that this bug has been fixed.

496


Check your calendar

497
498


With 3D printers like the Open-5x or tool changers (e.g. Prusa XL) both, 5-axis simultaneous 3D-printing as well as hybrid manufacturing (additive followed up by subtractive), is more accessible than they ever were.

For those already venturing into this endeavor: What is your toolchain/software?

Currently, I finish the additive/3D print before running a second gcode for the subtractive part (contact surfaces, threads, ...). This is far from an efficient and powerful process.

499


I think it's finally time for a dryer box. Want something I can run filament out of directly to the printer. Right now considering space pi vs. Esun vs. Eibos. Ideally something I could run for just a little while before a print and during the print. Low noise also important. A decible chart for dryers would be nice if that exists. Any favorites or good ones I am not considering?

500


On my ender 3 I have to turn the knobs on the bottom for leveling.

I just picked up a Bambu Lab P1S and it doesn't.

Fundamentally, what is different that allows the P1S and other printers to get away without it?

view more: ‹ prev next ›