3DPrinting

16521 readers
247 users here now

3DPrinting is a place where makers of all skill levels and walks of life can learn about and discuss 3D printing and development of 3D printed parts and devices.

The r/functionalprint community is now located at: or [email protected]

There are CAD communities available at: [email protected] or [email protected]

Rules

If you need an easy way to host pictures, https://catbox.moe may be an option. Be ethical about what you post and donate if you are able or use this a lot. It is just an individual hosting content, not a company. The image embedding syntax for Lemmy is ![](URL)

Moderation policy: Light, mostly invisible

founded 2 years ago
MODERATORS
626


This is super neat.

627


I am looking to purchase a 3D printer as a hobbyist, not for any commercial use. I have limited options with local 3D printers but that's good as they're mostly cheaper low end printers so I can look at them thoroughly.

When I'm comparing the different 3D printers I'm mainly looking at the following: Cost, nozzle diameter, layer height, volume, and viable filaments.

My question is, is there anything else I'm missing? Are there important things I should be considering or avoiding?

Different printers have different resolutions but for my purposes it looks like they're all highly accurate and way past what I need. Not worried about speed either. They all mention bed and nozzle temperatures but I assume they are all within the necessary range for the filaments they allow right? So does it matter?

Also, any advice for maintenance? How to make it last as long as possible any mistakes I should be wary of. Thanks.

628
9
submitted 1 year ago* (last edited 1 year ago) by cosmicrookie to c/3dprinting


My prints get very good adhesion to the bed, especially when doing prints with large adhesion areas. So good, that after the print is done, I actually have to wet the surface with alcohol and put it in the freezer for it to let go! (edit: I print with PLA)

My question is, if the adhesion could be a bit less violent, if I lower or increase the bed temperature? I have an ender 3 v2 with the original glass bed (it has some black layer on top of the glass).

I know that there are tons of alternative beds that I could buy, but I'd rather keep this bed if I can counter the too strong adhesion

629


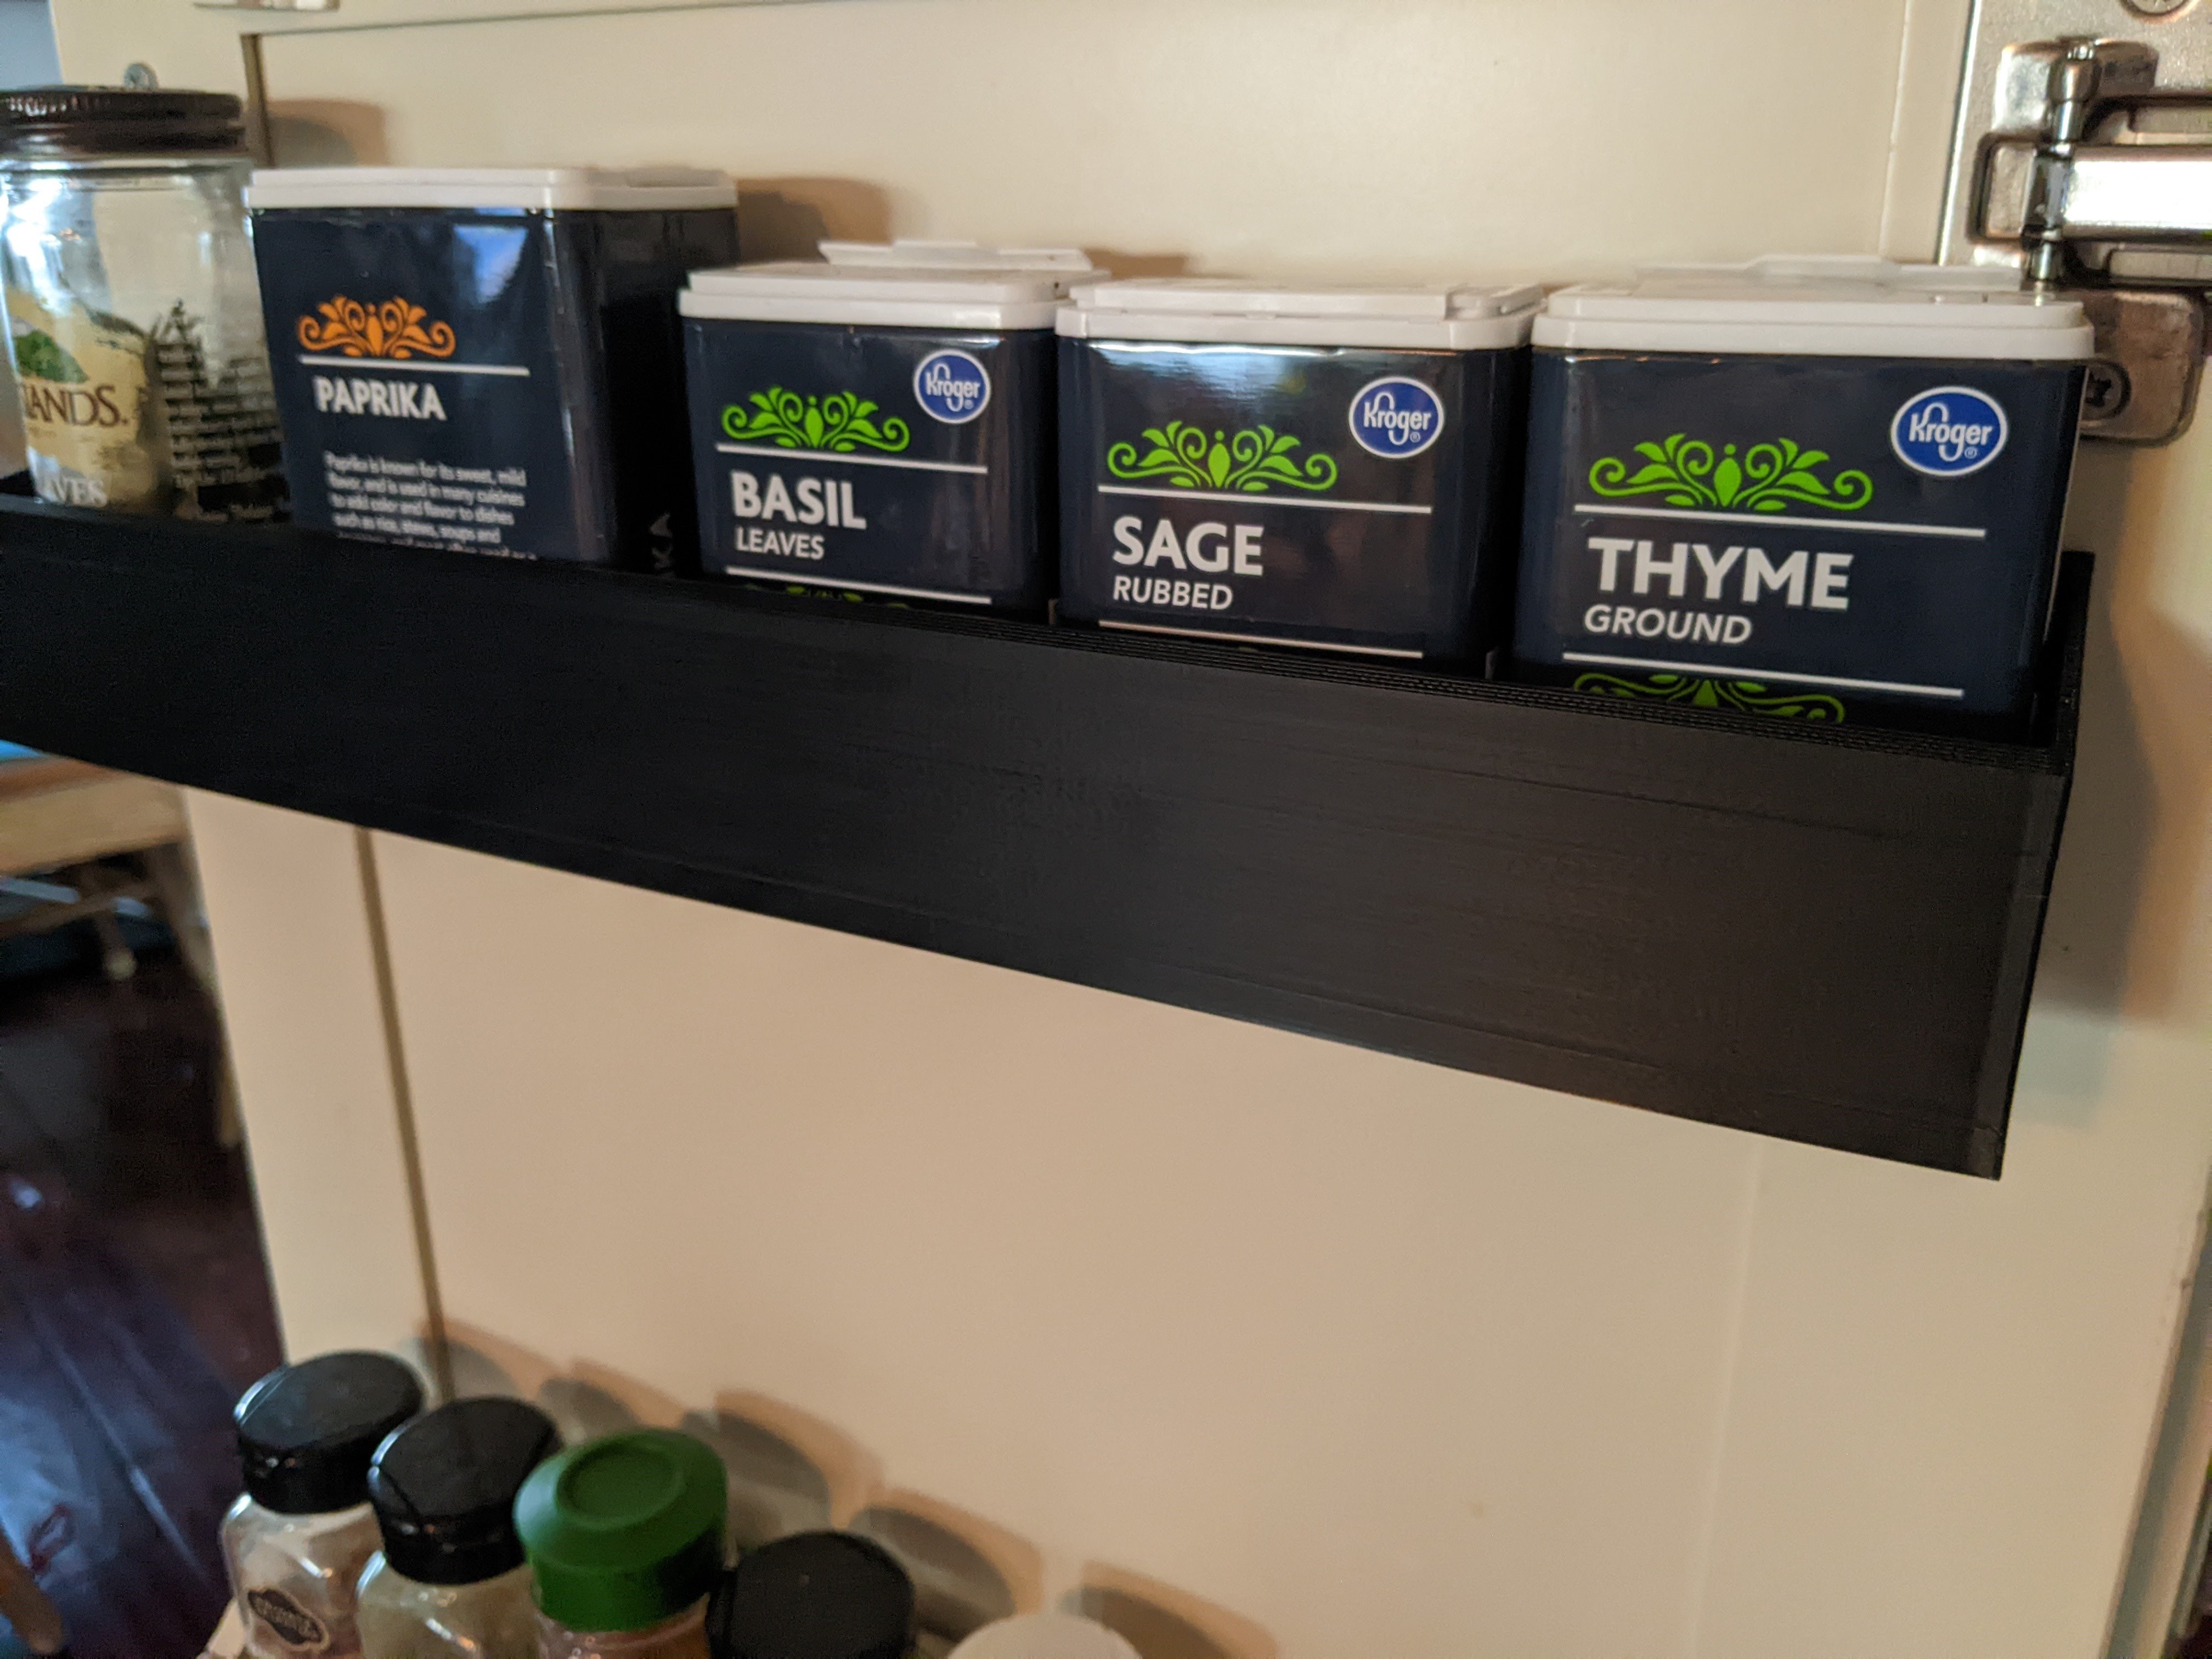
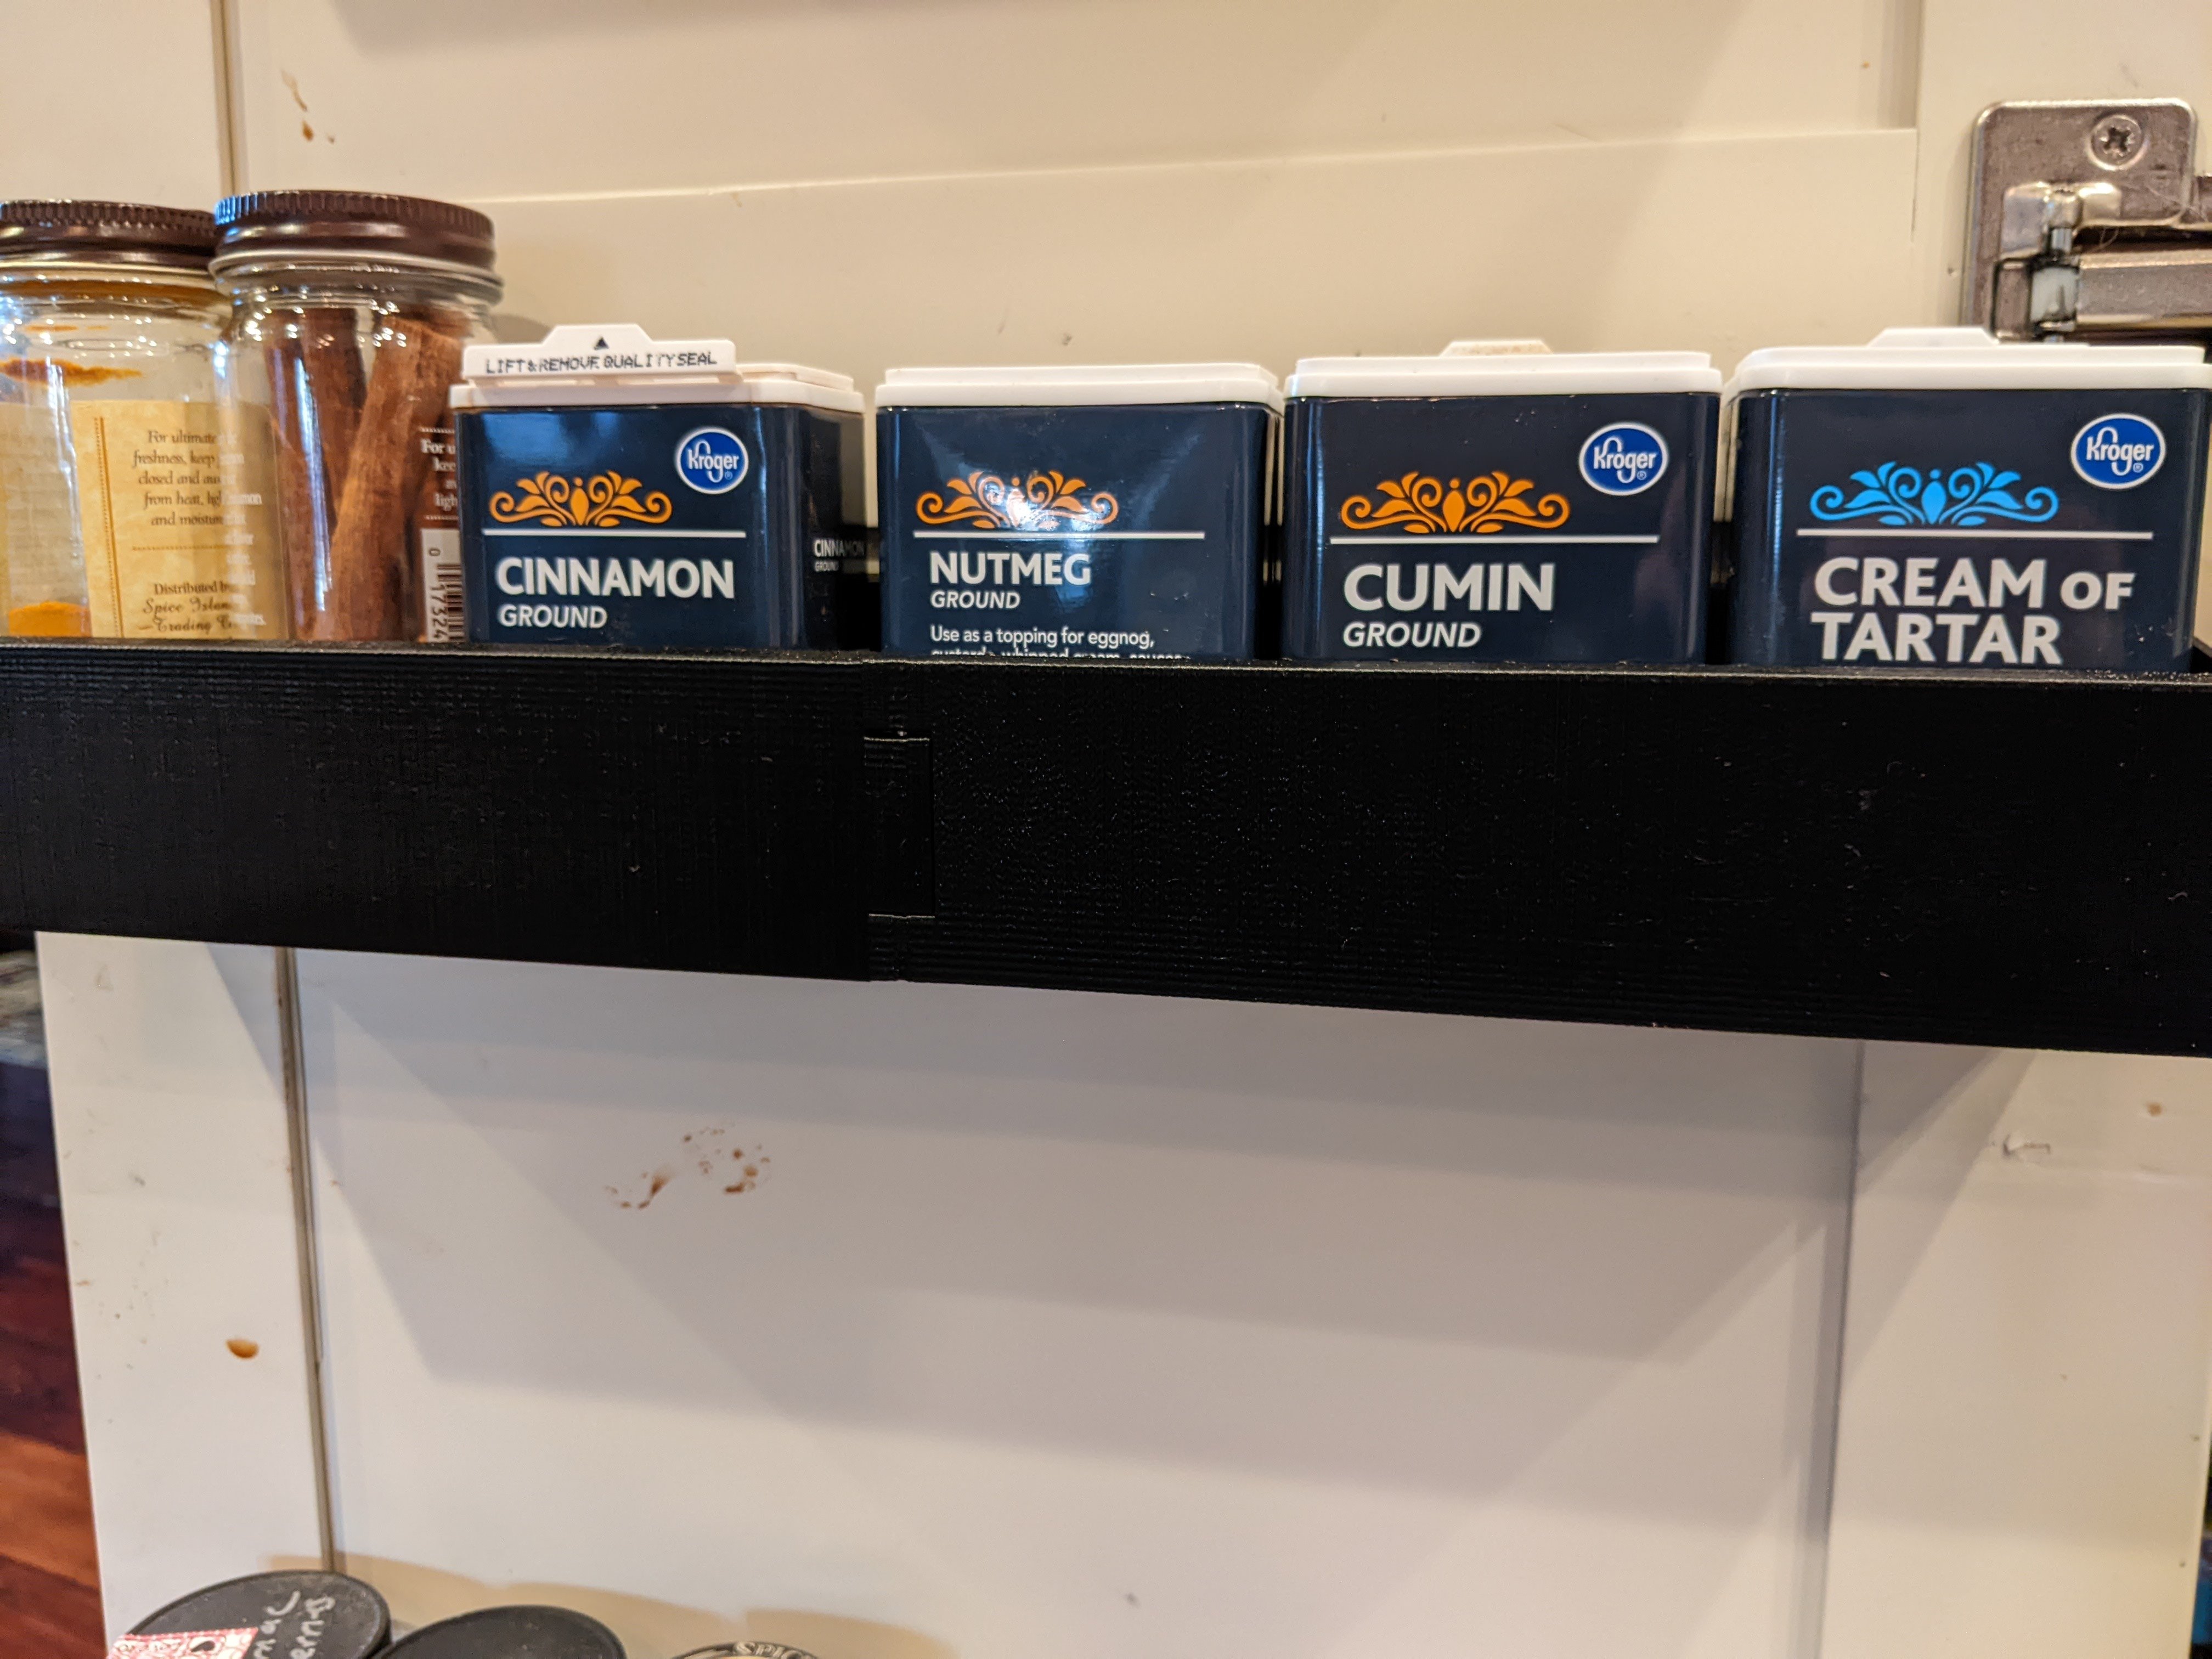
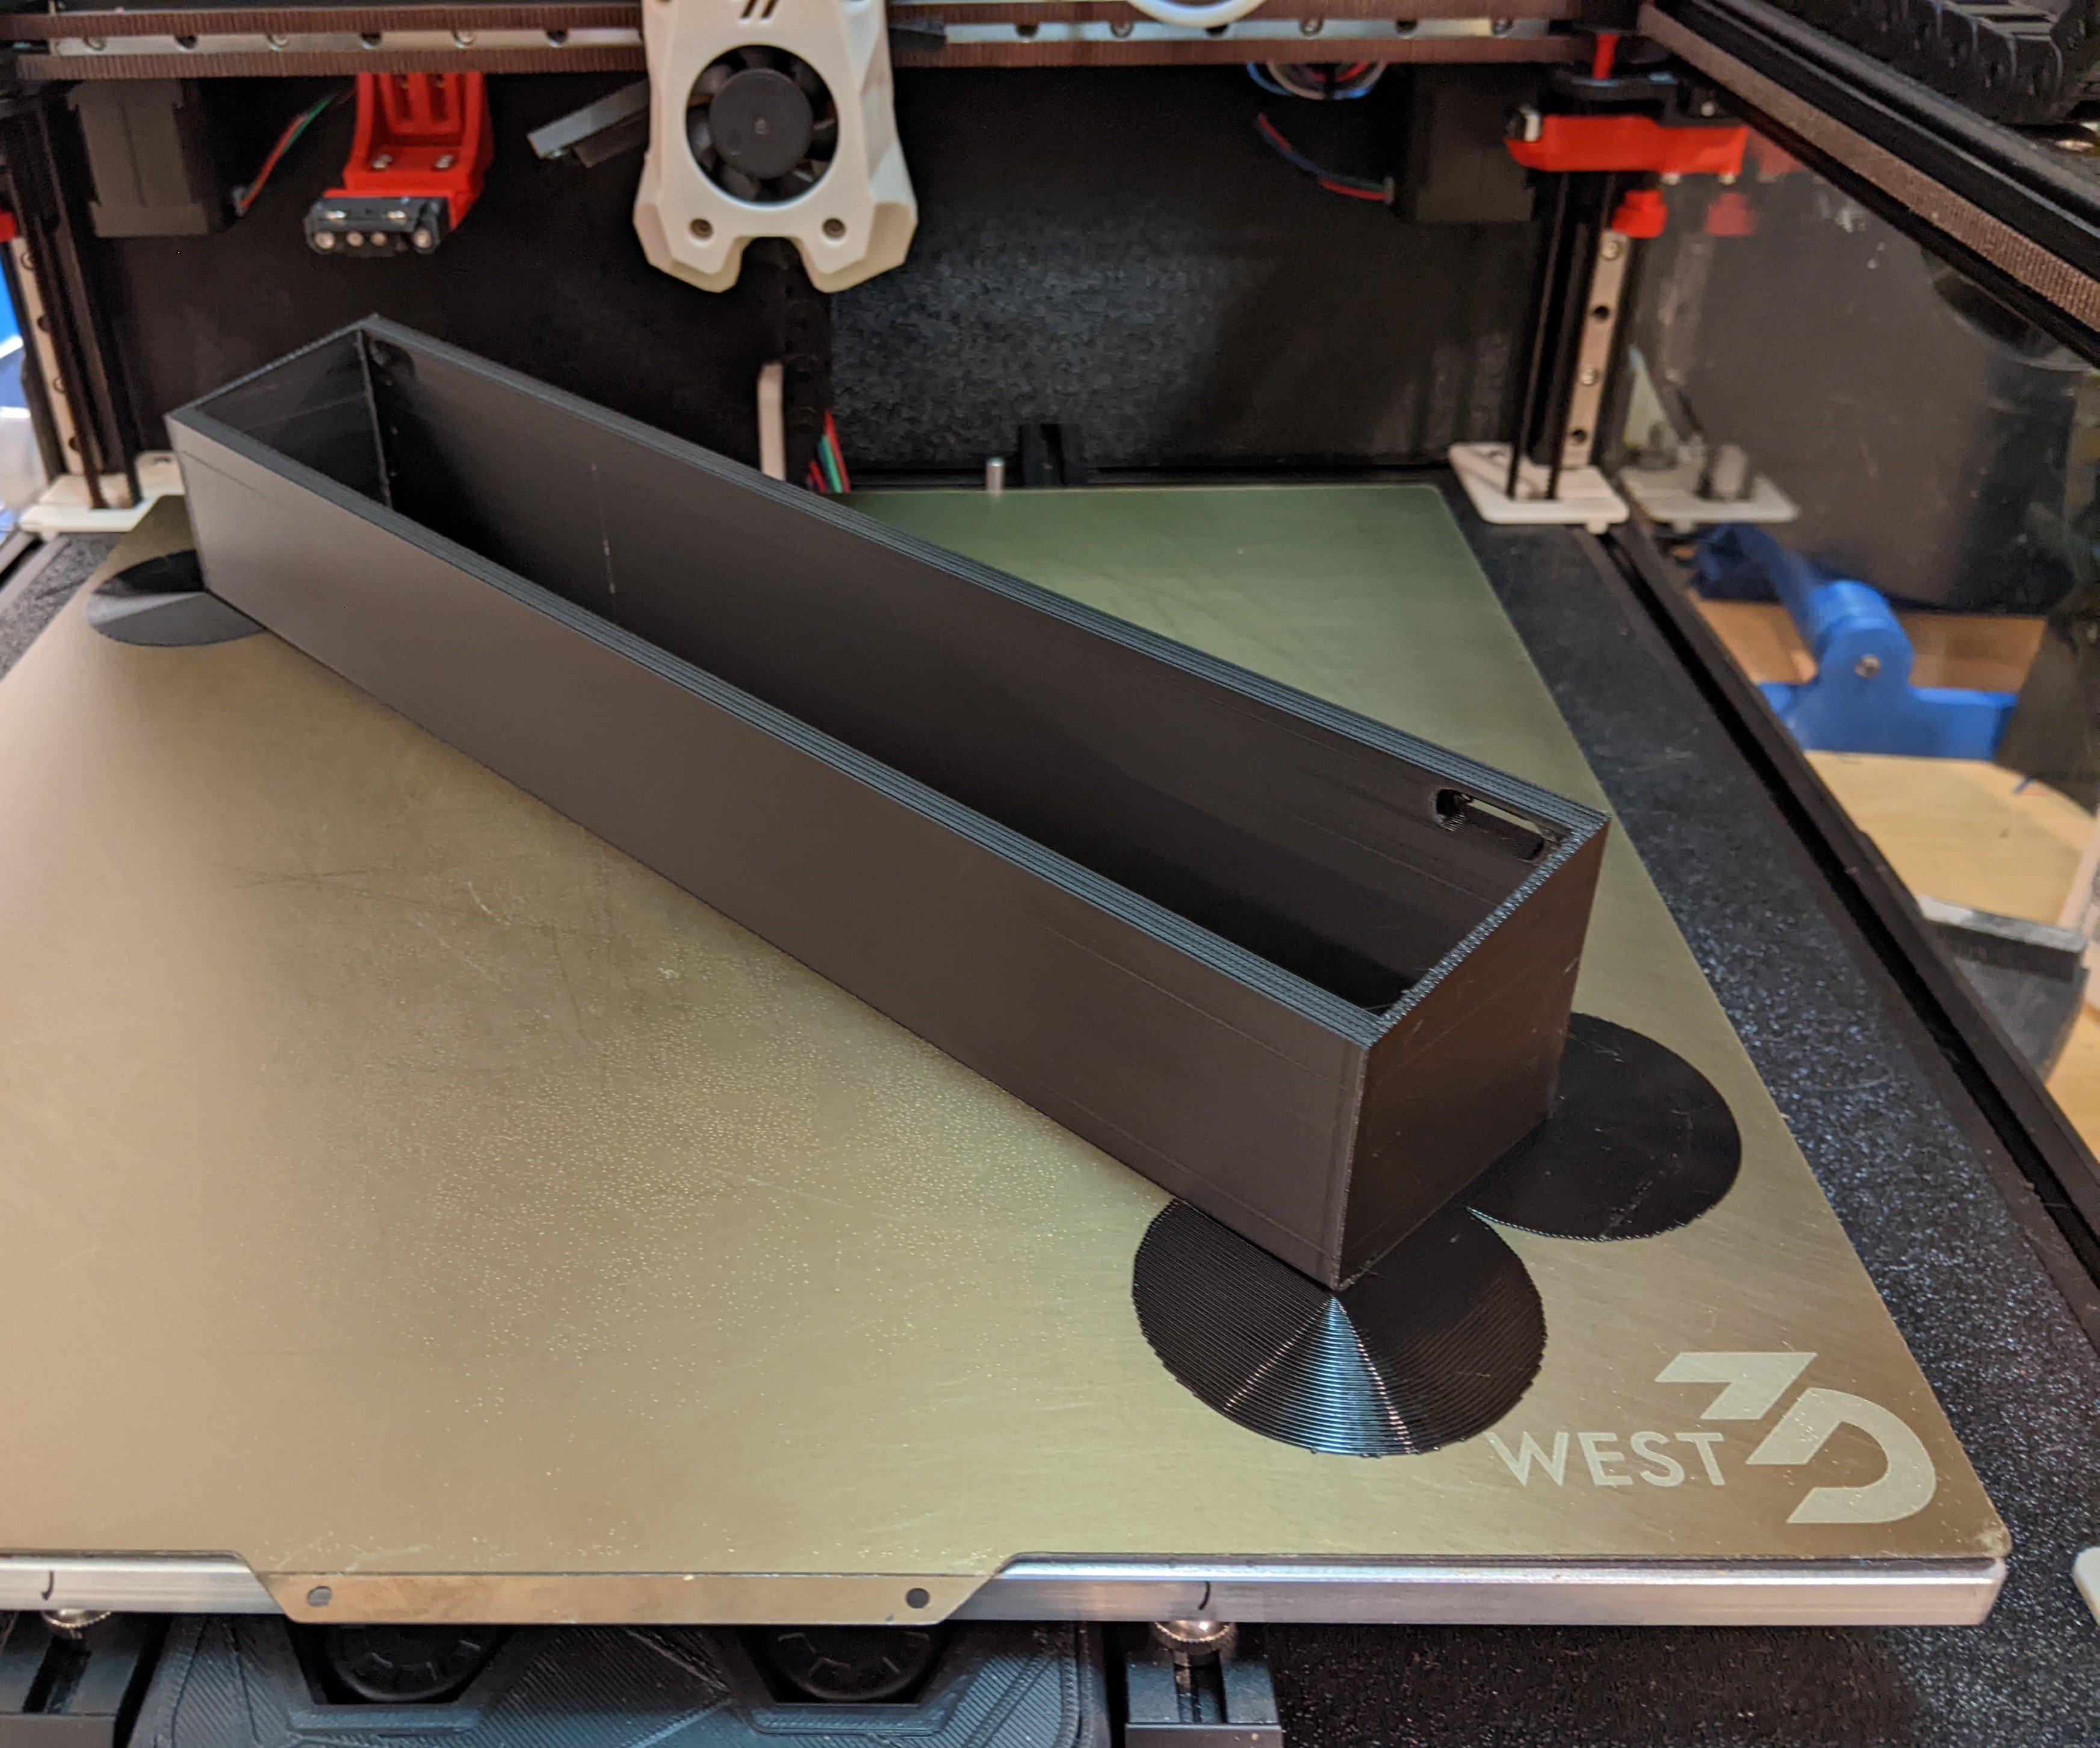
The part is a 345mm x 60mm spice rack that mounts to the inside of our pantry door.

About 7 years ago, I made four spice racks out of wood and painted them to match our cabinet door. Wear and tear (and kids) have resulted in them getting glued back together multiple times. I finally gave up, modeled the design, and have been printing replacements in PETG as they fail. So far they've been holding up a lot better. They're also a touch deeper than my original wood design, so they can fit the round spice island containers more easily.

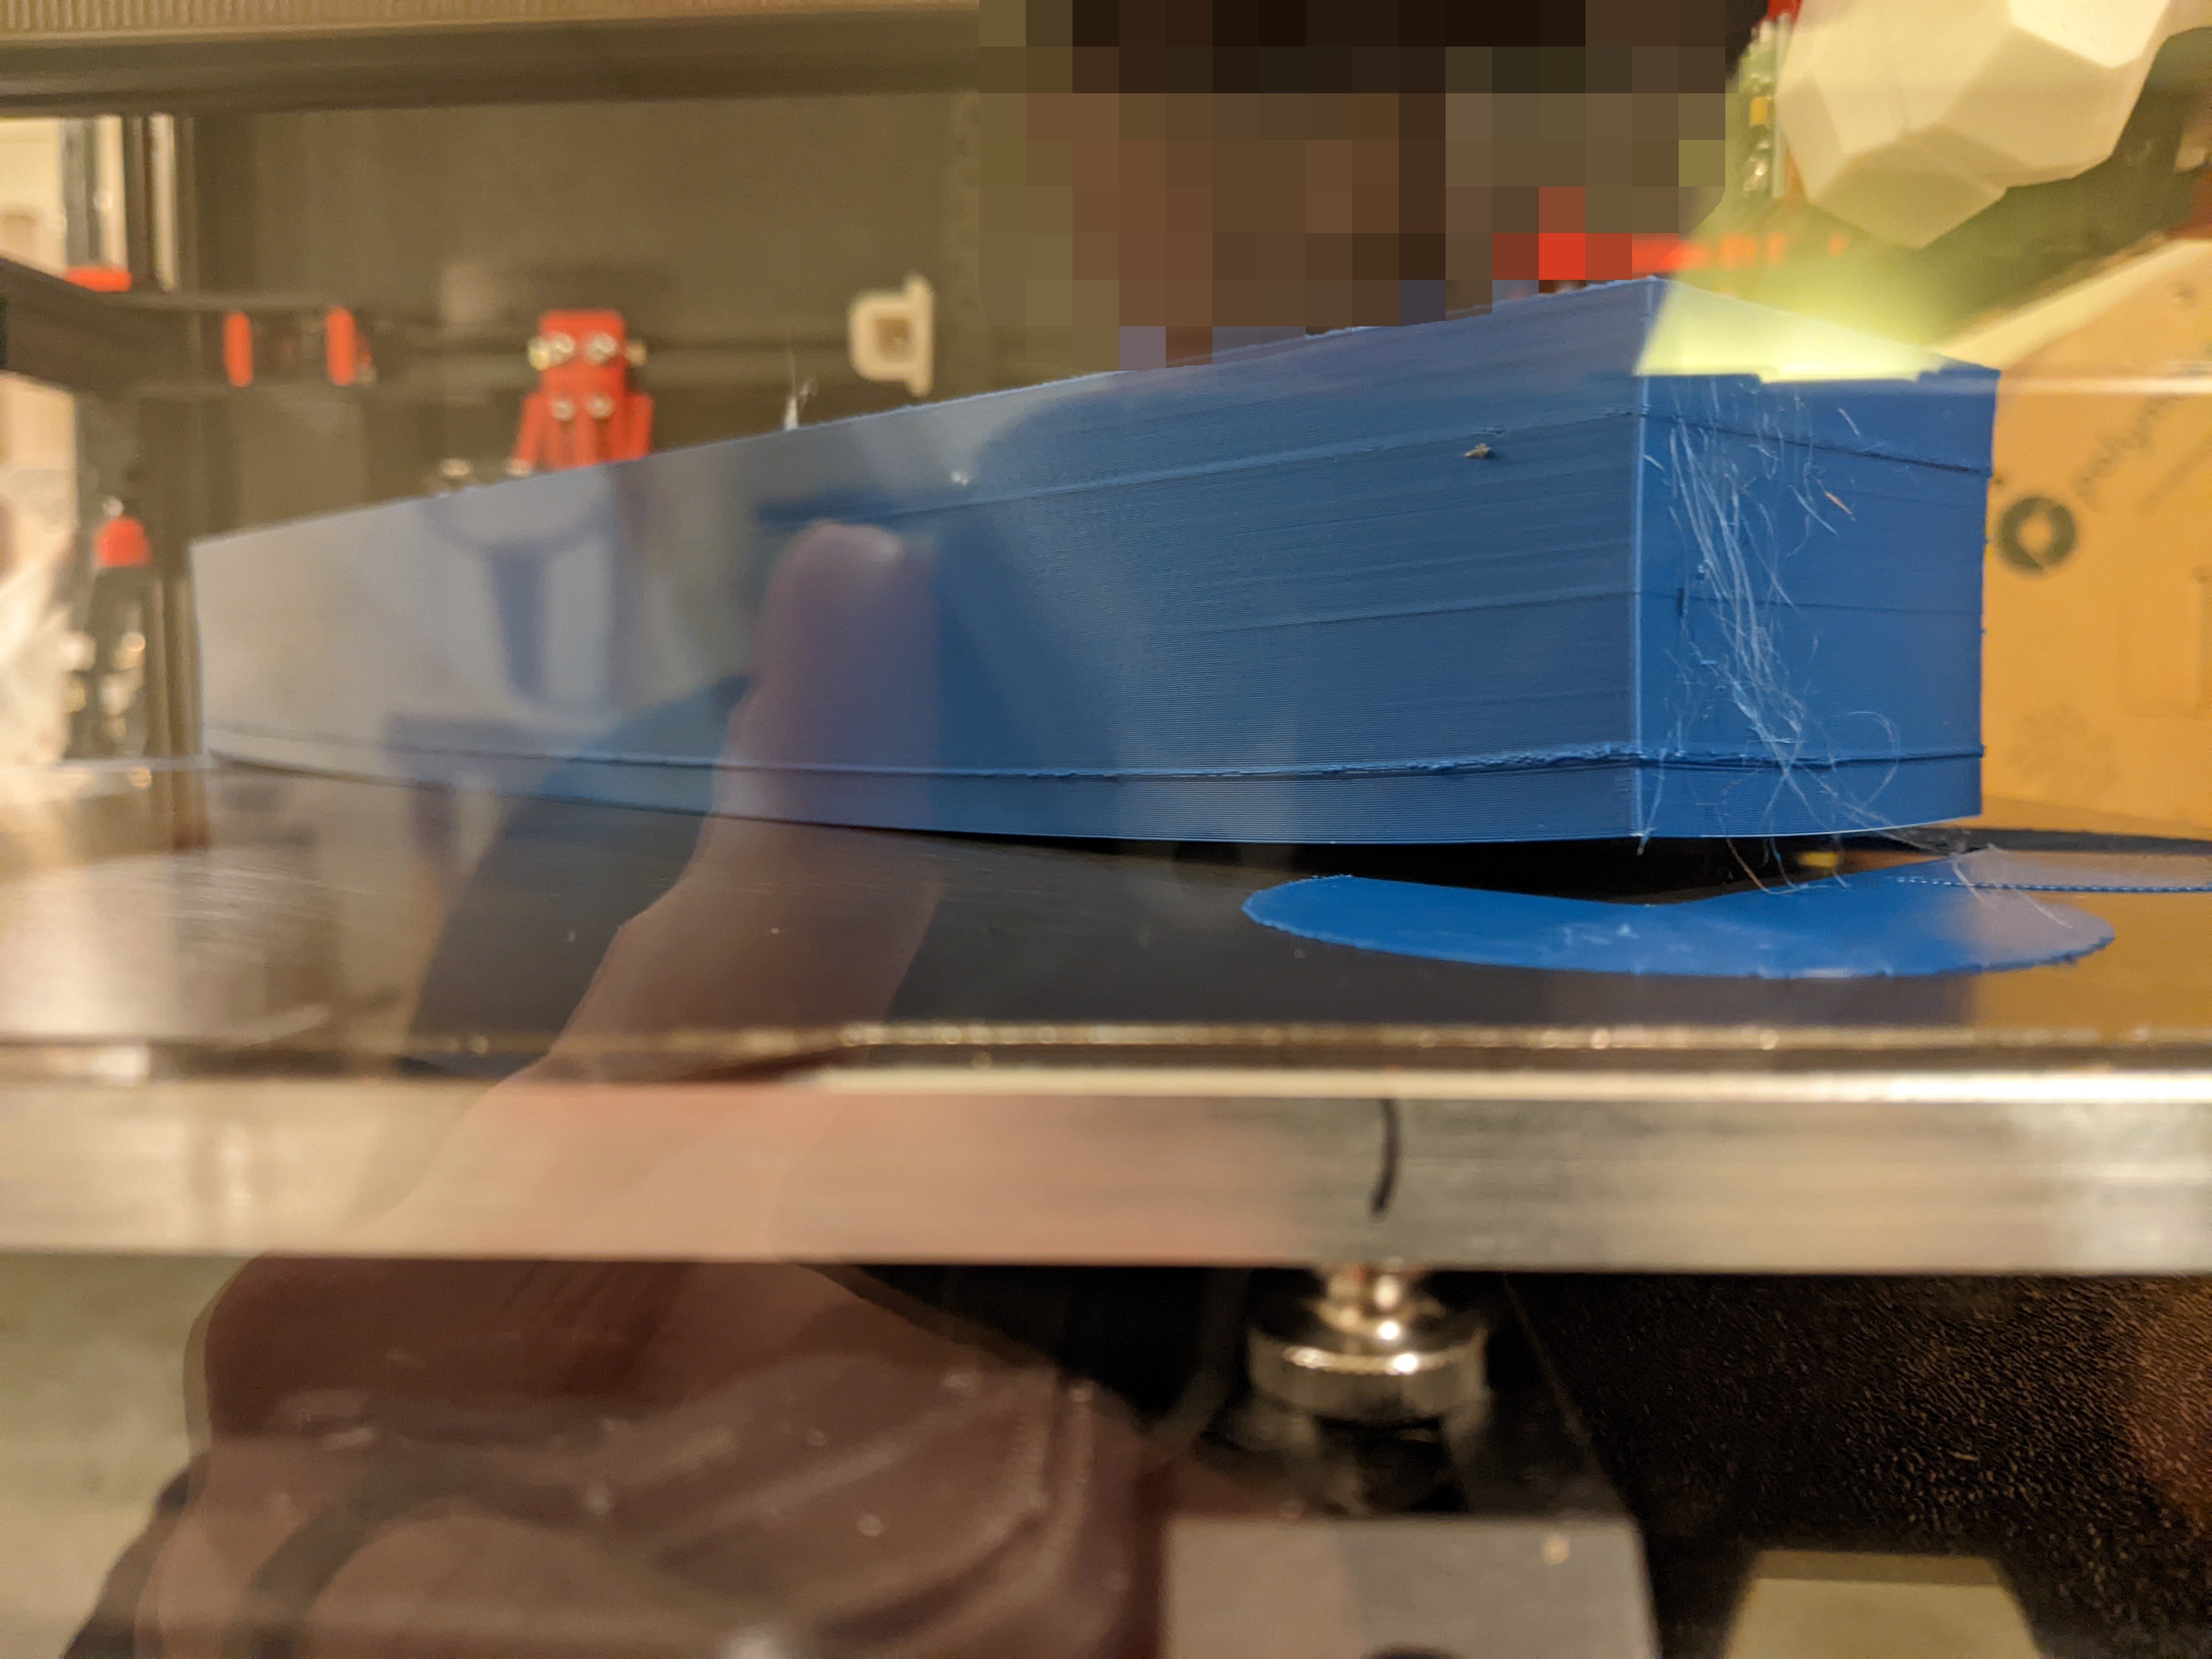
In the past, I had to print these in two halves on my i3 clone (a Monoprice Maker Select Plus, which is a rebadged Wanhao Duplicator i3 Plus). Now that I have a printer with a 350 mm^2 bed, I thought I would see if I could print the rack in one piece. My single ASA attempt was an epic fail due to warping, but the PETG print went very smoothly with very minor lifting. I've read others say PETG does not like enclosures, but I've printed a number of PETG parts with my Voron fully enclosed and they've come out very well. I struggled with PETG warping on larger parts with my unenclosed i3 clone.

Here are a few photos comparing a rack I printed on my i3 clone to this one. The print quality is quite a bit better, but now that I have a higher ceiling to shoot for I'm realizing I have a further to go on my tuning journey. I will say that I never noticed things like the Slic3r buldge, that's also present in Super Slicer, until now.

I personally find it helpful to see other's prints under unflattering lighting, so with that said...

Somewhat flattering lighting (eg ambient)

Voron:

i3 clone:

Direct light, provided via a flashlight, perpendicular to the surface

Voron:

I3 clone:

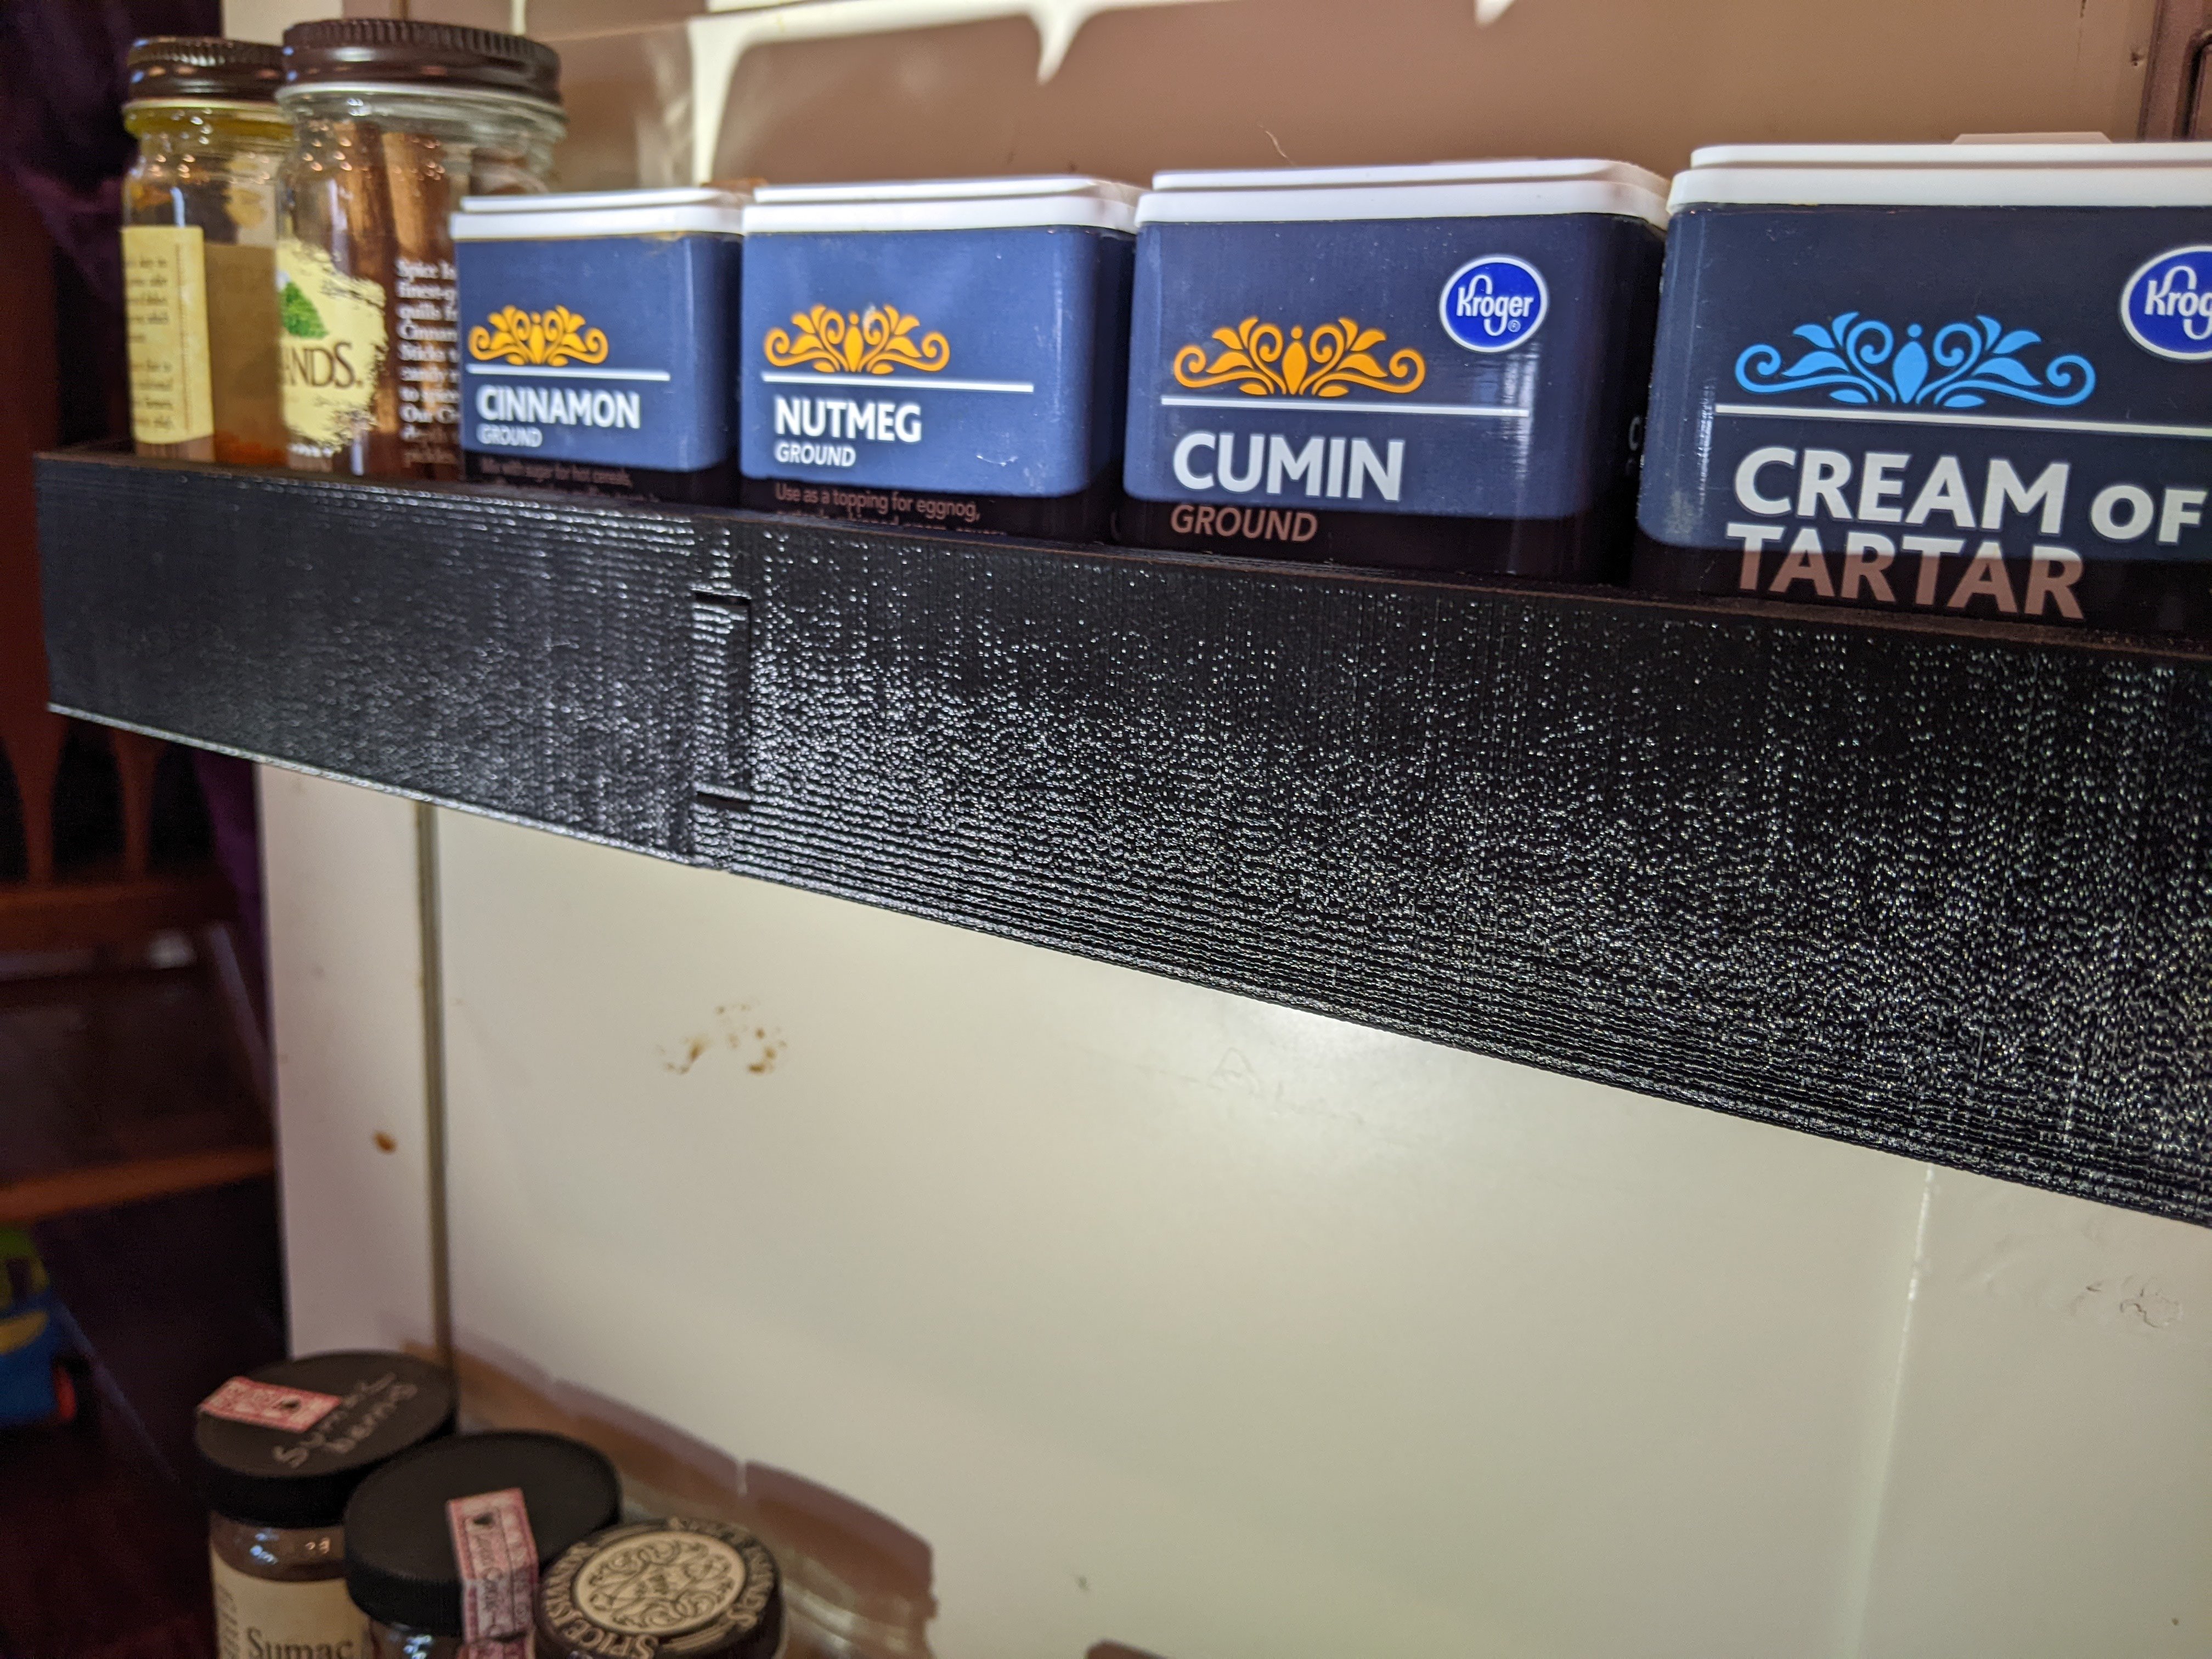
direct light, provided via a flashlight, nearly parallel with the surface

Voron:

i3 clone:

Bonus photo of my ASA attempt

Sadly, I forgot to change my print temp back from 250 to 240, so there's quite a bit of wispy stringing. I suspect the print would have separated from the bed anyway. Any pointers here would be appreciated. The bed was clean (soap + water), was at 100, I let the printer heat soak for about 45 minutes with the filter going full tilt, first layer squish was solid good, smooth PEI (the textured side seems to have prints come loose more easily).

630


So to start, I know pretty little about 3d printing, which is why I came here. I have seen the machines work, know that you need a file, there's different materials, not much else. I'm not really looking to get into this as a hobby as I don't really have the time, and certainly don't have the money (maybe later if things change). I just have this one thing (at the moment anyway) that I would like printed, but I have a couple of questions to see if I even want to proceed or not. I just plan on getting some local company to make it for me.

So here is what I'd like to make: https://sketchfab.com/3d-models/elegant-lightsaber-hilt-19b183269b5d4577a44f3152b15df9a5

It comes in an obj file which unless I'm mistaken should be enough for me to have. If not, I know about online file converters to make it slt.

This is intended to be a hand-held prop, not just a display model. So my first question is, is that even feasible? I don't know how strong things like this are. I'm not going to be hitting anything with it, but a little bit of waving around I think would be in order.

Assuming that's ok, what material should I use? Not entirely sure I even get a choice but I think so?

Another question I have is about painting. I've seen painting guides online, but one question I have I didn't find an answer to is again, about it being hand-held. I don't want to use a paint that will come off or smudge with sweaty palms. Are any kinds better for that than others? Are any?

And how close could I likely make it look like in the link? It doesn't have to be exact, but there's metallic parts, glassy parts, kinda gives a glowy impression... or is this going to be too hard for someone with no experience? (I've painted a couple of model kits when I was a kid.)

I realize that this may not all be feasible, but I thought I'd ask here first before asking people who will want my money. :p

631


#3dprinting @[email protected] @[email protected] does anyone have experience with the manta m8p motherboard and canbus? I'm pulling my hair out trying to work out what's going on with mine and could really use a little help

632
633
634


TP is essential.

635


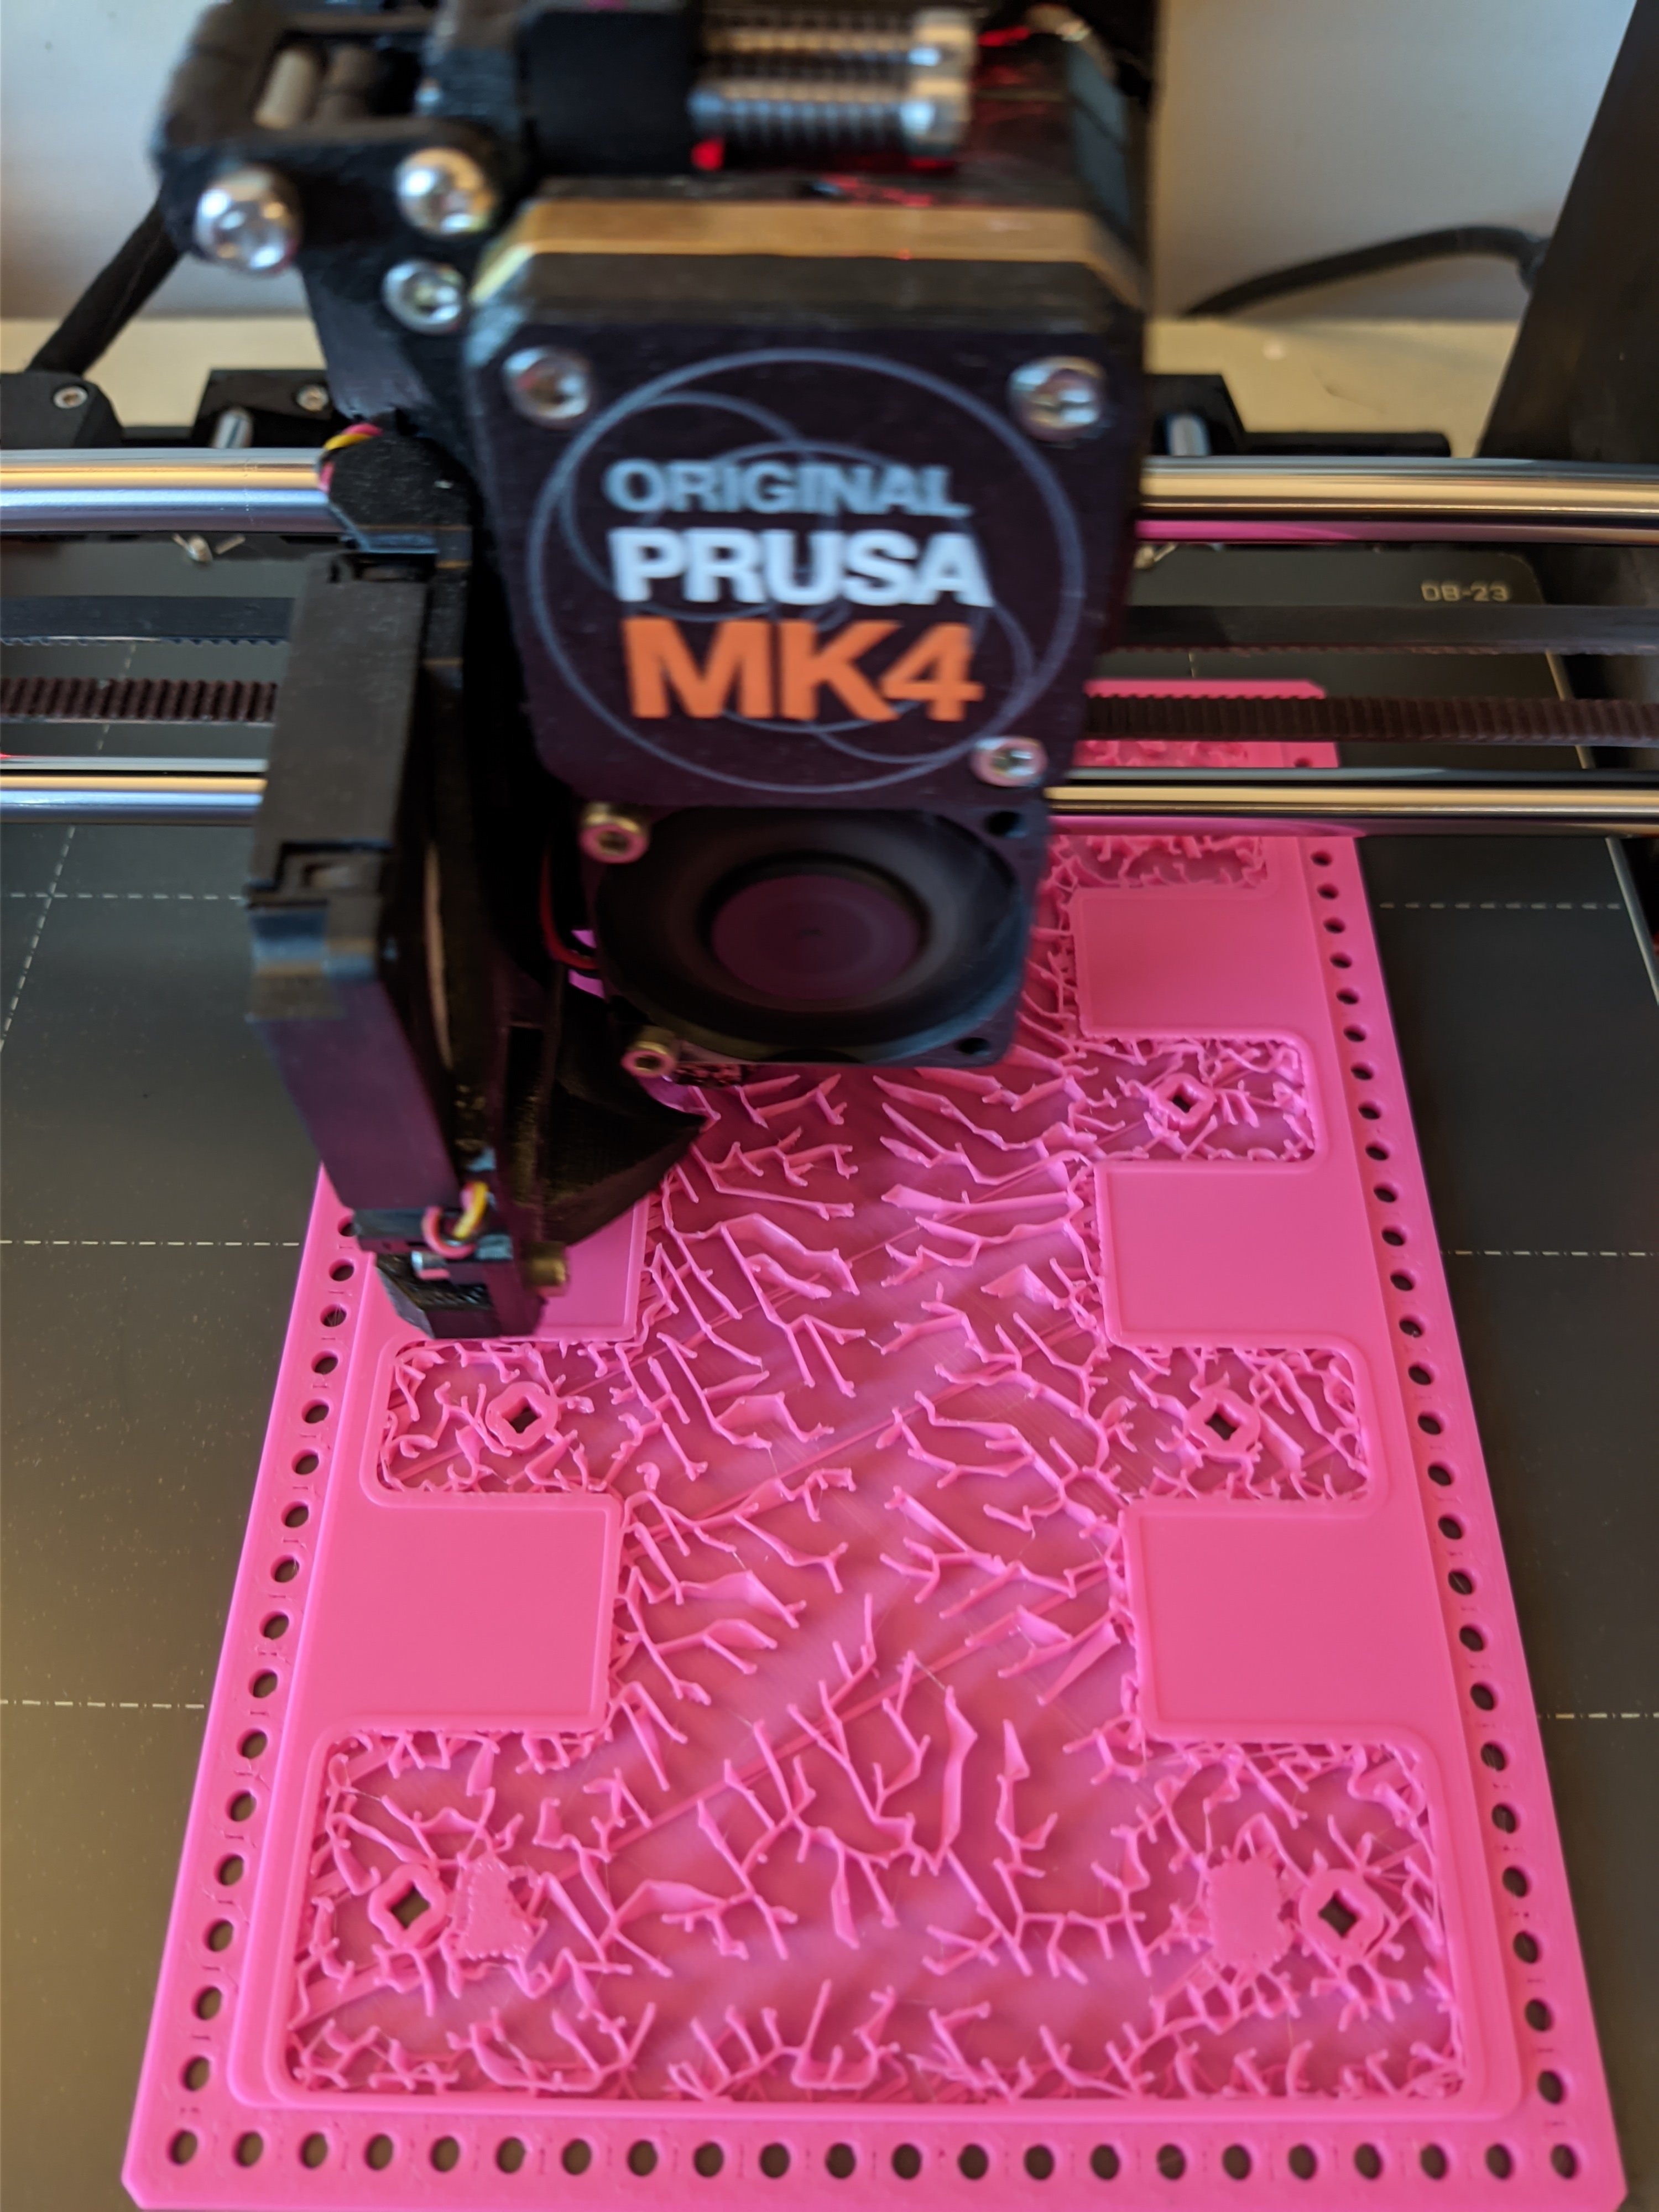
If you don't know what lightning infill is, it was made by Cura and was added to PrusaSclicer.

I chose to print with it since it showed up as a tool tip. Hoping has the same infill strength as Gyroid as it's suppose to use less filament (estimates is around 5 grams for this part). It was suppose to also save time, but it instead added 10 min.

636


Apart from blow up printers, the one scariest thing for me about a slicer is losing settings. You spend hours getting your printer dialed in, specific profiles per material and then..

You update your slicer software and it all goes away. I have now learned Cura does this. And does this a lot. Forum posts abound about it. Friends recommend I switch to Prusa because it happened to them. Unfortunately too late for me to write down my old settings, and they're apparently not in the ~/.config/cura folder anymore. Nice.

637
118
4hr 40m Benchy! (lemmy.world)
submitted 1 year ago* (last edited 1 year ago) by 4lan to c/3dprinting


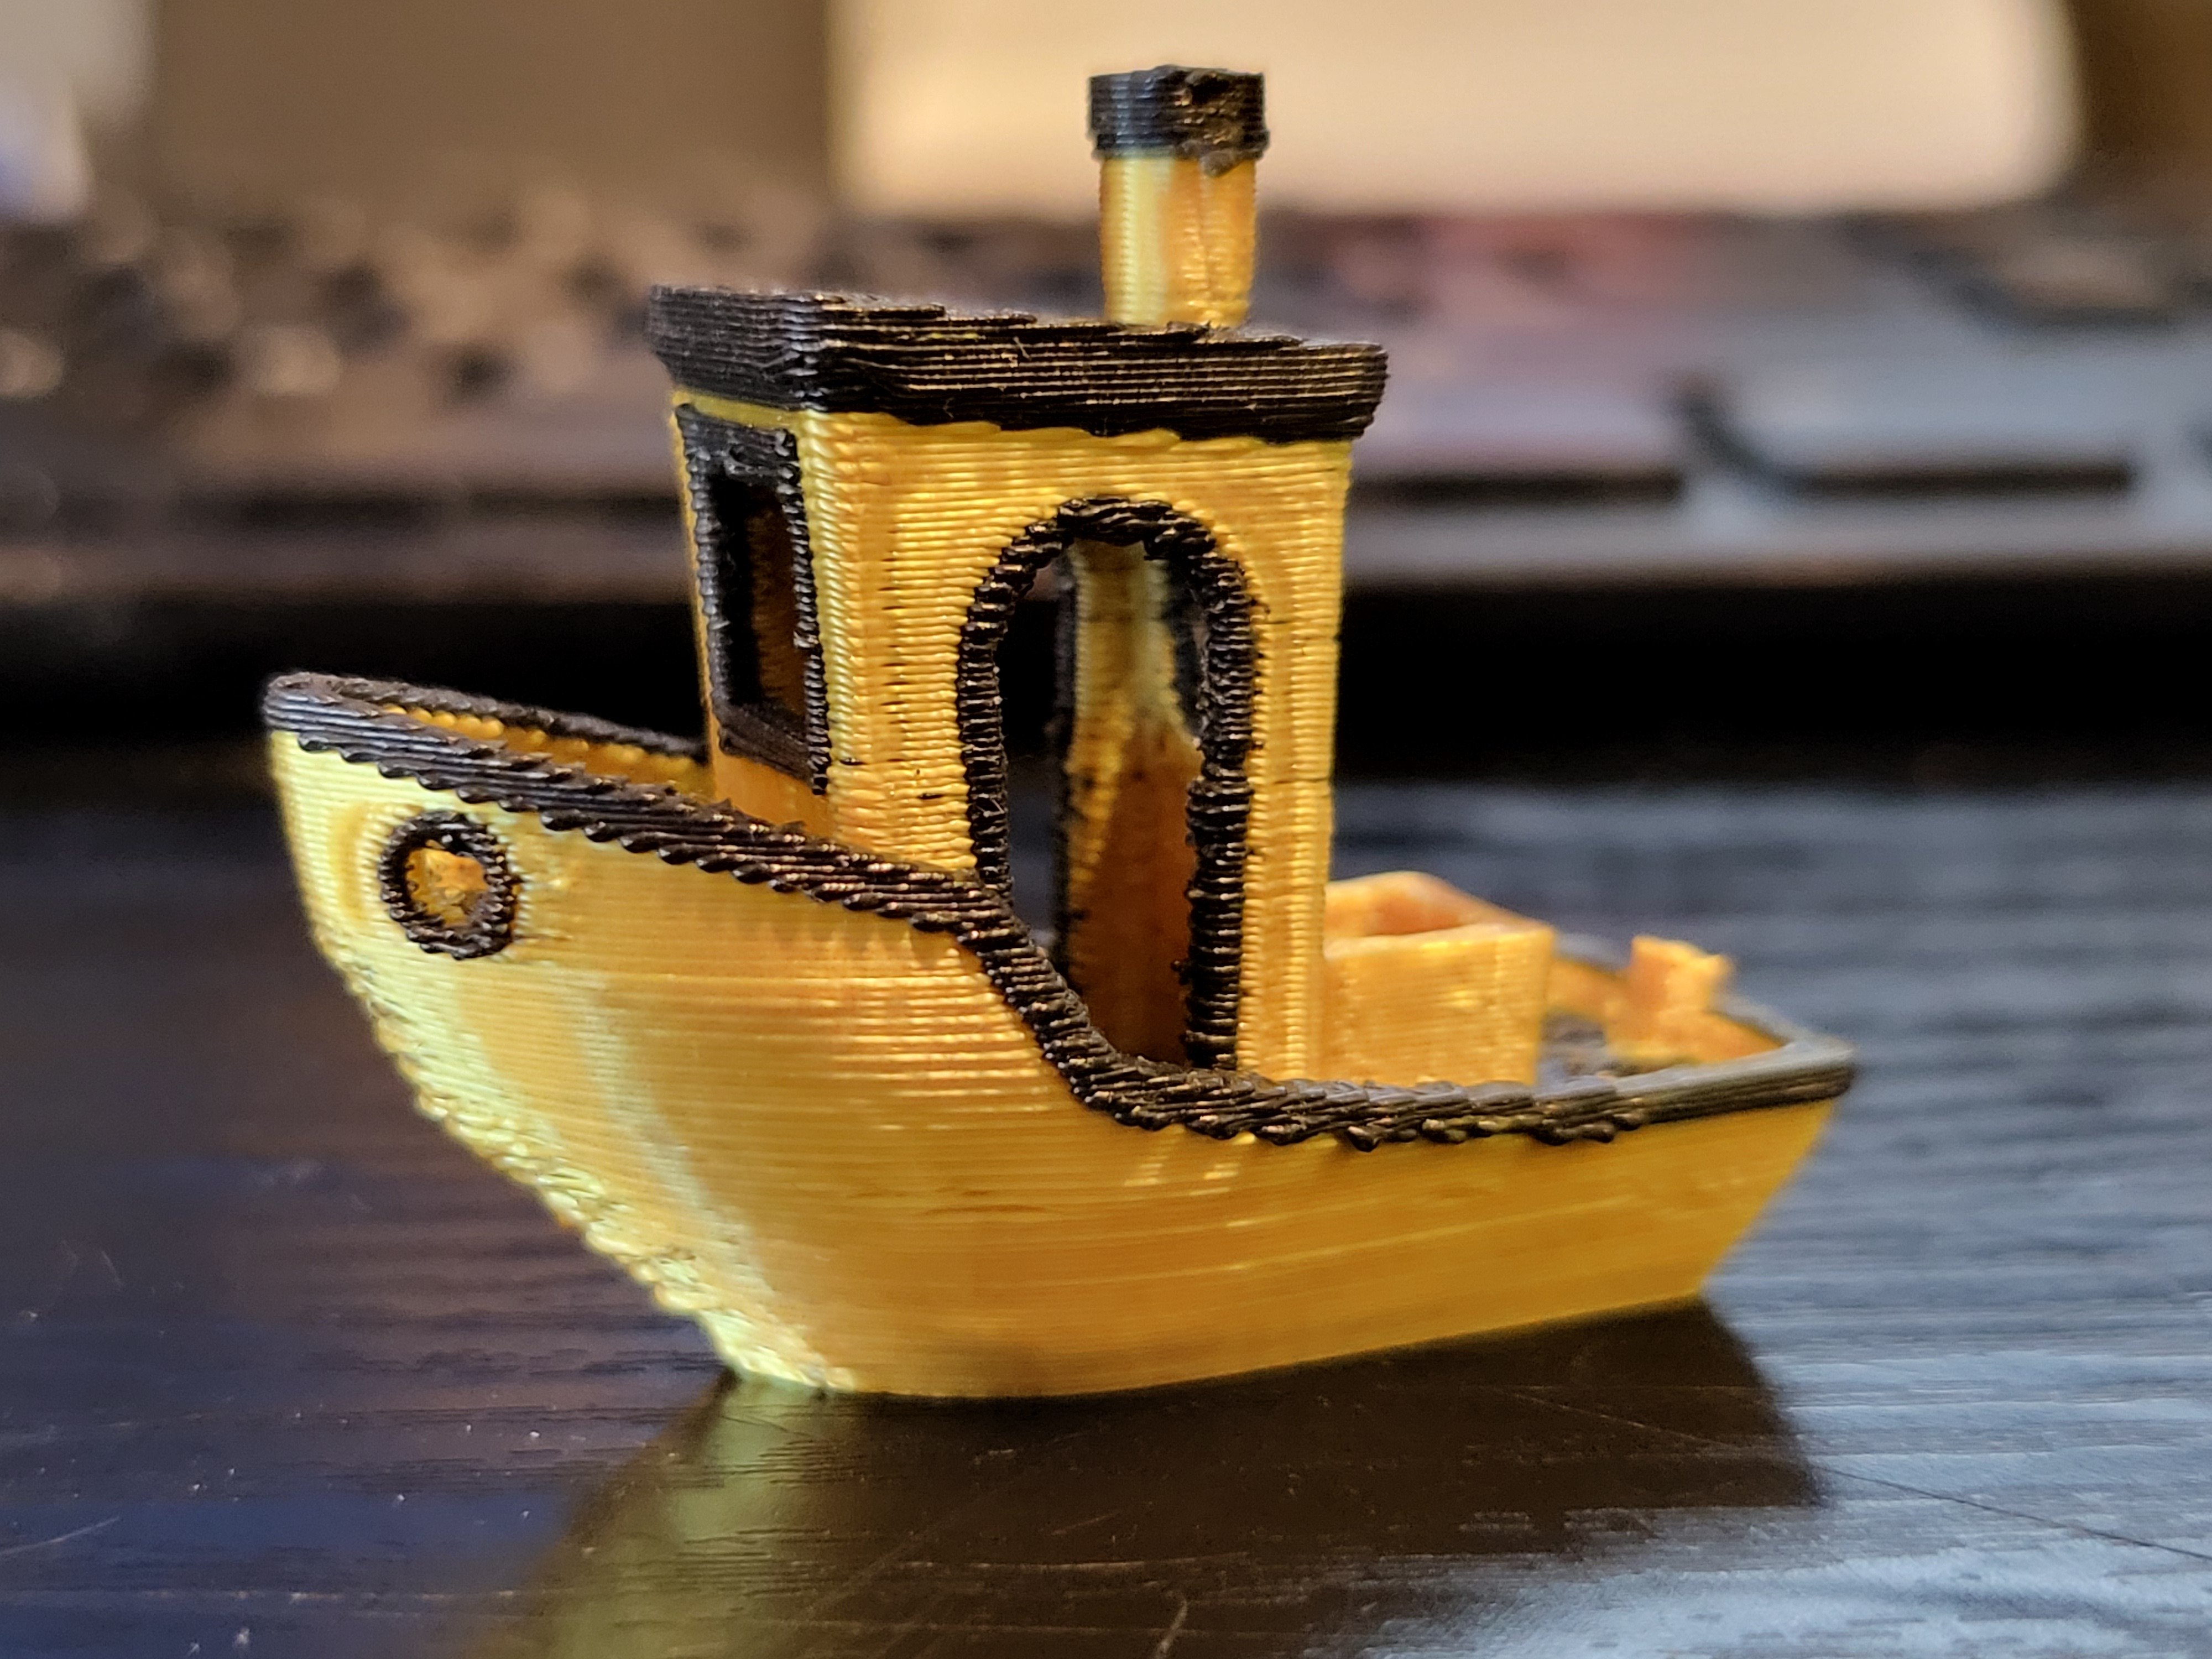
I finally got multi-color working on my Creality K1 Max using the 3D Chameleon.

Decided to make a 2 color benchy and scaled it down to 75% to save time, along with 0.25mm layer height.

So far the Chameleon has been pretty picky with filament, but when it works it works well! This print is with silk gold and matte black. I have even gotten 95A TPU to print with it surprisingly!

I modified the color-change code so it takes 1 minute less, which makes a big difference when you have hundreds of color changes.

Next up, 4 color benchy. Probably will be 10 hrs lol

638
 
 
639
16
submitted 1 year ago* (last edited 1 year ago) by yokonzo to c/3dprinting


So I've been on an ABS kick, I've upgraded the crap out of my ender 5 just for this purpose, better hotend, better build plate and heaters, full enclosure, the works. I've had the worst luck with every single print warping no matter what. That is until I learned about ABS juice, suddenly my prints were gasp Sticking to the plate. I know, amazing. Soon as printing all sorts of little things, flat things, tall things, skinny things. But there's one thing I hadn't tried, big things. Not I decided to go for broke, and I don't exactly know what the difference may have been here, it might be that the ABS is about a year old even though I kept it inside of a cupboard it may have still absorbed some moisture or something

. But I get about halfway through this print, and I swear to God I was pretty sure that it was sticking to the build plate just fine when I hear some cracking. I look over and I see all these little lines starting to form, I'm about halfway through and there's no way I have enough ABS to print the rest of it so I figured just wait and see what it comes up with. Now I'm pretty sure I can make some ABS slurry to maybe fill in the cracks and make it usable enough for my girlfriend, it's just a book rest. But I would like to figure out what happened here and how to prevent it in the future.

Do any of you guys who have more experience with abs know what might have gone wrong?

Main variables for this print are ABS obviously, 15% infill, 110⁰C build plate, 250⁰c hotend, 240⁰c near the end to try and lower the temperature differential to try to prevent the layer splitting. Entire print speed was set to 60steps and 20 steps for infill with 110% flow rate.

Entire print was . 28mm layer height

640
 
 
641
17
submitted 1 year ago* (last edited 1 year ago) by [email protected] to c/3dprinting


I recently made the switch from the marlin-based stock firmware on my anycubic kobra 2, to klipper. I didn't have issues with bed levelling or first layer on the stock firmware, but I'm having significant issues running klipper. The bed is uneven, the probed mesh shows a deviation of 0.197mm, it was the same when running stock FW+octoprint.

But it seemed to be correcting just fine for this on the stock FW. I got a consistent decent first layer across the entire bed.

With klipper, it's absolutely impossible to get it to correct for this unevenness. Half the bed will get perfect first layer, but then the second half is either way too squished or hardly connecting to the bed. And it's causing further issues as it's also hitting the print when moving, despite having Z-hop of 0.3mm for travel moves.

What the hell is going on? How do I fix this?

642


My very first thing posted to Printables ever. And it's a thingamabob I designed explicitly for storing pocket knives. How on-brand...

Anyhow, this isn't exactly rocket surgery but I figure it may be useful to somebody other than me, so here it is. This hooks on to the perennially popular Honeycomb Wall and is long enough for most pocket knives (and also flashlights, pens, markers, various hand tools, glue sticks, or whatever other sundry articles you've got lying around) with little drop-in dividers that you can place with near-maniacal levels of adjustment granularity.

The secret sauce is the 10 degree angle built in, so the tray hangs downwards facing you a little bit, making it easier to see and get at what you put in there -- even if you stack a whole bunch of them on top of each other.

643


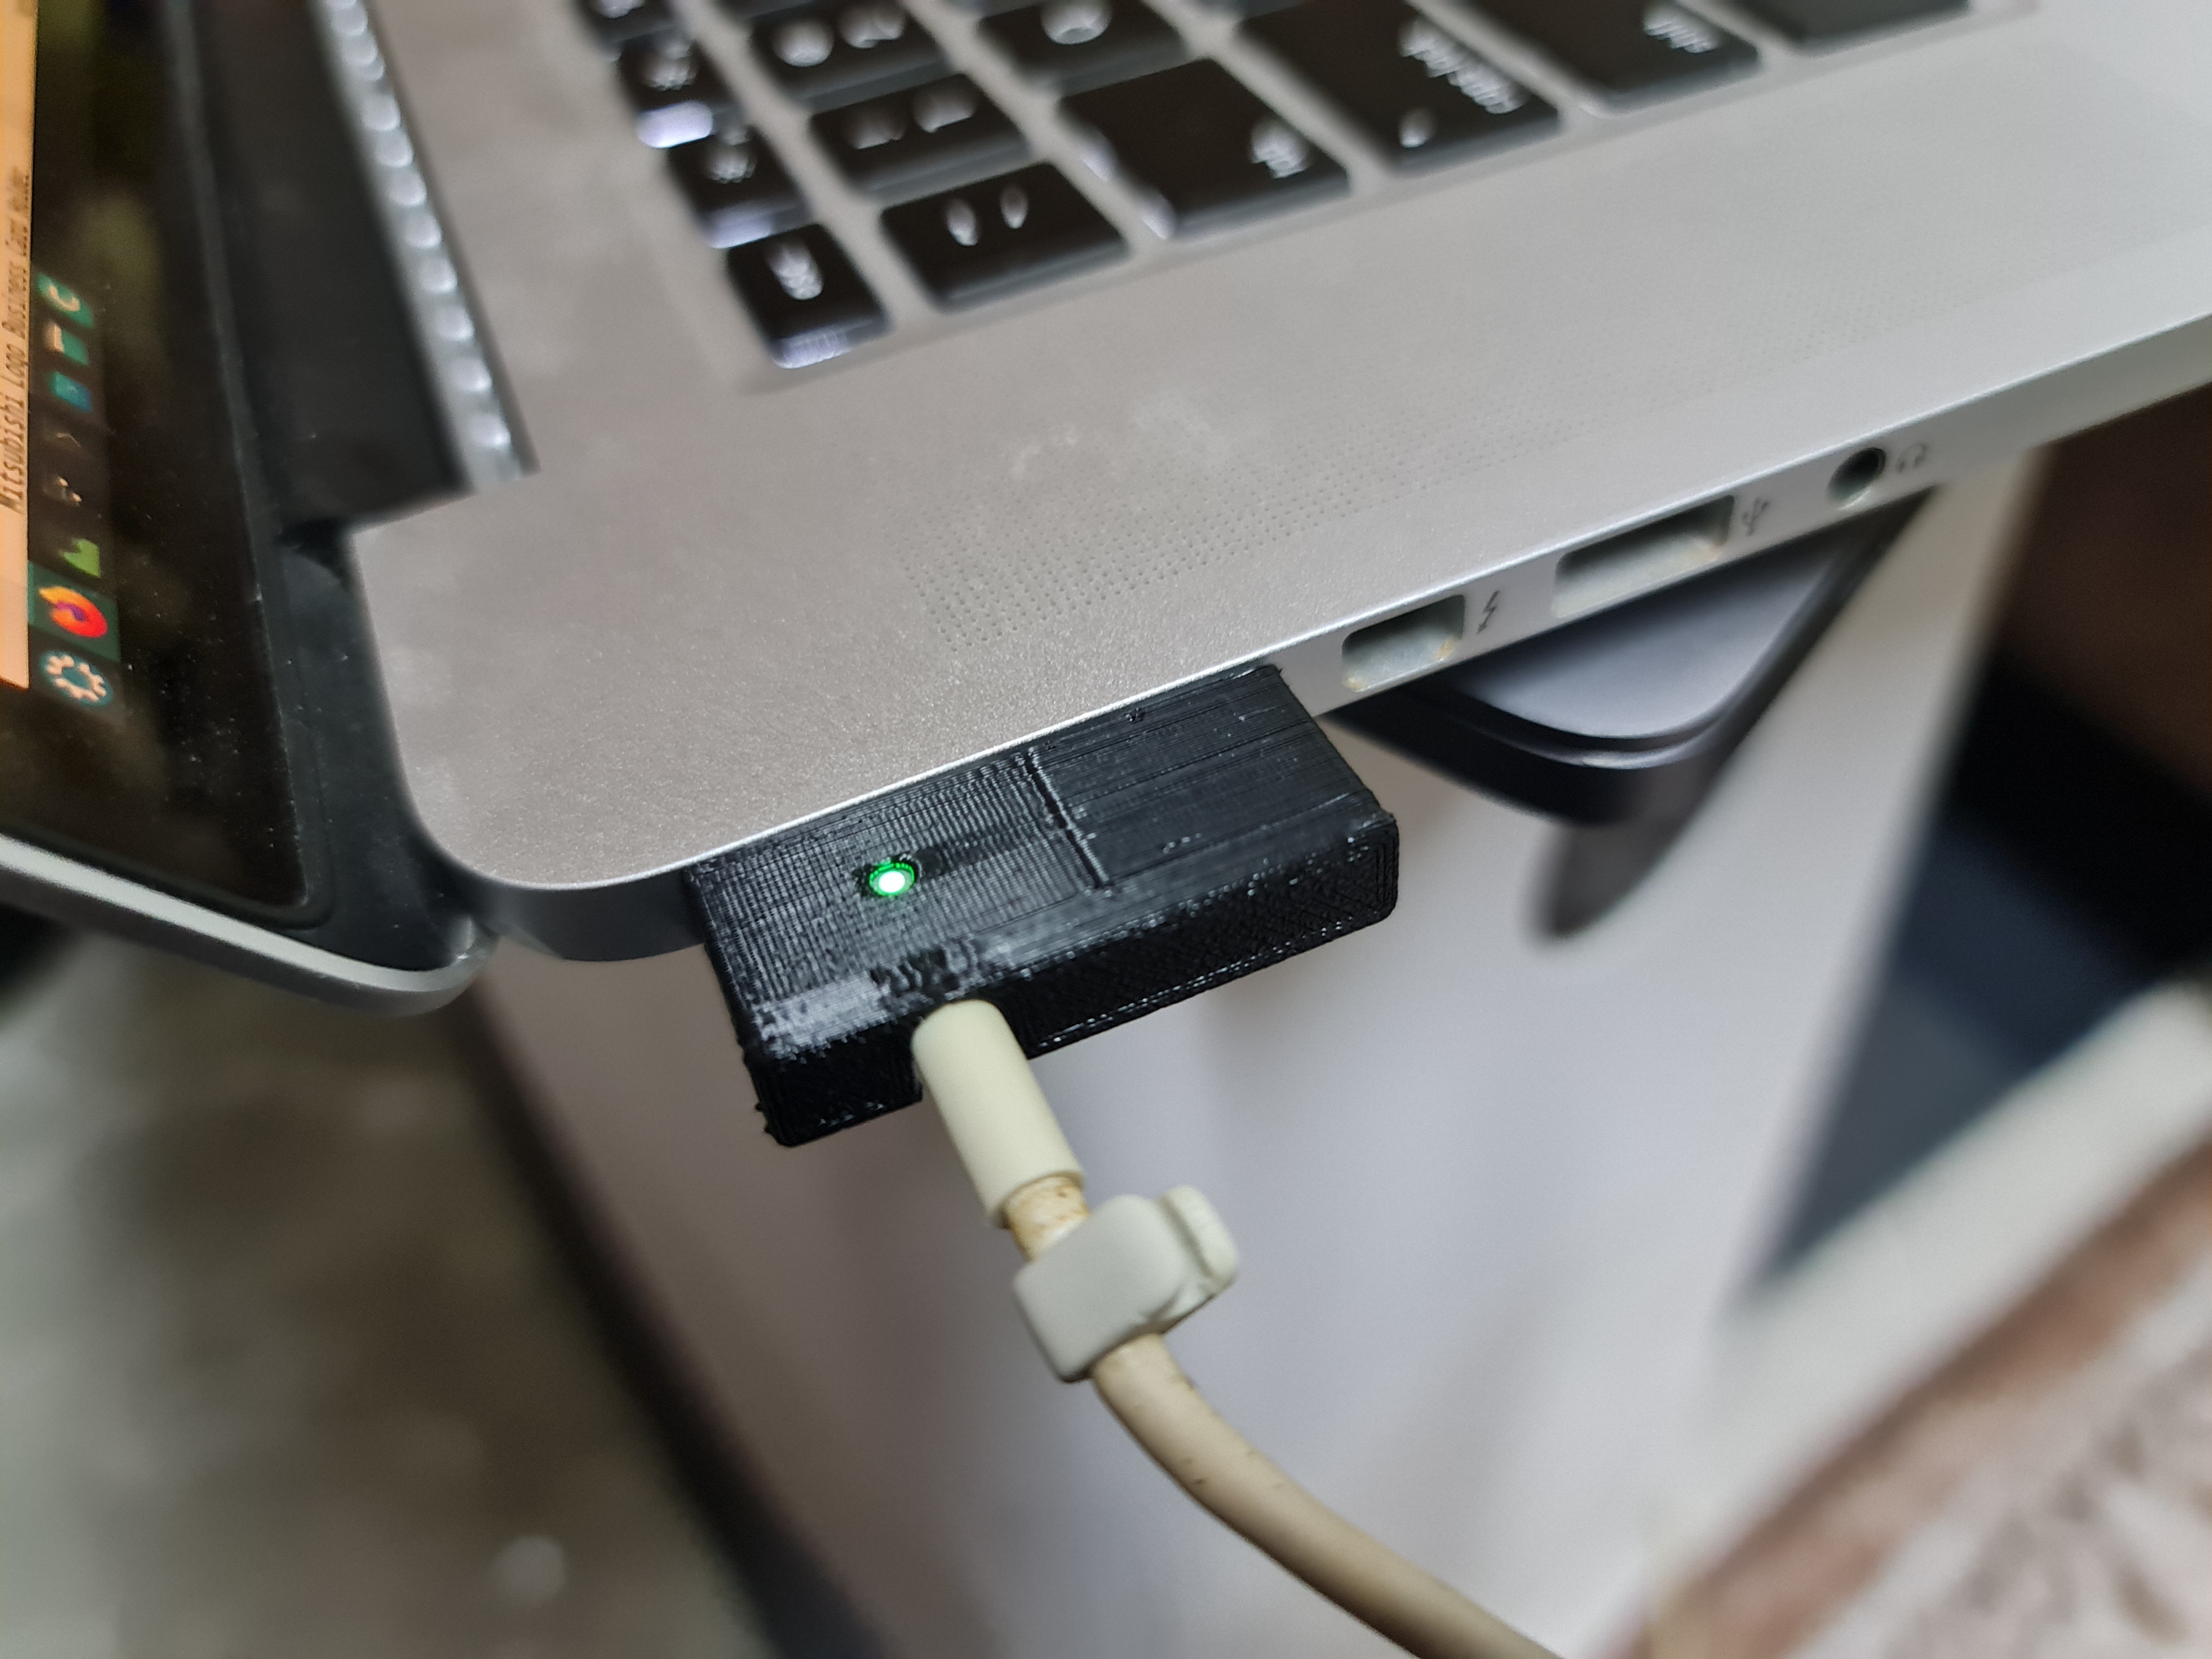
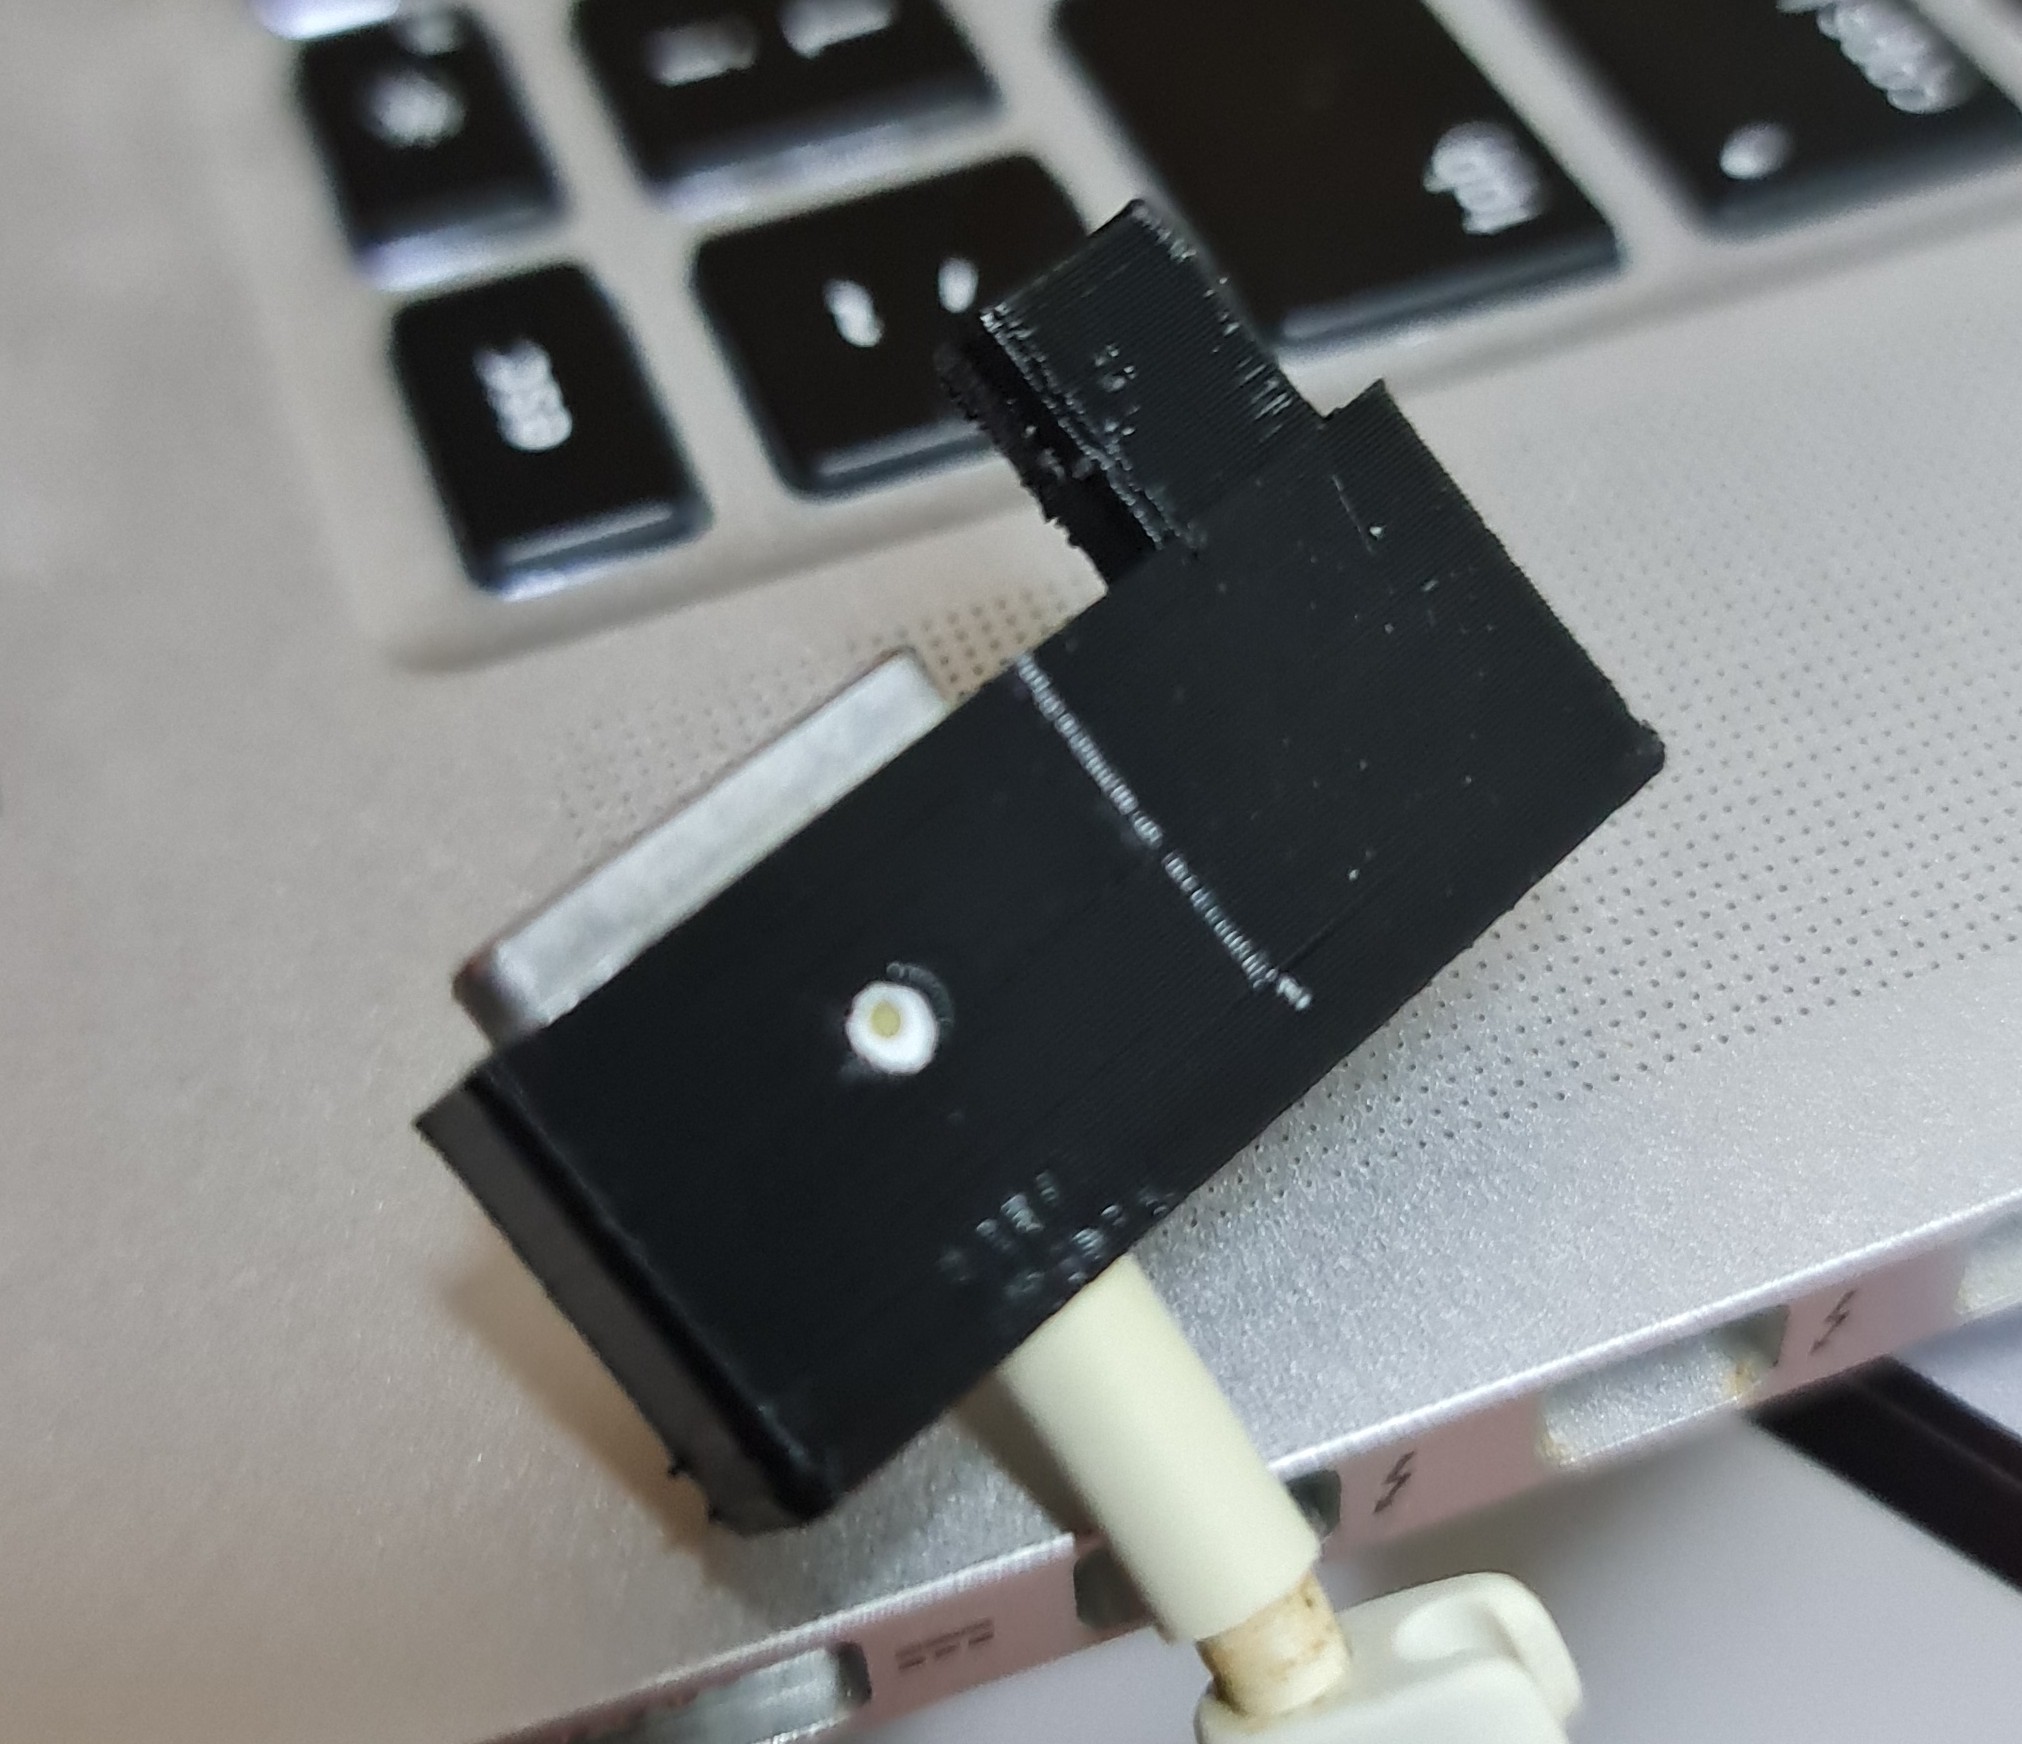
I'm new to 3D printing and CAD, it's not the best looking, I was going for fast printing. I borrowed a couple of files from the internet to get the dimensions of the charger and the thunderbolt.

644


This took a little tweaking. I think the designer needs to look at tolerances or my printer needs a talking to. Probably both.

Tabletop Shelf Rack by michelem https://www.printables.com/model/713135-tabletop-shelf-rack

645
7
submitted 1 year ago* (last edited 1 year ago) by [email protected] to c/3dprinting


I'm looking to expand my printer lineup, and have been looking at kits from magic phoenix for both the Voron Trident and the v2.4R2.

Is there any real benefit to one over the other, or is it more a preference thing?

Edit: if anyone know of other kits, preferably available in the EU, I would also like to take a look at those.

646
269
submitted 1 year ago* (last edited 1 year ago) by NardoPolo to c/3dprinting
647


Source https://twitter.com/TheCraftyMaker/status/1752694202062827715

No STL posted, but if you ask he might. He has other shadowboxes here https://www.printables.com/@TheCraftyMaker/models

648
17
3d printing pen (self.3dprinting)
submitted 1 year ago by Aarrodri to c/3dprinting


What 3d printing pen do you guys recommend? I see ranges from 30 to 200 dollars out there. Any tips?

649


As you might be aware BambuLab issued a recall for the BambuLab A1 3d-printer. In particular, the issue is the mains-voltage (230V AC) heat bed cable.

As a resolution, they offer two solutions:

  1. Ship the entire printer back to them and receive a replacement printer.
  2. They mail a new cable and you install it.

What BambuLab doesn't mention at all is the test according to EN 50678 (Verification of the effectiveness of protective measures of electrical equipment after repair). Unless you can perform this test I would recommend choosing the printer replacement.

650


Hello everyone!

I was asked to print someone a case which would be placed in a bathroom and my question is:

What would be the best filament option for it? (We have PLA and PETG currently.)

Some general questions relating to this:

  • How long does PLA last indoors?
  • How does PETG & PLA in particular handle humidity after being printed?

Thank you guys in advance!

view more: ‹ prev next ›