601
3DPrinting
16516 readers
207 users here now
3DPrinting is a place where makers of all skill levels and walks of life can learn about and discuss 3D printing and development of 3D printed parts and devices.
The r/functionalprint community is now located at: or [email protected]
There are CAD communities available at: [email protected] or [email protected]
Rules
-
No bigotry - including racism, sexism, ableism, homophobia, transphobia, or xenophobia. Code of Conduct.
-
Be respectful, especially when disagreeing. Everyone should feel welcome here.
-
No porn (NSFW prints are acceptable but must be marked NSFW)
-
No Ads / Spamming / Guerrilla Marketing
-
Do not create links to reddit
-
If you see an issue please flag it
-
No guns
-
No injury gore posts
If you need an easy way to host pictures, https://catbox.moe may be an option. Be ethical about what you post and donate if you are able or use this a lot. It is just an individual hosting content, not a company. The image embedding syntax for Lemmy is 
Moderation policy: Light, mostly invisible
founded 2 years ago
MODERATORS
602
I use to sell games on eBay a long time ago and I still have quite the collection. So I made these display stands for my games. Would've killed to have these back when I was selling them!
Of the carts I have shown here we have stands for
- NES Printables | Thingiverse
- SNES Printables | Thingiverse
- N64 Printables | Thingiverse
- Sega Genesis/Master System Printables | Thingiverse
- Atari 2600/7800 Printables | Thingiverse
- Atari Jaguar Printables | Thingiverse
You can also see my design files on GitHub

603
604
I think I found a counterexample to the common wisdom that more walls always create a stronger part.
The pictured S shape is 1.5mm thick, so printing with 2 walls leaves no room for infill. My testing wasn't very rigorous, but it seems that the hybrid structure of walls + rectilinear infill is 10-20% more rigid than walls alone. The infill adds strength by cris-crossing between adjacent layers.
I think it's fine to include a concentric top/bottom layer, but multiple identical layers weaken the part. I also tried 0 walls (infill only) and that was garbage.

605
Designed in freecad, printed in black pla on an ender 3 v2 neo
the print popped off the bed near the end but it works fine 😅
606
607
Can't even take a short break from 3D designing stuff. Glad I'm switching over to FreeCAD. All I wanted was to grab some dimensions from an old model.

608
https://www.printables.com/model/759734-oreck-vacuum-tube-extension#preview
Replacement tubes are only about $15 but why spend that when I can just print them!

609
249
610
165
3D Printed in TPU a replacement gasket for my bath tubs Spring Stopper. Where the only option was a $30 replacement
(lemmy.world)
Long and short of it. My bathtub's spring stopper has deteriorated. Building manager solution was to use a rubber stopper. I looked for a replacement part, couldn't find one outside of an outright replacement. So I modelled and printed this one in TPU.
It works!

EDIT: 2h30m later, the I've lost ~20mm of water in the replacements tub. Probably should increase the width of the Part to get a better seal. Nothing I can do about it tonight
EDIT: 12h later, the tub was pretty much empty. Trying again with a wider plug since I think the fit wasn't tight enough before. As for those who think a regular stopper would be better, you are right. But for the $0.16 of material and a learning opportunity for TPU I don't see it as a waste of time

611
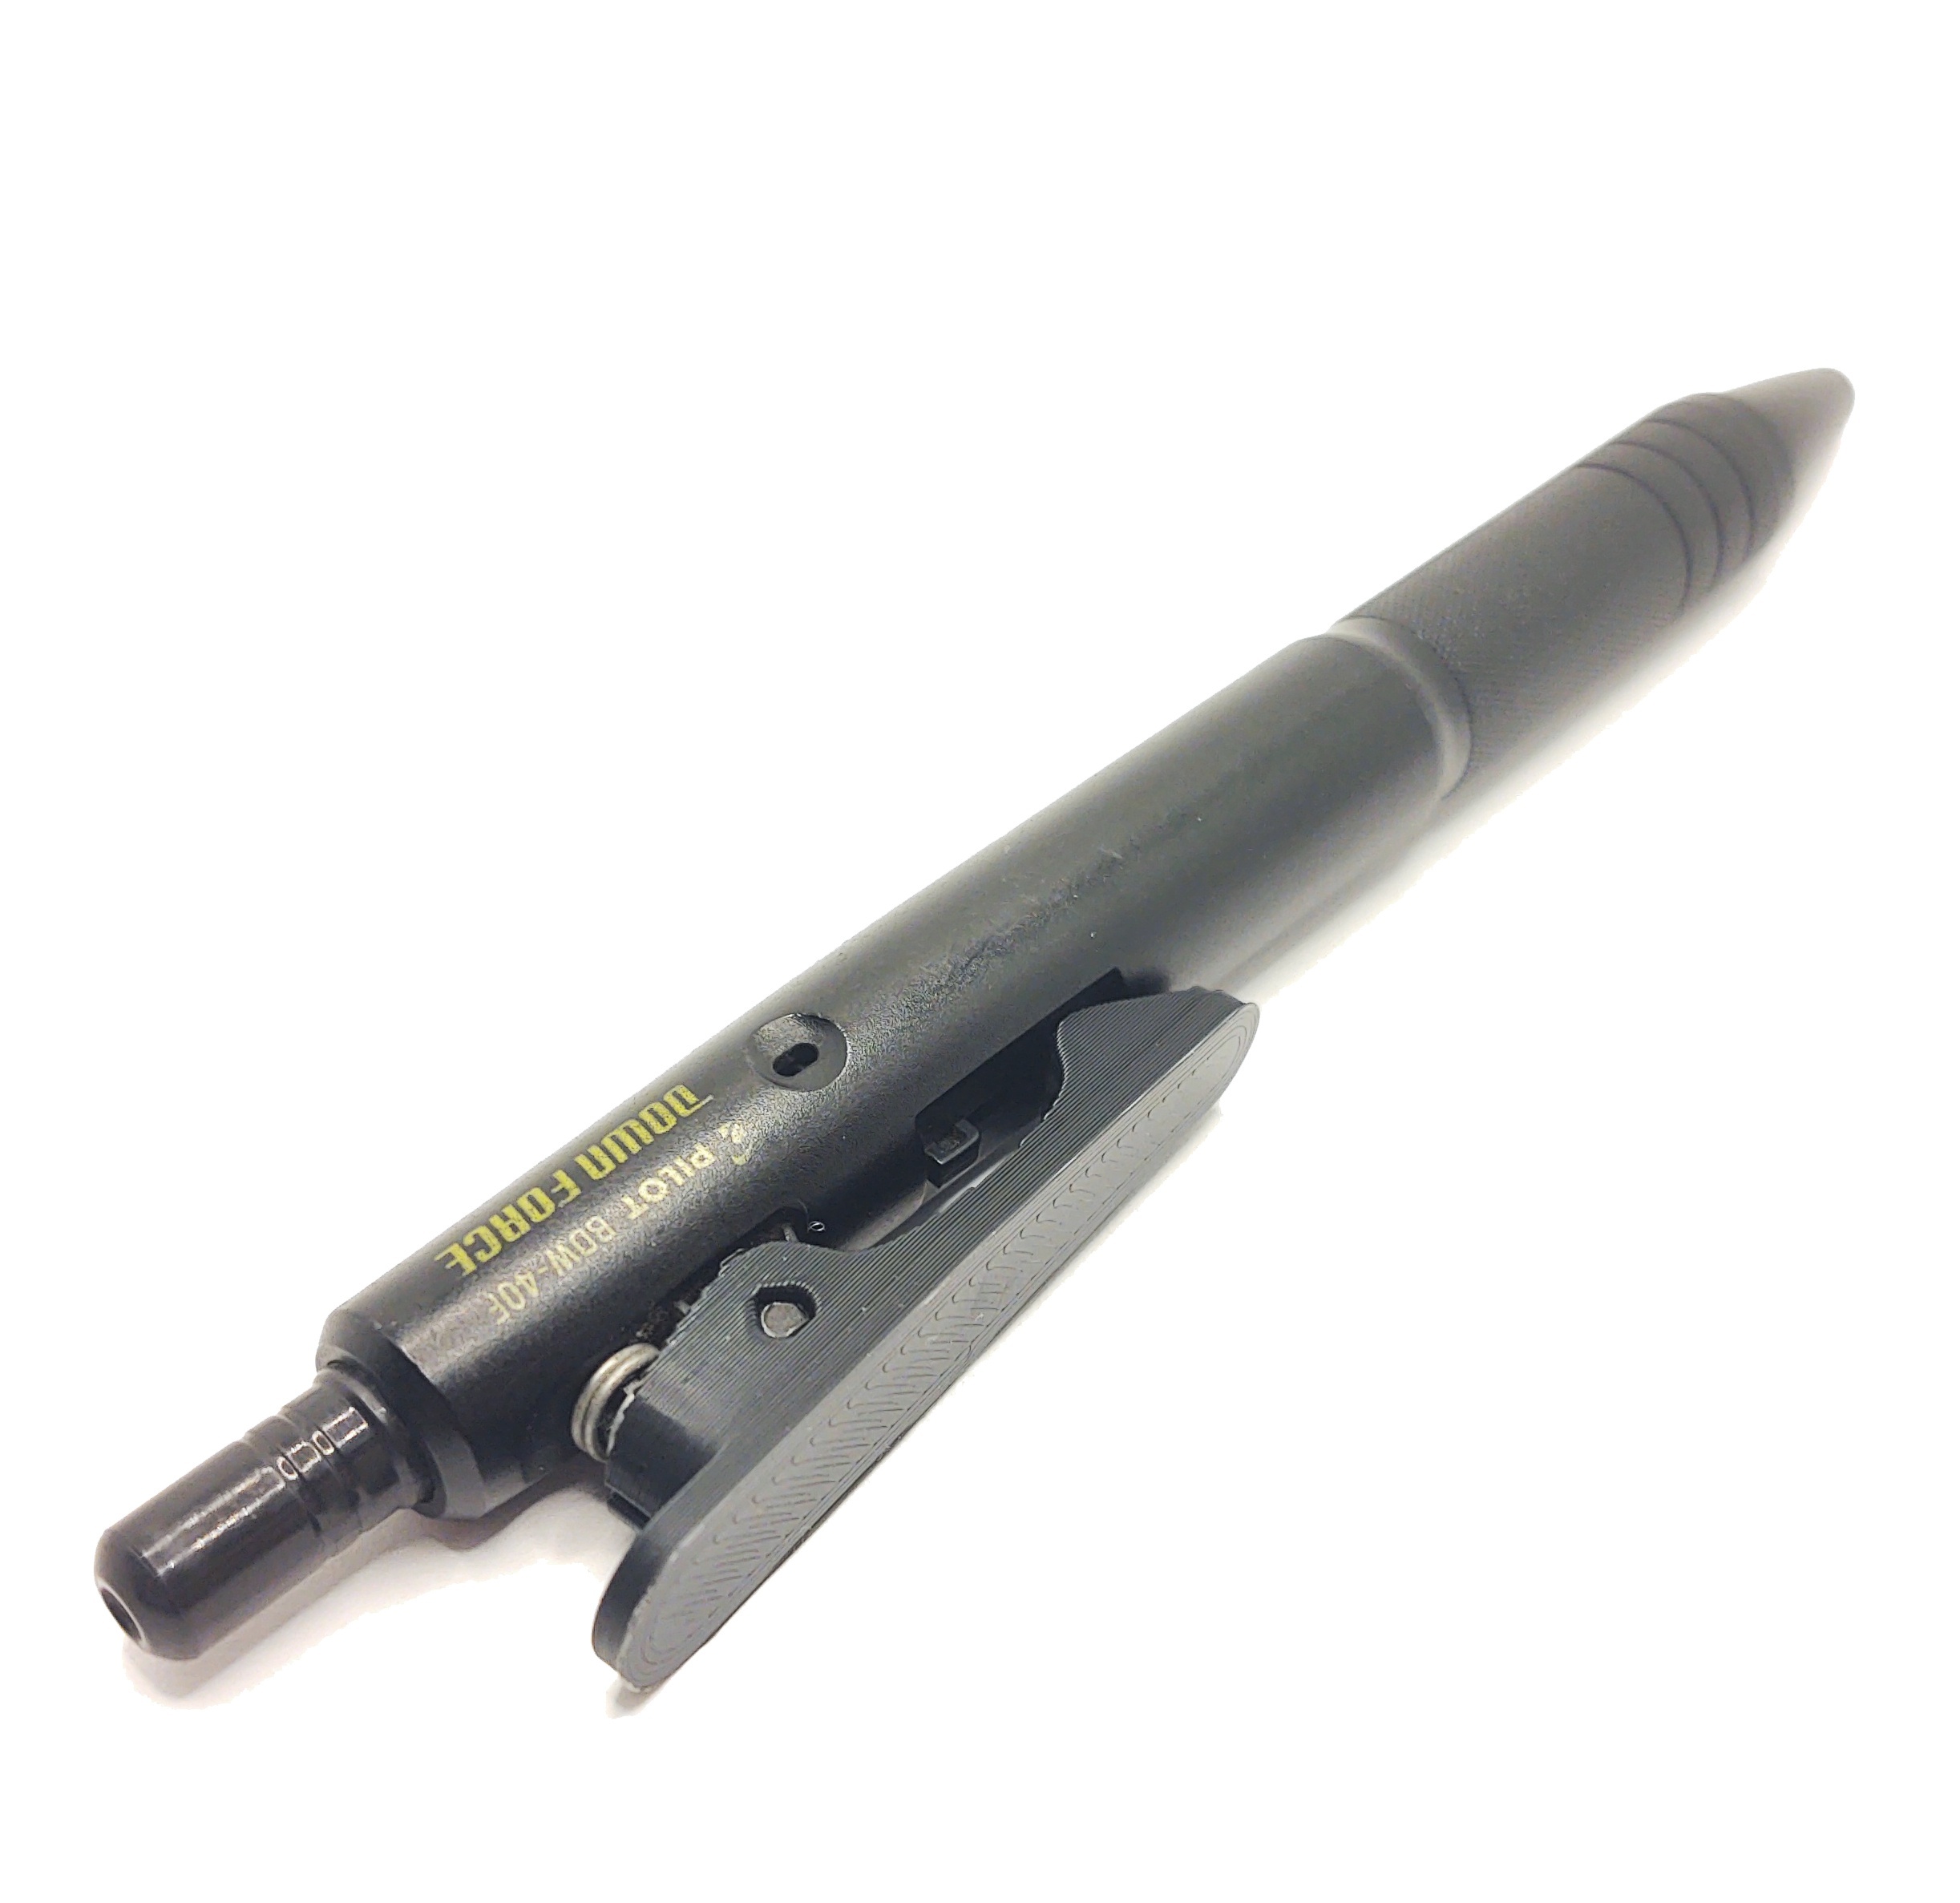
Here is a Very Specific Object. For one of the nine people in the world who own a Pilot Down Force pen (I already excluded myself from the total), here's a direct fit replacement clip for when yours breaks.
Who cares, and why? Well, part of this pen's deal is that the clip is absolutely required to use it. That's because the angled rib on the clip is part of the hold-open mechanism. No clip, no write.
And now, no problem.
https://www.printables.com/model/768071-pilot-down-force-replacement-clip
613

615
20
The #Razer #Junglecat is a truly great smartphone controller that has one big flaw - it supports 3 or 4 phones.
(media.phpc.social)
The #Razer #Junglecat is a truly great smartphone controller that has one big flaw - it supports 3 or 4 phones.
Luckily, #3dprinting (and #openscad) to the rescue!
Lo and behold, #RazerJunglecat on my #GalaxyS23Ultra!

616
Short side hamper handle from the top:
https://social.fbxl.net/media/c06e0e29294d96565b1b189f3bde757486e4af9d79cb92ab3387419f5a802f4b.jpg
Long side hamper handle from the bottom:
https://social.fbxl.net/media/9890d325f4126ae3d58d94435392bff91c44b5f6b557e39a97bf5e16f891b1c7.jpg
I always enjoy prints that just become part of our lives (and especially ones that let us keep using something that's going to the landfill otherwise)
The hamper has handles that break. For most people I think that'd be time to replace it. I didn't want to do that, so I designed a new handle based on the handle on the short end. This ended up being a mistake later, I'll explain then.
I printed 2 handles (the connection between the two is just to make the printing work better since it can print the two pieces as one piece, then I just snap the two apart and clean up the spot they were connected)
I used my rotary tool to remove the remnants of the original handles. I should have used the cutting tool but I had the diamond grinder so I used that. It worked fine, I was able to fully remove the old material. A quick test fit confirmed that the handle design was pretty good (I just used a tape measure for the measurements so this was a real potential problem)
I went to the long side, but realized that the design of the hamper was different lengthwise than widthwise. I removed a couple tabs that were going to block the new handle, and instead of putting it in as designed, I just put it sideways, which fit.
I put the two in and added gorilla glue. Gorilla glue requires water to foam up, so I wet all the parts. Now everything is fitted, the glue is in, and it's just drying now. I'd consider this repair a success, and I expect the strong PLA part to give the whole hamper a lot more stiffness at those parts, and there's significantly more material in these spots that break. If the other two handles break, I'll just print two more, and at that point I can't help but think that the hamper will be bulletproof.

617
122
Finished my DIY keyboard with printed case, feet, and RPi Pico "caddy". Keycaps are not 3d printed, but the labels were DIY from my laser.
(media.kbin.social)

618
I've been making a bunch of silly accessories for the highly popular Honeycomb Storage Wall lately, what with using the stuff to turn an architectural oddity in my closet into an EDC gadget storage space. Most of that stuff is too humdrum to bother posting here, but I'm pretty proud of this one.
Honeycomb inserts, for the removal of, nuclear option.
Here's the Printable:
https://www.printables.com/model/762739-better-insert-remover-for-honeycomb-storage-wall
Maybe it'll getcha out of a jam.

619
620
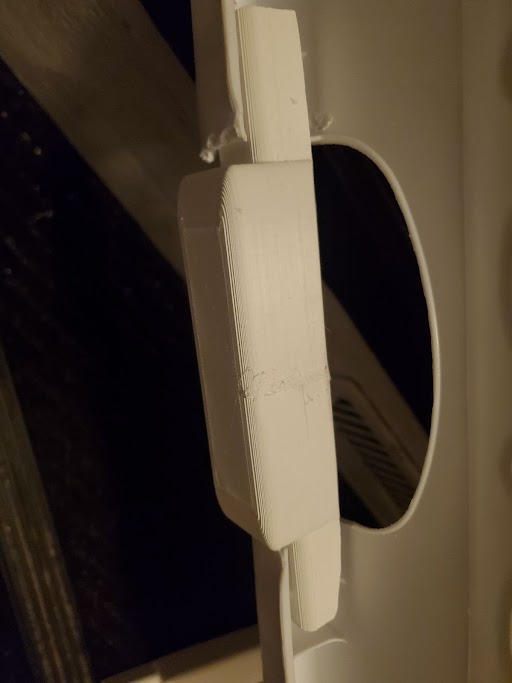
----SOLVED----
Thank you to everybody for your assistance. I managed to get to where I wanted thanks to instructions provided by @dual_sport_dork
Thank you, thank you, thank you!
Not sure if anyone can help me here. I am pretty lost and confused and wouldn't mind if someone could ELI5 something for me.
I've never used a real CAD software before yesterday night and I'm struggling a bit, I tried googling things but it's just sending me deeper into a rabbit hole of things I do not understand yet.
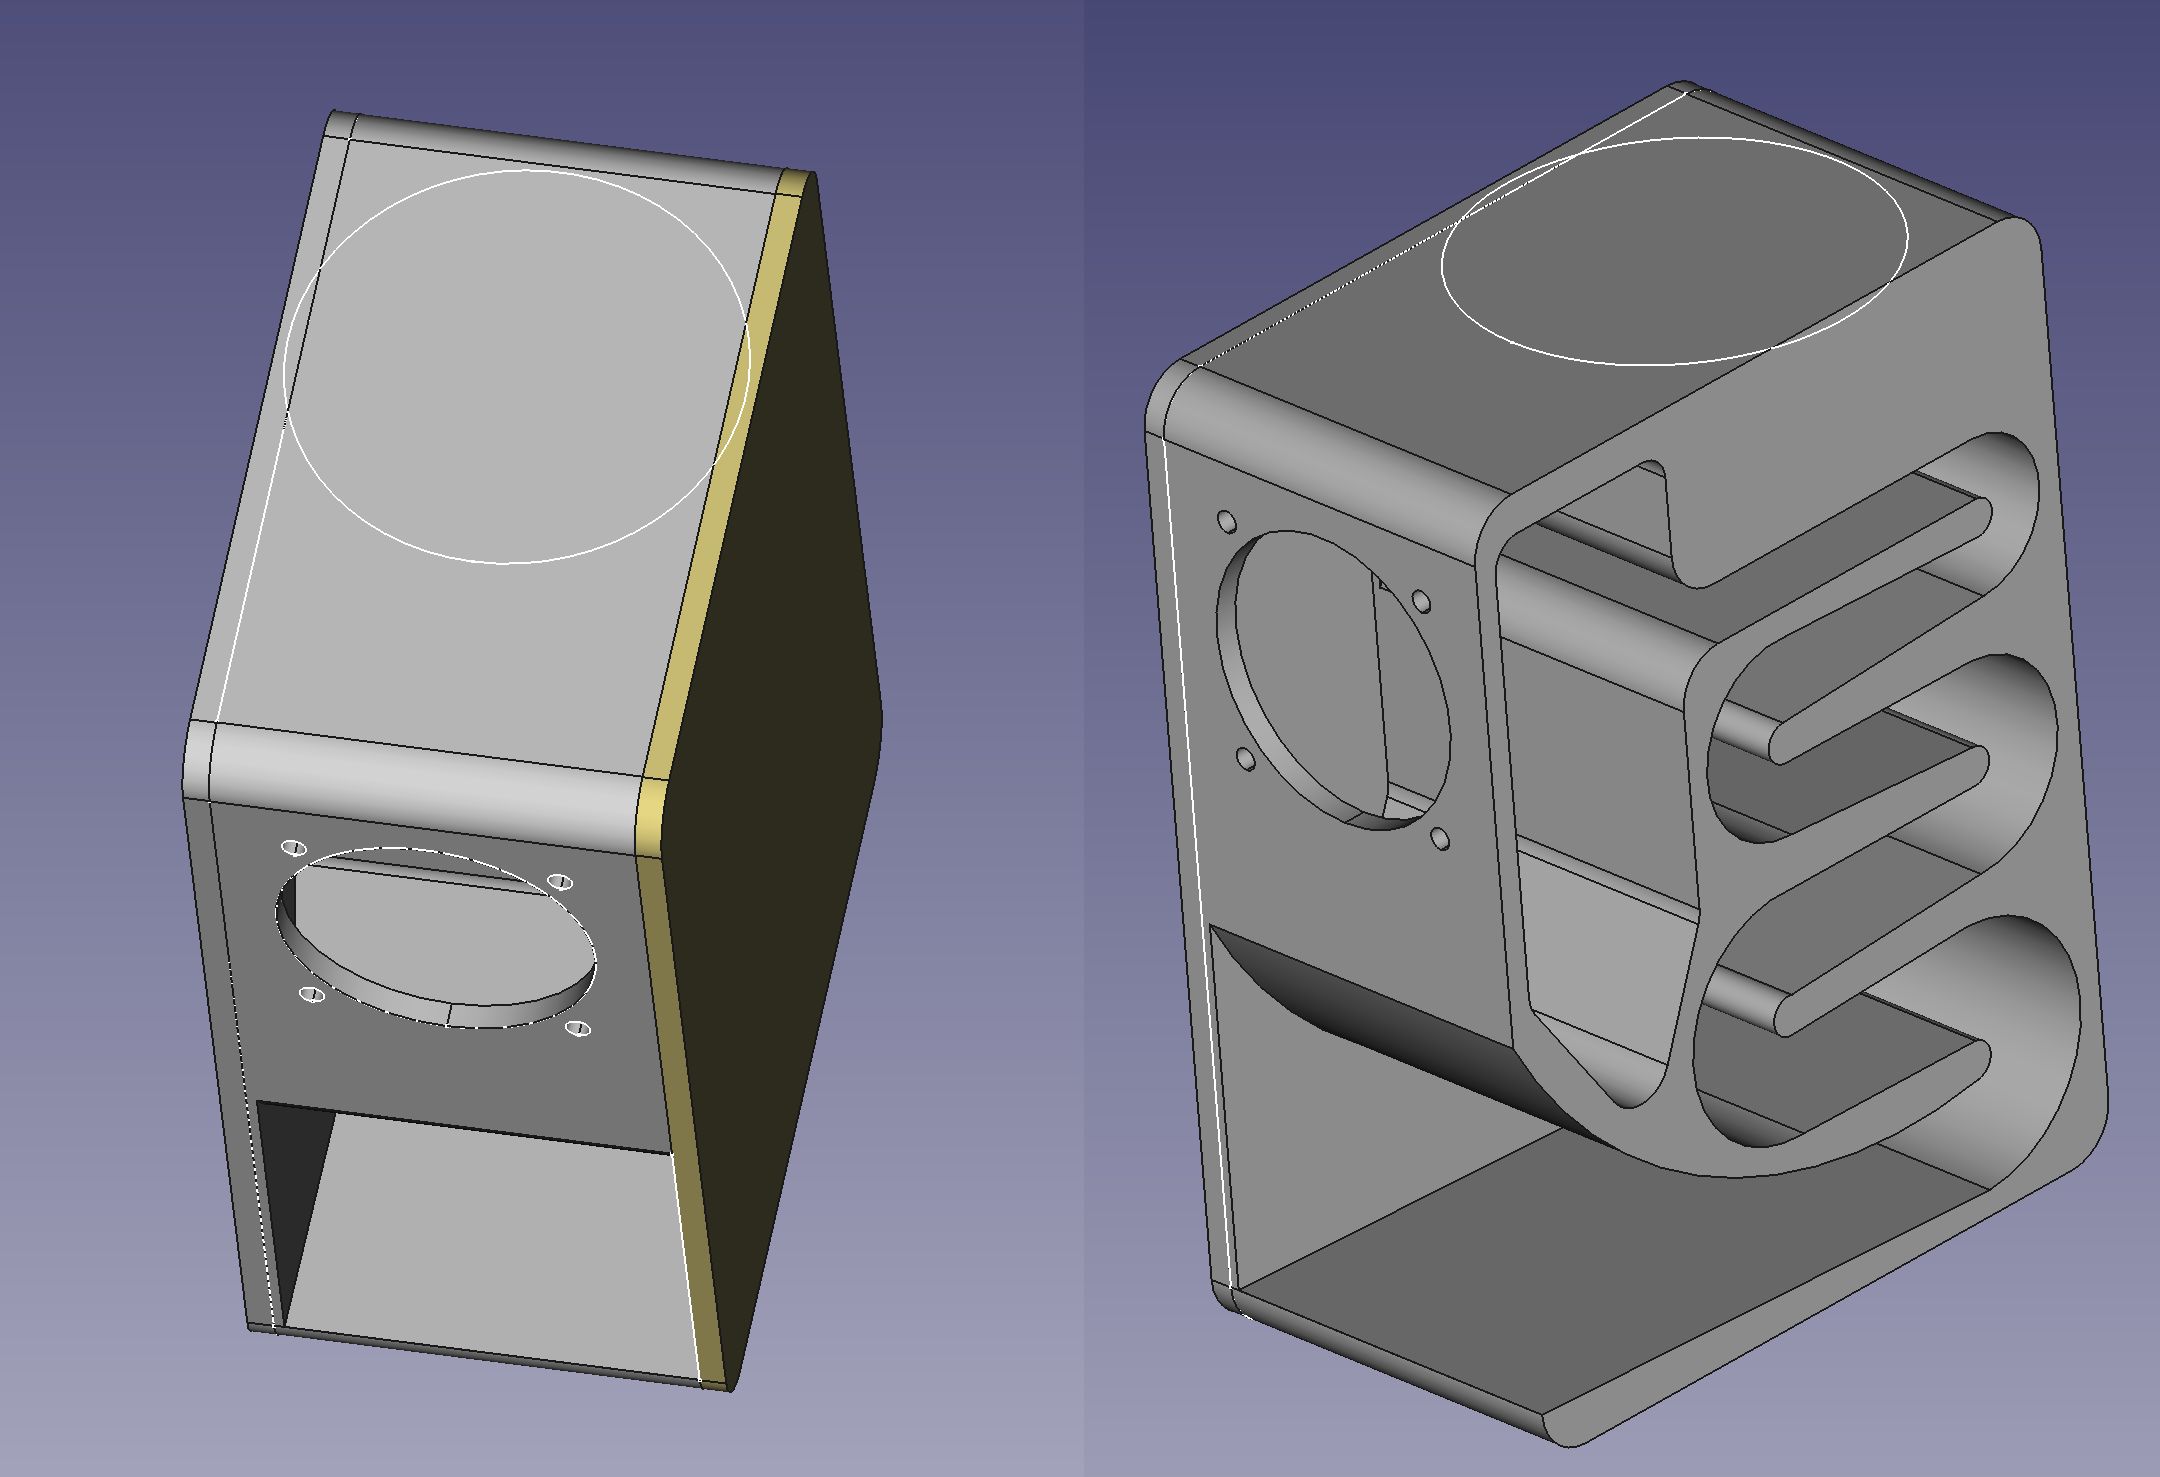
I'm trying to make this speaker enclosure I've seen just to do something with this shitty bluetooth speaker I have, so I decided to recreate the enclosure myself.
Long story short, I realized I kinda screwed myself after disassembling the bluetooth speaker and now I need to make a 2mm deep pocket on top of the case to snap in the buttons module. I don't really feel like starting the design again from scratch.
Anyway, as you can see in the attached image, I need to make a big round pocket on top, but both side panels are separate bodies so my pocket only goes through the main body and ignores the 2 other bodies.
I can think of other ways to achieve what I want but I'd really like to figure out a way to do it from where I am right now, if possible. I've seen the term shape binder and "union" in my searches but I can't quite figure it out.
Thank you to anyone who bothered reading this lol
EDIT: For anyone who might see this and is curious about how the enclosure is performing, I finished printing the main body and assembled it to test. Am still missing the side panels and I have to design some kind of flange cover for the driver but here's what I got so far:
621
622
623
And some bookmarks.
Box is a prusa slicer primitive with no infill and top. Inside the box is where I keep filament clips https://www.printables.com/model/581033-grandmas-double-sided-filament-clip
Bookmarks are https://www.printables.com/model/59453-bookmark-basic. I use them as last meters prints and give them away at the office.

624
625