3DPrinting
3DPrinting is a place where makers of all skill levels and walks of life can learn about and discuss 3D printing and development of 3D printed parts and devices.
The r/functionalprint community is now located at: or [email protected]
There are CAD communities available at: [email protected] or [email protected]
Rules
-
No bigotry - including racism, sexism, ableism, homophobia, transphobia, or xenophobia. Code of Conduct.
-
Be respectful, especially when disagreeing. Everyone should feel welcome here.
-
No porn (NSFW prints are acceptable but must be marked NSFW)
-
No Ads / Spamming / Guerrilla Marketing
-
Do not create links to reddit
-
If you see an issue please flag it
-
No guns
-
No injury gore posts
If you need an easy way to host pictures, https://catbox.moe may be an option. Be ethical about what you post and donate if you are able or use this a lot. It is just an individual hosting content, not a company. The image embedding syntax for Lemmy is 
Moderation policy: Light, mostly invisible
view the rest of the comments

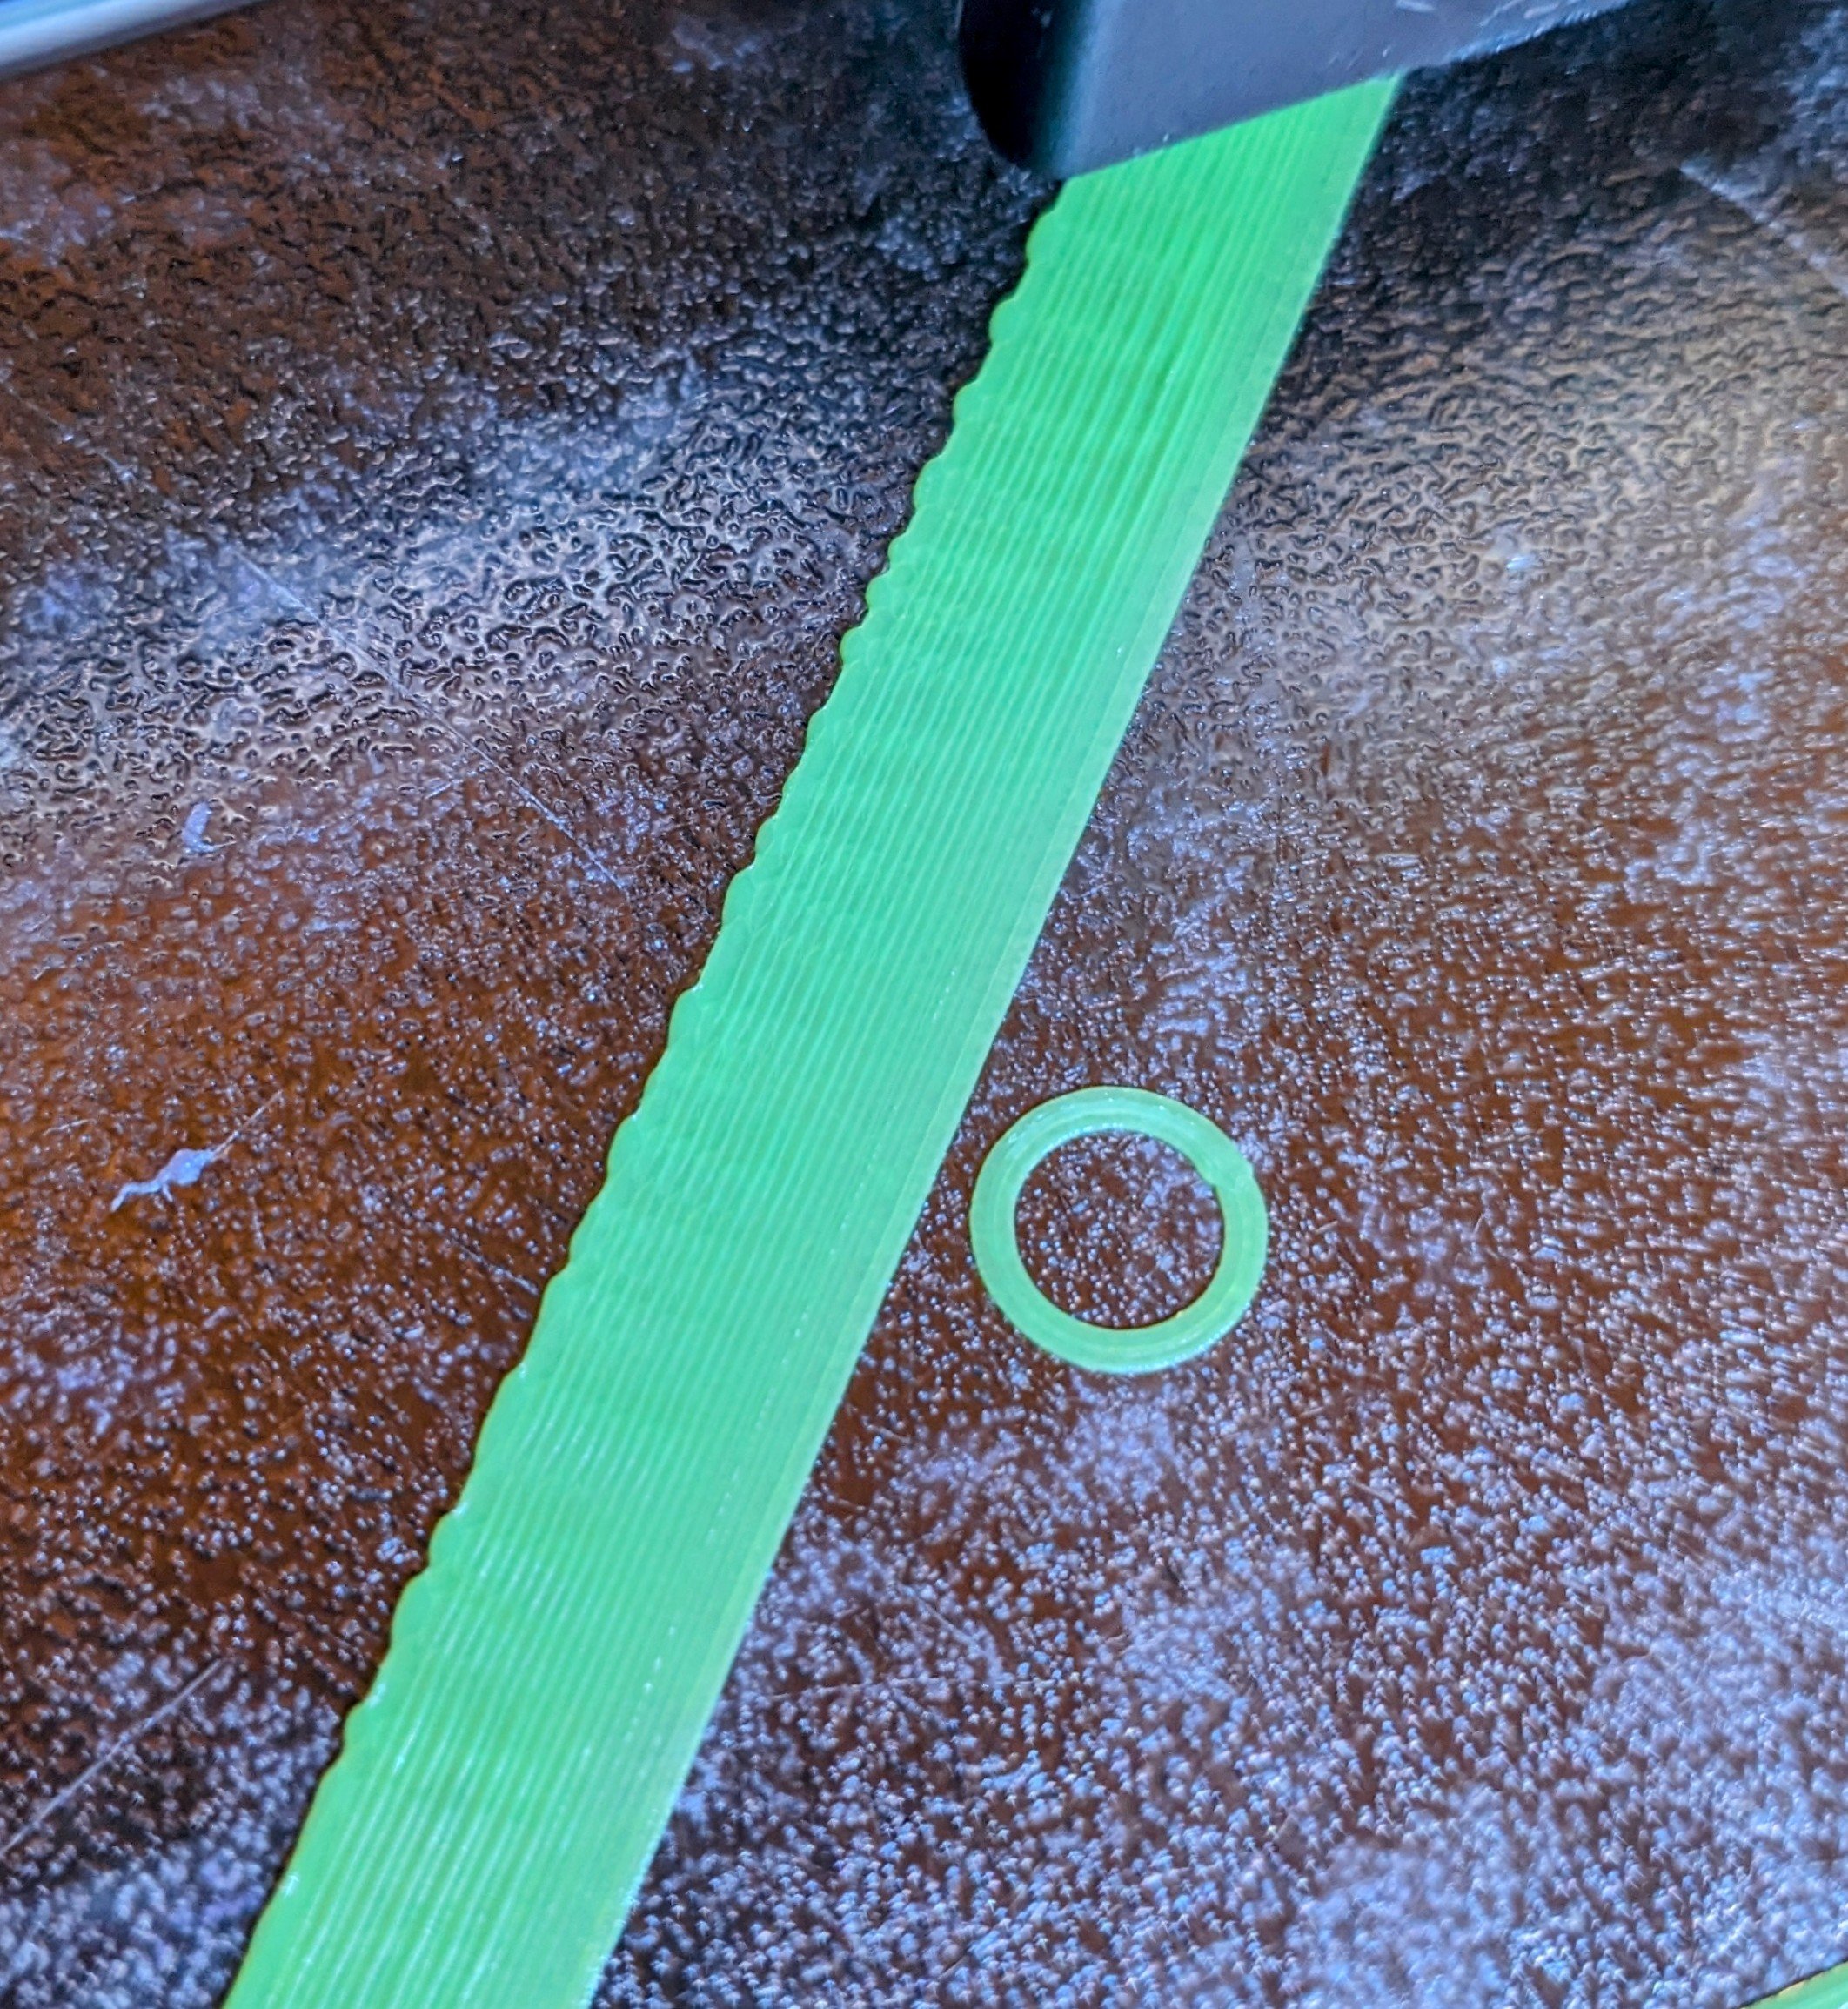
Might be too close to the bed
To elaborate a bit, it looks like over extrusion. Do you have a first layer calibration procedure you've used?
This is my attempt at calibrating the first layer. I don't know if there's some other process I should be using (while I'm fairly technical, I'm new to 3D printing)
If you look around you can find some pretty good tests to characterize all the different features that contribute to good performance. Usually they include using a feeler gauge at several points, and printing certain test shapes in different areas. I don't have one at hand, since I'm on mobile. Can you describe how you leveled it already? If you're looking for something to try immediately, I'd try printing at 10 and 20% less flow in the first layer and see how it behaves. Based on that, you can adjust the offset if necessary.
I think this could be the case but I just calibrated it twice and it still does it.
In the case that is an uneven bed, where the middle is slightly high/convex, how do people fix that?
You could fix that by shimming the print surface with paper. I don't recommend that. You could also get a mesh leveling sensor. It's technically a workaround, but it works. But it is very hard to believe that your bed is this heavily warped. It looks like the nozzle is generally too close to the bed and the squeeze out accumulates. I've had this problem before. I would recommend releveling the bed.
Would you mind also saying what printer you are using?
This is a flashforge creator pro 2 (in original comment). I'm not sure how to characterize the distortion, but the standard leveling routine puts the extruder in 3 locations near the screw adjustment. After adjusting spacing with a sheet of paper (included, calibrated thickness), it puts the extruder down on the center. The center is always higher than the 3 calibration points, often significantly.
Well then I have bad news. You will have to get your bed straight, be it by replacing or some sanding on a flat quartz block. Maybe you could even mill it. One last test I would run is trying to print without the bed heater just to see if the warping gets any better.
A hackier solution is mesh leveling, but in your case it will still produce parts that aren't flat.
Also back the nozzle off from the bed by about 0.05-0.1mm in the meantime to get some semi usable results.