576
Don't know why but i my printer has been printing the first layer unevenly

3DPrinting is a place where makers of all skill levels and walks of life can learn about and discuss 3D printing and development of 3D printed parts and devices.
The r/functionalprint community is now located at: or [email protected]
There are CAD communities available at: [email protected] or [email protected]
No bigotry - including racism, sexism, ableism, homophobia, transphobia, or xenophobia. Code of Conduct.
Be respectful, especially when disagreeing. Everyone should feel welcome here.
No porn (NSFW prints are acceptable but must be marked NSFW)
No Ads / Spamming / Guerrilla Marketing
Do not create links to reddit
If you see an issue please flag it
No guns
No injury gore posts
If you need an easy way to host pictures, https://catbox.moe may be an option. Be ethical about what you post and donate if you are able or use this a lot. It is just an individual hosting content, not a company. The image embedding syntax for Lemmy is 
Moderation policy: Light, mostly invisible
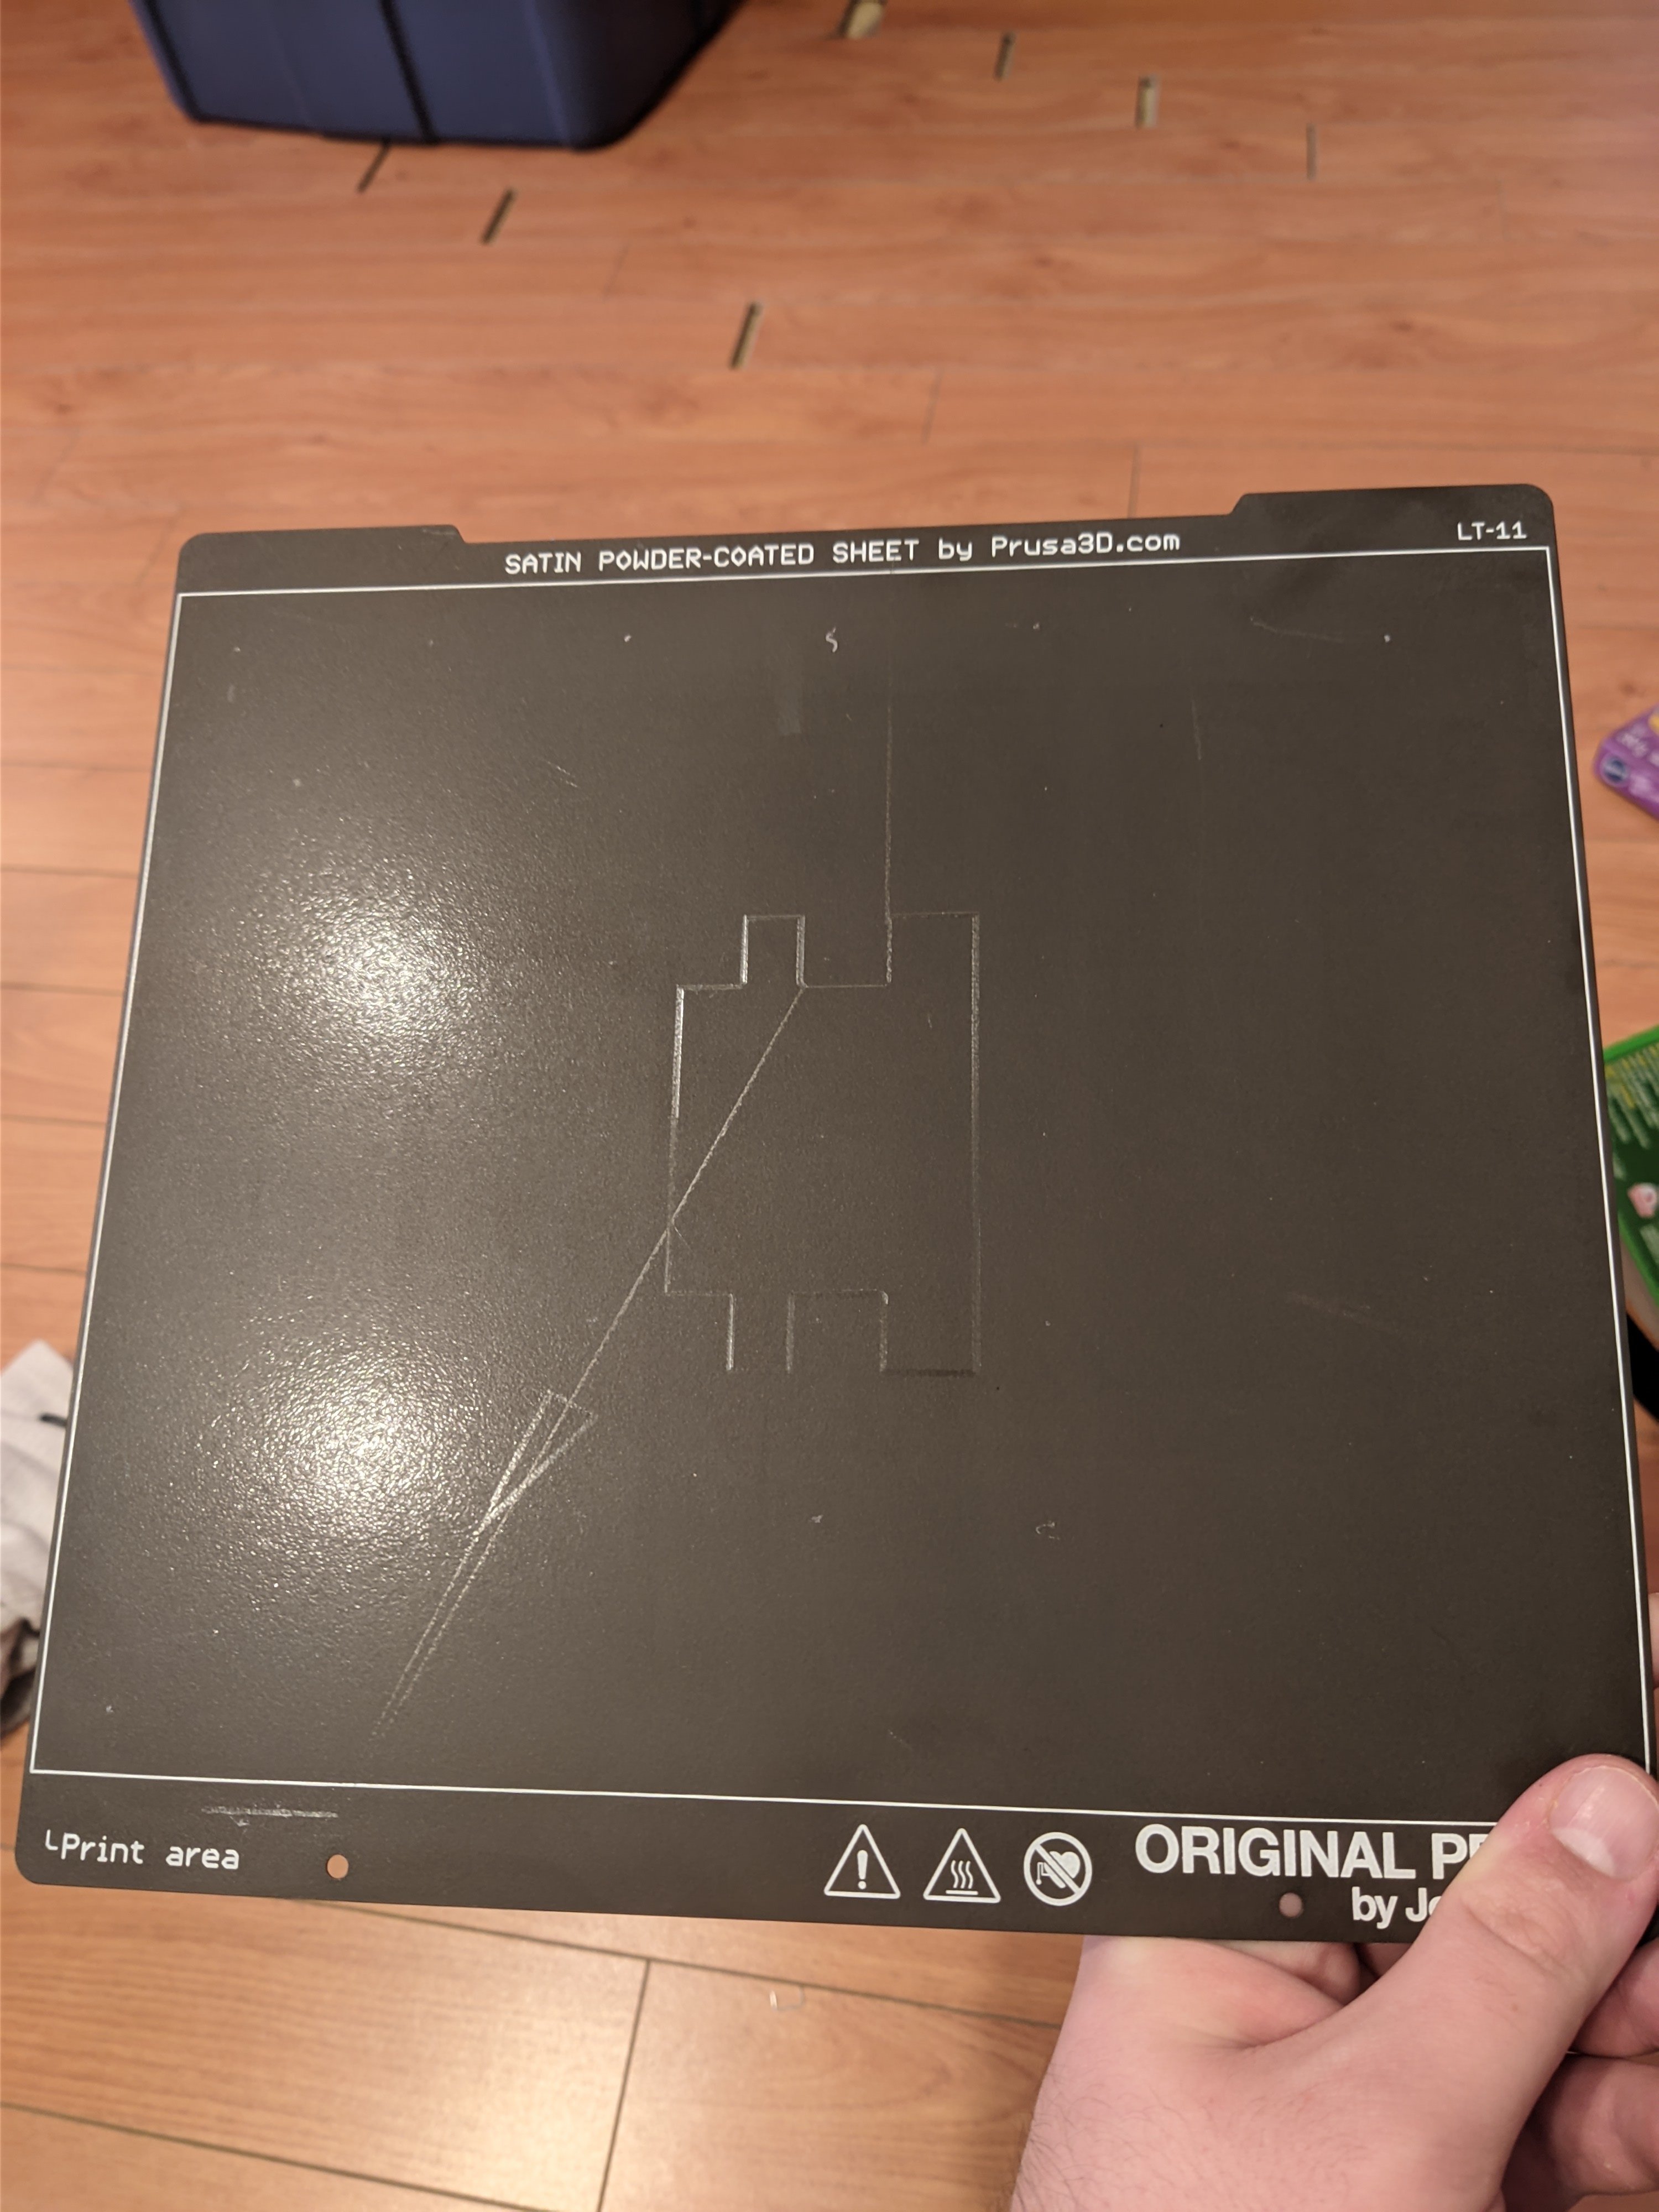
Don't know why but i my printer has been printing the first layer unevenly
Oof. This was a hassle and a half to get right. Learned a good bit tho. The trick was to lower the part by 1mm to get more surface area on the bed.
I've tried to report the issue to Prusa support but they keeps trying to diagnose it as user error. But at this point I'm at a loss and presume that it's either a firmware issue or a sensor issue on my unit.
Either way im very disappointed.
And before you ask, this is the opposite side
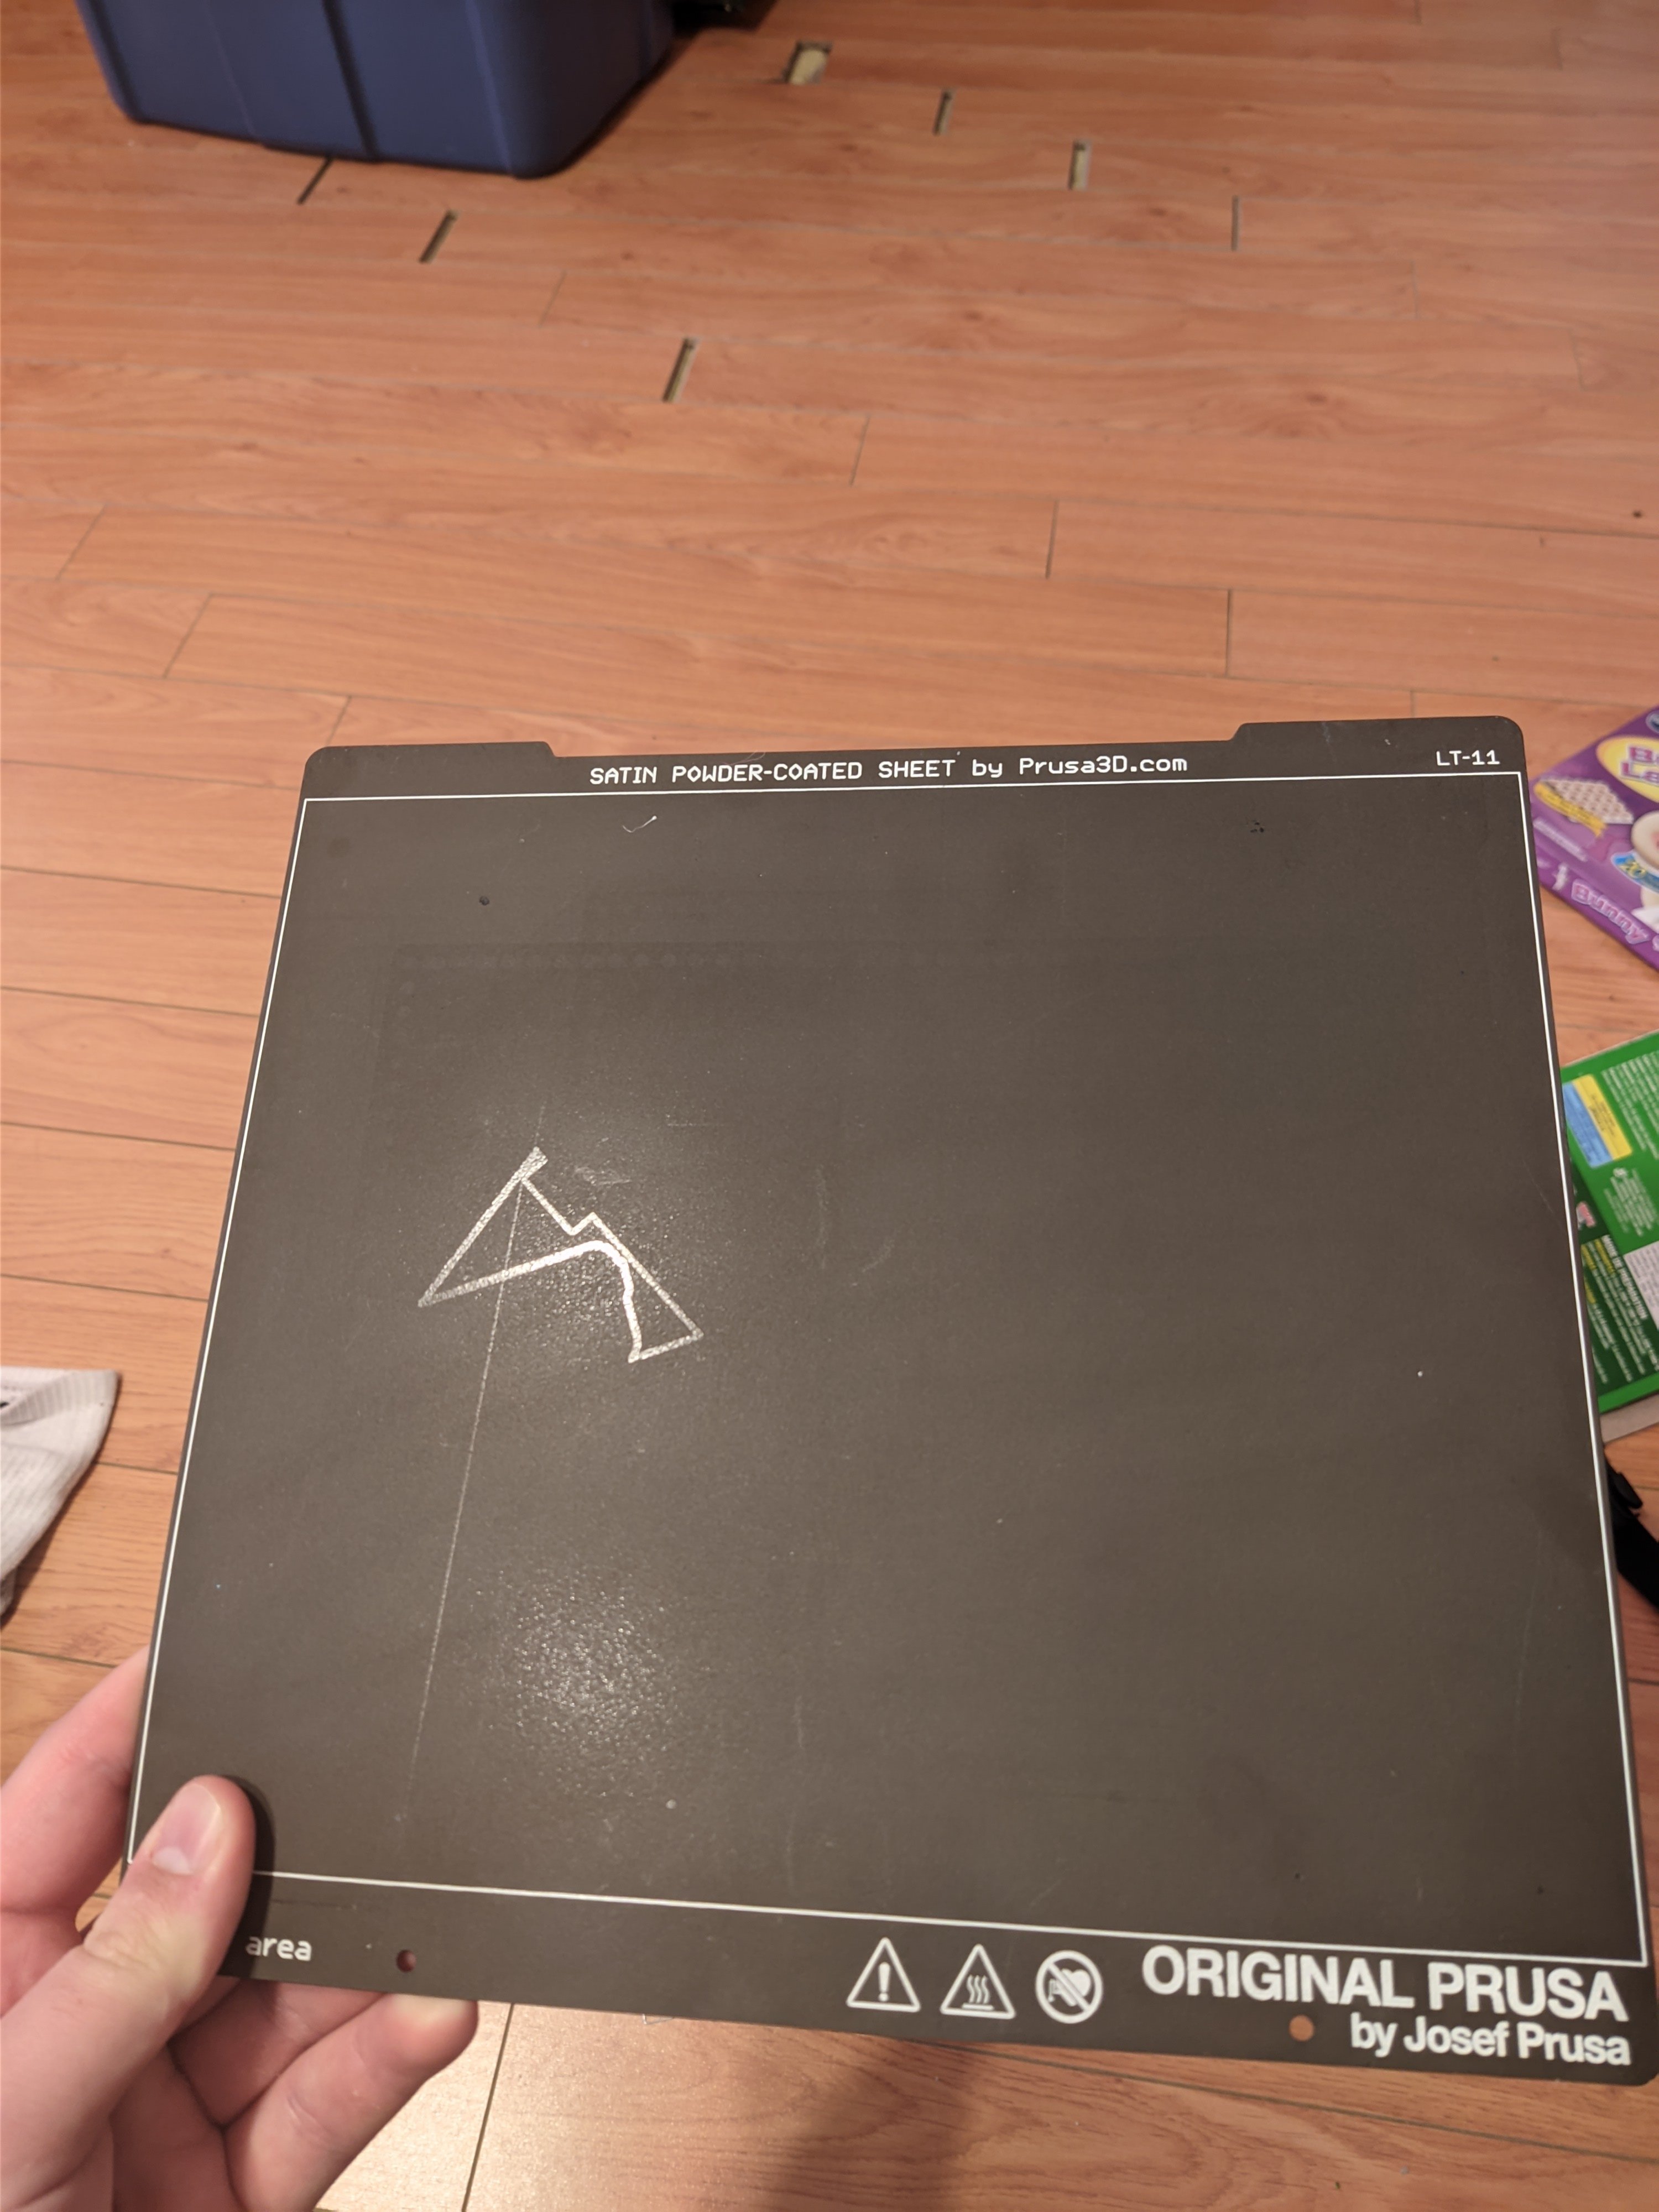
EDIT: I will note that this print sheet is ruined for my use case, since those patterns will be shown on the underside of my prints. But the print surface still works and can be used without issue... if you ignore the gouges that are being detailed into every print.
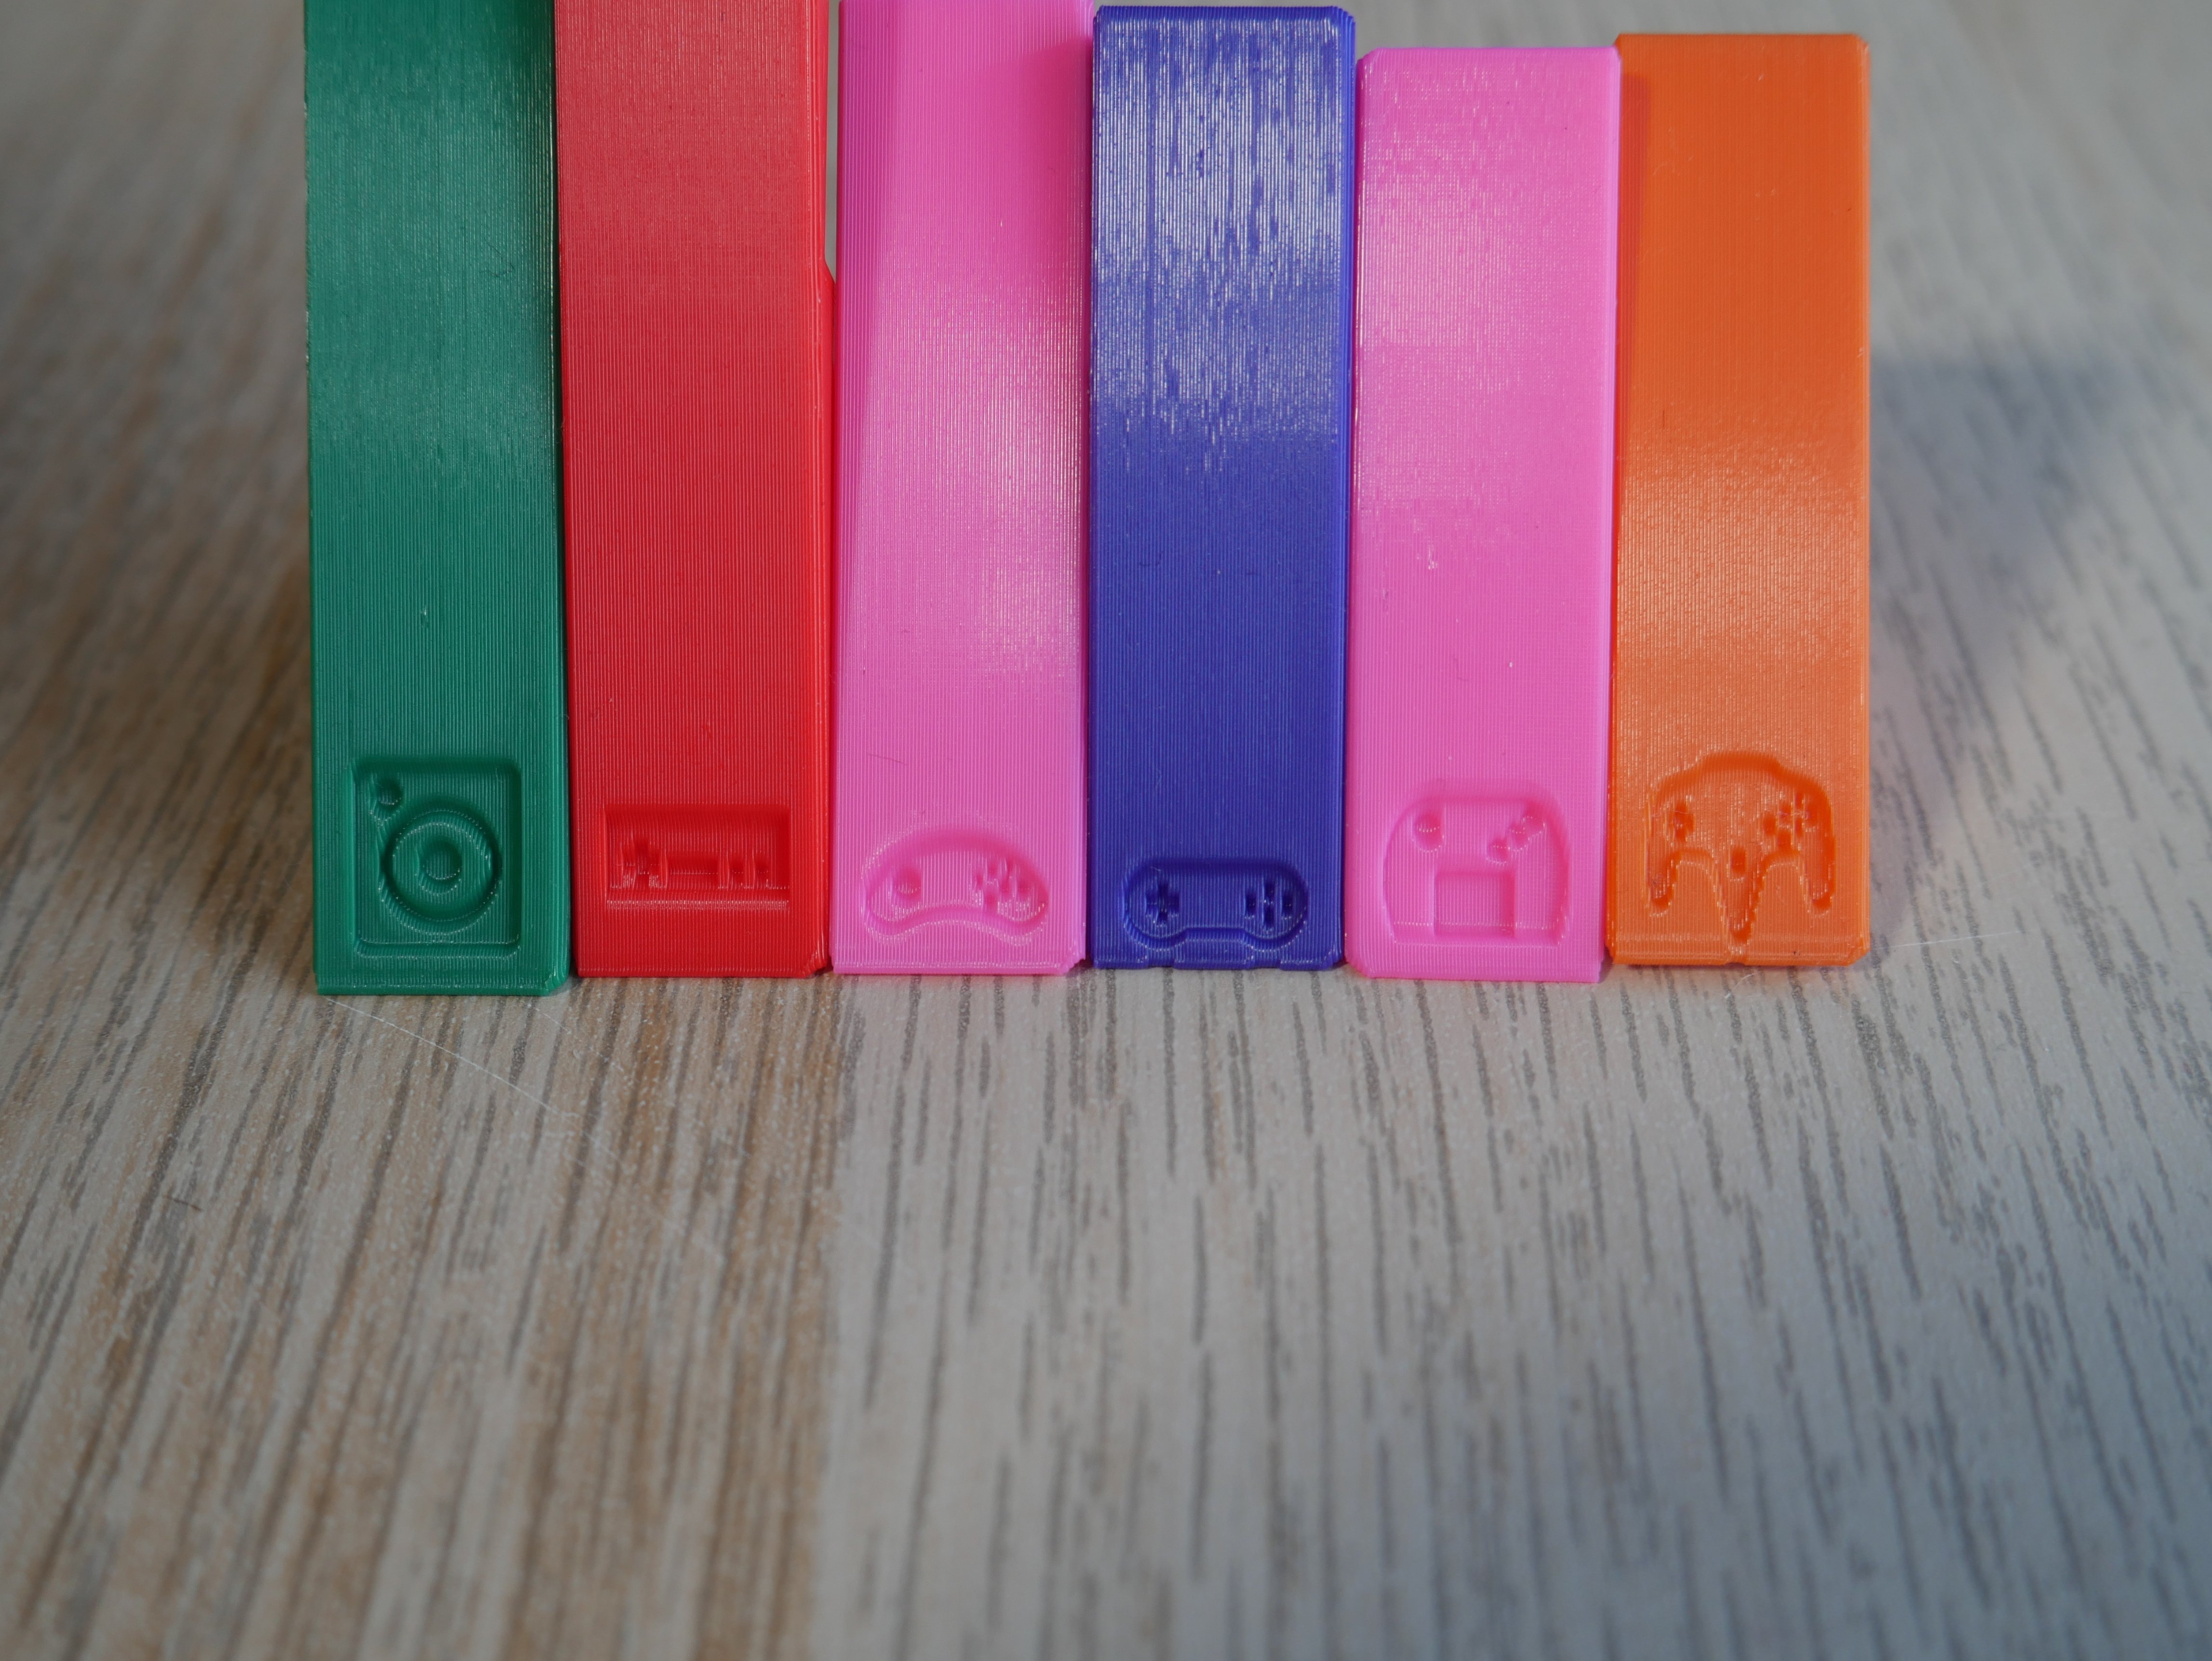
My daughter wanted a "Gorilla Tag" birthday. And my wife wanted me to print some party favors for the guest kids. Not my model, but they are churning out ok-ish.

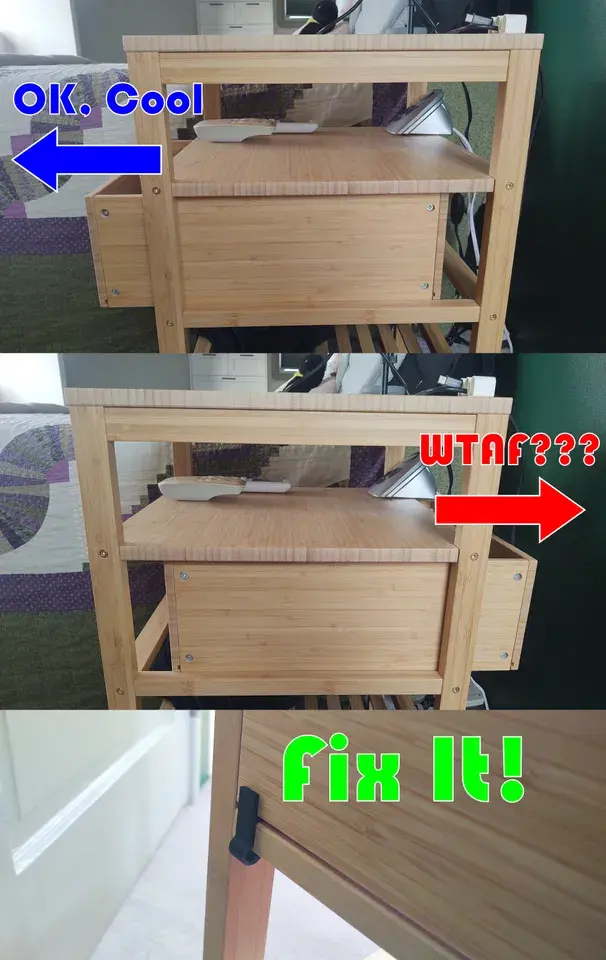
I think one of the aspects I like most about 3D printing is the ability for anyone to generate what I like to call a Very Specific Object, which is an item with a purpose so niche it's a near certainty no one but the author would ever have a use for it. Ergo, it's an item that by definition doesn't exist, or rather didn't until it was created for its bespoke purpose. And the point is that it does have a functional purpose, but the more obscure the better. The beauty is that we can create such things as we see fit.
I think I achieved nirvana with this, then, given that this model has garnered precisely zero downloads on Printables. Despite the fact that at least one or two punters inevitably download any damn fool thing I post there. Not even the scraper bots want this one.
https://www.printables.com/model/783183-ikea-nordkisa-drawer-stopper-clip
This is a clip-on end stop for the Ikea Nordkisa nightstand, in and of itself a specific enough object. It prevents the drawer from being pushed out the back, which is an aspect that while highly annoying has probably only had the chance to personally annoy a very, very small portion of the world's population.

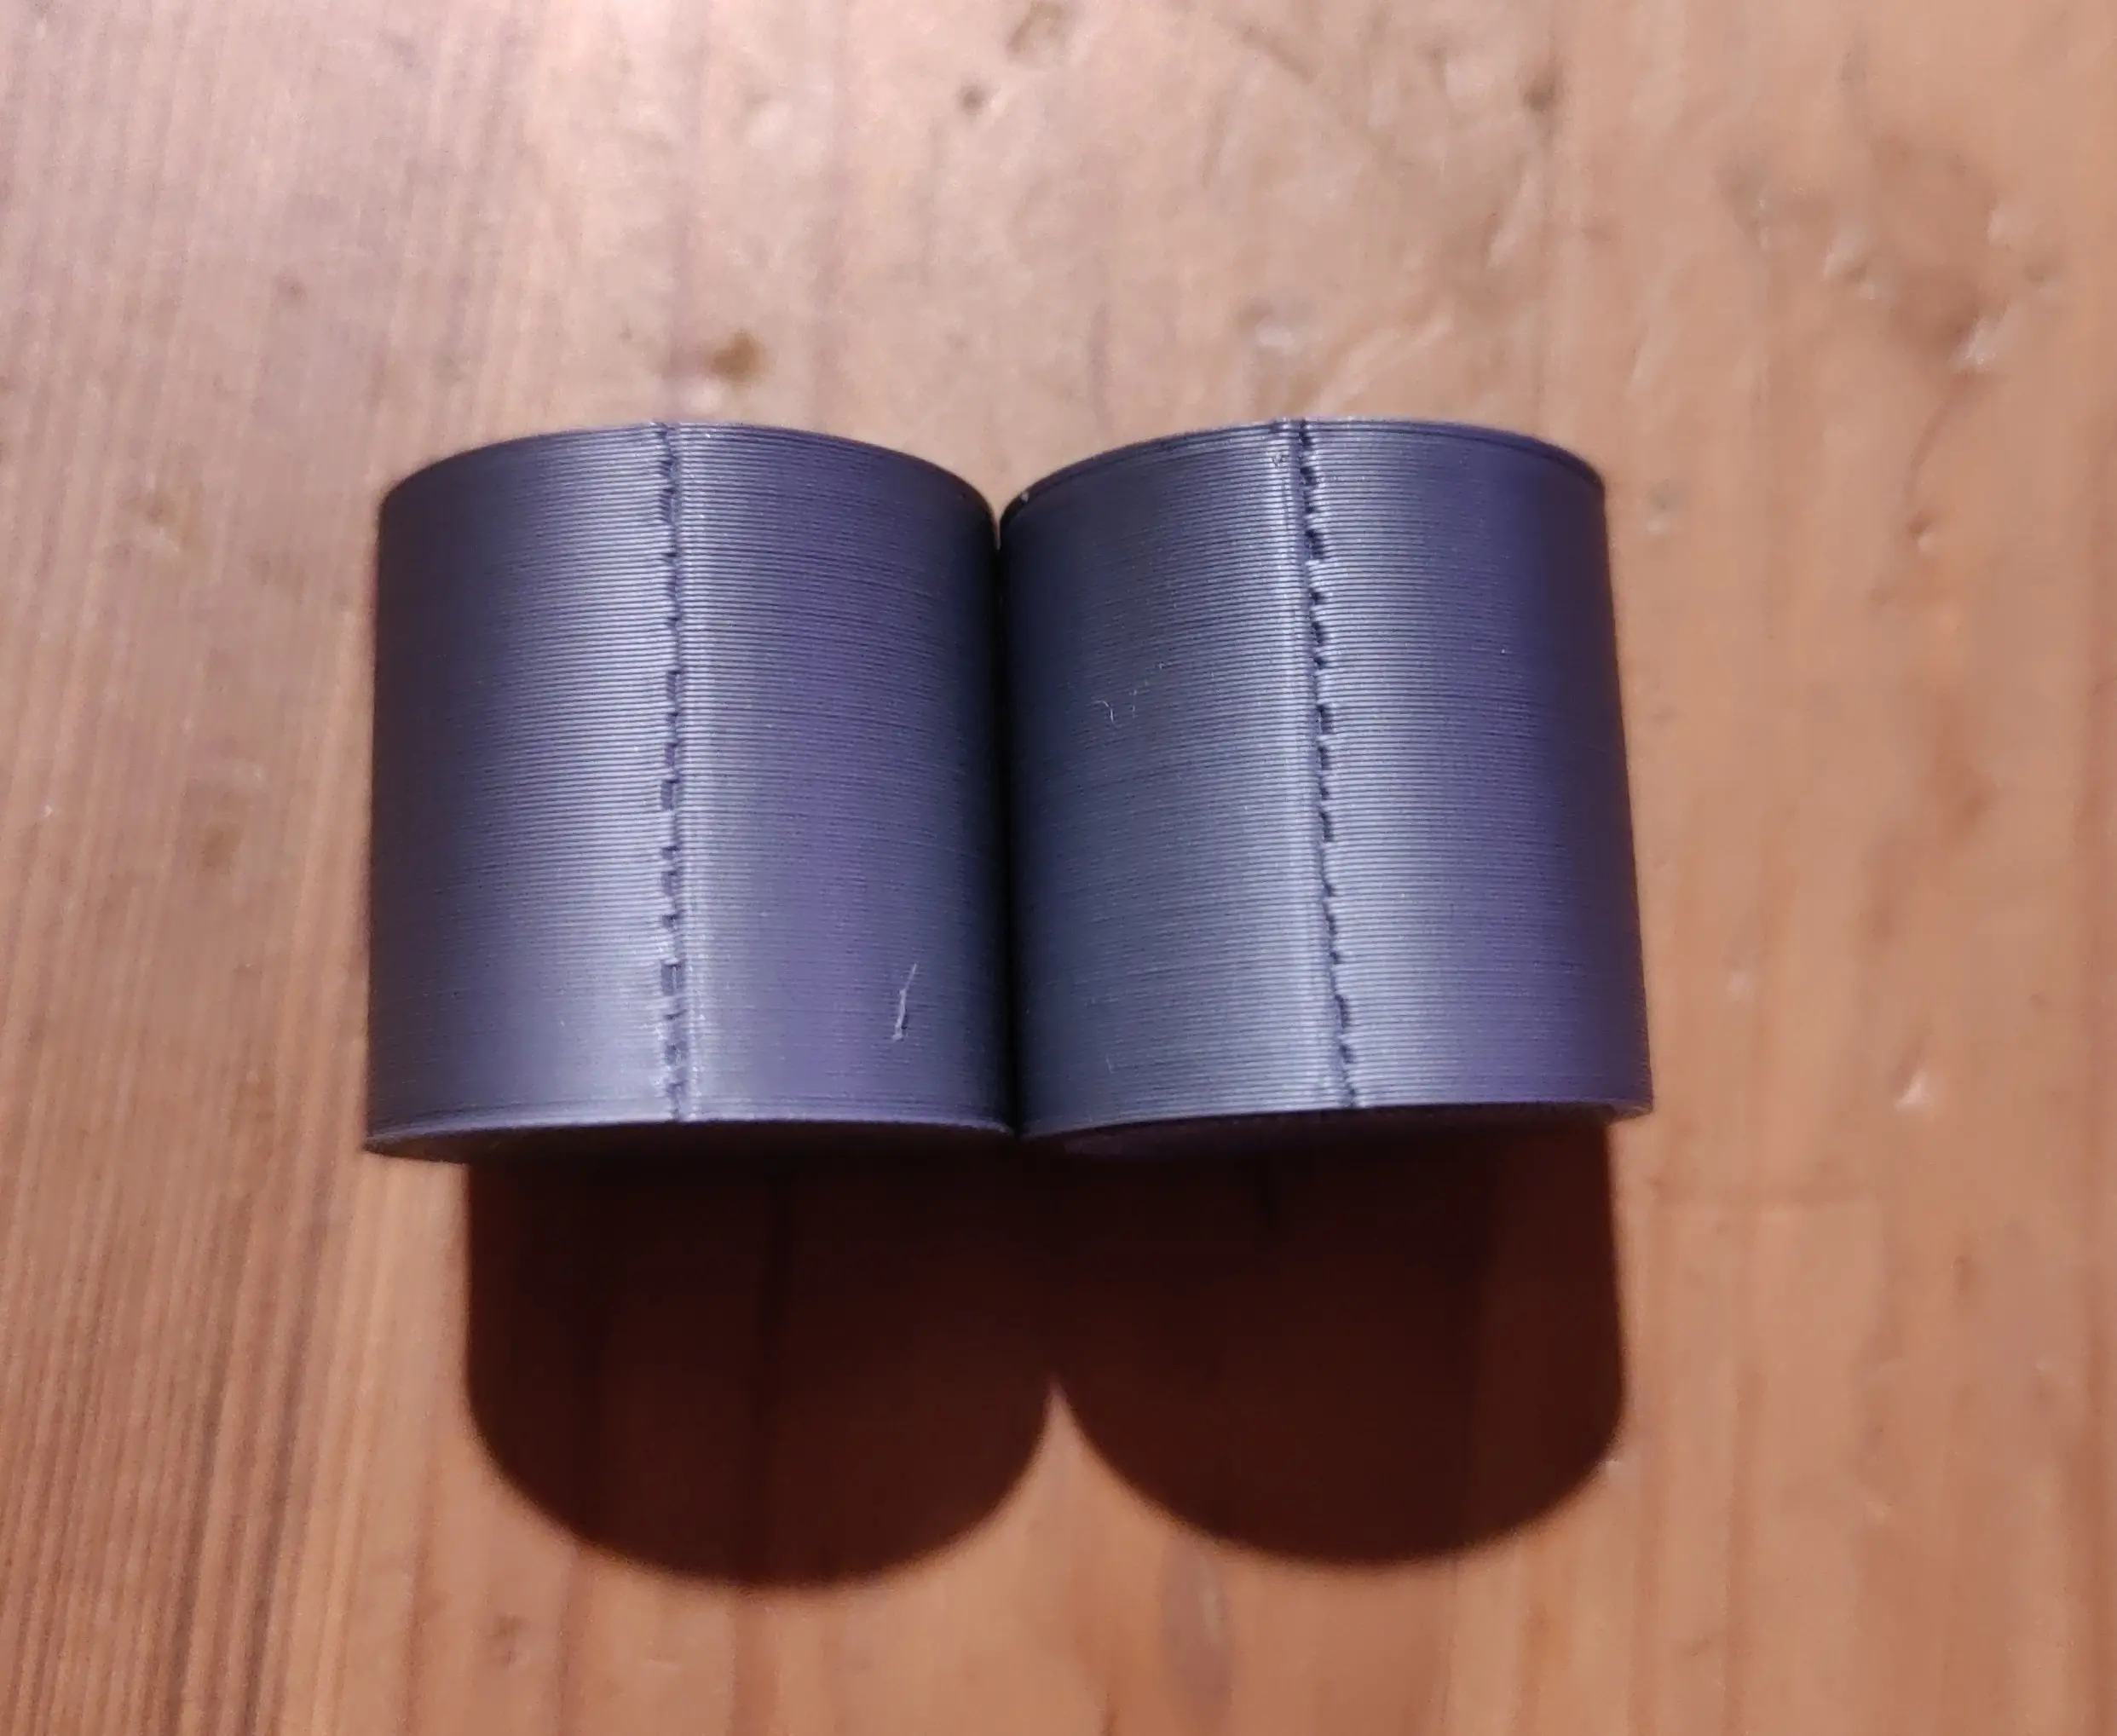
I have trouble fixing the terrible seams I'm getting. I've followed Elli's print tuning guide and calibrated extruder, tuned PA (it's now 0.035) and extrusion multiplier.
I've tried adjusting both retraction length and speed, but it doesn't seem to have much impact. I'm not using "wipe on retract" or "retract on layer change", I only retract if travel distance is longer than 3mm. Retract is 0.3mm @35mm/s.
I've tried reducing PA smooth time too, but this also doesn't seem to have a noticable impact.
I've tried reducing seam gap from the default 10% in Orca all the way down to 0%, but the bad seams persist.
I've tried with "wipe on loops" both disabled and enabled with no difference.
I've tried with both arachne and classic wall generator, no difference.
I've tried different wall orders, inner/outer, inner/outer/inner and outer/inner, all with the same bad seams.
Filament in the picture is matte PLA, it is without doubt dry and generally prints well aside from the seams. It's stored vacuum sealed with silica, and I use a filament dryer to dry if I suspect wet filament.
I'm running out of ideas for where to tweak to get a decent result.
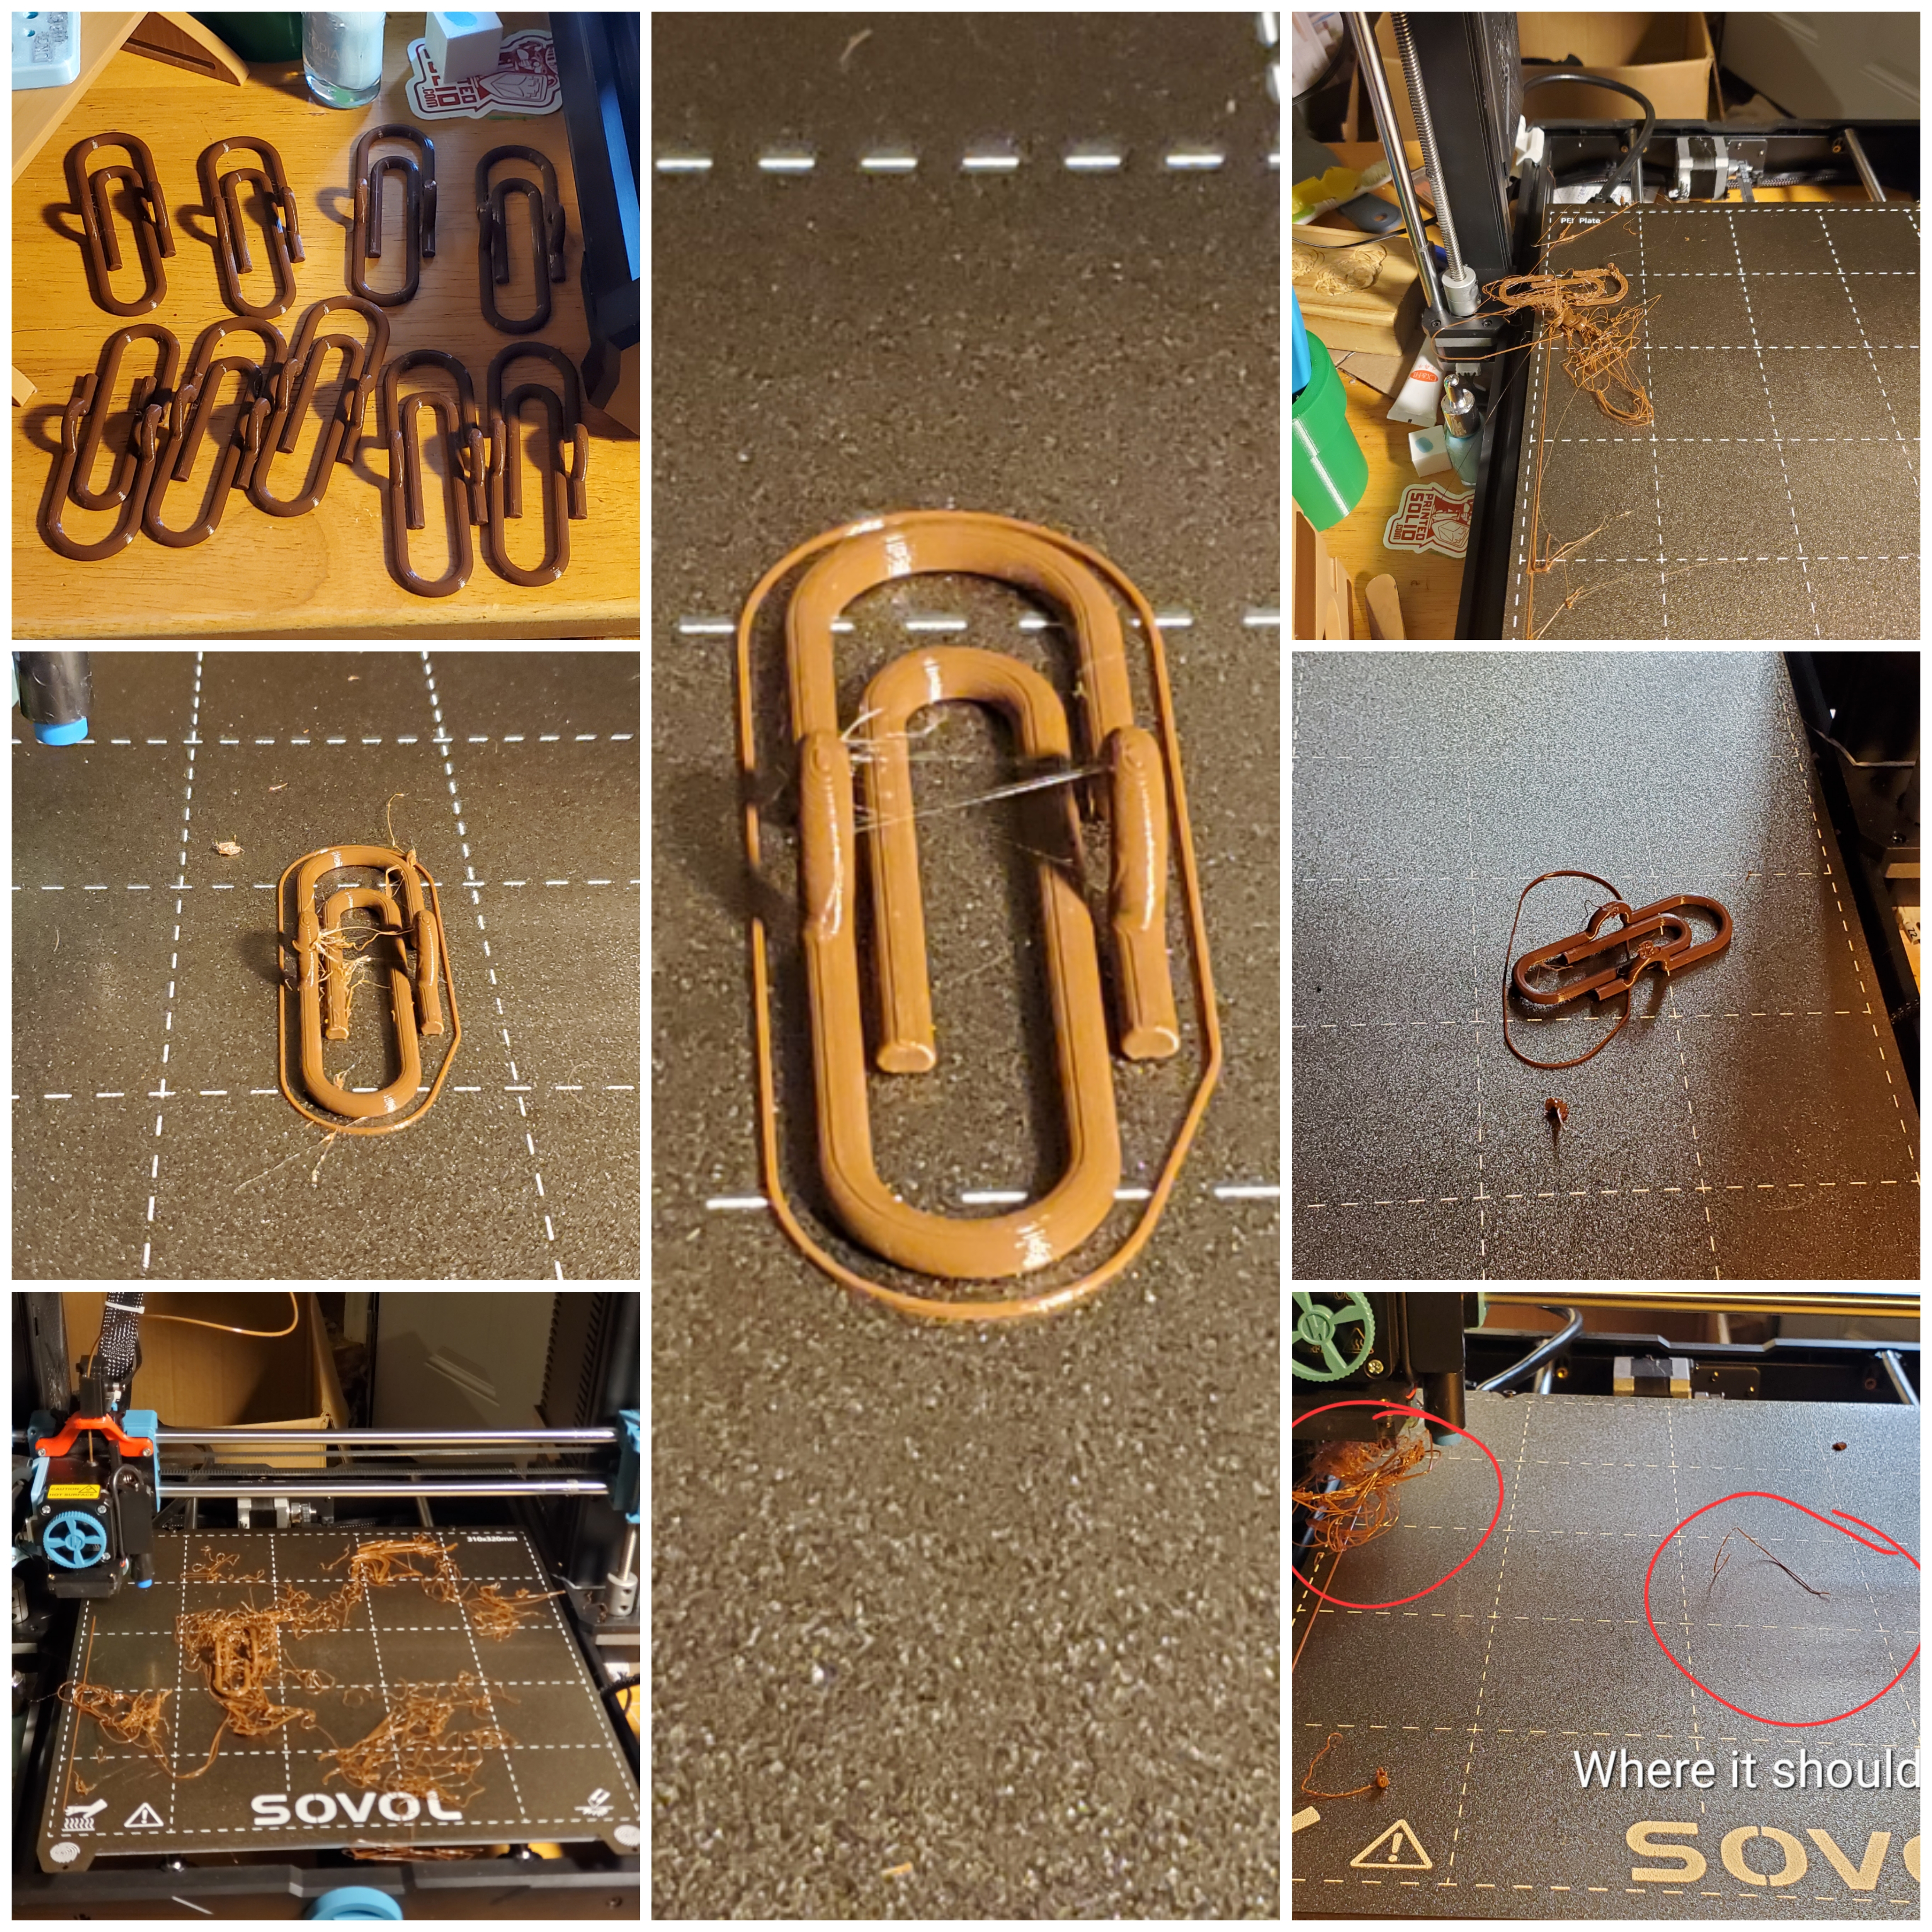
Just thought I would quickly share what can happen if you're not paying attention with a heavy mass spool if you're not careful. I have all my spools on a dowel rod attached to the top of my printer enclosure and fed through an opening in the top. Never had the slightest issue with 1 kg spools, and I thought I would save a little bit of money and time changing filament by trying a 3 kg spool. It spins perfectly fine without friction, but the much heavier mass is enough to cause it to have significant strain on the extruder pulling it in to the hot end. You can see in the result where I provided strain relief by hand while watching it print. 
I am finally reaching out as I am at my wits end and need experienced people to help me resolve my printing issue.
I have a Voxelabs Aquila (Ender 3 v2) formerly running marlin with small but manageable annoyances like overhang and manual bed leveling and thus began my journey after a year of using Aquila to start modding/upgrading the thing.
First thing i did was upgrade the fans and shroud, this improved prints slightly but was still not satisfied.
Moved to Klipper and added BLTouch and this is where all my problems started. After hours of following guides and troubleshooting of setting them both up, i still get very little bed adhesion and layers are not smooth together (gaps) with the same 3d slicing software i have been using before the switch (yes changed it to Klipper firmware in slicer)
As you can see in the picture this is after a manual bed level. Where do i go from here?
Edit 2: fully cleaned nozzle, hotend, and bed without any other changes with same results.
Edit 1: forgot to add my printer.cfg
[include mainsail.cfg]

[stepper_x]
step_pin: PC2
dir_pin: PB9
enable_pin: !PC3
microsteps: 16
rotation_distance: 40
endstop_pin: ^PA5
position_endstop: 3
position_max: 235
homing_speed: 50

[stepper_y]
step_pin: PB8
dir_pin: PB7
enable_pin: !PC3
microsteps: 16
rotation_distance: 40
endstop_pin: ^PA6
position_endstop: -17
position_max: 228
position_min: -17
homing_speed: 50

[stepper_z]
step_pin: PB6
dir_pin: !PB5
enable_pin: !PC3
microsteps: 16
rotation_distance: 8
endstop_pin: probe:z_virtual_endstop
#position_endstop: 0.0
position_max: 250
position_min: -6

[extruder]
max_extrude_only_distance: 100.0
step_pin: PB4
dir_pin: PB3
enable_pin: !PC3
microsteps: 16
rotation_distance: 34.406
nozzle_diameter: 0.400
filament_diameter: 1.750
heater_pin: PA1
sensor_type: EPCOS 100K B57560G104F
sensor_pin: PC5
#control: pid
# tuned for stock hardware with 200 degree Celsius target
#pid_Kp: 21.527
#pid_Ki: 1.063
#pid_Kd: 108.982
min_temp: 0
max_temp: 250

[bltouch]
# Can't move this configuration to include because of z-offset adjustment
sensor_pin: ^PB1
control_pin: PB0
x_offset: -28
y_offset: -15
#z_offset = 0
samples: 2
speed: 2
#pin_move_time: 0.500
#probe_with_touch_mode: False
#pin_up_reports_not_triggered: True
#pin_up_touch_mode_reports_triggered: True
#stow_on_each_sample: False

[safe_z_home]
home_xy_position: 125,125 #this should be the center of your bed
speed: 50
z_hop: 10
z_hop_speed: 5

[bed_mesh]
speed: 80
horizontal_move_z: 5
mesh_min: 3, 33       #!!min and max co-ords are based on the probes location not the nozzle!!
mesh_max: 207, 213  #needs to be calibrated for your individual printer
probe_count: 5,5 #this is the number of probing points on X then Y axis
mesh_pps: 2,2
fade_start: 1
fade_end: 10
fade_target: 0

[bed_screws]
screw1: 25, 25
screw2: 195, 25
screw3: 195, 195
screw4: 25, 195

[heater_bed]
heater_pin: PA2
sensor_type: EPCOS 100K B57560G104F
sensor_pin: PC4
#control: pid
# tuned for stock hardware with 50 degree Celsius target
#pid_Kp: 54.027
#pid_Ki: 0.770
#pid_Kd: 948.182
min_temp: 0
max_temp: 130

[fan]
pin: PA0

[mcu]
serial: /dev/serial/by-id/usb-1a86_USB_Serial-if00-port0
restart_method: command

[printer]
kinematics: cartesian
max_velocity: 300
max_accel: 3000
max_z_velocity: 5
max_z_accel: 100

#*# <---------------------- SAVE_CONFIG ---------------------->
#*# DO NOT EDIT THIS BLOCK OR BELOW. The contents are auto-generated.
#*#
#*# [extruder]
#*# control = pid
#*# pid_kp = 31.251
#*# pid_ki = 2.510
#*# pid_kd = 97.268
#*#
#*# [heater_bed]
#*# control = pid
#*# pid_kp = 69.577
#*# pid_ki = 1.022
#*# pid_kd = 1184.541
#*#
#*# [bltouch]
#*# z_offset = 3.609

A companion to my last generator. This one makes cylindrical screw-top containers, with configurable dimensions and beefiness. And threads figured out for you.
https://www.printables.com/model/781549-parametric-easy-screw-top-container-maker-freecad-
(You could even store your ~~weed~~ KLR valve shims in it.)
Edit: This just received an update. The cap now generates with grip crenelations in it.

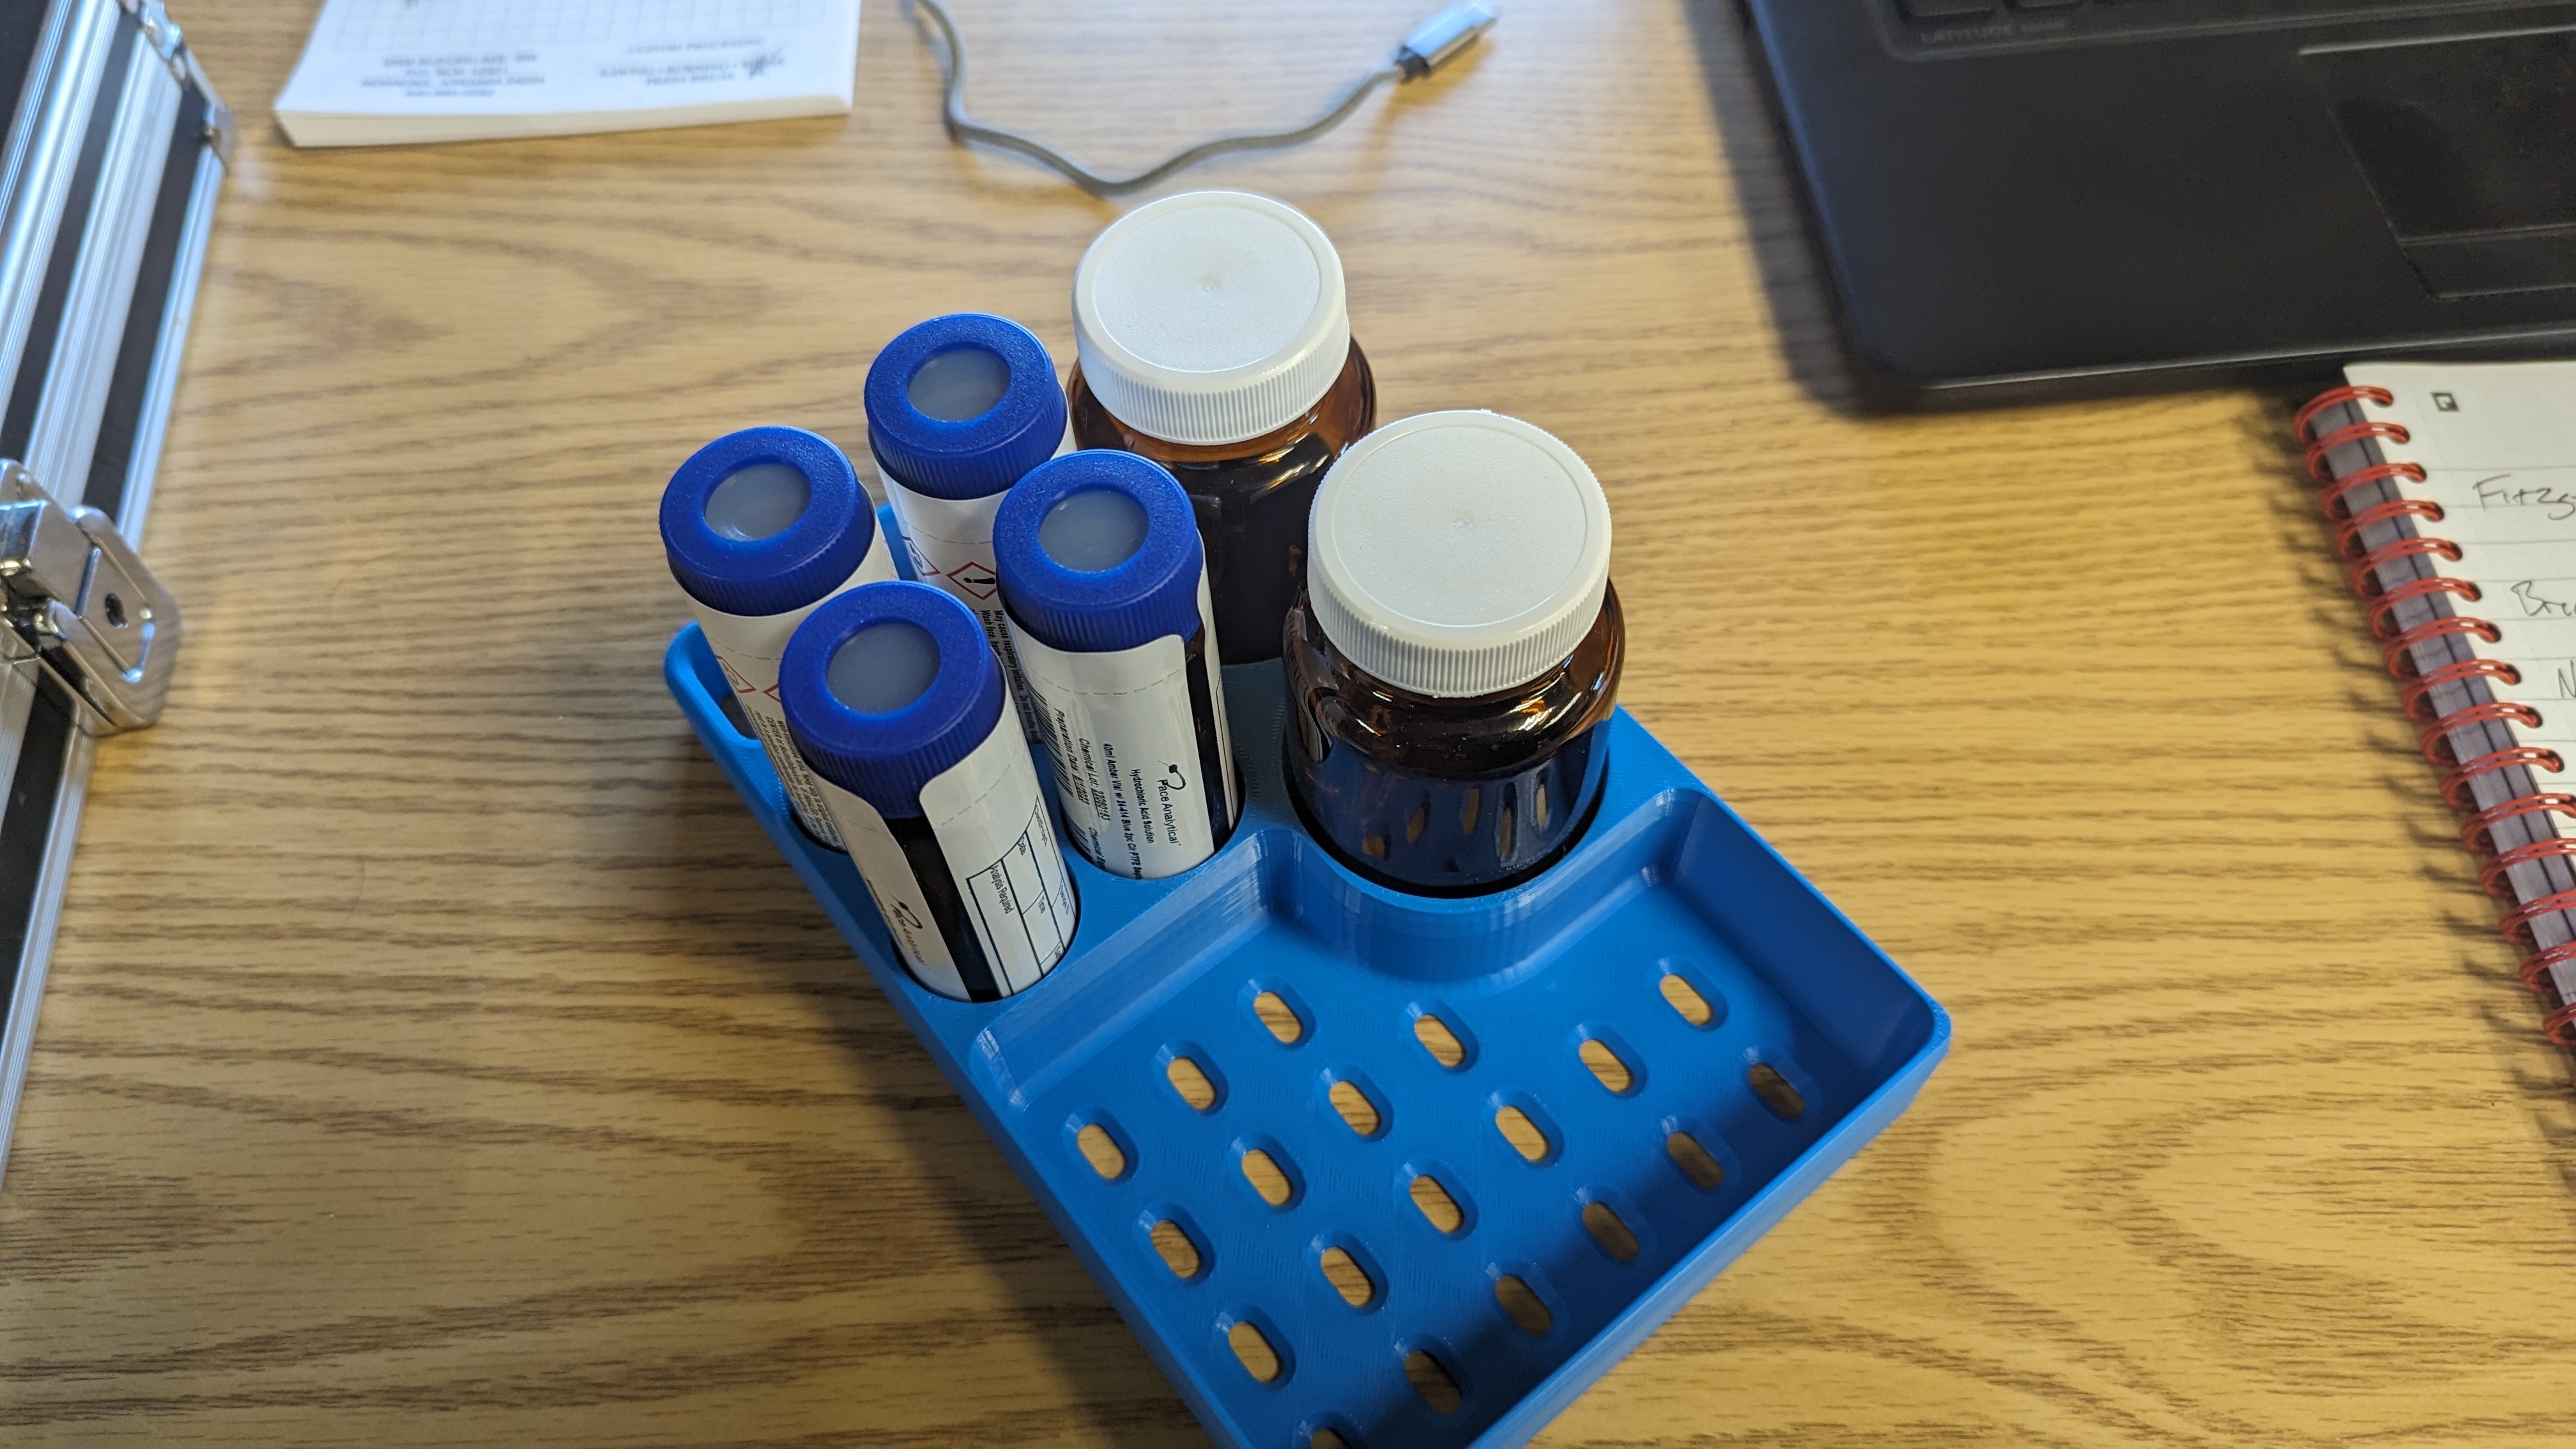
A tray designed to hold sample containers for supply well/surface water sampling.

I had made Junglecat controller cases for my galaxy fold but just got a S23 Ultra and decided to make another for this phone.
I love how perfectly the size of the controllers matches the phone width. It makes it look like one cohesive device!
Speakers, USB and pen are all accessible still.
I am willing to share the STL for free to anyone interested, but if you want to leave me a 'tip' you can buy the file from my store for five bucks (Frogcase)

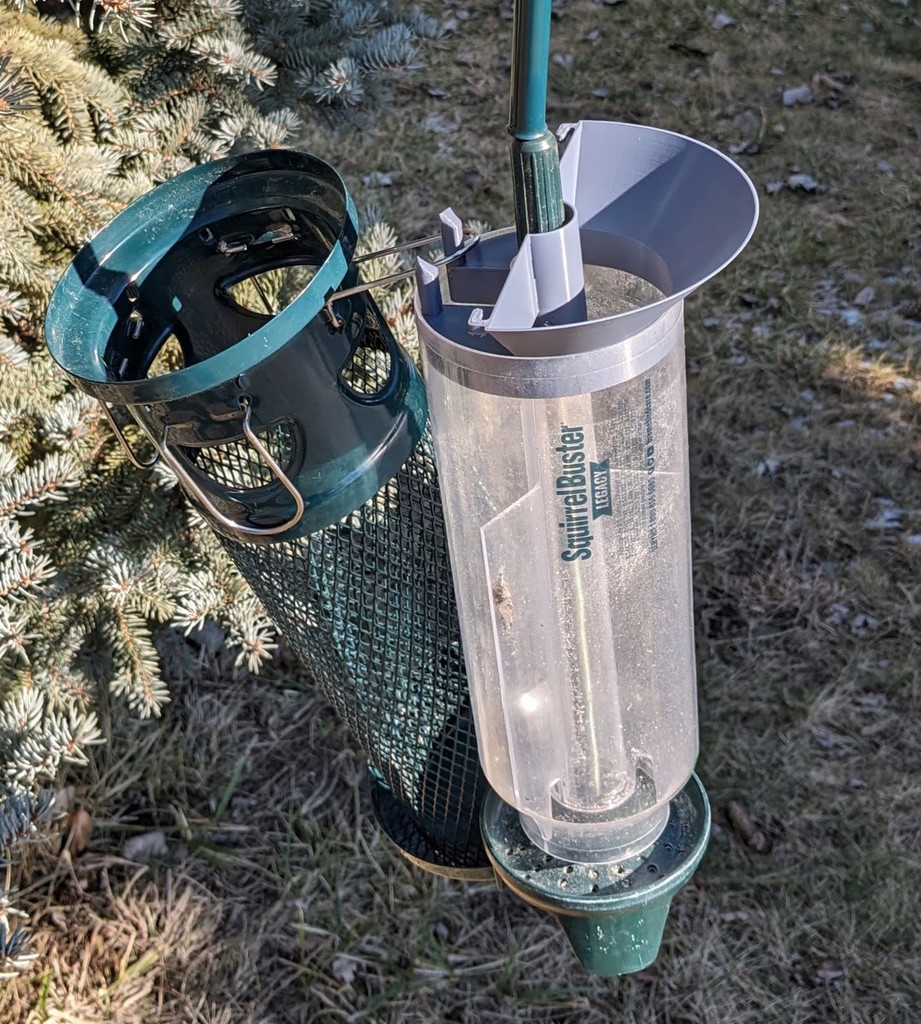
I designed this wonky-looking funnel to fit my Squirrel Buster Legacy (and probably similar models), with hooks and posts that make it possible to refill the feeder without setting any parts on the ground.
This design of feeder needs to be located away from surfaces that a squirrel could stand on, so I assume a lot of people run into this problem. I don't really blame the company for making it so cumbersome to operate, because there's overlap between the smartest squirrels and the dumbest humans.
The latest.
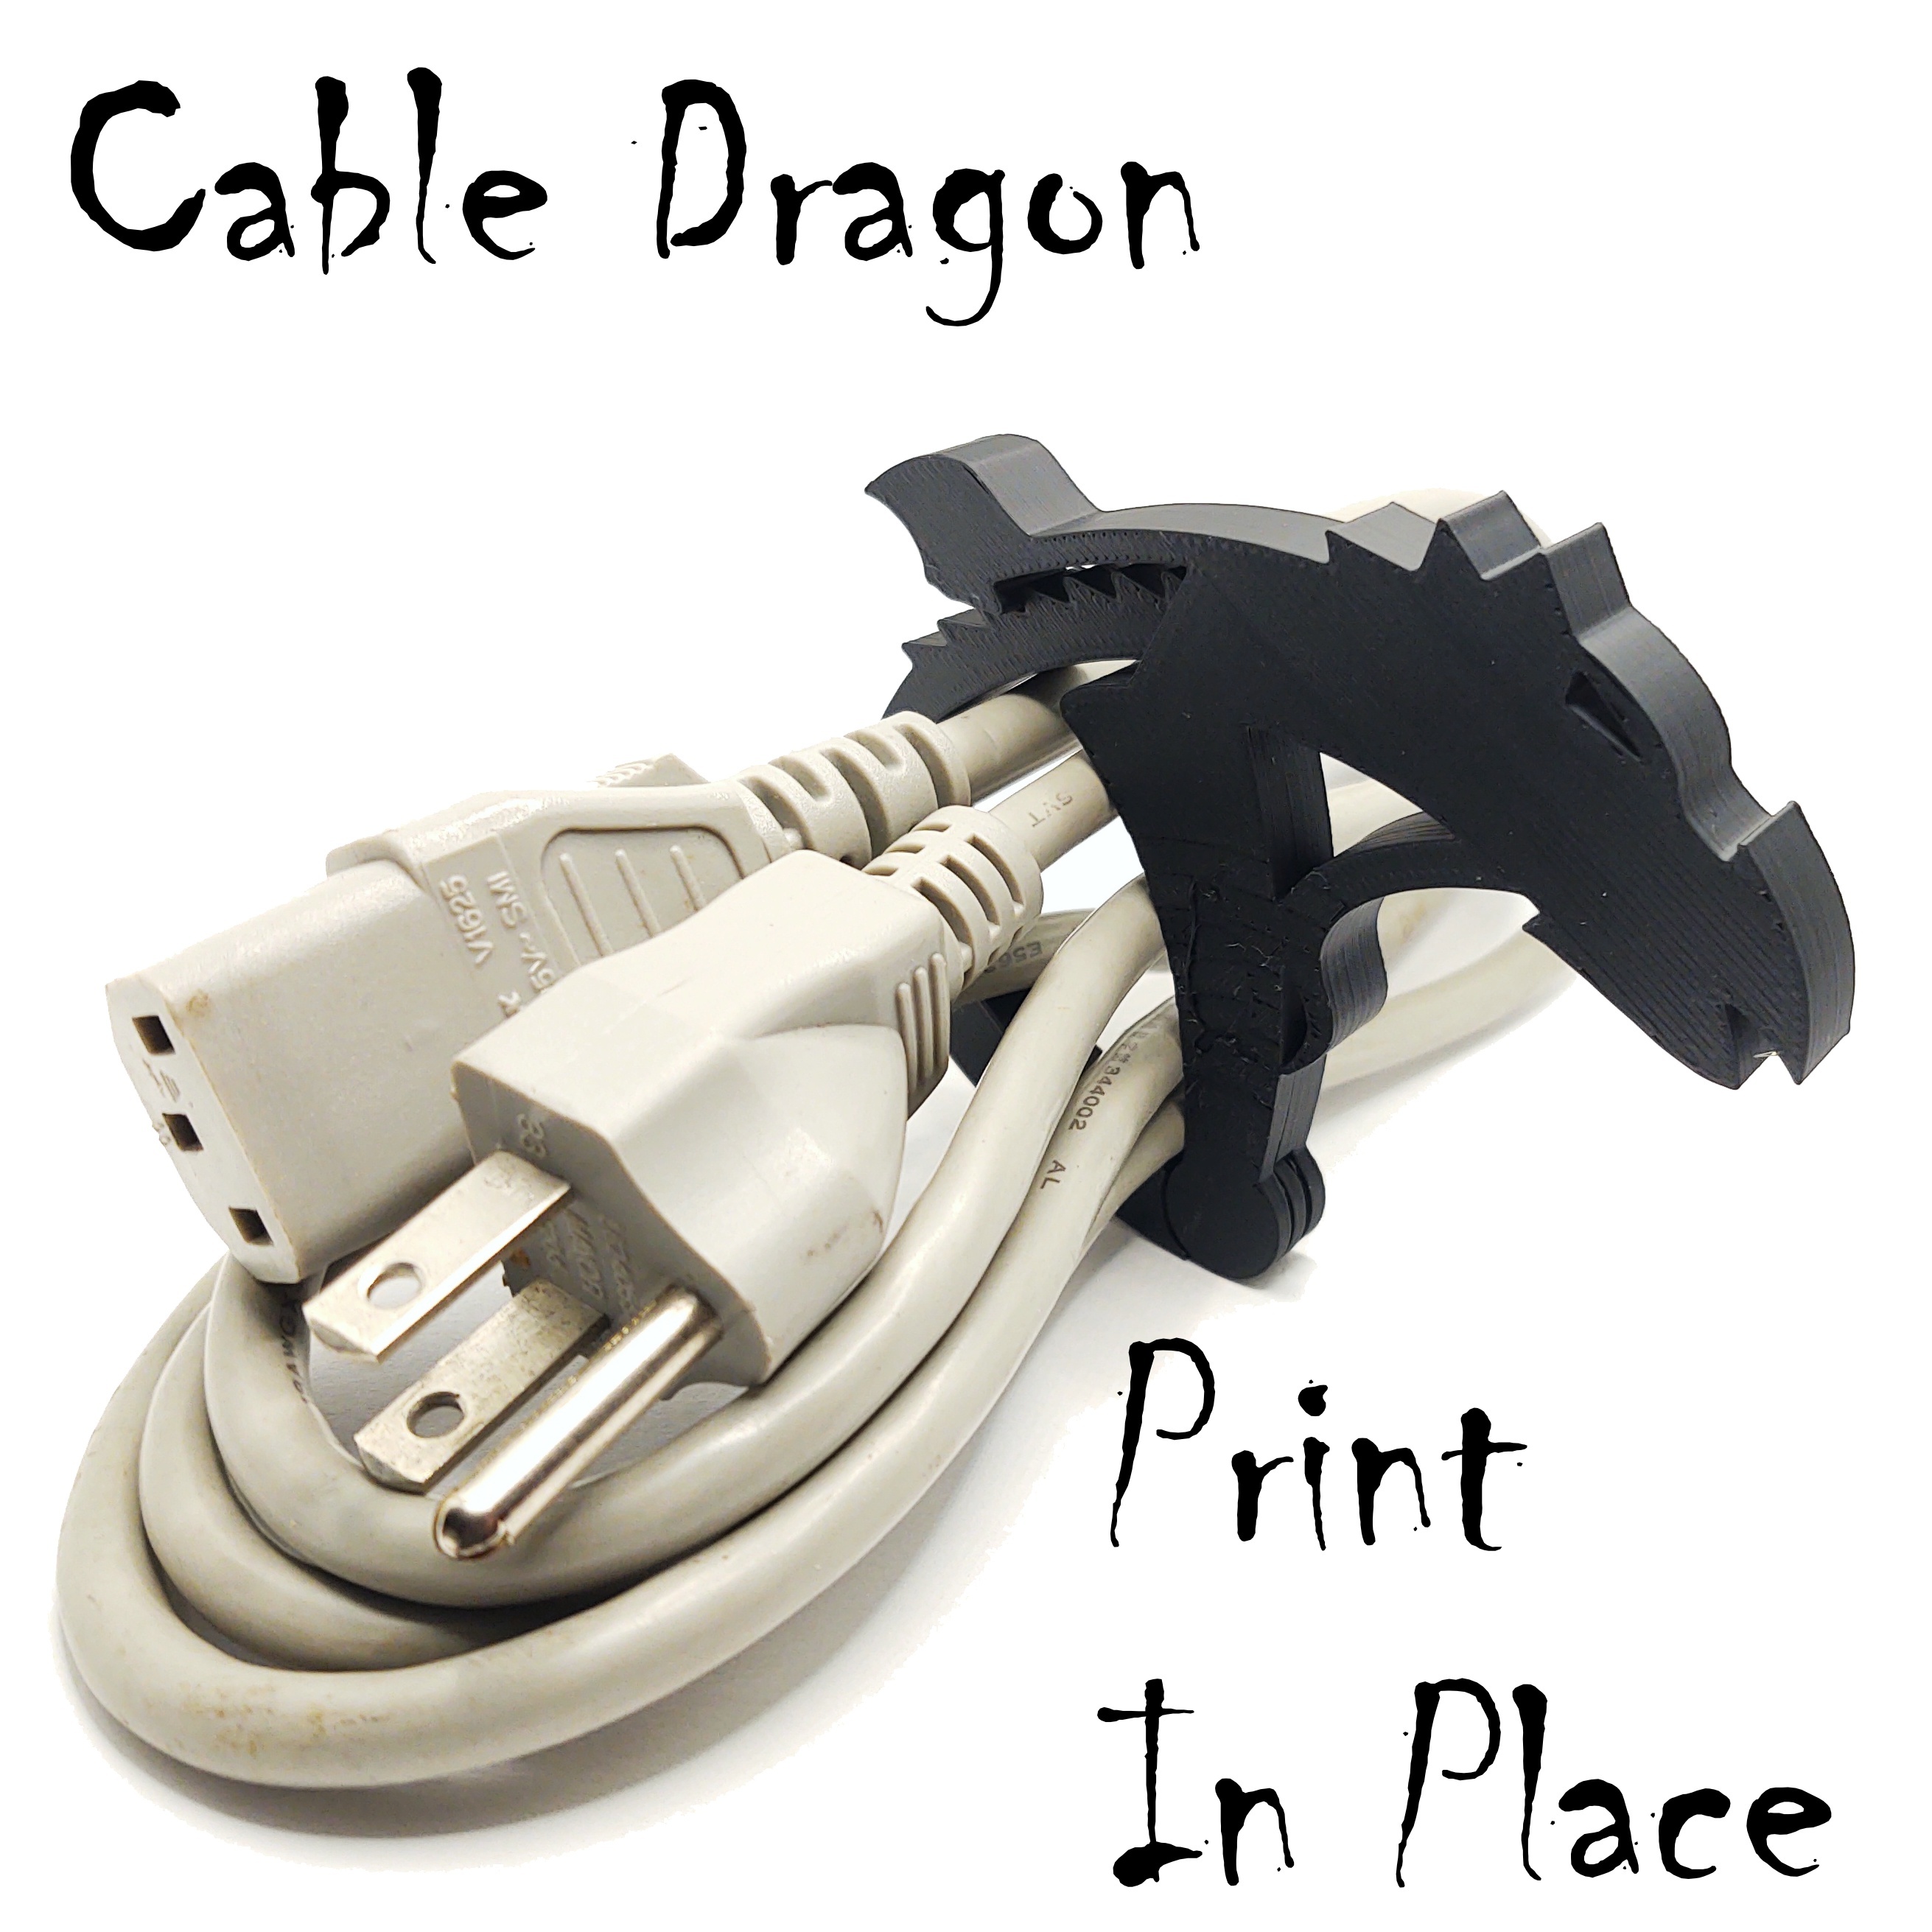
https://www.printables.com/model/774332-cable-dragon-print-in-place-ratcheting-cable-cuff
I feel like this one is rather self explanatory.
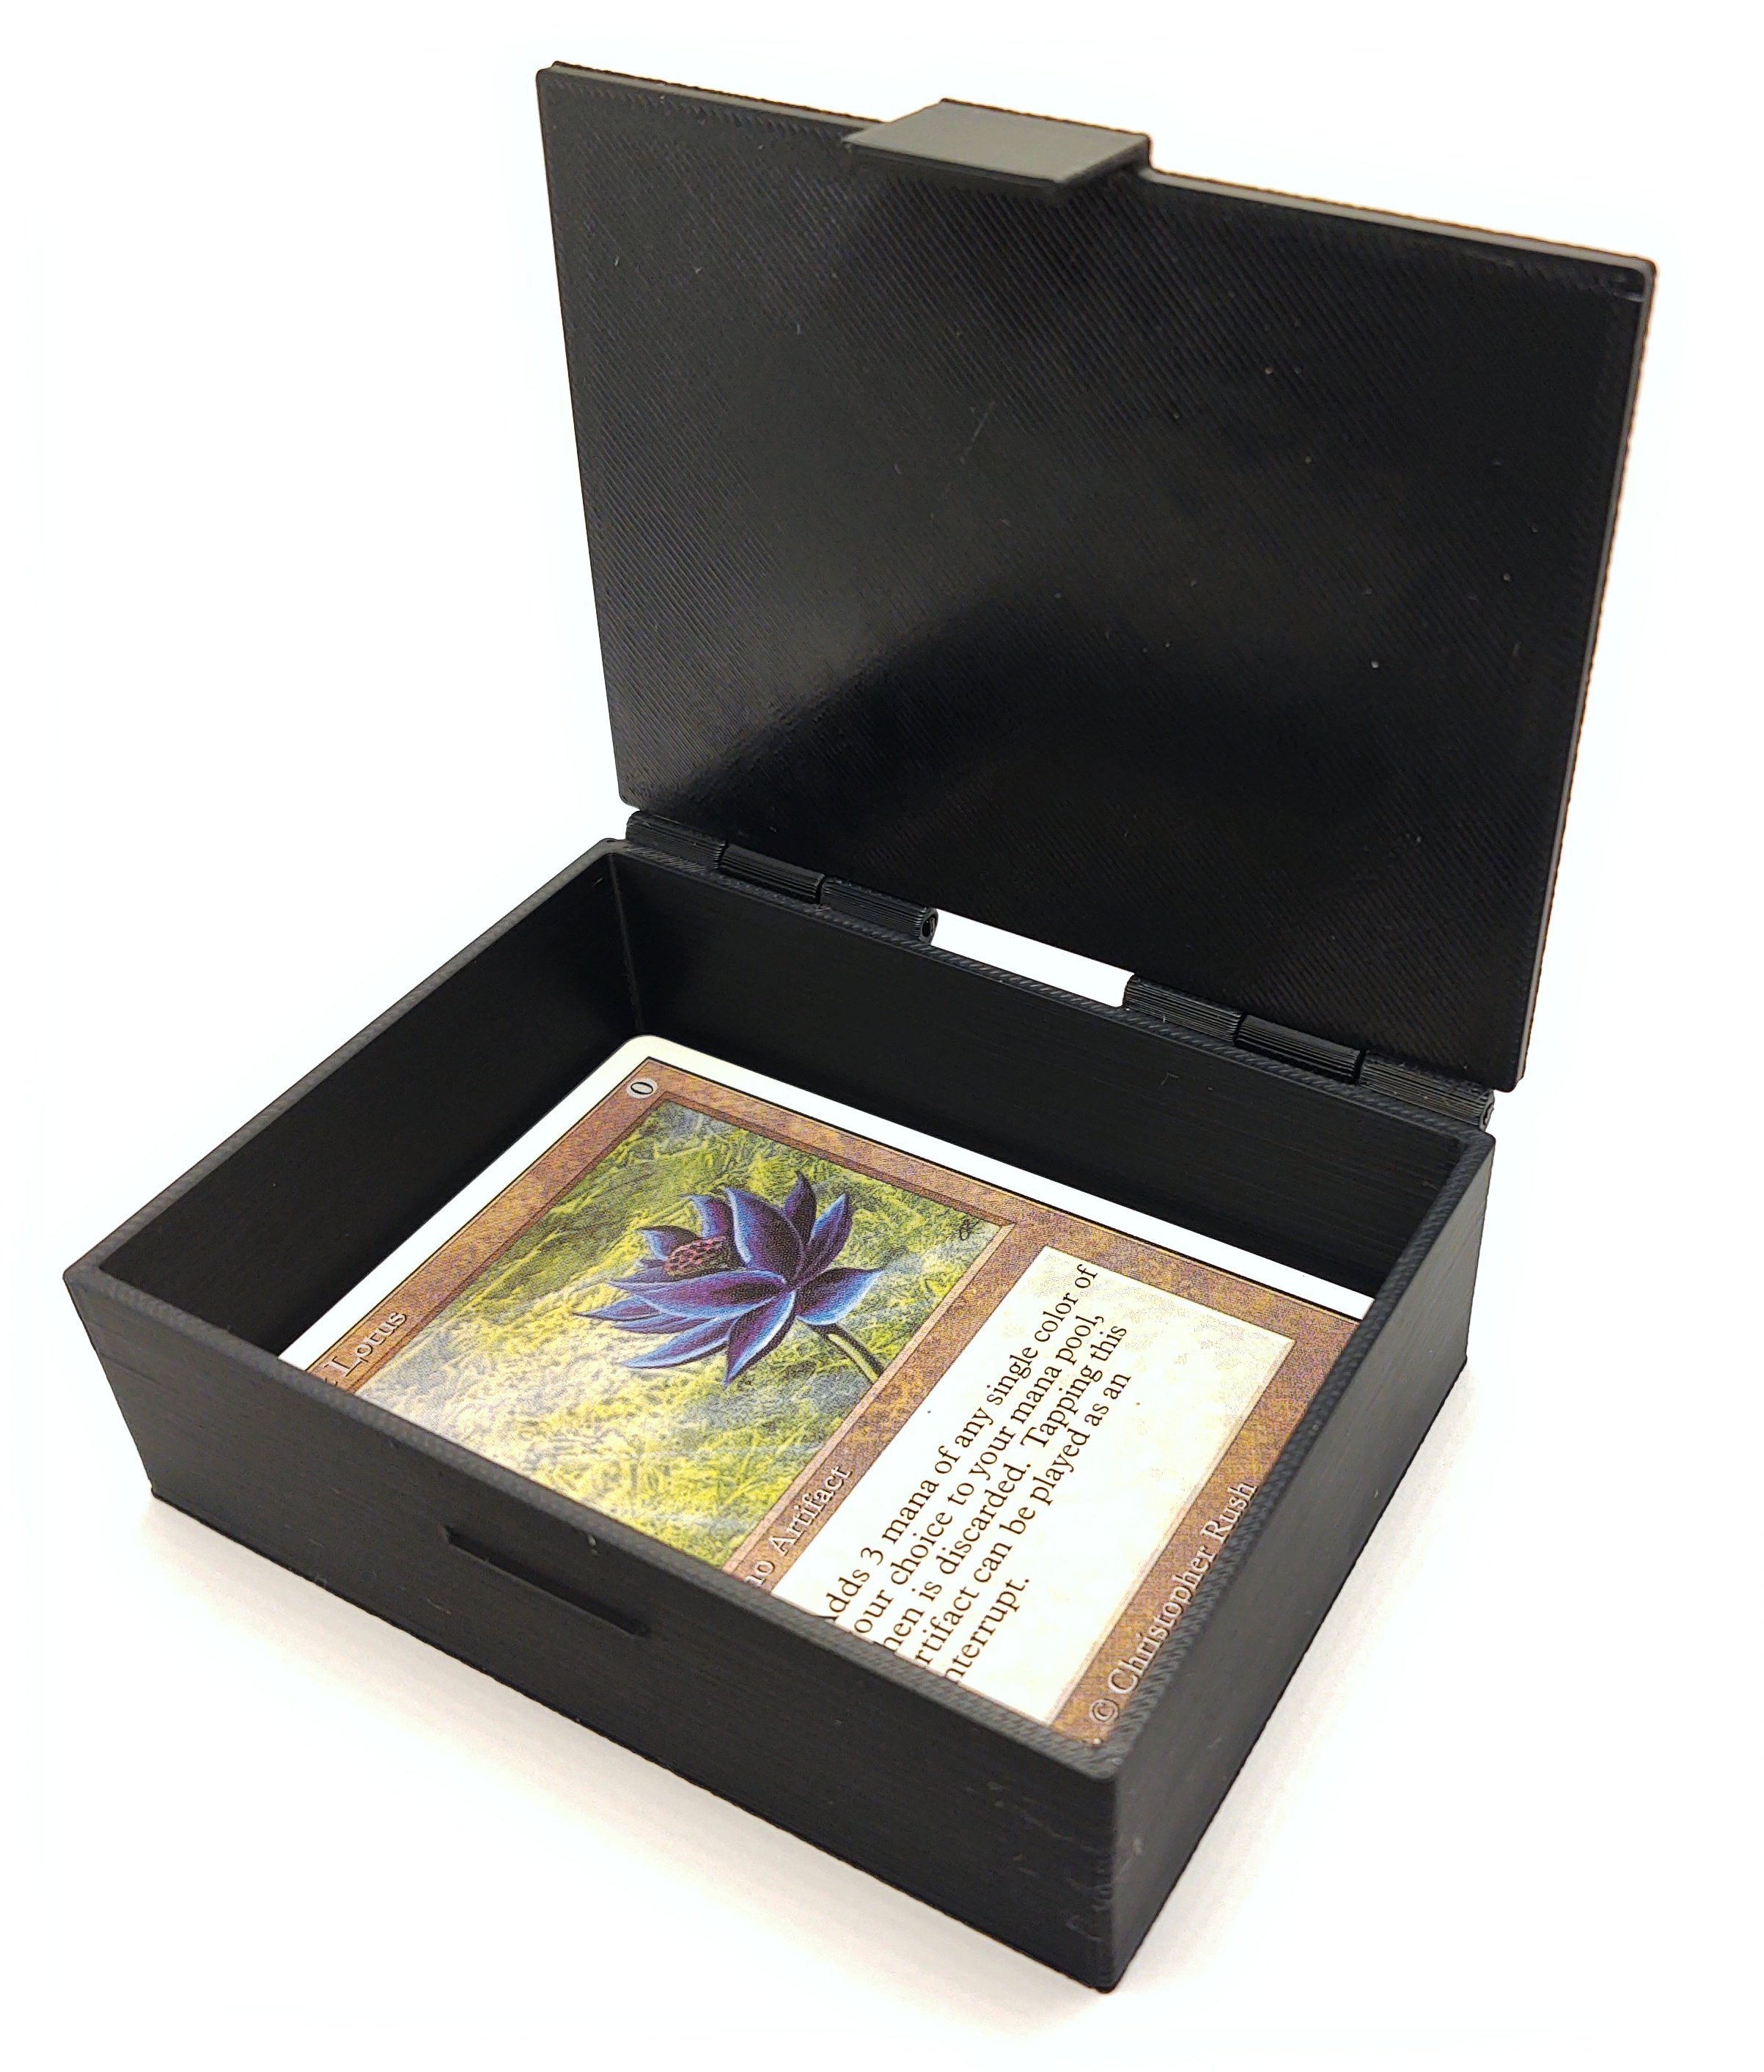
I just dropped this on Printables: A FreeCAD based custom size box generator. I've been using it for all kinds of stuff. Maybe some of you lot will get some use out of it, too.
https://www.printables.com/model/770701-parametric-simple-custom-box-maker-freecad-generat
Plug in your parameters, make a box with filament hinges -- No hardware required. No screws, no nuts, no supports, no glue, no Fusion, no proprietary software, no going cross-eyed looking at OpenSCAD code.
(And yes, the default size in the file will make an M:tG card deck case.)
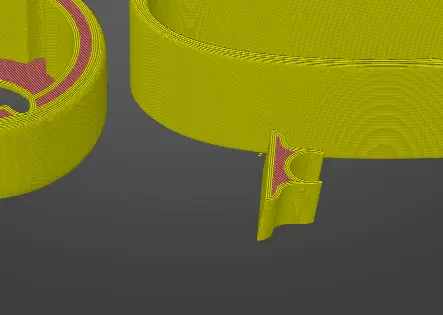
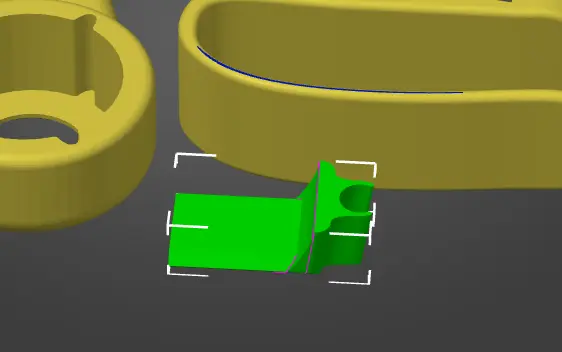
This whole chunk of this model is getting cut when sliced