3DPrinting

15751 readers
112 users here now

3DPrinting is a place where makers of all skill levels and walks of life can learn about and discuss 3D printing and development of 3D printed parts and devices.

The r/functionalprint community is now located at: or [email protected]

There are CAD communities available at: [email protected] or [email protected]

Rules

If you need an easy way to host pictures, https://catbox.moe may be an option. Be ethical about what you post and donate if you are able or use this a lot. It is just an individual hosting content, not a company. The image embedding syntax for Lemmy is ![](URL)

Moderation policy: Light, mostly invisible
founded 2 years ago
MODERATORS
1
70
submitted 9 hours ago* (last edited 9 hours ago) by [email protected] to c/3dprinting


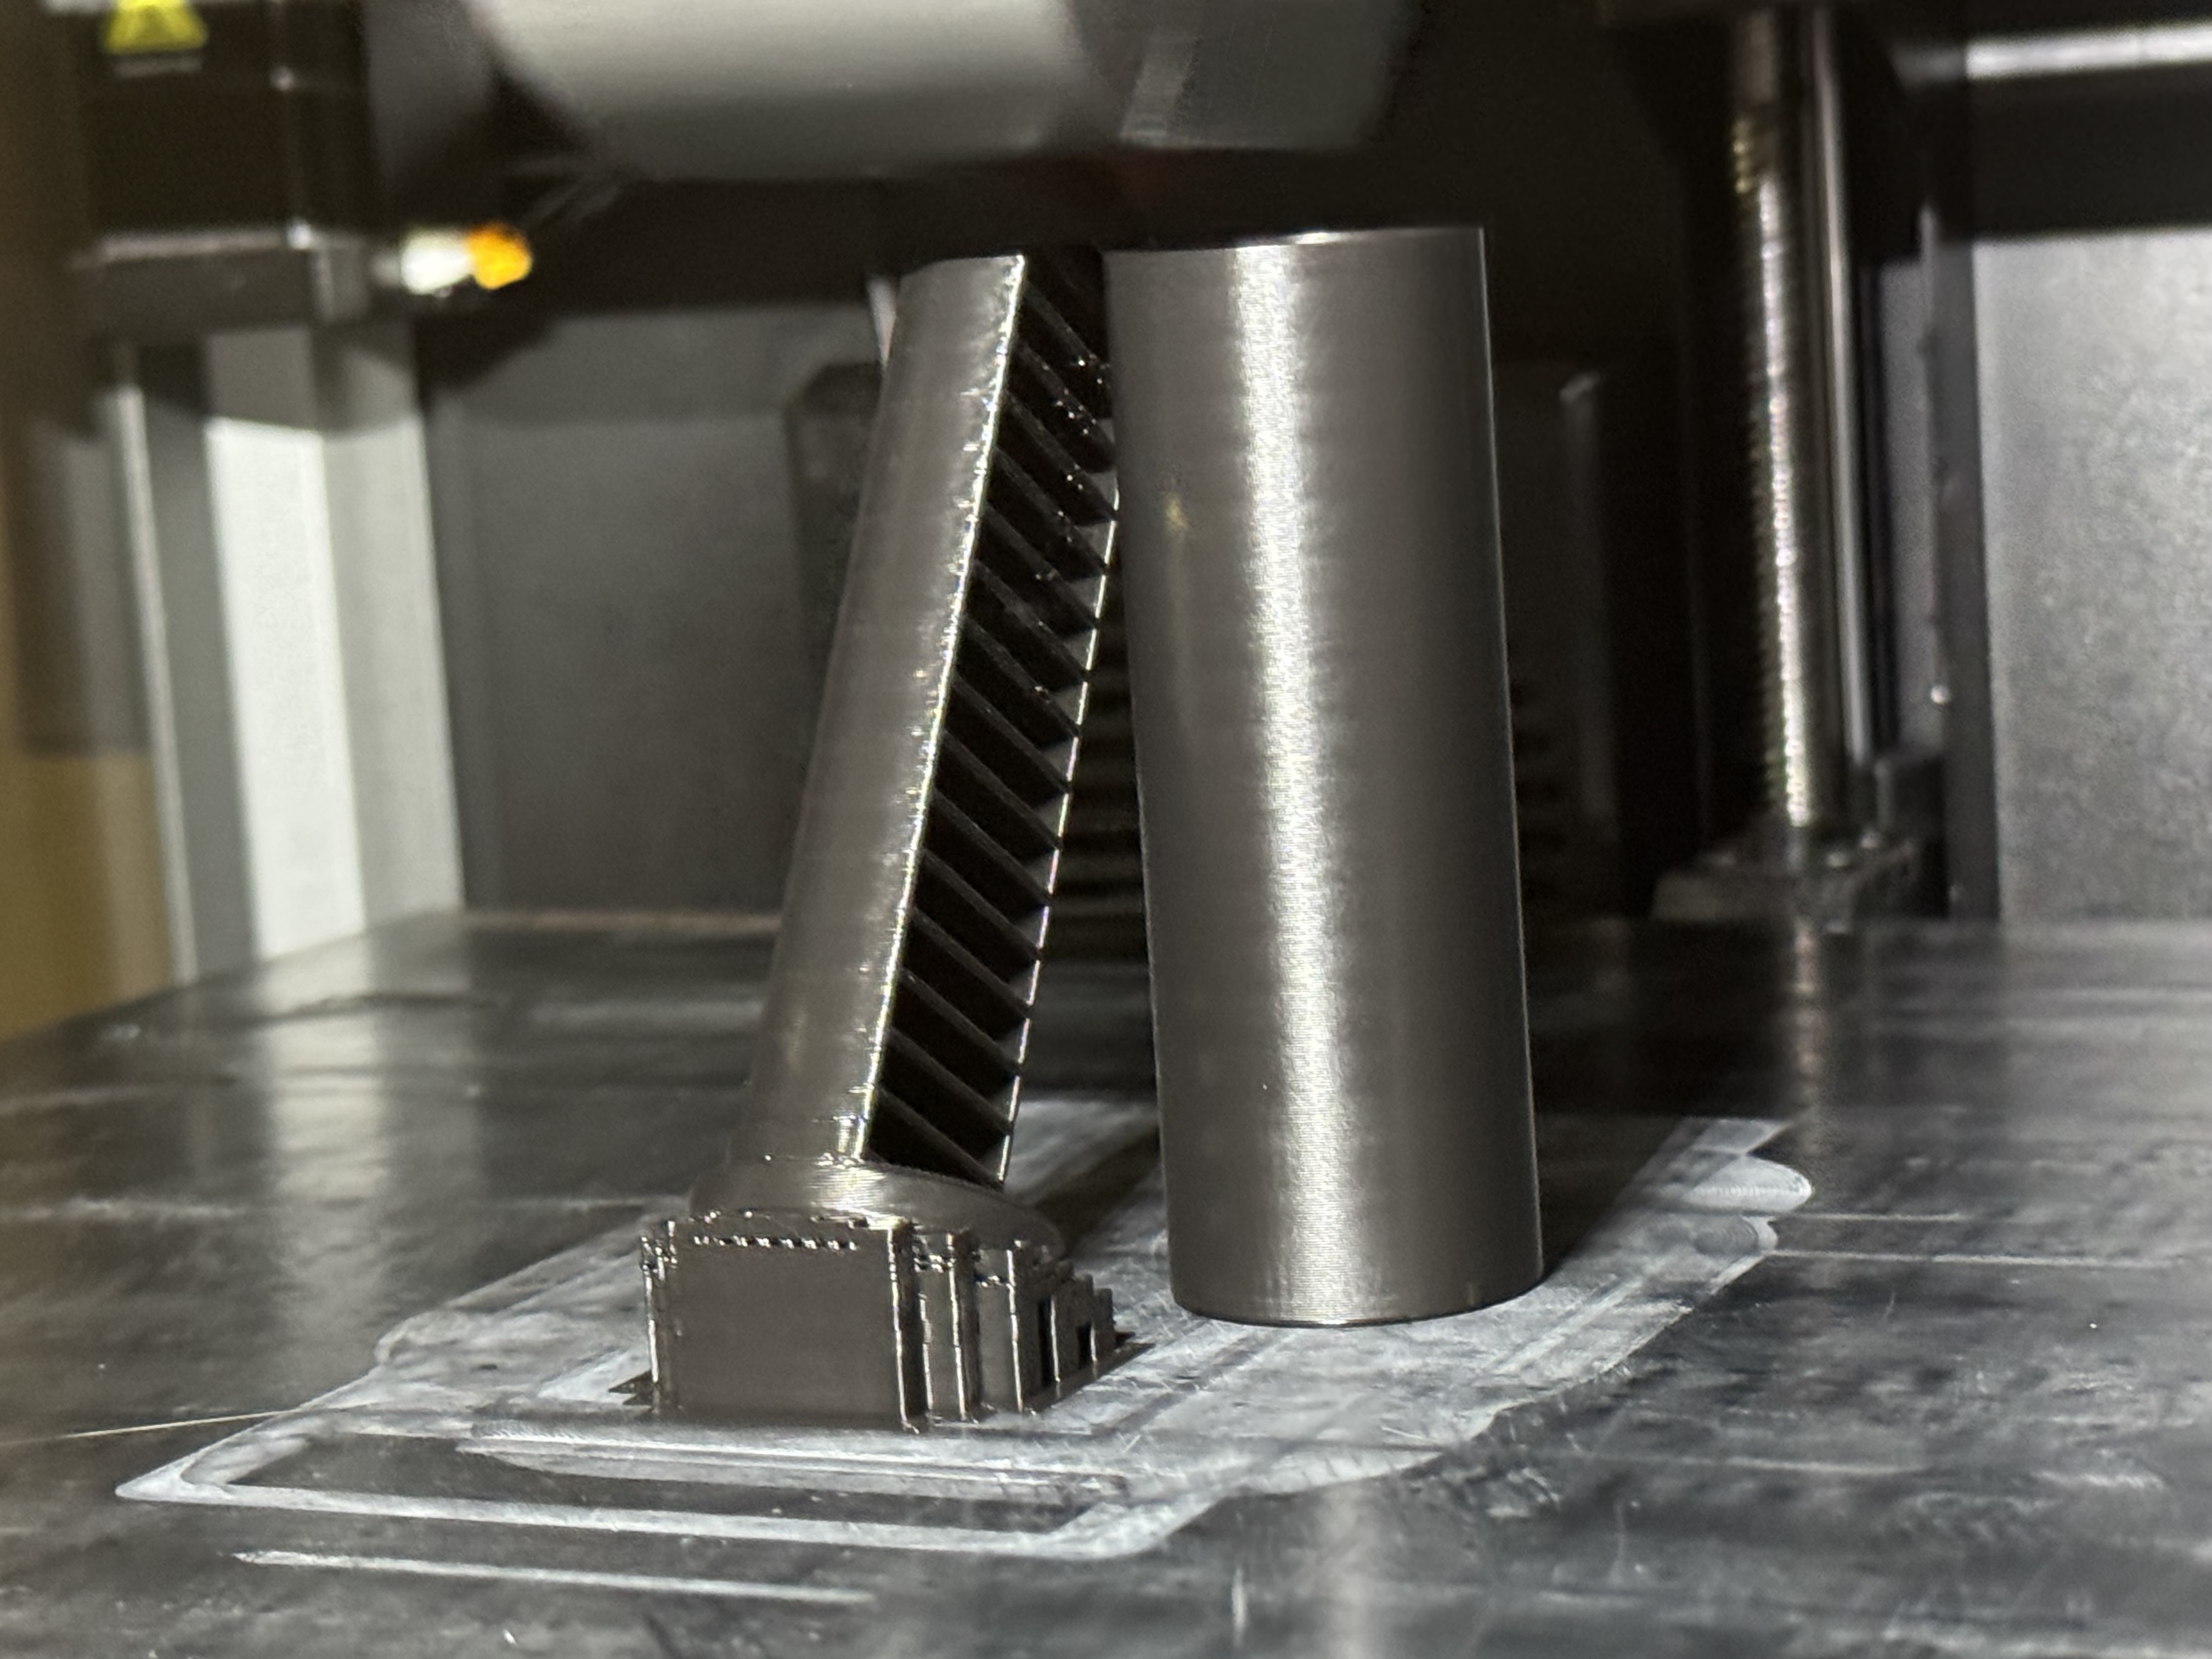
This is a battery cell case that was a pain last time I printed it with supports

Model: https://www.thingiverse.com/thing:5240533/files

2


So, i wanted a personal 3d scanner a while back and bought the revopoint mini and creality cr-scan lizard with my own money. I wasn't too happy with either, and ended up buying an einstar afterward.

I made a video comparing the revopoint and cr-scan to show off the pros and cons, but never did a follow up on the einstar. Well, i guess shining3d (the people that make the einstar) saw the original video and thought it was good enough to send me their new handheld scanner (einstar vega, i know... confusing names) to play with for a month, so i did just that and compared it to my own personal original einstar.

I made another (hopefully entertaining) video, and thought i would share. I use the 3d scanner a handful of times per year to make 3d printed bits that fit well with existing real world items, and i have also made some stuff out of clay, and 3d scanned it to use in 3d printed designs when i want more organic shapes that are past my modeling experience.

happy to answer any questions about modeling processes, or the scanners themselves! :)

3


It seems like over the last couple months/half year there's been this new fixation with printing a huge perfect single layer of plastic all cross the entire bed of one's printer. I see lots of folks asking about calibration issues when they are trying to do this. It seems like it's sorta become a standard of sorts.

I just ask why?

It seems to use a huge amount of plastic and honestly I don't think it probably effects real world results that much.

I feel like the 3d printing community has a lot of shilling going on for companies and the information you get might not be entirely reliable. Look into the issues with this FLSUN S1 if you want to know what I mean.

But anyway, I have never had an impulse or see the need to print a single layer across the entire build surface of my printer. because I feel like that's a huge waste and doesn't actually matter when it comes to real world results.

Am I missing something? I kinda wonder if this kinda test is being pushed by the folks selling us filament, to sell us more filament. Is there a good reason to actually do this?

Please enlighten me!

4
 
 
5
171
submitted 4 days ago* (last edited 4 days ago) by [email protected] to c/3dprinting


Here is all the Stuff I printed with my new P1S thus far!

Since im here, I'll need a bit of advice/guidance tho... For one, sometimes the nozzle doesn't clean itself properly and flings its poop on the bed. From what I read I can put an A1 Nozzle Wiper somewhere to insure it cleans better?

And for the bigger, what I asume to be Issue, even when it wipes itself successfully, there always comes out a large string of Filament afterwards, which the P1S does not try to clean. Then going on to print away with this string still on. It seems very unintentional.

While this is manageable in single colour prints, it makes using the AMS basically impossible, as this happens after every Colour change. This is what the bed looked like after my only proper Multicolour Print...

Anyone faced the same issue who could maybe help me?

6


Basically title, but I can provide some information.

I'm looking to spend no more than $300 or so. I'm not well versed in different filaments (I'll be honest, I know nothing) or really anything about 3d printing, but I want to be able to print cup holders for someone I know whose vehicle has none, I imagine heat resistance and strength would be important there. I also do robotics now and would like to be able to make my own small robot chassis and parts. I'm also a Linux user and like FOSS, which I believe is fairly compatible with 3d printing, so I would like to find a printer that doesn't make me use proprietary software and that I can use with Fedora Linux without too much hassle. I know I'm new to this, and I know I'm in other hobbies where people post things like: "I want to spend no more than 6 dollars to get artificial superintelligence running on an Arduino Nano," so I hope this isn't that, and sorry if it is. Thanks in advance.

7


I've been waiting to finish up with some major life stuff before diving into the world of 3D printers. Now that is finally behind me, and I am currently trying to find out which printer I want so that I can place an order.

So far I've set my eyes on the new Prusa CORE One. It ticks a lot of the boxes that I think I am after, including:

  • As open as I can get (before going into that Voron-stuff, which I think I'm not ready for). I don't want to be bogged down with having to run proprietary slicers through Wine and things like that. I am not sure how big of an issue that is with e.g. Bambu or Creality (if at all), but I've seen enough rug-pulls and enshittification processes that I don't really want to risk that. I want to be sure that I can use FOSS tools such as Blender and FreeCAD for design, and similarly open slicers, and the whole workflow will work just fine.
  • As future-proof as I can possibly hope for. I think the upgrade path from the MK4 to CORE One shows that they are serious about sustainability and longevity of their devices, and as far as I can tell, I should have no troubles sourcing replacement parts. I also want to support companies with this philosophy.
  • Has a decent print volume (I know there are bigger, maybe I will be constrained by this at some point?)
  • Enclosed - a major reason I did not want the MK4S was that it was not enclosed (but maybe you can get an enclosure?). It will be placed in my study where I spend most of my computer time (which often times is a lot, so I imagine I will be in the room while it is printing). I imagine, with the additional filter, that it will be better with an enclosure. Also, it will be easier to keep good temperature control during prints, as it can get cold here during winter.
  • Locally produced (I'm EU based).

I understand that other manufacturers provide more "bang for the buck" and that I in that sense will be overpaying feature-wise. I am fine with that given my emphasis on the above criteria.

However, I am a complete newbie to 3D-printing. I am sure there are some limitations I have not thought about, and I was wondering if there are any major things I have not thought about that would actually affect me negatively and should make me reconsider this model?

8


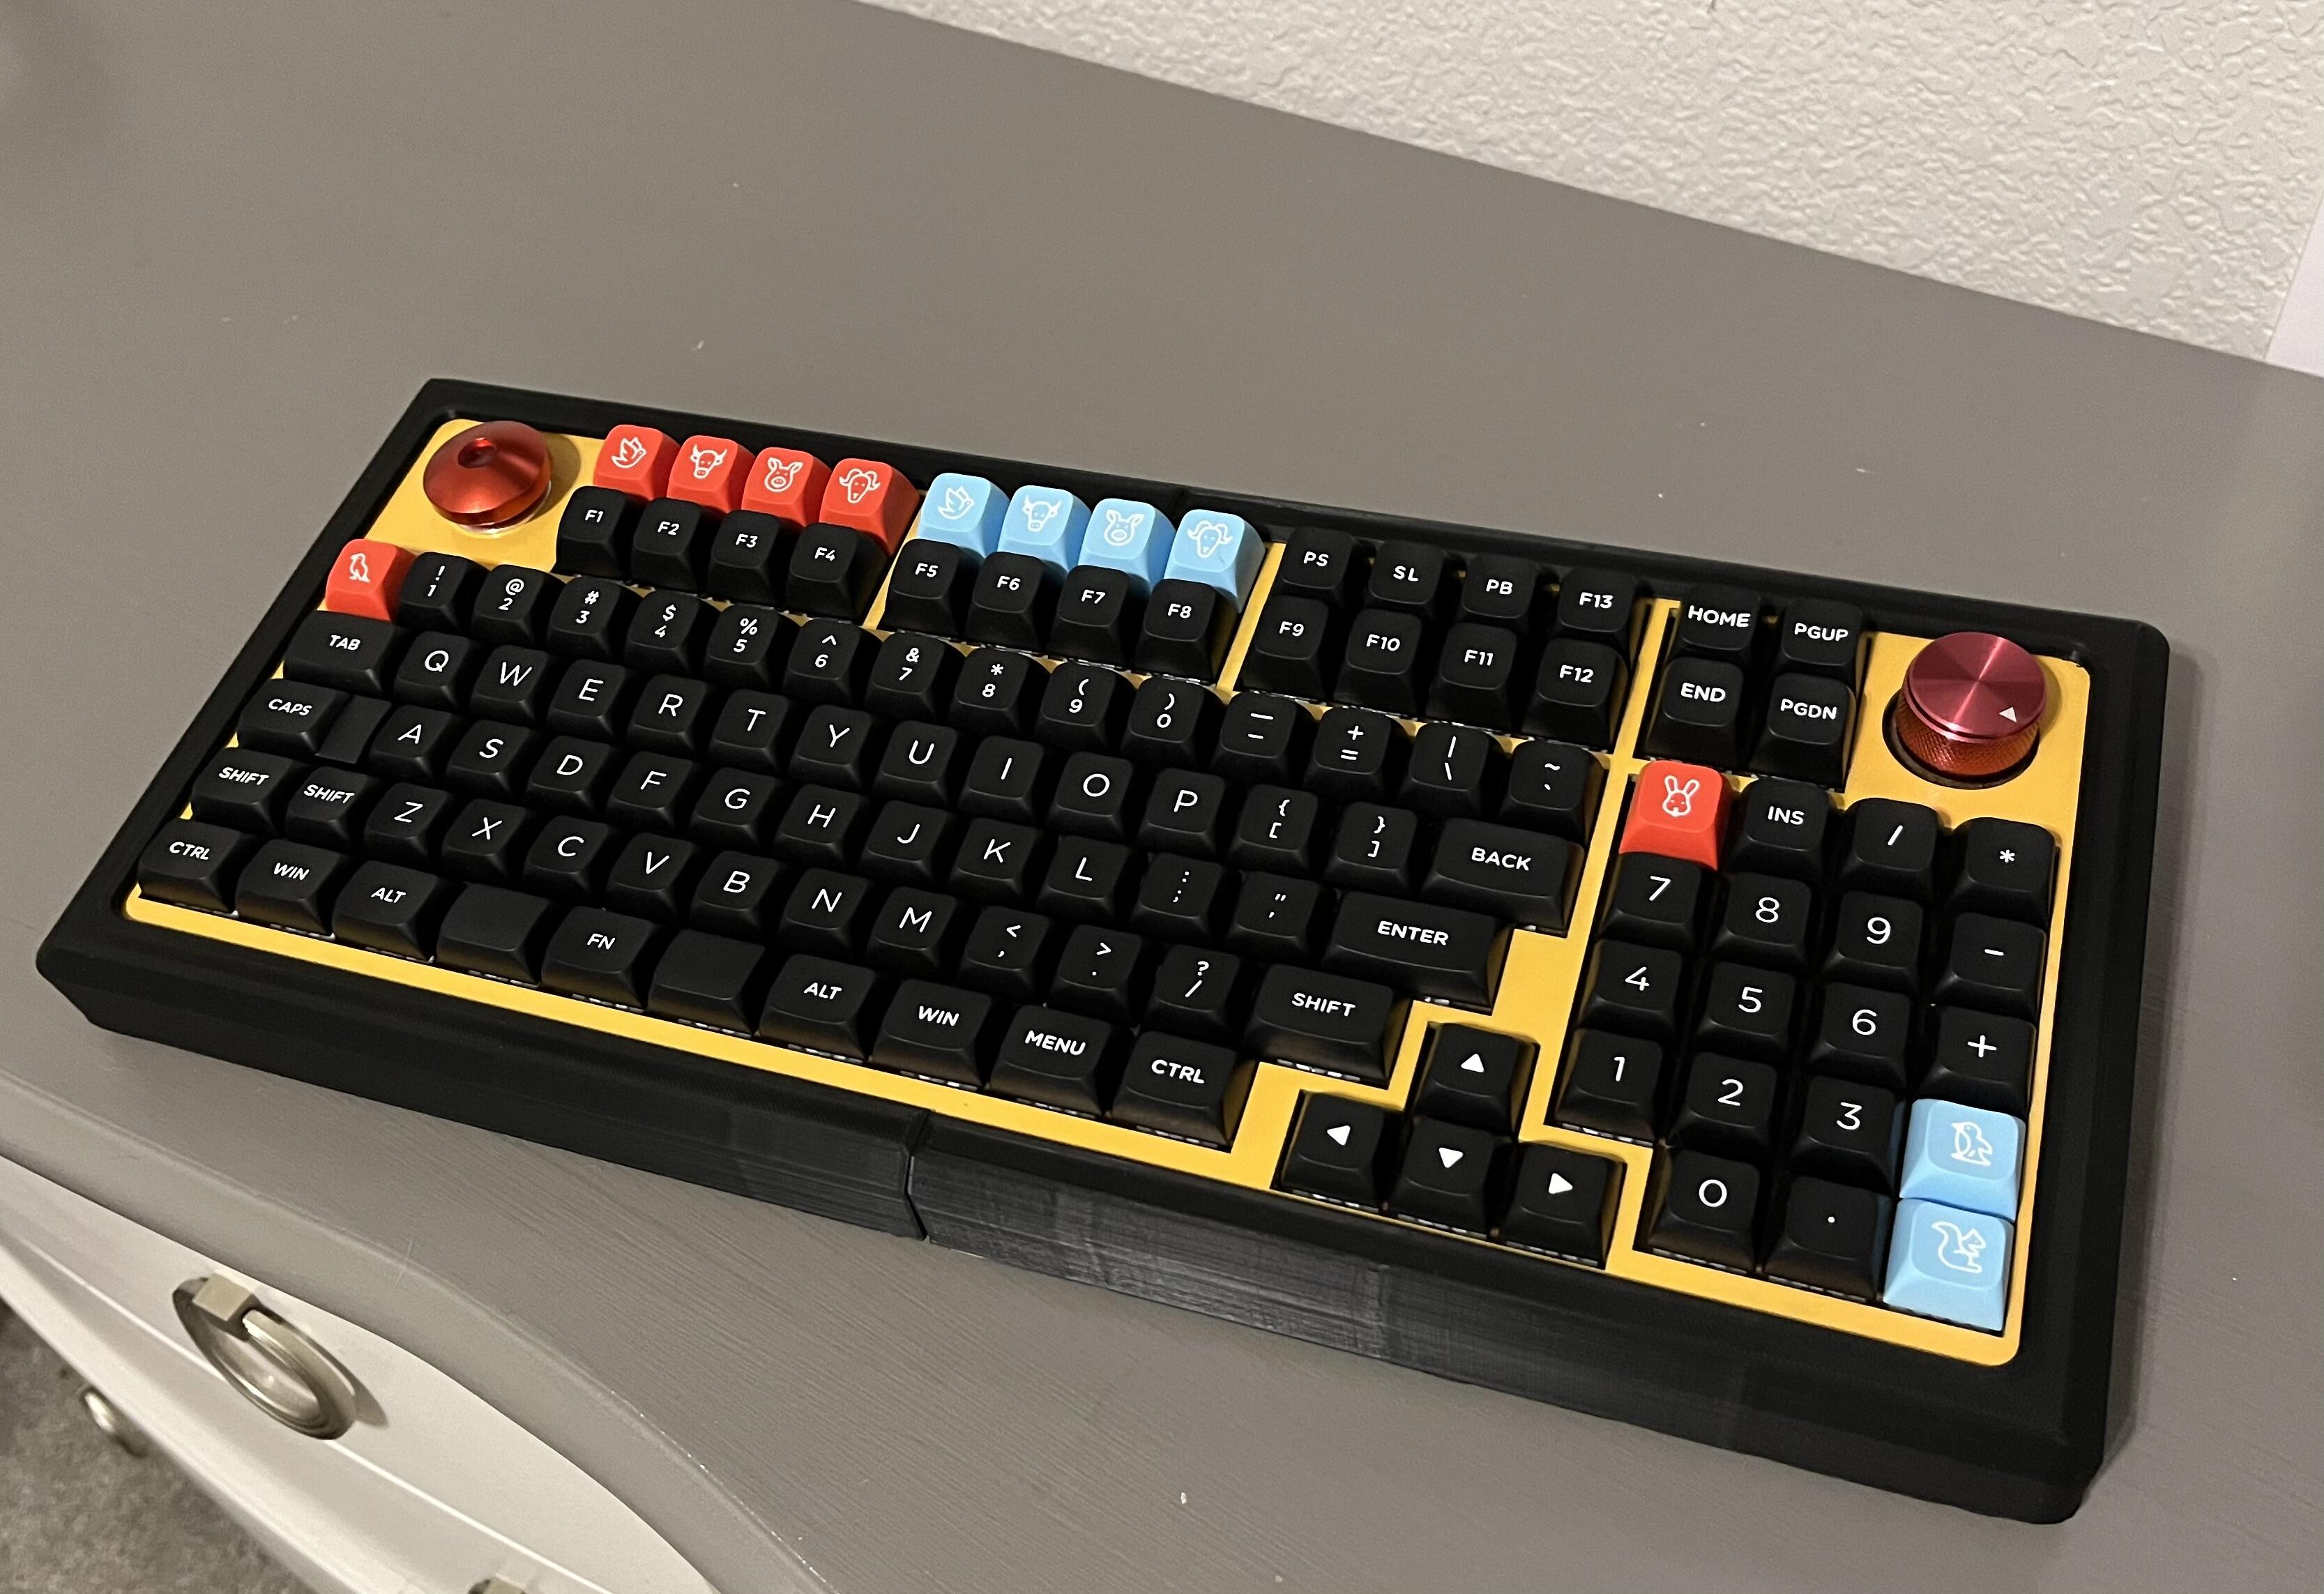
Looking specifically at the two-part black frame that contains the rest of the keyboard parts.

The lighting accentuates it and makes it look worse than it is, and it's certainly not hard to live with, but it'd be nice to fix it.

Basic Ender 3 clone (Voxelab Aquila) with no real physical mods to speak of. PLA, .2mm layer height, 50 or 60mm/second. Happy to add any other details as requested.

9


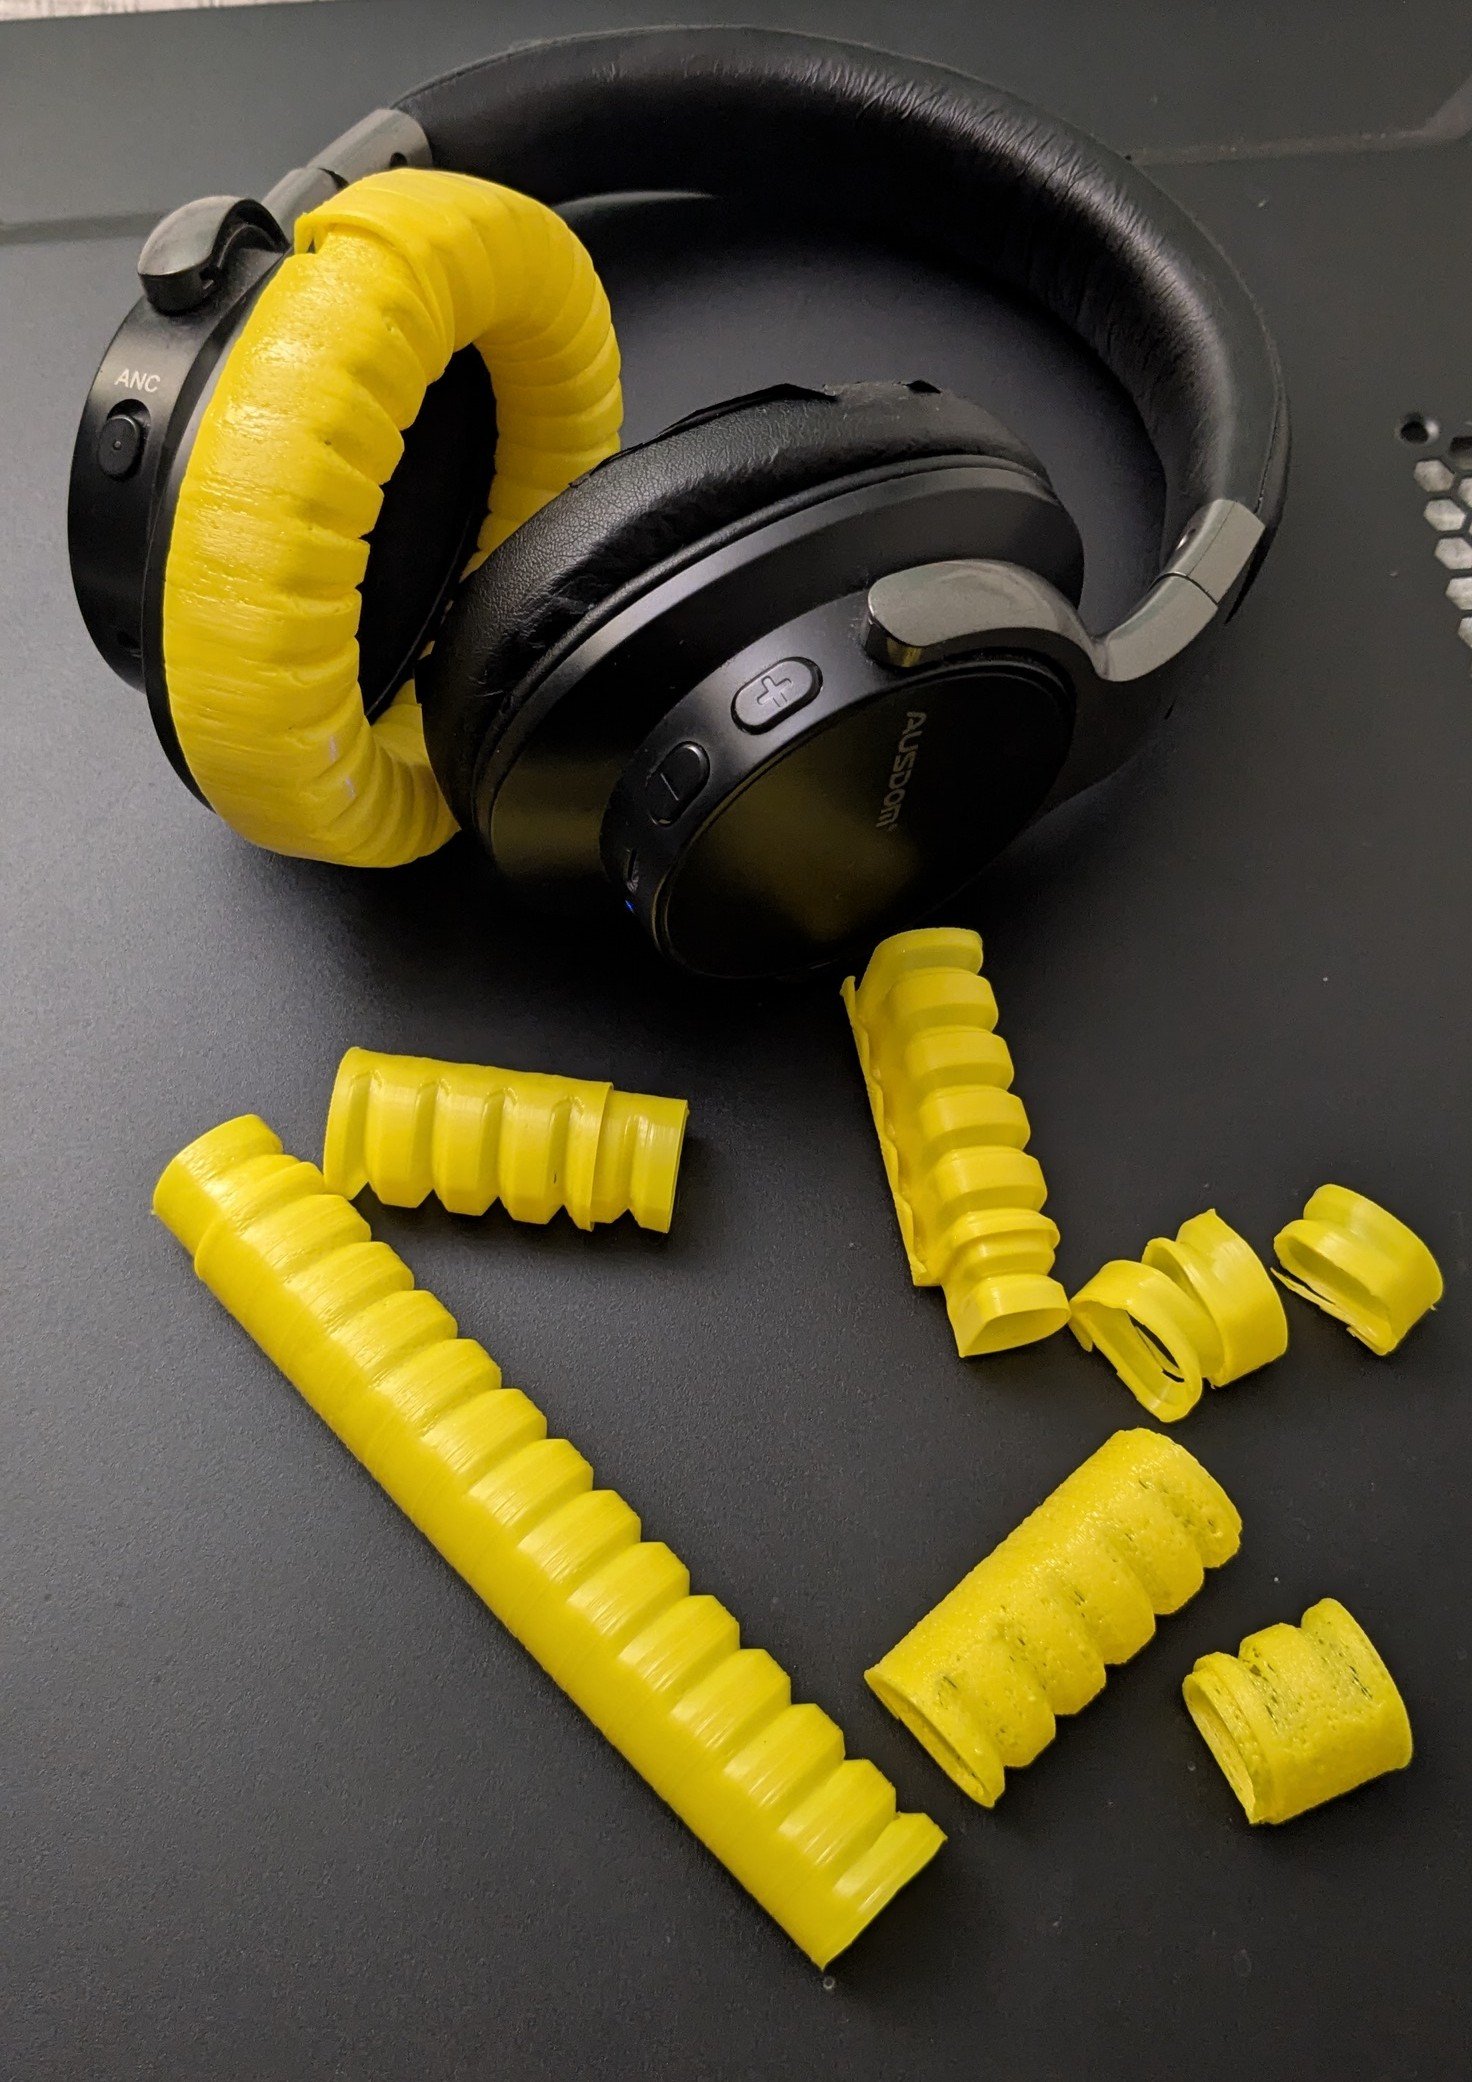
Compliant tube based headphone pad idea I had while riding a bicycle two days ago. I got the thickness and dimensions dialed for printing and bending, but I either need to setup my old KP3 kingroon with a longer 2040 Z extrusion or print this in 2 pieces. Either way, the joint connection needs more than just the overlap and glue. TPE would probably be better too, although I have no idea what shore hardness this $10 clearance spool of TPU has. The sound quality seems a little tinny and I have no way to tell how loud it is externally, but it is just my first iteration that I can put around my ear and test. TPU is so slow to print and the moisture levels impact the qualities drastically. I actually like the texture and properties of wet TPU more than dry, but it is hard to get it just right. With the design's compliant bend, consistency is kinda important. Anyways, just another boring project. On the bright side, this seems cooler temperature wise when the TPU pad is against my ear.

I spent all day chasing custom logarithmic infill patterns that might incorporate a compliant bend but only learned about how not to do a thing like that in CAD.

10


This is a killer reference source and entry point for many applications and projects.

Capstan actuators = rope twisted around two drums for gear reduction, but with limited range of motion.

https://www.youtube.com/watch?v=MwIBTbumd1Q

https://github.com/aaedmusa/Capstan-Drive

11
130
Release: Custom Pegboard Organizers (lemmy-ui.nowsci.com:33443)
submitted 6 days ago* (last edited 6 days ago) by [email protected] to c/3dprinting


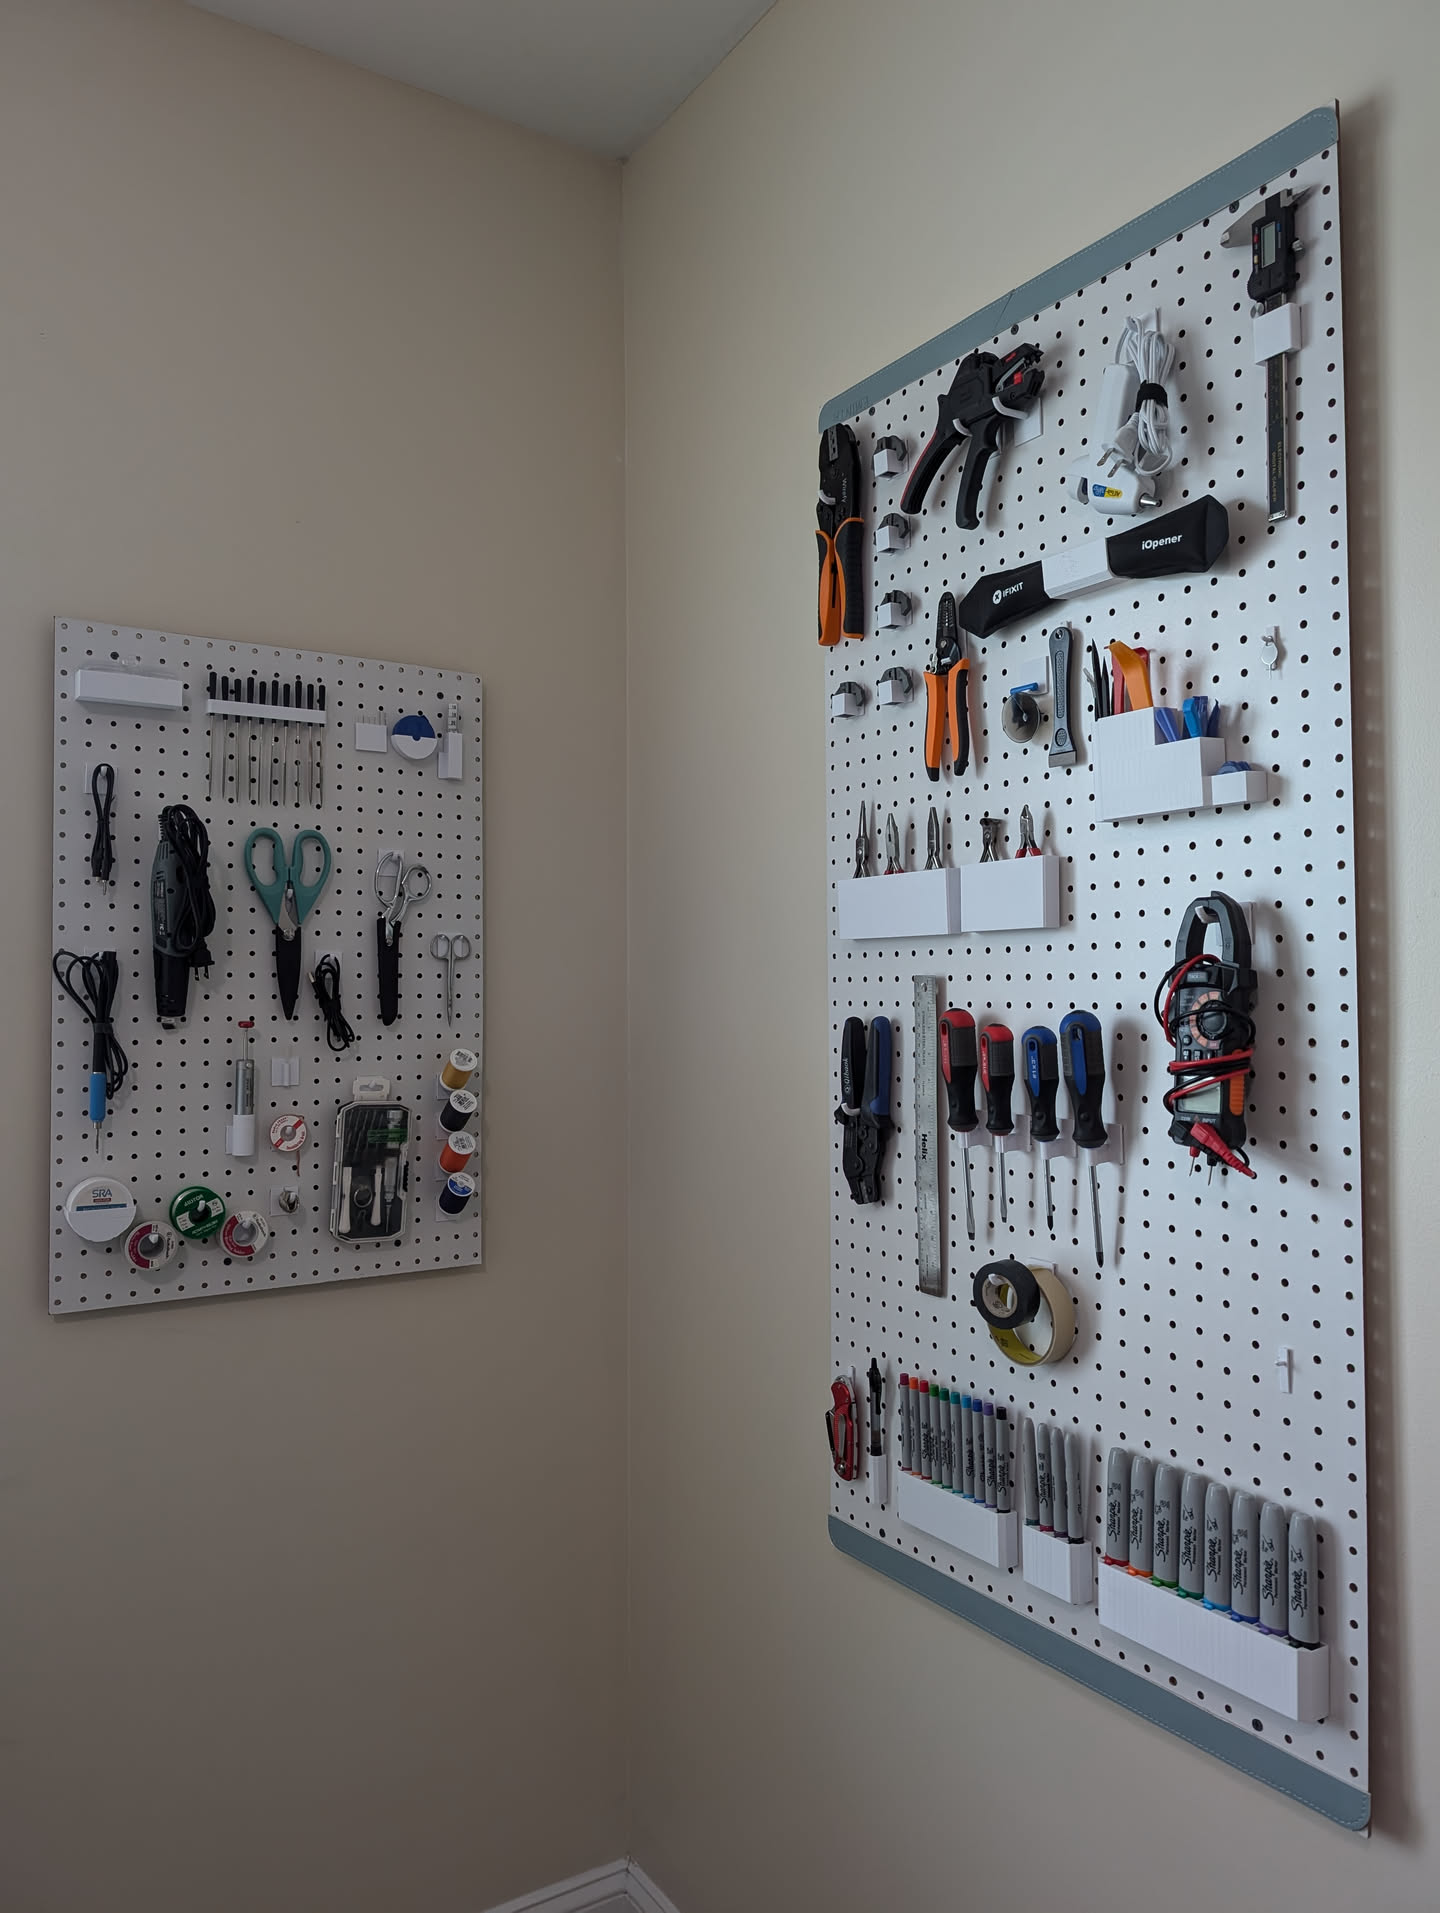
I've been custom designing pegboard inserts for all of my workshop items to clean things up. Figured since I release most of the things I create to various communities, these should be no different ;)

https://nowsci.com/pegboard

12


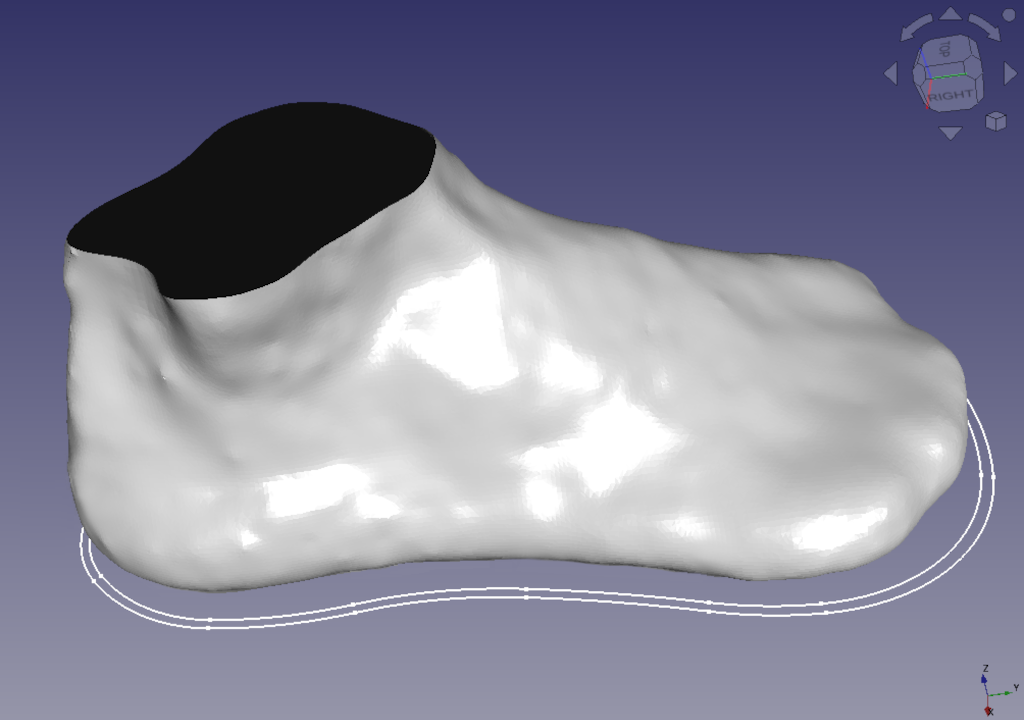
As you know, I started designing custom 3D-printed shoes for myself. This is a follow-up.

So, I spent some time modeling a basic, thin-walled shoe. Nothing fancy, just a quick something to test the fit and do my first TPU print - although I'll probably start with test pieces before printing this doozie.

One shoe fits on the bed of our Prusa Mk4 - barely.

It's a 17-hour print. Yikes! I think I'll probably do this over the next week-end, otherwise my colleagues will kill me.

The support is mostly inside the toe box and promises to be a real b*tch to remove:

TPU supports

The shoe is very close-fitting, but I've left 2mm all around inside: if I mess up, or if the TPU shrinks like I think it will, it has a chance to remain wearable. If it doesn't, I'll simply put a sock on.

Right shoe model

Stay tuned 🙂

13


Our Prusa Mk4 only has one extruder and no MMU. But I was playing around with filament change in the middle of a print to have several colors in a single part.

So I drew a small part with 3 characters connected by a common "bridge". Printing the characters face down, I tried inserting a color change at the first layer of the bridge in PrusaSlicer:

Simple color change mid-print

This works fine: the printer parks the head in the lower right corner of the bed, ejects the filament and wait for a new filament to be fed. Then it purges for a while and somehow manages to cut the purged filament clean and continue printing. A bit sketchy but it works.

Then I tried a 5-color print with multiple colors in X, Y and Z. Obviously the filament needs to be changed mid-layer for most of the layers. I defined 5 virtual extruders in PrusaSlicer, added a custom tool change G-Code to force a filament change with M600. After a bit of messing around with layer thicknesses, I managed to limit the print to "only" 16 manual filament changes. A bit annoying but it's okay for an experiment:

Multiple virtual extruder setup and multi-color print

Custom tool change G-Code

When I launched that print, it started out well, printing the first layer of the green "5" digit.

Then it hit the first M600 instruction, proceeded to eject the filament, and horrible noises from the extruder ensued:

https://toobnix.org/w/5M5n1ZxxPjHgp9uPWUKu8s

I could NOT free up the filament for the life of me, and the printer wouldn't come out of the menu to resolve the problem. Eventually I had to reset the printer and apply force to finally clear the problem.

Fortunately, no damage occurred and I could reload new filament as if nothing had happened. I thought it had been a bad fluke, so I restarted the print and it did it again.

Before I file a bug, anybody knows if I'm doing something wrong here?

The printer is running the latest firmware as of today - v6.1.3, released in September 2024.

14
45
submitted 1 week ago* (last edited 1 week ago) by [email protected] to c/3dprinting


I've started my next project, which is to design and print myself custom shoes. I'm gonna start with something simple: pool shoes.

Pool shoes are typically designed to be close-fitting and put as little material around the foot as possible. So they're ideal to iterate through the design of my shoes to find the perfect fit without wasting too much filament. And I need a new pair anyway...

I ordered a bunch of TPU with different Shore hardness and the rolls have arrived. So now I'm designing the shoes.

I have no experience with TPU, but a colleague at work does: he told me he tried to print a remote-control-like flexible sheet of rubber buttons that was 2mm thick, and the sheet readily delaminated when he pulled on it.

I want my pool shoes to be as thin as possible - apart at the front where I need protection. So bearing in mind what my colleague told me, I opted for a wall thickness of 2.5mm. Do you think this is enough?

As for supports, the printer I use at the moment only has one extruder head (it's not mine) so I'll have to print them out of TPU too. Is there a good strategy to limit the amount of material used and maintain structural integrity on such a large print? I'm thinking of drawing the supports myself inside the shoes to control exactly where they will be and limit wastage.

15


I wanted to print some tokens for a boardgame which need different colors. I don't need that much colored filament. I came across that set while searching for cheap filament. Is that a good deal or would it be better to just buy full spools, even if I dont know what to use it for?

16
17


There's nothing super special about this print in particular compared to what people usually post here, just a simple Santa figurine requested by a makerspace patron. However, it's made from 100% pure PHA (polyhydroxyalkanoate), a natural polyester byproduct of common soil bacteria. Unlike PLA, it is fully home compostable. It can break down in any biome, in a very reasonable timeframe. Also unlike PLA, you can make it by feeding the bacteria stuff like old fast food fryer oil, and other waste products. The print settings are pretty similar to PLA, but it has some significant differences in material properties, like being less brittle.

There aren't a whole lot of people making 100% PHA filaments, but if you can find it, definitely give it a shot! It's our staple filament at the makerspace I work in. Hopefully this doesn't sound too much like an ad or something, I just really like this stuff and want it to catch on.

Oh also! The flexible version looks and feels really neat if you run it through a vibratory tumbler: A rubbery black object, some kind of gasket, that looks like it's been coarsely sanded

18


Really clever

19
105
3D-printed sunglasses (lemmy.sdf.org)
submitted 1 week ago* (last edited 1 week ago) by [email protected] to c/3dprinting


Well, not really sunglasses, but rather clip-on shades for my 3D-printed glasses

But here's the thing: they're FULLY 3D-printed. The "lenses" are in fact the finest and thinnest mesh I could print with our printer - basically one 0.1mm layer of 0.4mm lines spaced 0.4mm running horizontally, and an identical layer of lines running vertically right on top of it.

Is it perfect? No. The image through it is kind of "pixelated" But it's surprisingly acceptable. It looks like this when looking through them:

View through the 3D-printed mesh

In real-life, it's quite a bit darker than this. But the photo shows fairly accurately how it looks like seeing through them.

It works because the mesh is very close to the eyes and totally out of focus. And although it's not optical-grade, the price is unbeatable 🙂

If you want to try printing it yourself, the model is here. It's meant to be printed with a 0.4mm nozzle and a 0.1mm layer height - including the first one.

Double-check how the slicer slices the first two layers, where the mesh lives, because it easily tends to "simplify" the lines by not printing them, which is obviously not what you want.

EDIT: as others have pointed out in this thread, don't use these shades as actual sunglasses without sticking some UV filter over the mesh on the inside. They're not eye-safe as-is. I made them more for the challenge of making them than anything else.

20
135
Dart case (lemmy.world)
submitted 2 weeks ago by callcc to c/3dprinting


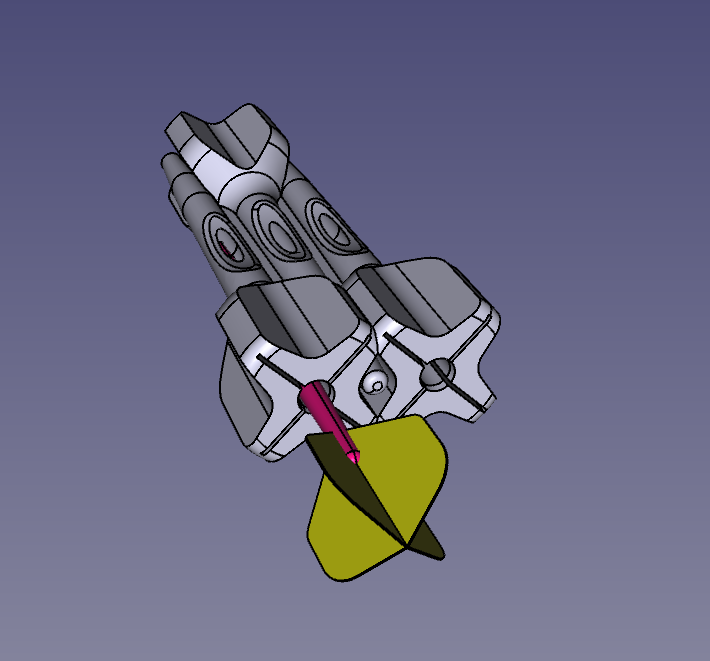
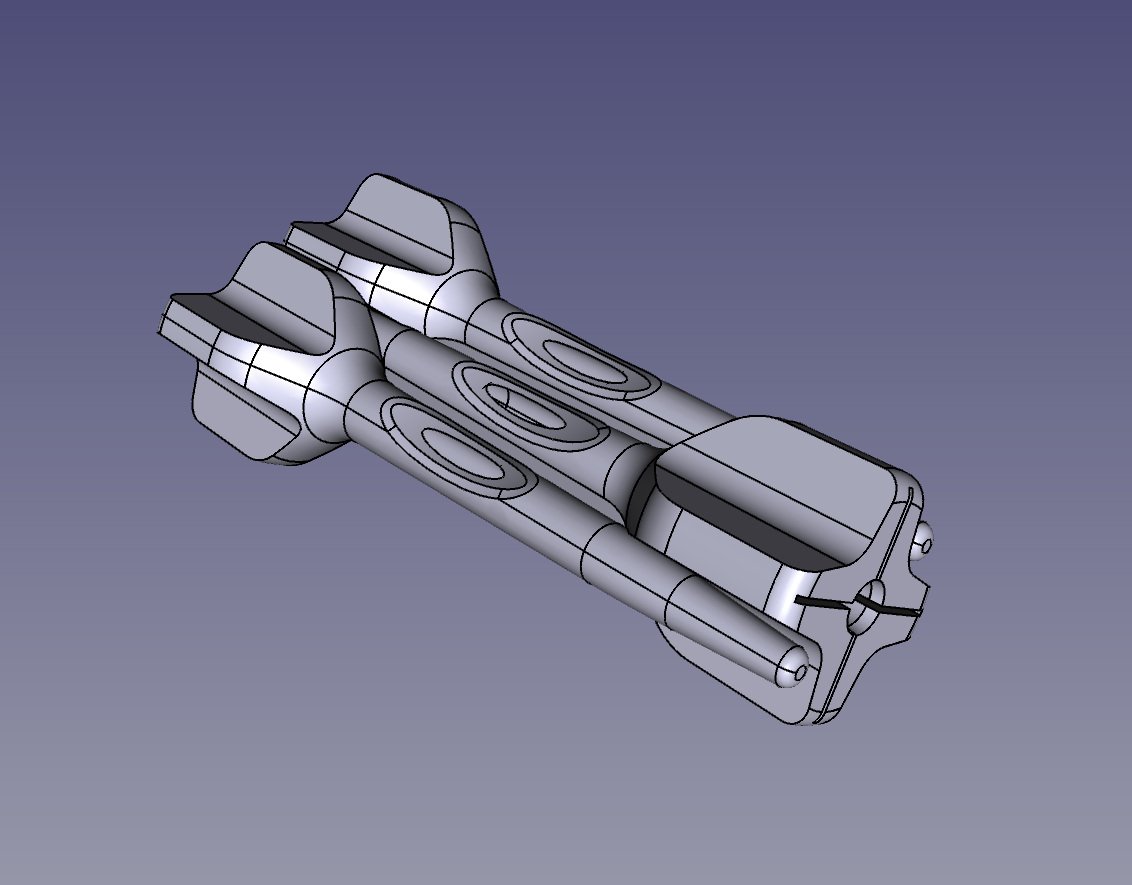
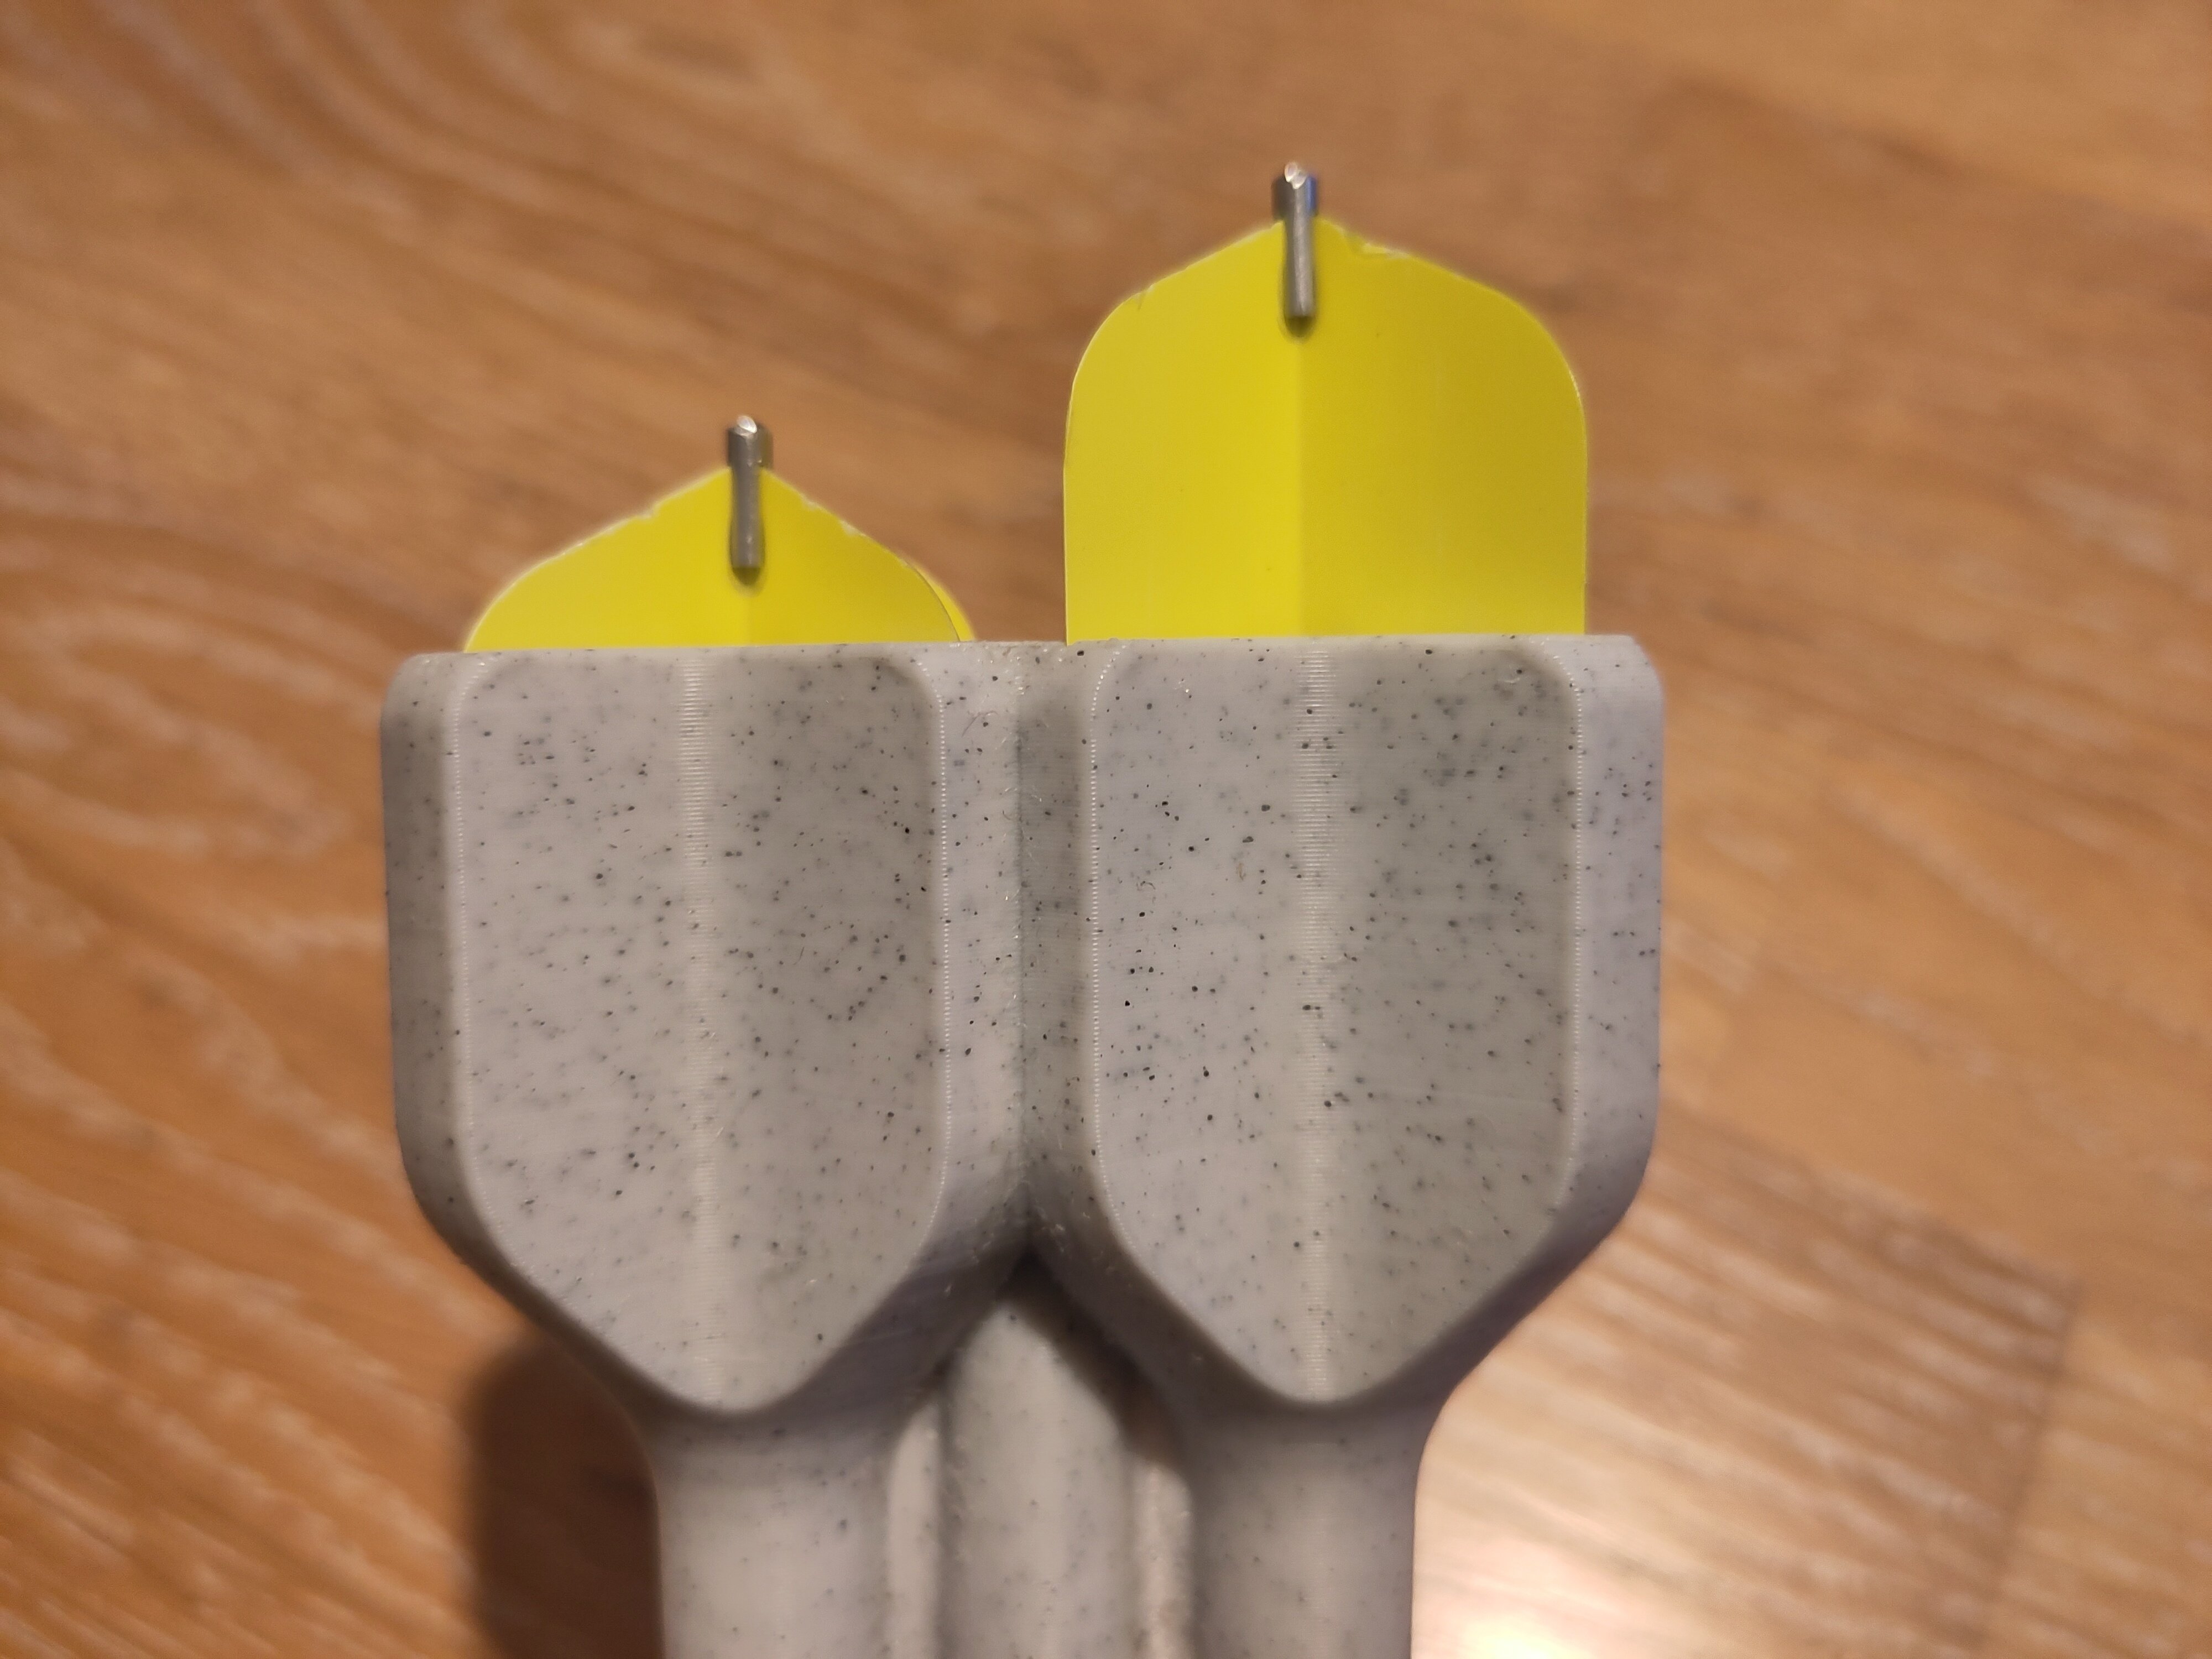
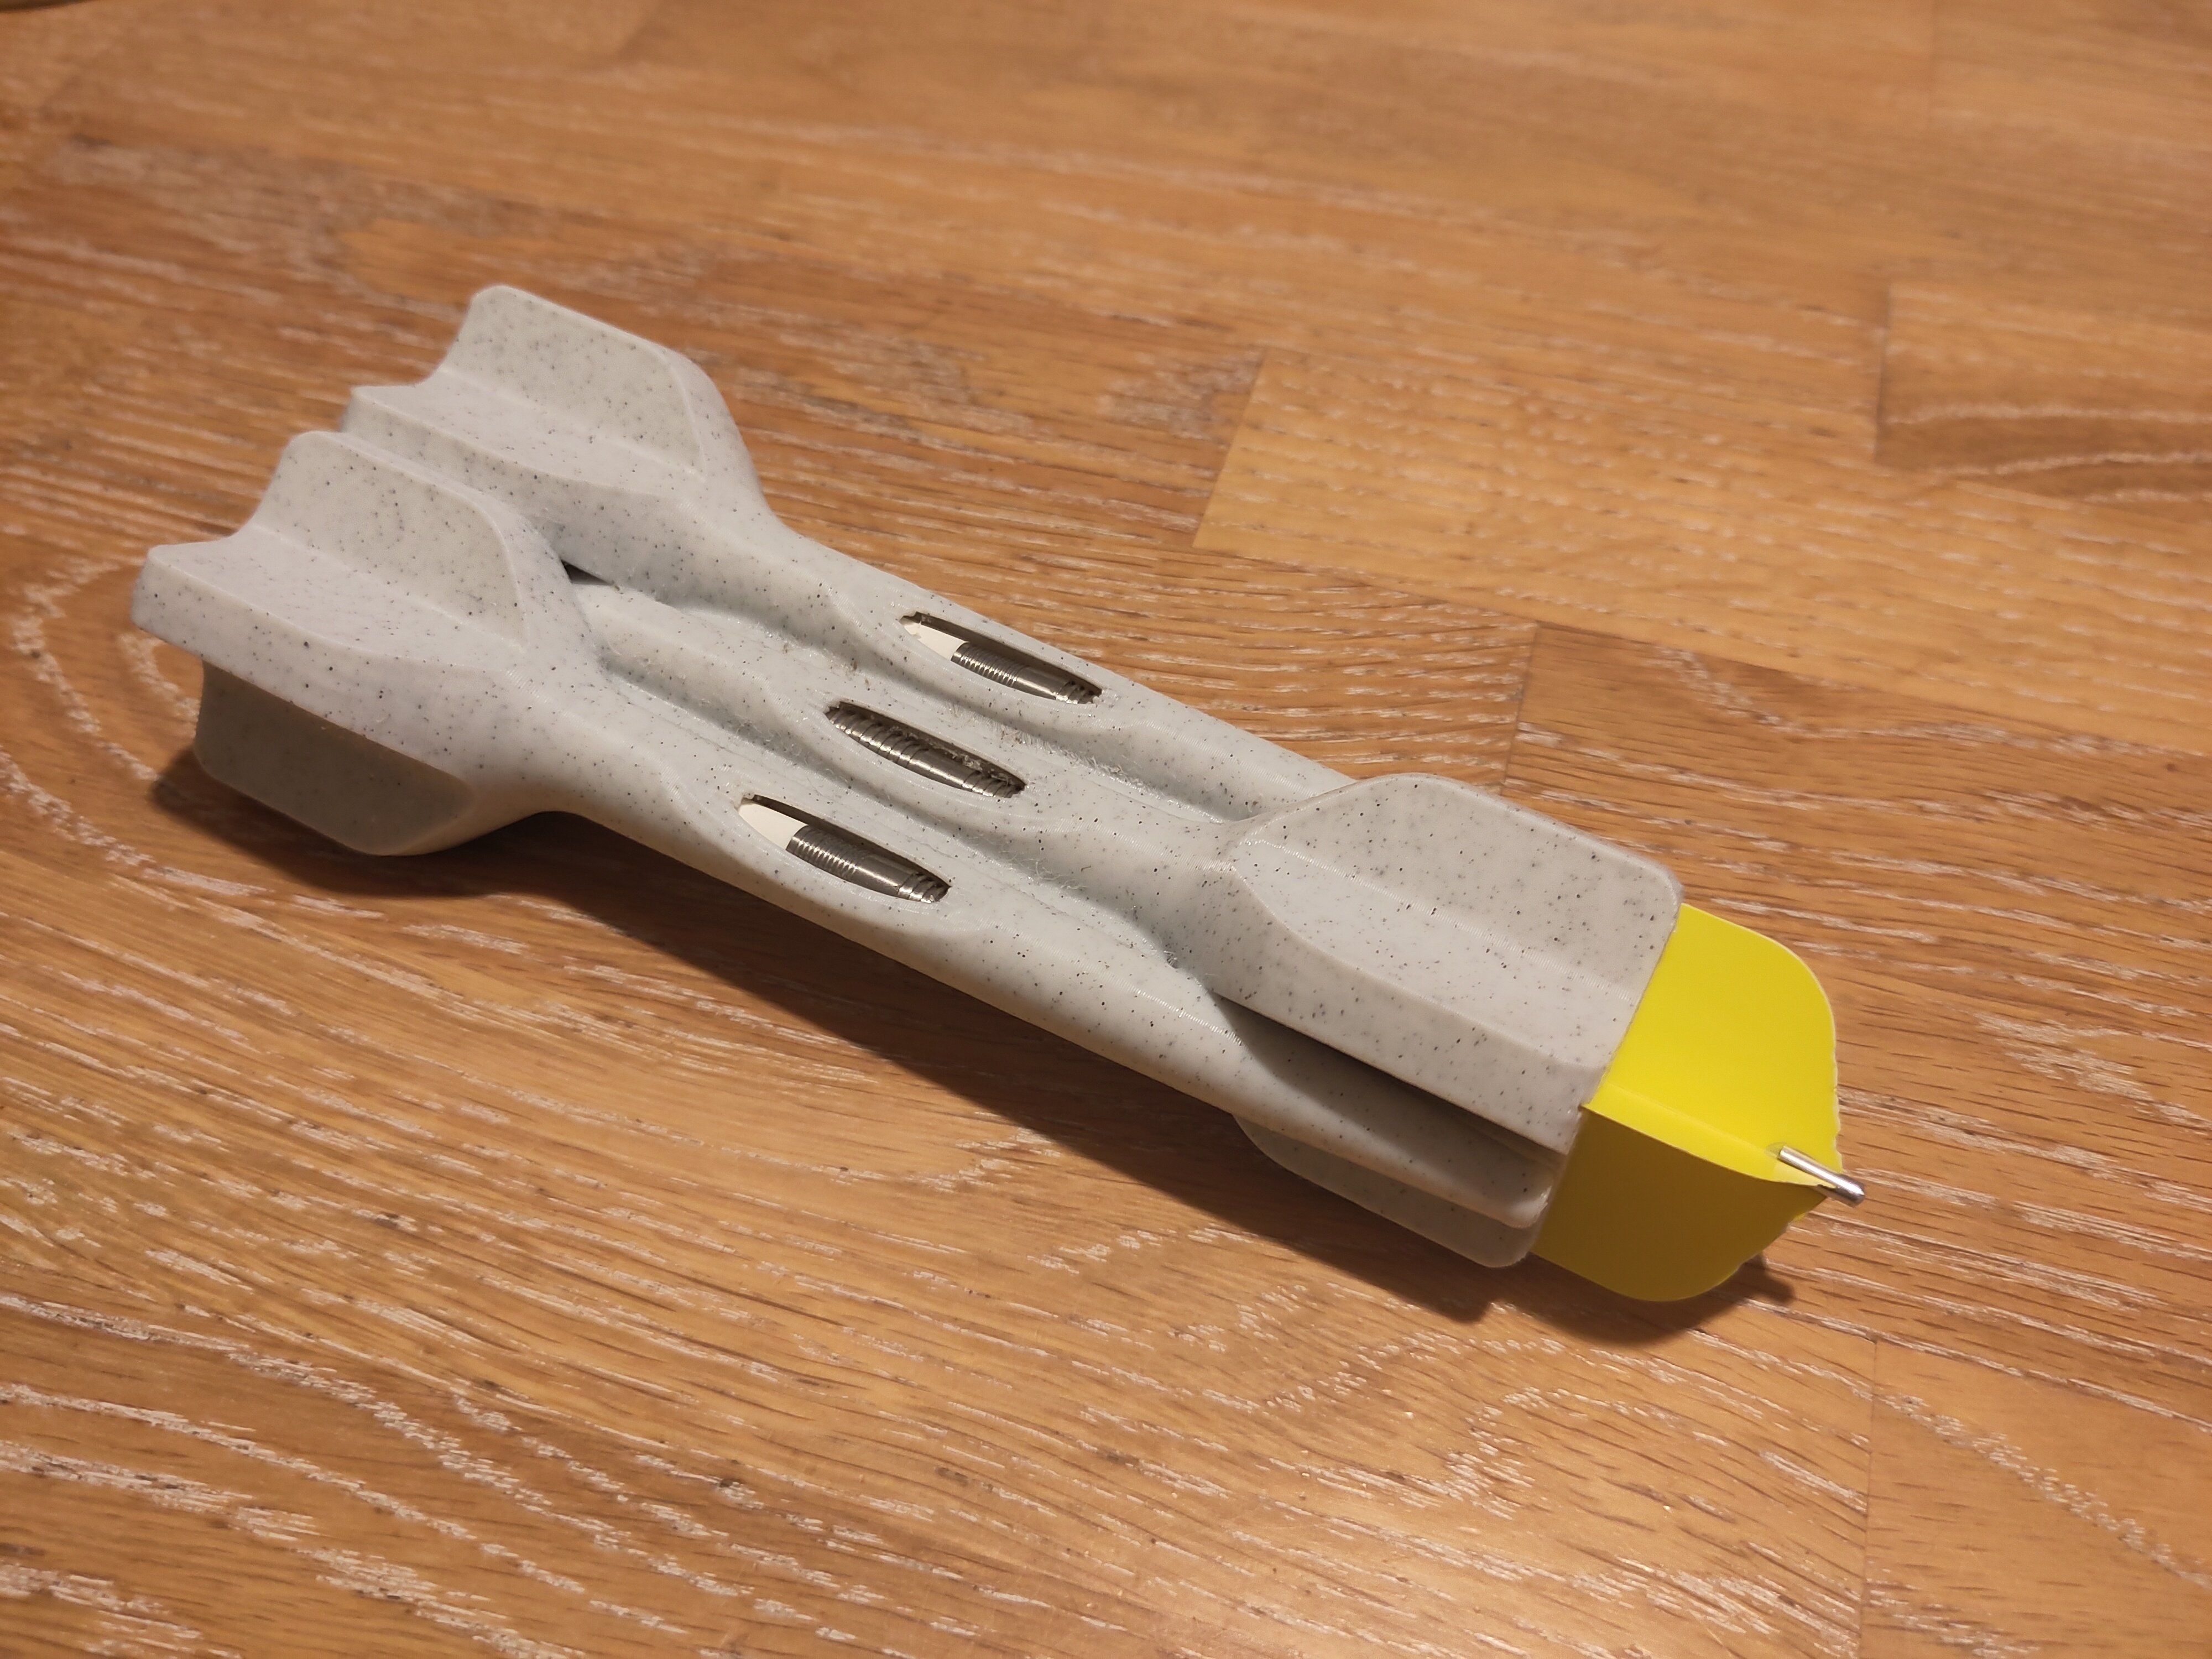
I made a case to protect my darts when taking them somewhere. Here are some more images. The case was made to fit a specific model and it's not very parametric till then end, so I'm afraid it's not super useful for others.

It was made in #FreeCAD 1.0 which was super smooth!

21


Bear with me for a moment, because I'm not sure how to describe this problem without just describing a part I'm trying to print.

I was designing a part today, and it's basically a box; for various reasons I wanted to print it with all the sides flat on the print bed, but have bridges between the sides and the bottom to act as living hinges so it would be easy to fold into shape after it came off the bed. But when I got it into PrusaSlicer, by default, Prusa slices all bridges in a single uniform direction--which on this print meant that two of the bridges were across the shortest distance, and the other two were parallel to the gap they were supposed to span. Which, y'know, is obviously not a good way to try to bridge the gap.

I was able to manually adjust the bridge direction to fix this, but I'm kinda surprised that the slicer doesn't automatically choose paths for bridging gaps to try to make them as printable as possible. I don't remember having this issue in the past, but I haven't designed with bridges in quite a while--it's possible that I've just never noticed before, or it could be that a previous slicer (I used to use Cura) or previous version of PrusaSlicer did this differently.

Is there a term for this? Are there slicers that do a better job of it? Is there an open feature request about this?

Basically just wondering if anyone has insight into this, or any suggestions for reading on the subject.

Thanks!

22


It is a well explained and documented build with a nice synchronized 895 based idler shaft type gearbox subassembly.

Be forewarned, this is a visual example, but is not open source. The files and code are posted on cults 3d for $20. This is not an endorsement. The project does not appear to be an On Shape subscription bait scam, but I have no affiliation, have not purchased, and have no way of knowing what is included behind the pay wall.

Personally, the visual example is all I need and could easily reproduce this in FreeCAD. This build is hardware intensive in the M3/M4/bearings sense but still budget standard. They are using 2mm aluminum welding rod for the track pins. The microcontroller is the Arduino Mega2560 with cheap motor driver modules, battery, RC control scheme, servo for the gear shifter, and some RC car dampers.

https://www.youtube.com/watch?v=OOjda40t6Ng

https://howtomechatronics.com/projects/making-a-beast-of-a-3d-printed-rc-tank-with-dual-speed-gearbox/

23
102
submitted 2 weeks ago* (last edited 2 weeks ago) by UnH1ng3d to c/3dprinting
24


I've been having some serious issues getting PETG to print well, and I was wondering what settings other are using with success? I'm using a bedslinger in an enclosure and normally i print PLA with 200mm/s.

What are you doing for nozzle/bed temp, cooling fan, printing speeds etc? enclosed/open?

What is your printer capabilities normally for e.g. PLA?

25


The bowden tube between the extruder and hotend somehow got unscrewed, and the extruder just kept unspooling filament around the room, as the printer kept happily going on.

Here's a photo from farther out: 1000010130

view more: next ›