DIY

1174 readers
2 users here now

For DIY - this is also a placeholder.

founded 2 years ago
MODERATORS
1
20
submitted 1 week ago by Andonyx to c/diy


I've spent a few days researching how to replace my air switch / timer box with something remote control. Water got in the air switch line and it hasn't worked right since. I've looked for replacement breakers, maybe some contactors with wifi etc. I don't need a timer function, just on and off for my spa pump and blower. I believe they each run on a 220v 20amp circuit. The pictures below are the old box with timer and air switch, and the breakers that precede that box, which I believe is a quad plex arrangement. I'm open to replacing the breakers or the box.

I'm a novice with this stuff so any guidance you have is appreciated in advance. I actually spoke with intermatic and their rep told me they don't have any single boxes that can control 2 220v circuits, which seems insane to me since the original is an intermatic product.

2


What are you.planning on DIYing this year? Large or small I'd love to hear about it. Is it something you've done before or something out of your comfort zone?

I'm planning on building some wheelie bin storagefor the from of the house that's on a bit of a slope. Never done anything like that before. I'm going to get a wood blade for my angle grinder as I cannot cut straight with a saw to save my life.

I'm sure it'll end up looking like Homer's handywork.

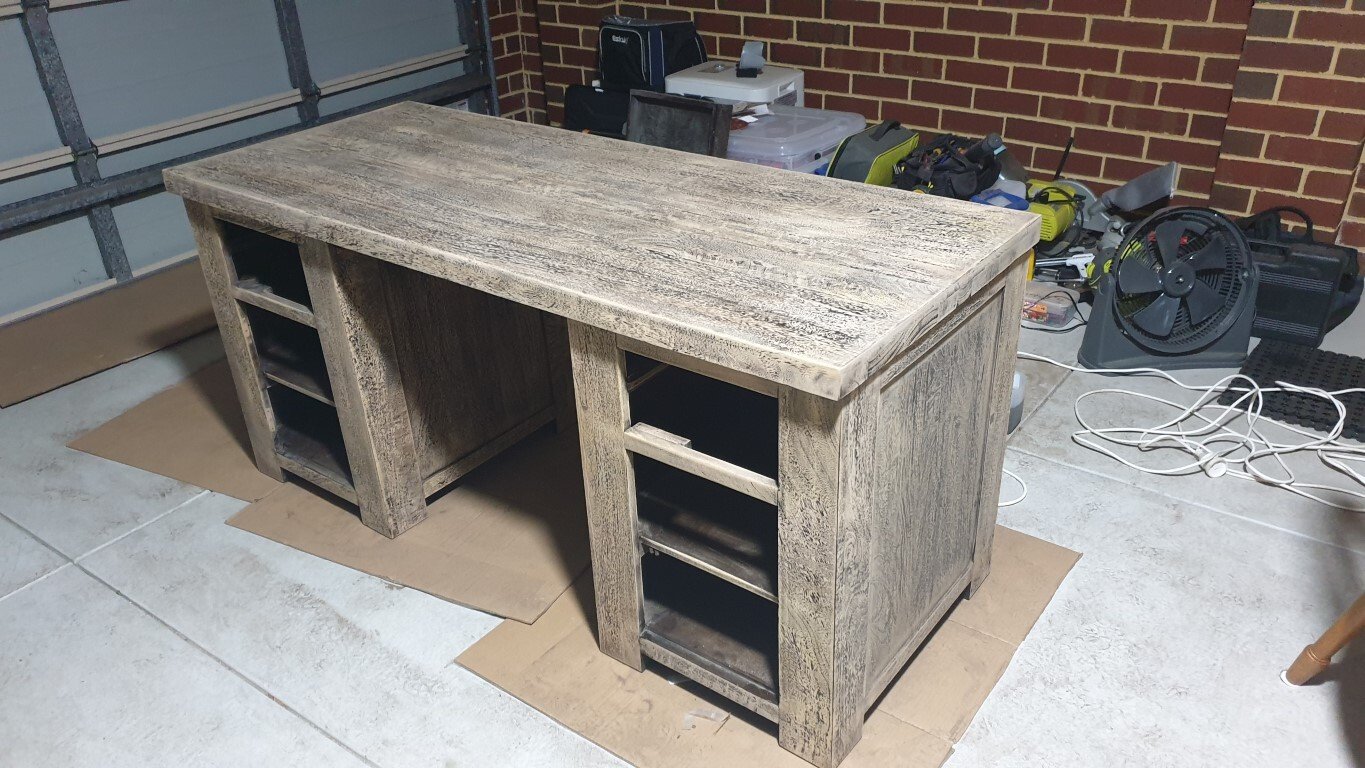
Before or after that I'd like to build a small work bench for the garage. But the possibilities are so much to decide on.

3
20
submitted 3 weeks ago* (last edited 3 weeks ago) by deathbysnusnu to c/diy


Hello all,

I have been tasked by the wife with putting up her new mailbox. It weighs in at a hefty 40 kgs. It came with a base plate with 4 holes to attach it to something on the bottom. I was going to make up a quick concrete slab but is a complete newb in that regard.

Please help;

Should I put some bolts in the concrete before it cures or should I drill the concrete after it's cured and put some bolts in then?

There is some existing concrete in the spot from the post of our previous mailbox, is it ok to just cover that over with the new concrete?

Will it be enough to just make a box shape with some scrap wood for the form or should I get something else? Being a 40 kg monster, how thick should I make the slab?

Any other advice?

Thank you in advance!

4


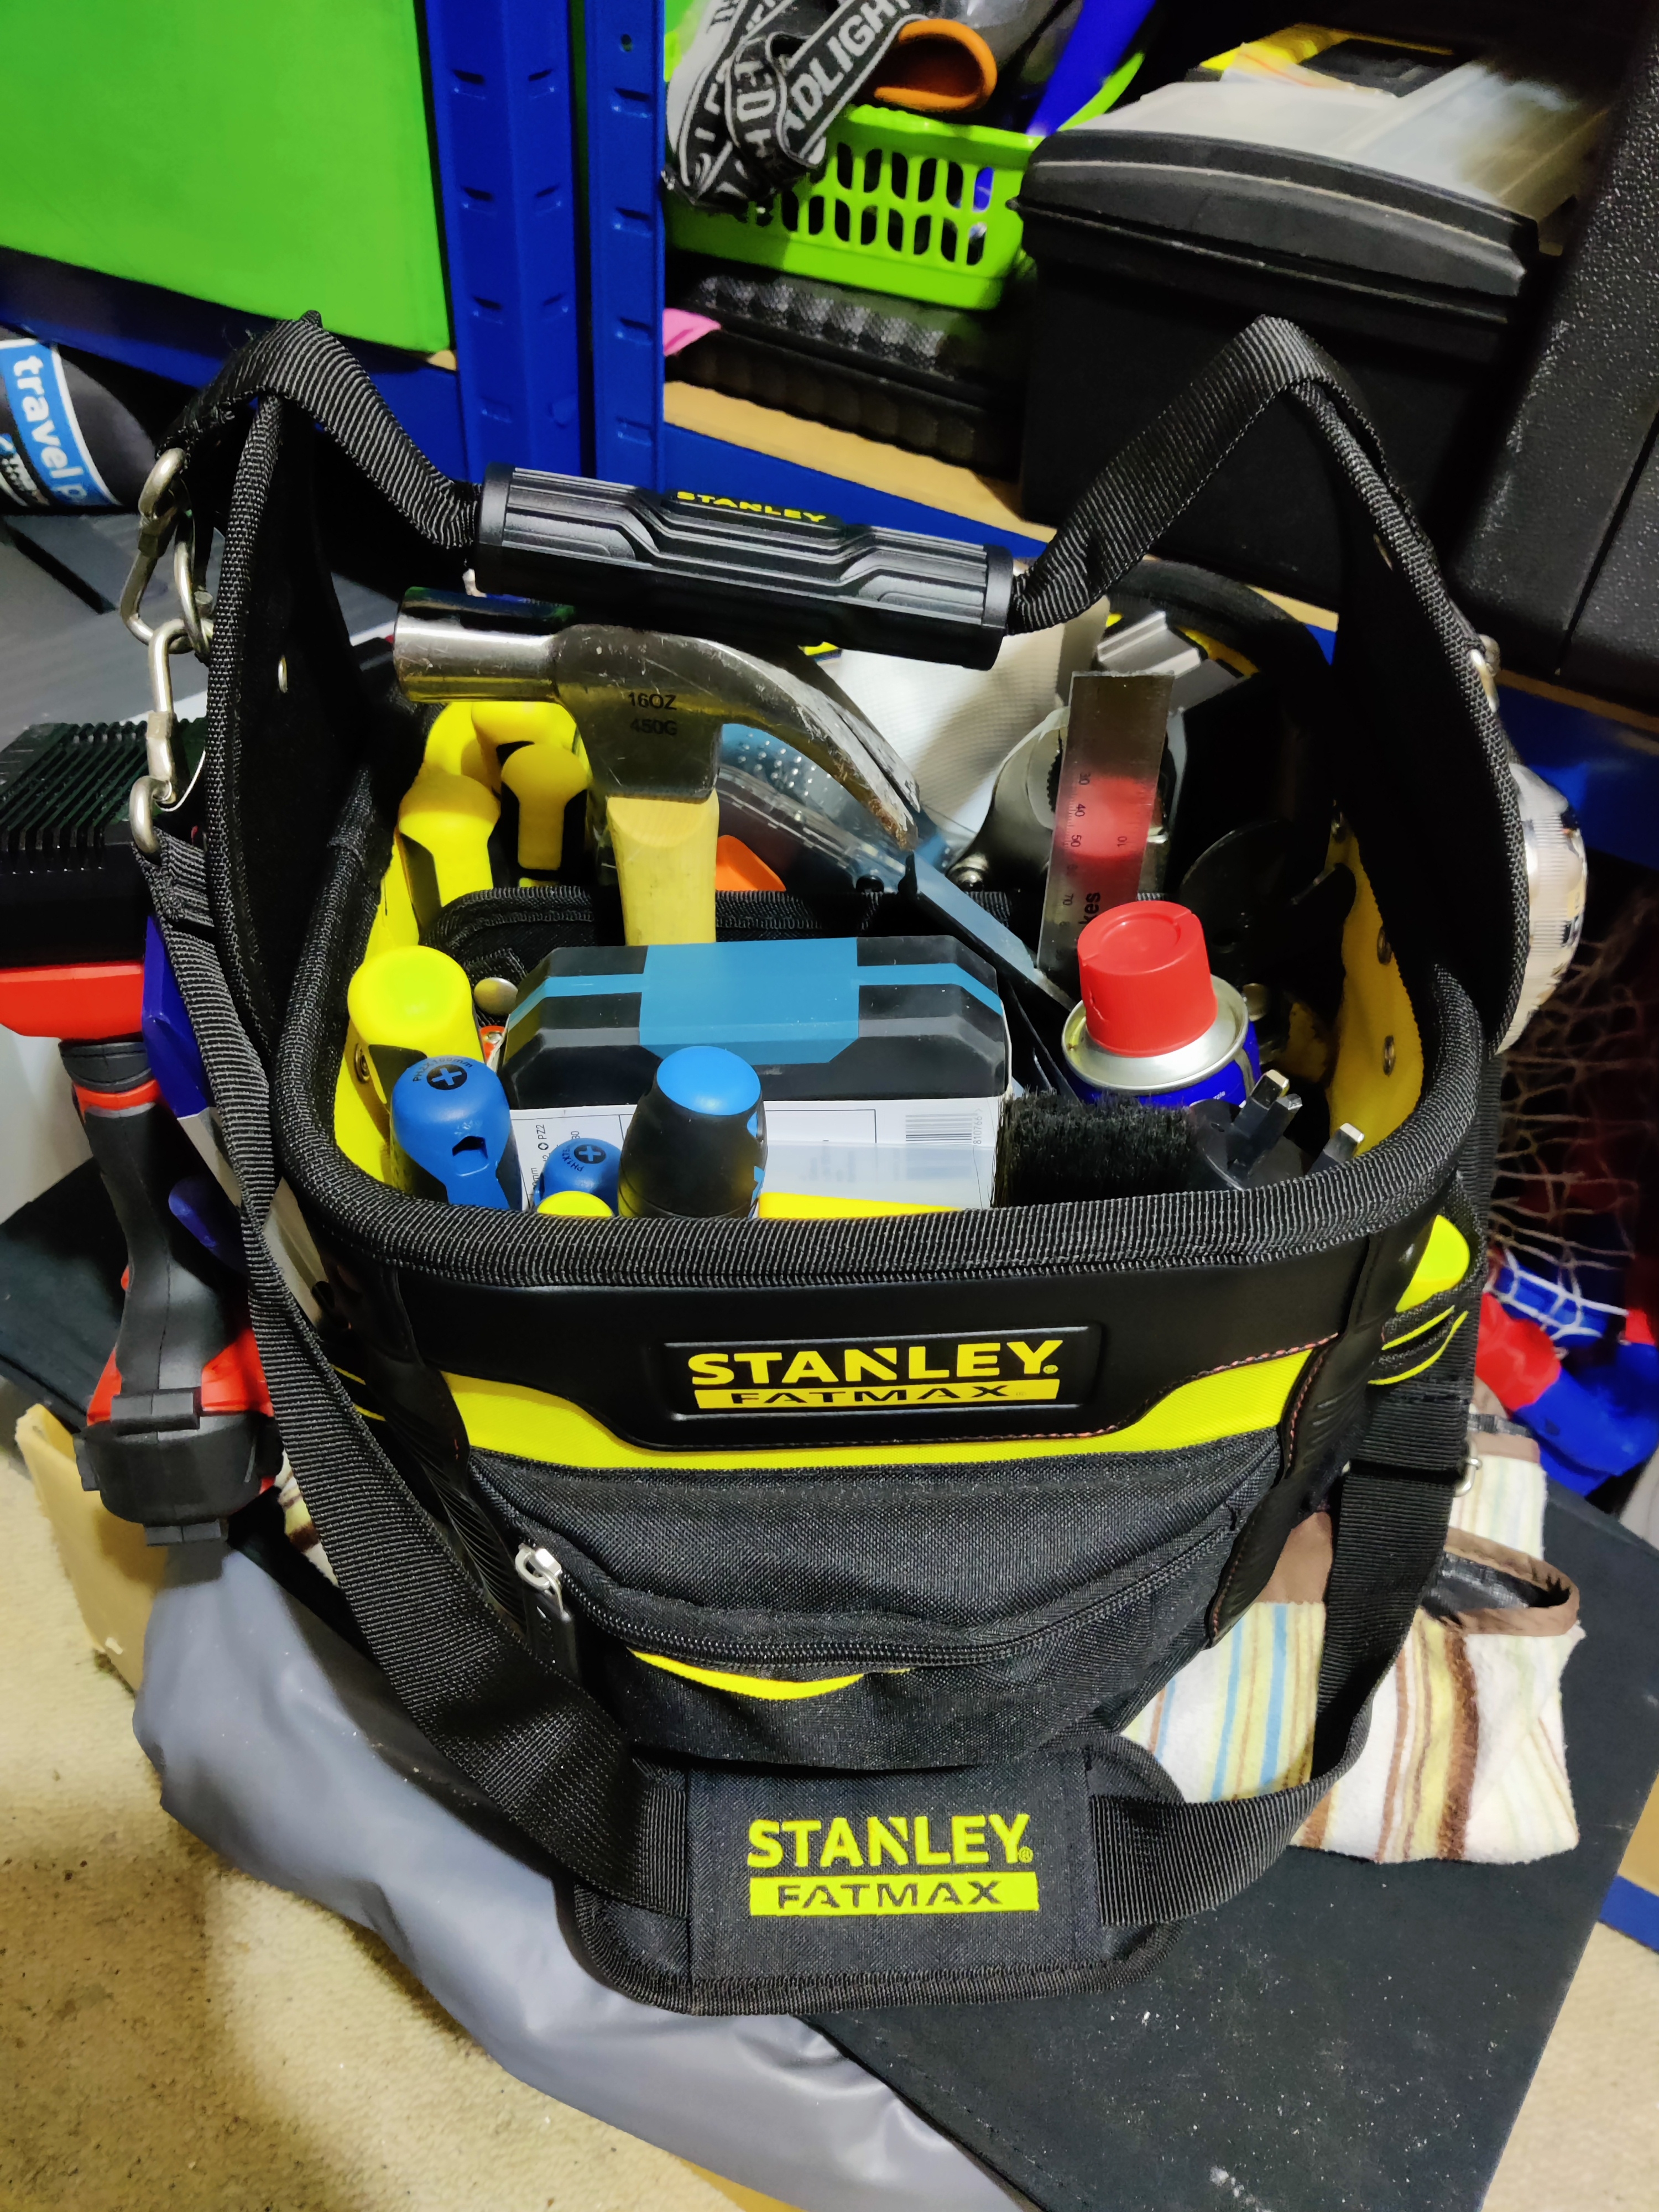
I've never had a proper tool bag before. As a home DIYer I've just had loose tools on shelves in the garage. I finally got fed up of running up and down stairs to get the next tool I needed on a job. This thing is great. I can fit most things in and I have a few other tools to add - like some scissors to stop borrowing the kitchen ones. I may even get a shorter, wider one for longer tools that are less frequently used.

Let's see your tool bags and setup.

5


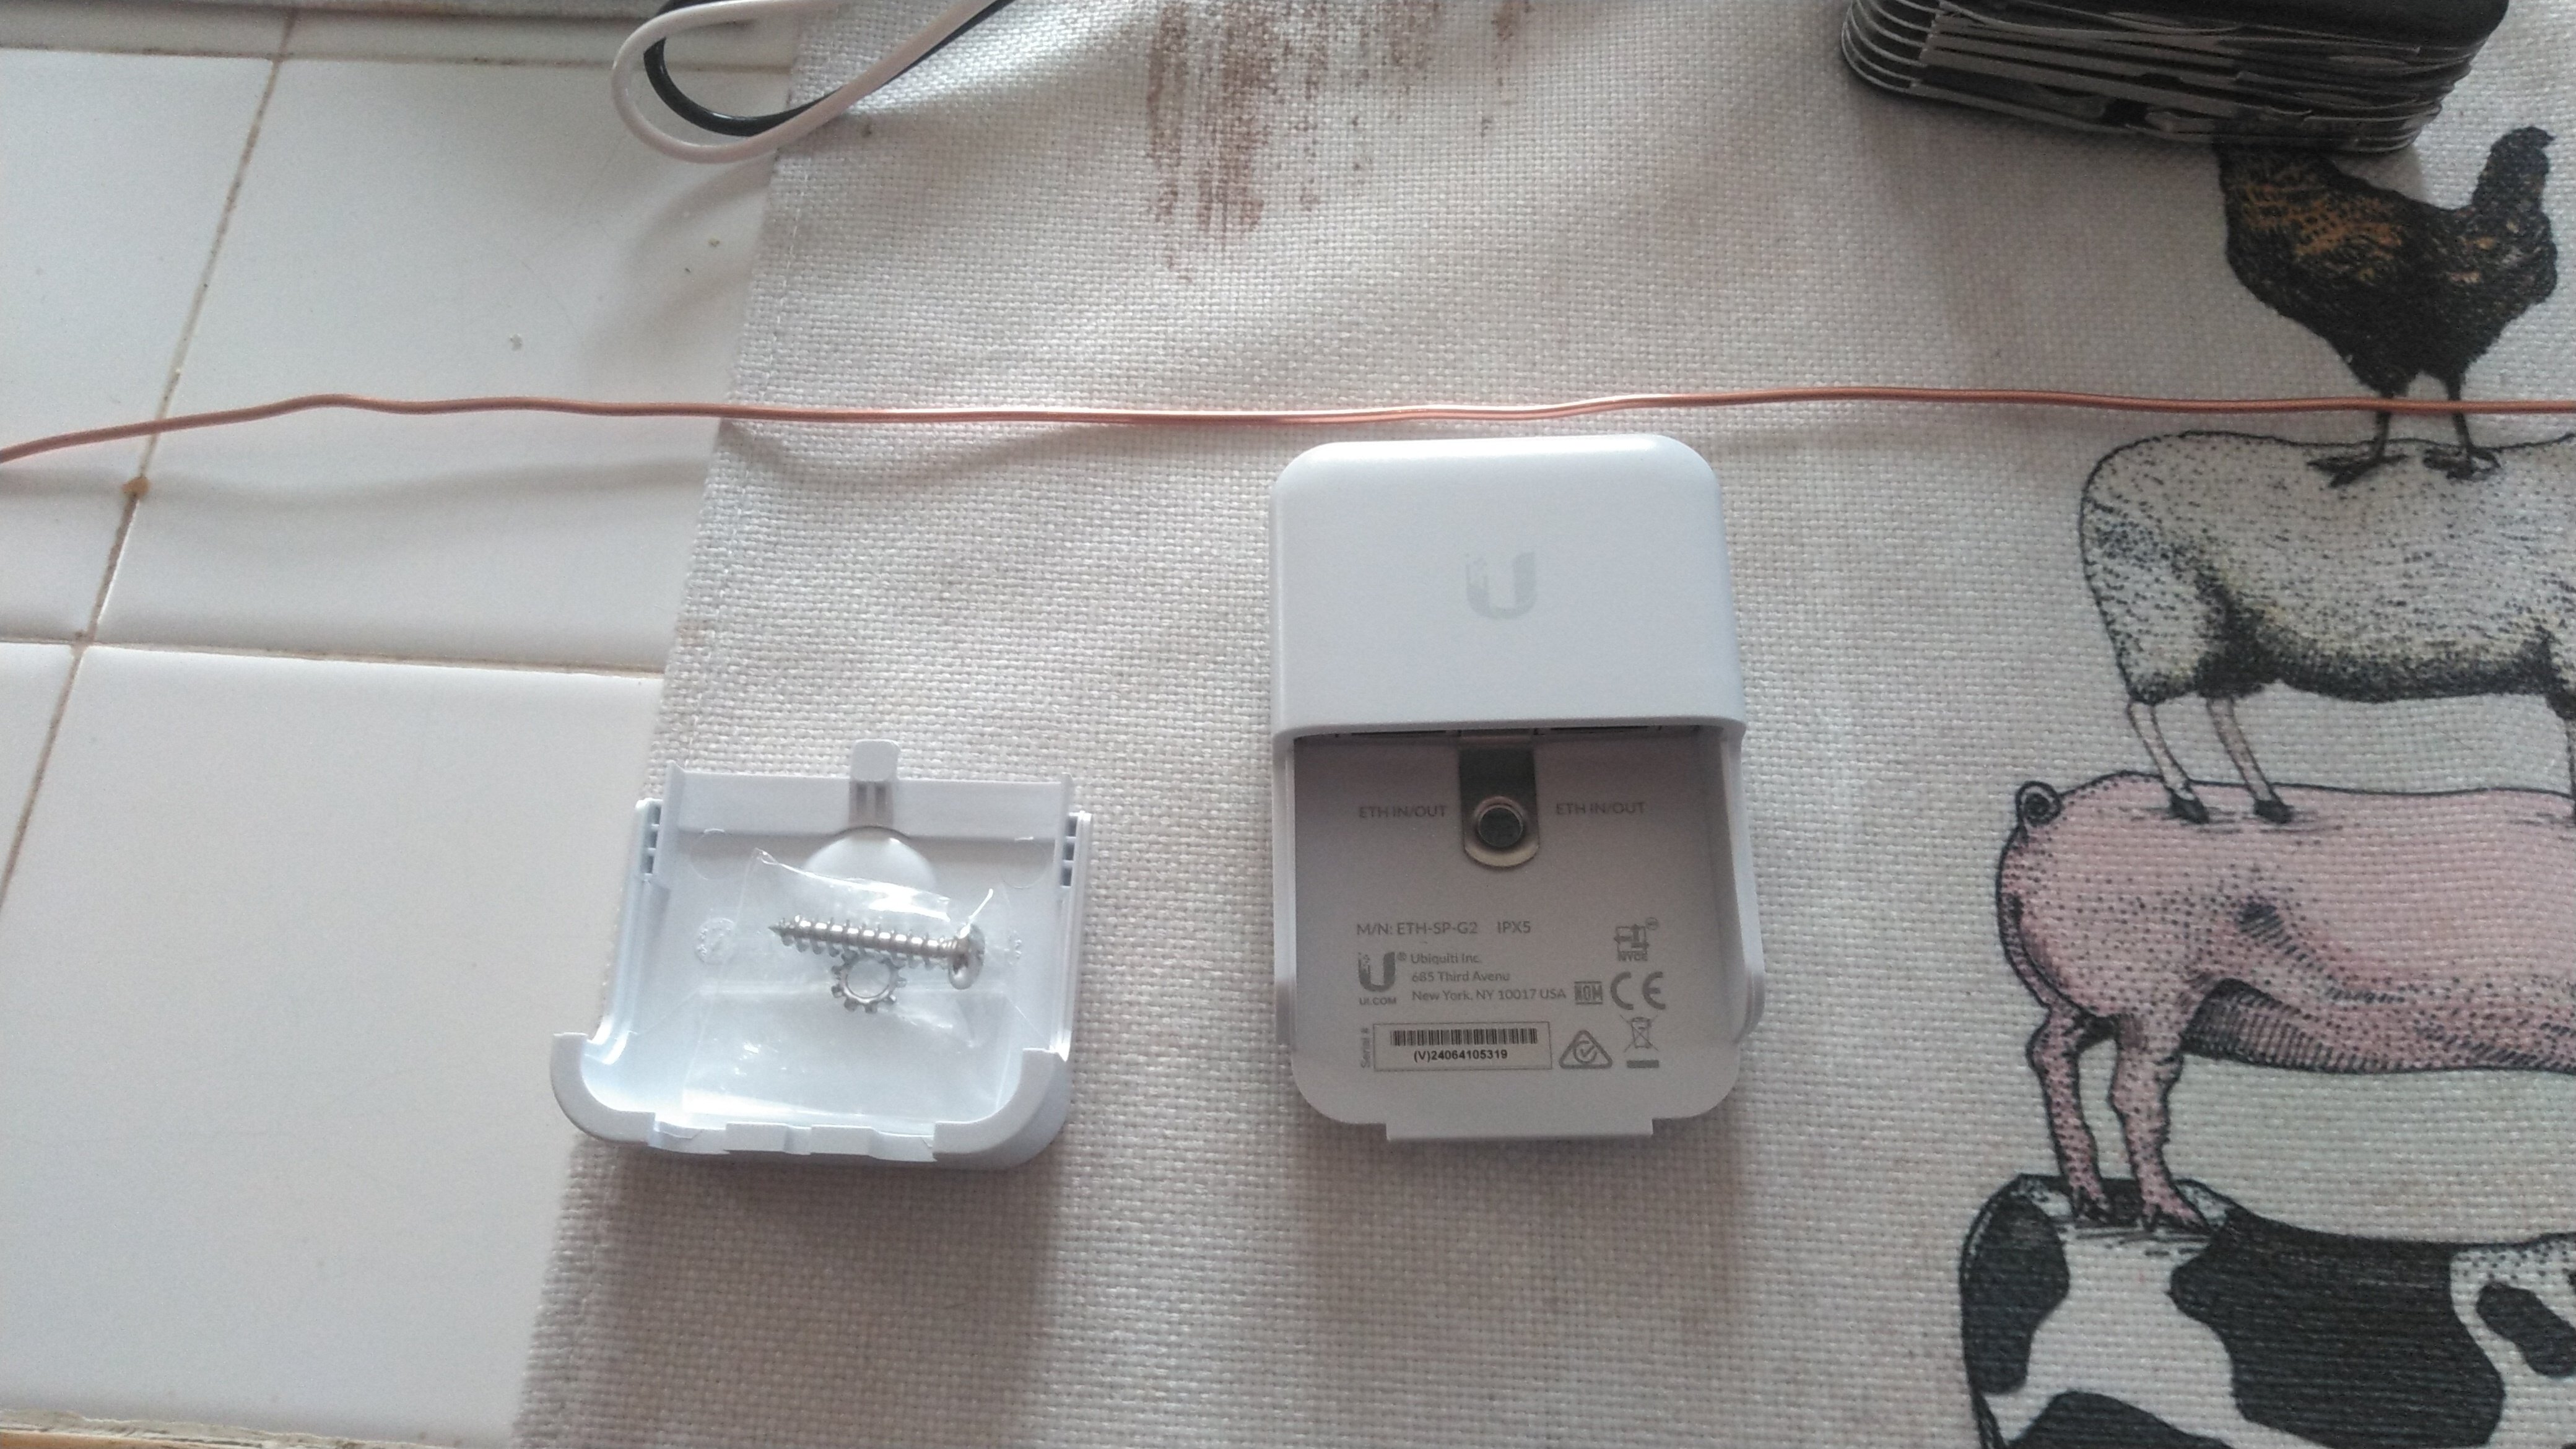
I have added a wifi repeater to the outside of my home so that my wife can watch her critter cams. It is a POE device that runs all the way back to my router.

Would like to install this surge protector but I'm getting conflicting information on grounding it. My installation is to the side of my house, not a metal pole.

Lowest effort options first, I can:

A. Place the protector inside near where the CAT5 enters the basement. Ground to a junction box that I installed that is grounded to the house panel and rod.

B. Ground internally to a water pipe or externally to the outdoor spigot.

C. Drive a ground rod where the cable exits the house and ground to it.

D. Repeat C and also bond to to the pre-existing home ground rod. (Least preferable option, rods would be on opposite corners of house.)

6


Over the next year or so, we're looking to replace our wood floors, all the base boards, all interior & exterior doors, and door trim. Since the wife and I both work full time, we're thinking we'd focus on one at a time, and do it slowly over a few weekends and evenings. Is there an order that would make things easier? Like do floors before baseboards or vice versa? Is it even worth doing things one at a time?

7


hell yeah

8


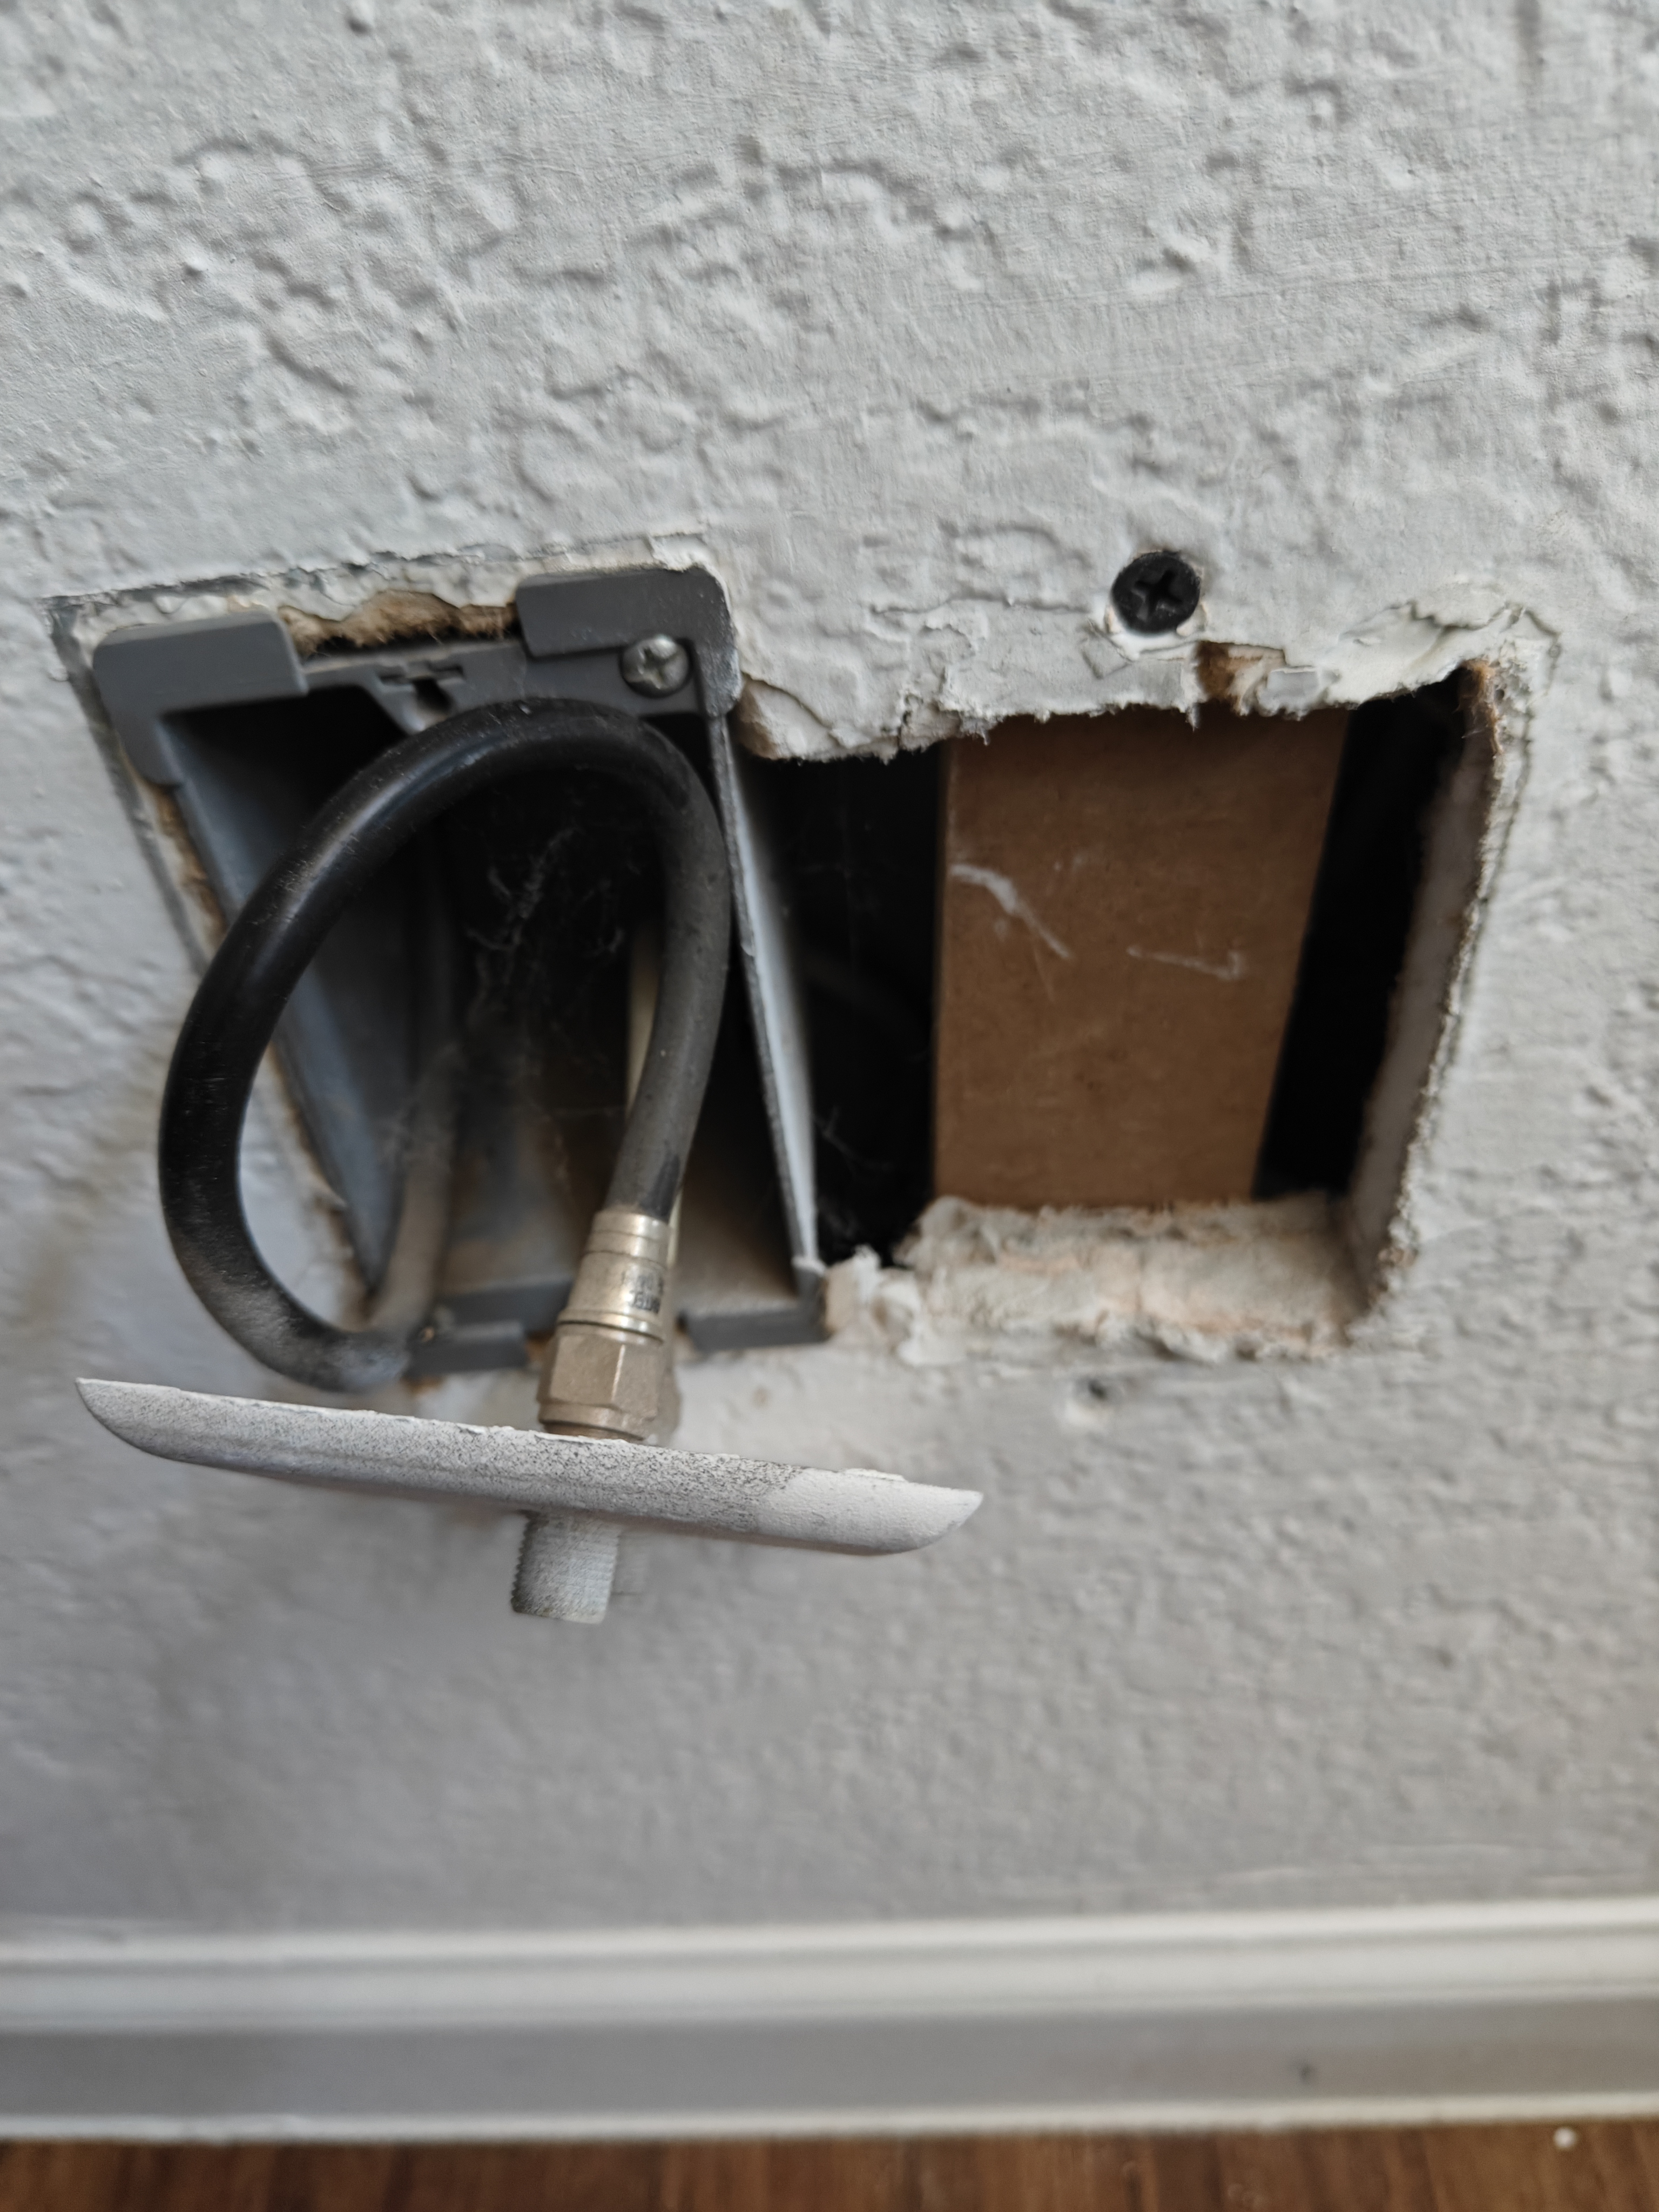
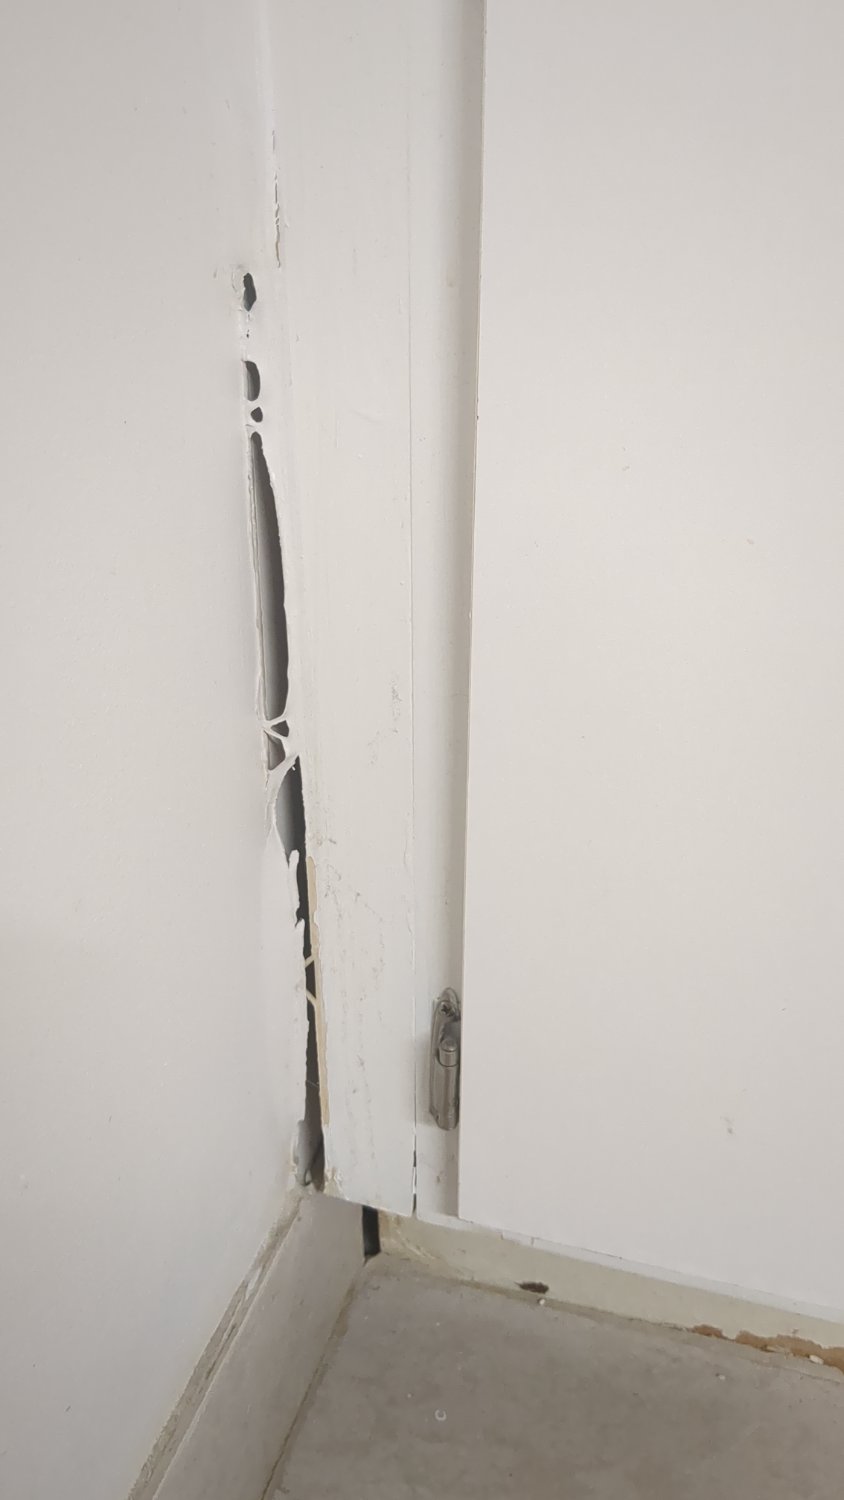
No idea what the story behind this is. It's a single gang coax box, and just a hole next to it. Looks like previous owner started to patch the drywall by putting the backer in but gave up.

9


First time homeowner here. The house was previously owned by an investment firm who cut a lot of corners on renovations at some point. Does anyone have a good resource for fixing botch jobs? A lot of tutorials cover fixing or replacing things that were done properly before hand, and I don't want to spam forums with "How the he'll do I fix this monstrosity??"

10


If there is a better community to ask, I’d be happy to post there. I am looking for ideas for a color to paint my living room, based on my accent colors.

It might be hard to tell from the photo, but the walls are a light grey. And I’m going for a farmhouse/country feel.

Thanks!

11
4
Gate problems (self.diy)
submitted 3 months ago by argueswithidiots to c/diy


Trying to get this gate to sit level and swing freely. I used an adjust-a-gate kit. The width is 92", height is 6'. I have used the lightest possible wood, and I can't get this damn thing to hang straight. The turnbuckle that came with it bent straight and came flying out of the holes, so I used a different one I had on hand. Clearly the wheel isn't doing anything except causing the gate to warp since it isn't centered under the weight.

I want to add a diagonal cross brace from the bottom hinge to the top corner, but I'm not sure how exactly to do it with the 3 horizontal boards.

I'm also considered replacing the hinges with 3 extra long strap hinges, one on each horizontal board.

What do you guys think?

Gates

12
32
submitted 3 months ago* (last edited 3 months ago) by kinther to c/diy


I tested this with an electrical socket reader and it chimed, so there is some power to it still. I'd like to remove this, the old keypad, a siren, etc.

Besides shutting off the power while doing it and maybe capping the cable ends, what do I need to think about? I'm just trying to make sure I don't burn my house down 😅

13
9
submitted 3 months ago* (last edited 3 months ago) by tobylemming to c/diy


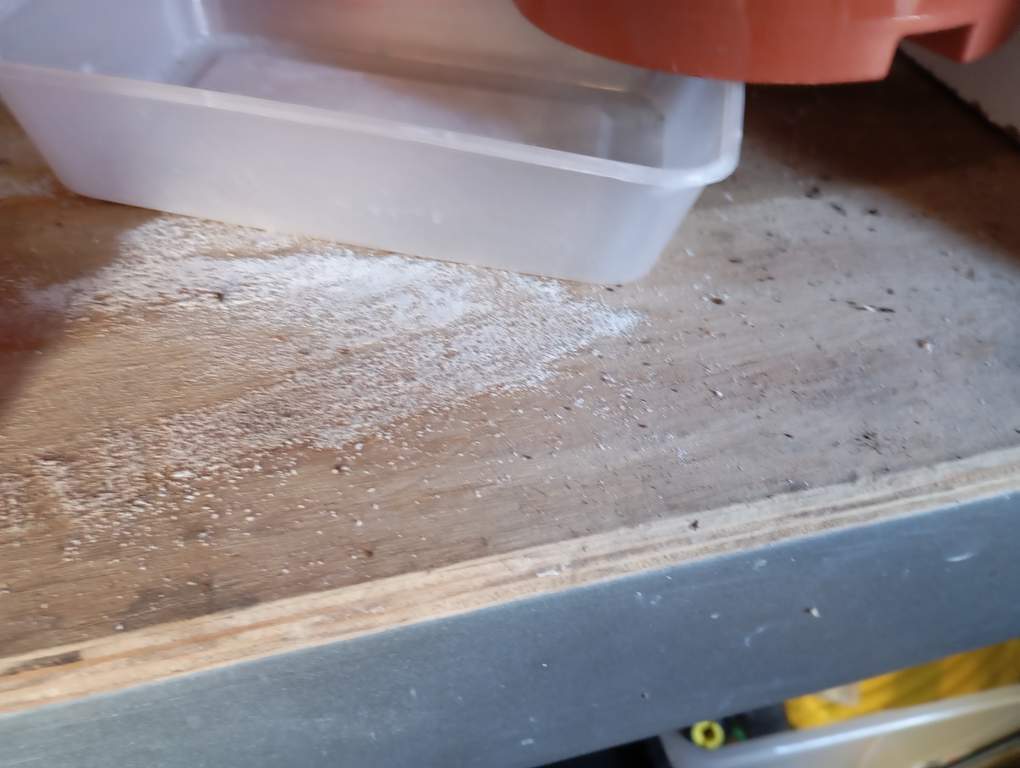
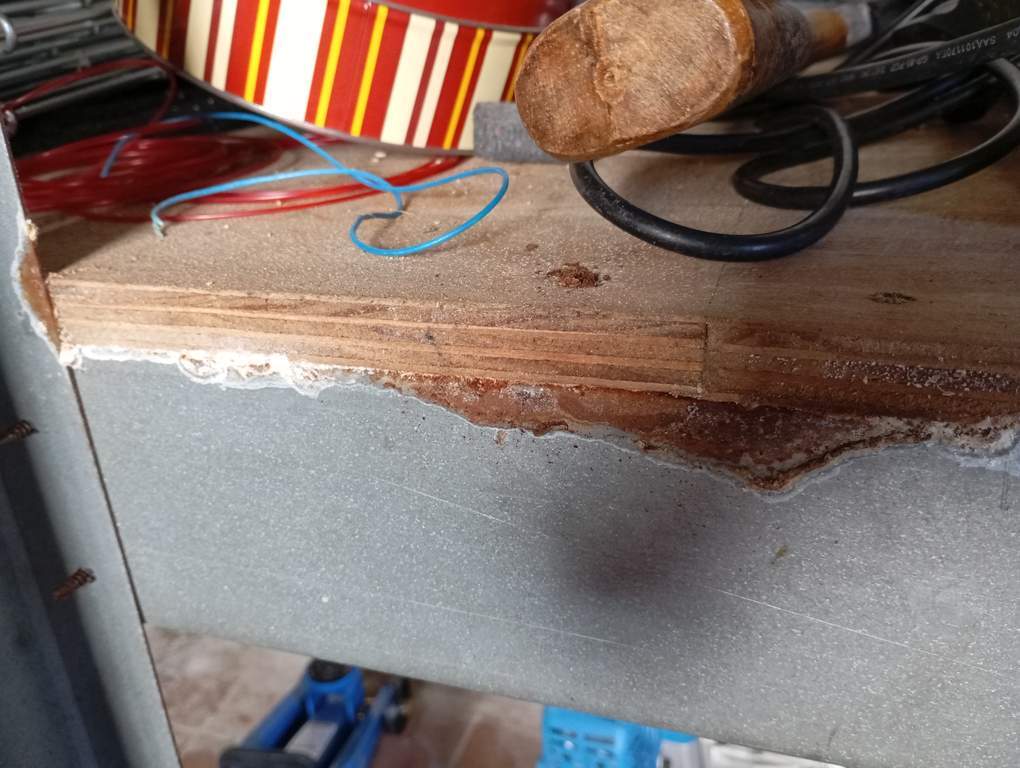
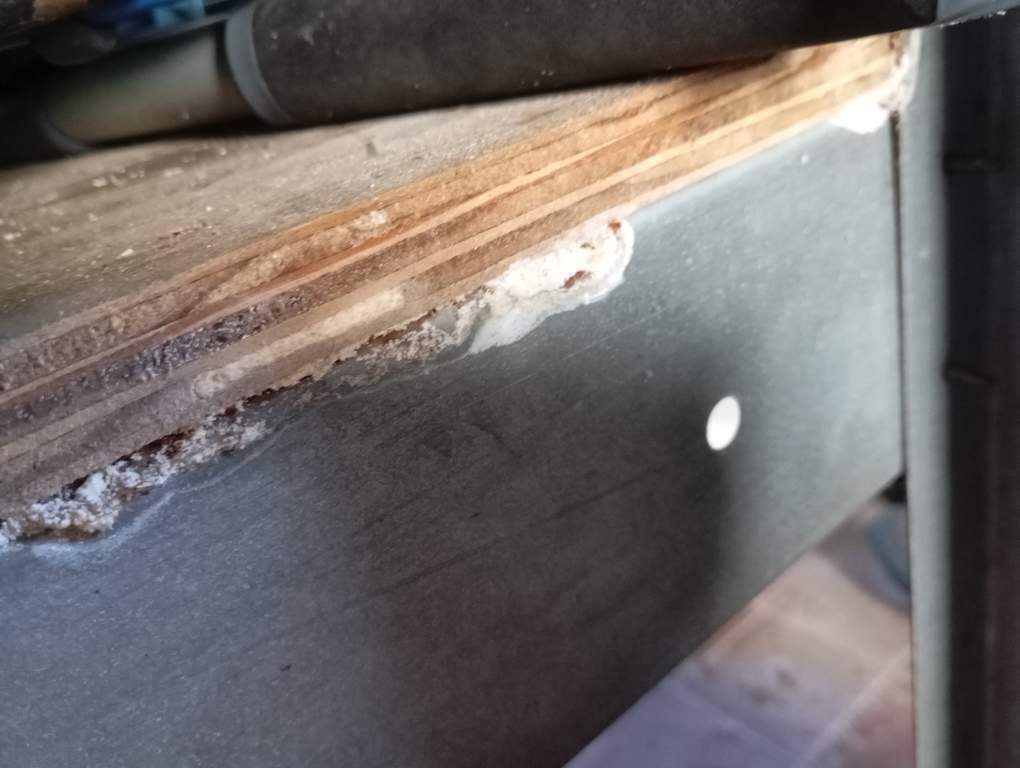
Hi, I am wondering if anyone could please help identify the white powder substance that is appearing on the shelves on my shed?

I think it may be some type of acid? It appears to be eating away at the metal of my shelves. I have previously brushed the shelves down to clear this before but it has returned, so I suspect I may need to use some sort of cleaner?

There was a leak in the roof for a few months and some tools became rusty as a result. The leak has been sorted but I wonder if it could be related to the powder substance.

14


So I am working on a project where I want a big dumb red button. I got a light-duty industrial illuminated pushbutton from AliExpress (this one, if you want to know: 22mm 3v-6v, non-locking). It looks like it will be fine to use, but I'm confused about the LED. It seems to work regardless of which orientation, and I briefly tried it without a resistor, and that was fine too.

I'd like it to be fairly bright, but as someone who has blown up his share of through-hole diodes in his day, I would rather not mess up this one, since without the diode light it's sad and dumb, rather than glorious and dumb. :-)

My question is this: is there any standard for these illuminated switches that would make it likely that there is some resistor and diode stuff going on inside the housing, such that this thing is fine to just wire up and use?

15


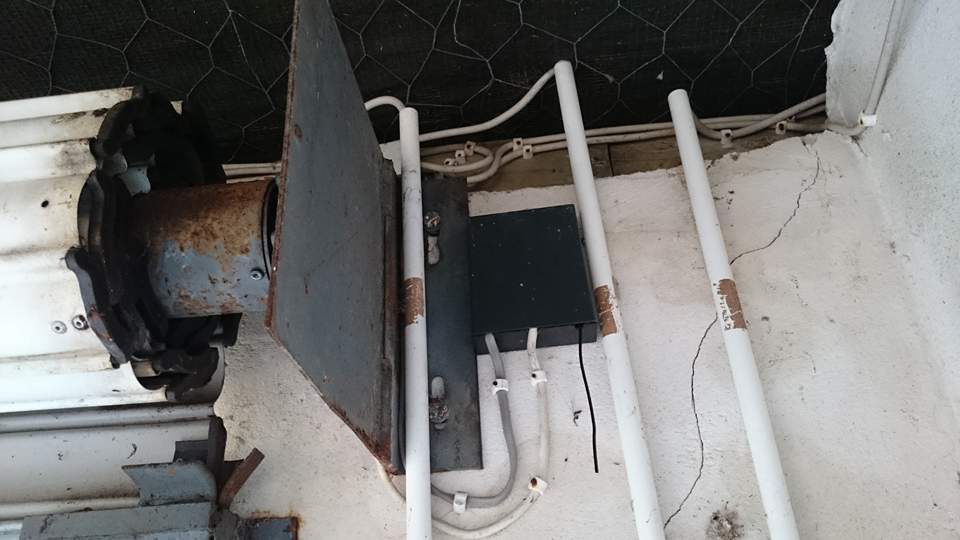
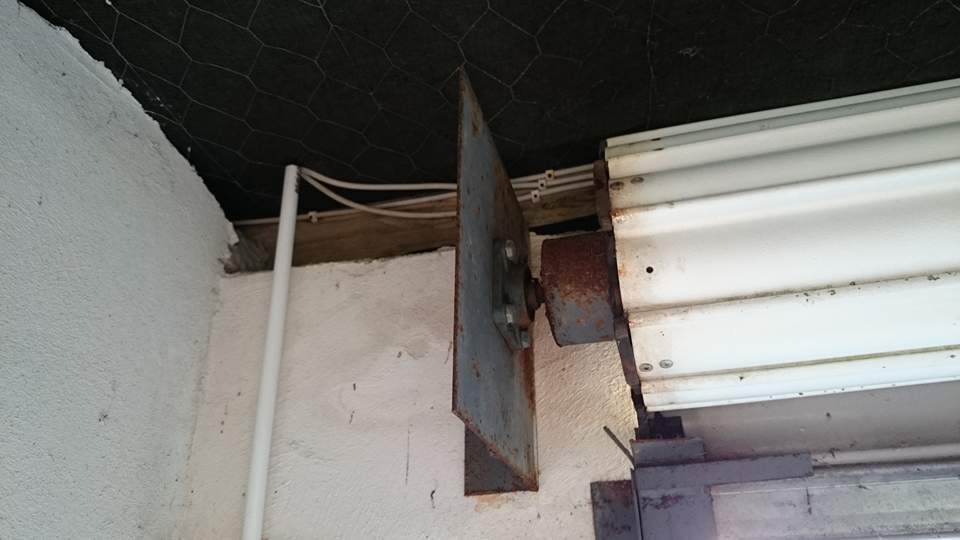
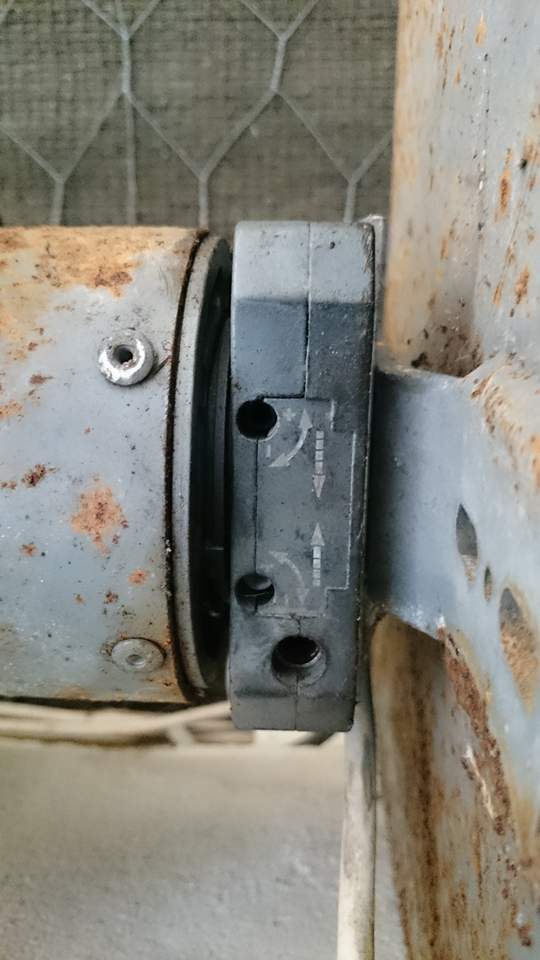
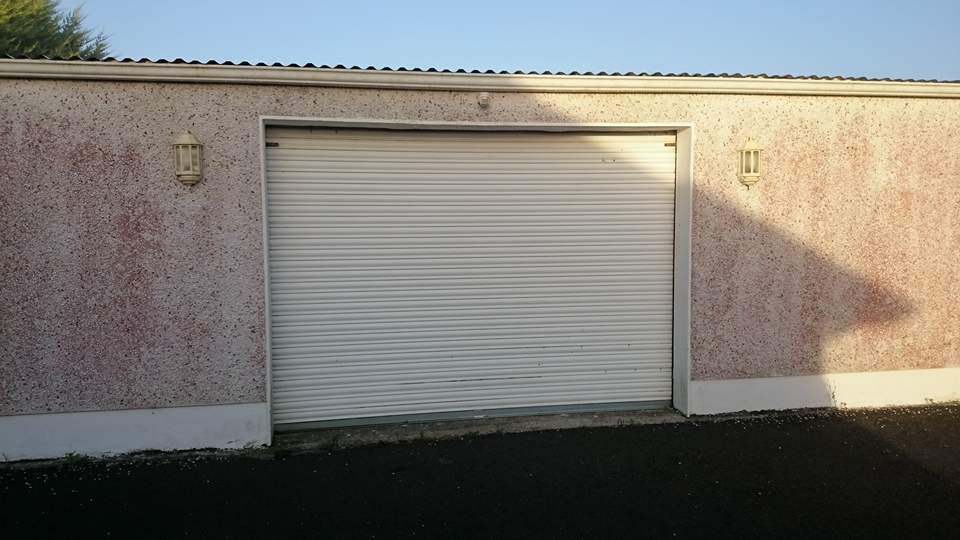
Hi, I would like to remove the electric motor from a garage door in the hopes that I can use it as a manual door.

I would like to be able to pull it up and down by hand (I will most likely add a handle).

I am hoping someone may know if this is possible?

I think the motor is at one end:

And the other is just a support:

There appears to be a manual hand crank:

In the future I may replace the door with something more practical.

I have an idea how it might be possible, but I think I would need to support the door and remove the brackets. Then take it down, and pull it apart. But I have no knowledge as to how the supporting axle is connected to the motor or if it is even possible to then move it manually.

Perhaps it would be too heavy to lift manually? Or perhaps there is an easier solution?

I am open to anyone's advice.

16


I am in the process of attempting to install an outside switch for a radon mitigation system. However, I am unable to drill through the remaining part of the block wall. I have an M12 Fuel hammer drill and a carbide drill bit. I imagine something is in the way but what? If it was concrete in the floor I would guess rebar. The first part went through like butter. I have pictures: https://imgur.com/a/hCed4u8

17
 
 
18
29
submitted 5 months ago* (last edited 5 months ago) by [email protected] to c/diy


It's a bit of a long story but someone tried using spray foam to fill the hole around where my sink's plumbing goes through and it seems like it essentially expanded too much and causing the paint to tear.

I was thinking maybe I could get some rigid insulation cut it to size, stick it in there, and spackle over it followed by painting it. I would probably cut the rest of the paint to the top because it looks as if it is going to tear eventually and it's at an angle.

Any suggestions?

The gap is close to an inch in size.

19


One side of my back yard is 6 foot vinyl fence post, then the other side and back are chest high chain link fence that are older than me and have concrete blocks under the ground, so would be a giant pain to remove.

Also I looked up and wires were laid right next to the concrete bases. So I "really" do not want to have to remove them.

The fence was installed before I was born, and the wires laid when I was in elementary school. So don't blame me for the silliness of it please.

Would it work if I just removed the panels from between the chain link posts, then slipped the hollow vinyl posts over them, and connected them with the vinyl panels? I would have to buy different distance panels to make it work, but that seems easier than tearing them out, then digging new holes for the new posts.

Or any other suggestions to make it look nice and not have to try and dig large concrete bases that are next to wires out of the ground?

20


I have a Nektar keyboard I've repaired for the most part, but the previous owner's bad gluing of the keyboard mechanism wasn't very good.

Since I'm not very good with normal musical keyboards, I was thinking about modifying its keybed into a Jankó keyboard.

21
42
TrebleSynth (lemmy.world)
submitted 7 months ago by profdc9 to c/diy


I create an open source software modular synthesizer out of a Raspberry Pi Pico. You can see a video on it at https://www.youtube.com/watch?v=252Vte4tYh0

22
91
submitted 7 months ago* (last edited 7 months ago) by dual_sport_dork to c/diy


...when he will find himself standing in a hardware store confronted with a wall of bird feeding accessories. This is, I'm told, some kind of twisted coming of age thing. Up until now you've thought about two, maybe three birds in your entire life. Tops. But then, bang: Suddenly the topic of a bird feeder is vitally important. It's serious business.

There's a snag, though.

"What about this?" She'll ask. "It's so cute, like a little tiny house. And it's only $14.97!" It's not even sold yet and you can see it's already falling apart. The wood's split, and clearly nobody taught the children in that sweatshop how a square works. Or a clamp. There's a gold sticker on the bottom, half peeling off. It says 'Made In China.'

"Come on, I could make that in about 10 minutes with crap I have lying around my workshop."

"Yes, dear," your wife will say, while patting your arm.

This is what 300,000 years of evolution has brought us. Countless generations worth of genetic fine-tuning, passed down through mitochondrial DNA, veritably ensured the delivery of that precise response. The woman has watched you rebuild transmissions, heft Labrador sized rocks over your head, and replaster the entire house. But this, this thing consisting of no more than five ratty planks of wood, elicits a sarcastic "yes, dear."

This is it, isn't it? Men, Mars. Women, Venus. Every single one of those dumbass 1950's stand-up routines, distilled. It turns out it was all true. Well, part of it, anyway.

But some things are a matter of principle.

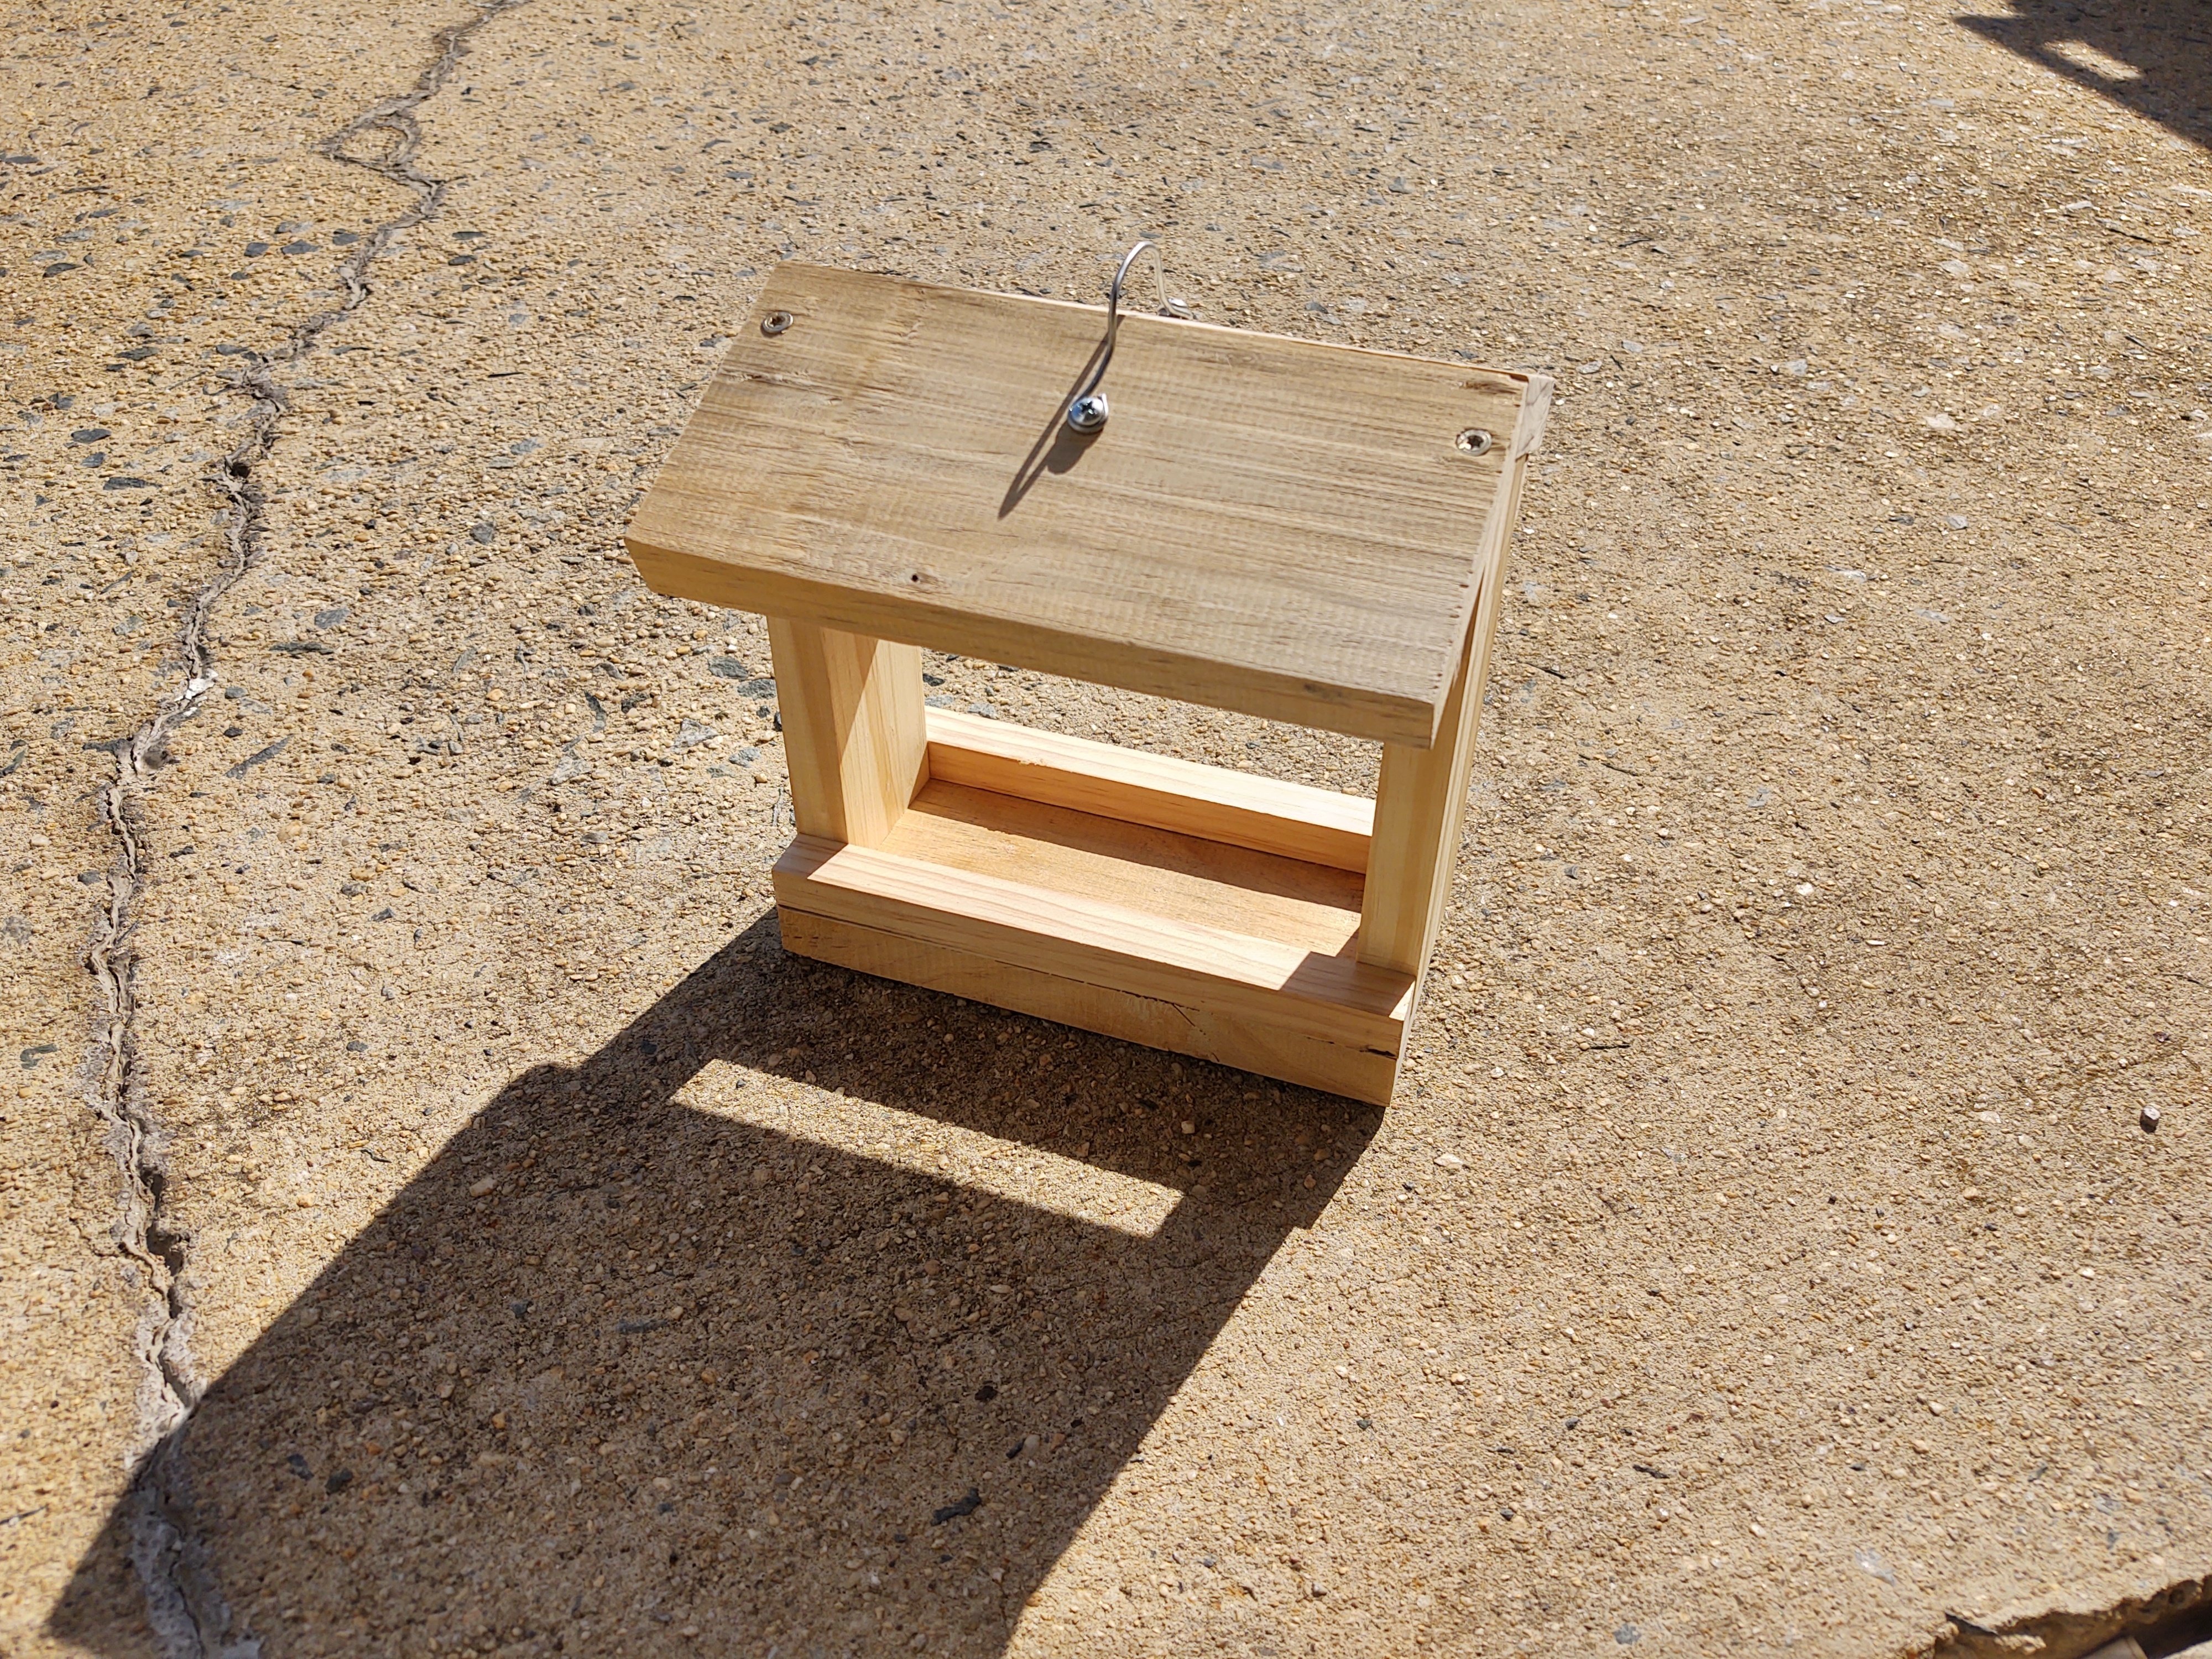
This is a bird feed suet cake holder I literally made out of offcuts and random crap I had lying around on my workbench, in ten minutes. Using nothing -- nothing, I say -- other than my compound miter saw and cordless drill. And a spot of wood filler, because there was a gnarly knot hole on the plank I wound up using on the top. It's held together with Spax screws and you could probably also use it as a jack stand for a bus.

Parameters drafted: Zero. Measurements made: Zero. Components purchased: Zero. And spending $14.97 on a ramshackle piece of shit? Studiously avoided.
23


Here is what it looked like when I got it home:

Fully stripped back:

And restored to it's former glory:

24


Hi,

Any of you folks know about EDPM vs Fibreglass roofing.

I need to make a choice for a property extension in the UK. I expect rain, a few hot days, more rain, more rain, and some ice.

The roof won't be load bearing (people won't be walking on it).

Seems like every other website has differing opinions on what's best. I guess because everyone is selling something.

Any impartial opinions on what you'd use?

Cheers

25
46
Bicycle Stand (lemmy.world)
submitted 9 months ago* (last edited 9 months ago) by madejackson to c/diy


Due to lack of well designed buyable solutions, I built my own bicycle stand from scratch.

BOM:

  • 14 Mtr. 3030 aluminum extrusions
  • 48x M8*16-25 Button Head Screw
  • 6x Feet with mounting Kit for 3030 Profile
  • 10x 90°-Angles for 3030 Profile with mounting kit

Tools:

  • Screwdriver with bits for screws
  • Drill
  • Drillbit 6-8mm
  • Allen Key
  • Chopsaw 1)
  • M8 Tap 1)

Guide:

  1. Cut extrusions to length 1) (F.e. 50cm spacing, 5cm tire width 50cm tire slot lenght, 25cm elevation. You'd need 1x2m, 20x50cm, 2x83cm, 10x11cm, 2x25cm)
  2. Cut M8-Thread into 20x50cm, 2x83cm and 2x25cm 1)
  3. Drill 6-8mm holes into 3030 Profiles corresponding to M8-Thread locations.
  4. Fit Everything together.
  5. Profit
  1. Only nececary if you cut the extrusions to length yourself. If you order the correct extrusion length pretapped you don't need those.

view more: next ›