v1605

joined 2 years ago
MODERATOR OF
[–] v1605 1 points 5 months ago

Thanks! Besides some other posts about this adapter on and some comments here and there on Reddit, I just post on Lemmy now.

[–] v1605 1 points 5 months ago
[–] v1605 2 points 5 months ago (1 children)

Not sure, no mention about it on his discord. Though with the new SD2SP2 V2.0 design the m.2 is less important (supposedly it has similar performance).

[–] v1605 21 points 5 months ago (3 children)
[–] v1605 5 points 6 months ago

Could you imagine if land voted instead of people?

Land Doesn't Vote

[–] v1605 1 points 6 months ago

Well thanks for giving it a second look lol

[–] v1605 1 points 6 months ago
[–] v1605 6 points 6 months ago

Here is how I received the console. Before the replacement

[–] v1605 3 points 6 months ago

Yeah that makes sense, Microsoft is definitely going to keep costs down and not switch out those reels. Based on the other info, these are 22uf 20%, so in spec with the others I've measured.

[–] v1605 10 points 6 months ago

Luckily all the c17x are 0603 22uf, 20% caps. Thanks for pointing me to the image so I could compare it to the schematics. Now I have to go through and look for others. No idea how this could have even happened.

[–] v1605 2 points 6 months ago

Good eye, I need to go over the entire board again and look for those. Combined with the other answer that help me with a revision that actually is labeled, you are right. It should be a 22uf 6.3 0603 decoupling cap.

[–] v1605 2 points 6 months ago

No, for that you still need a real broadband adapter.


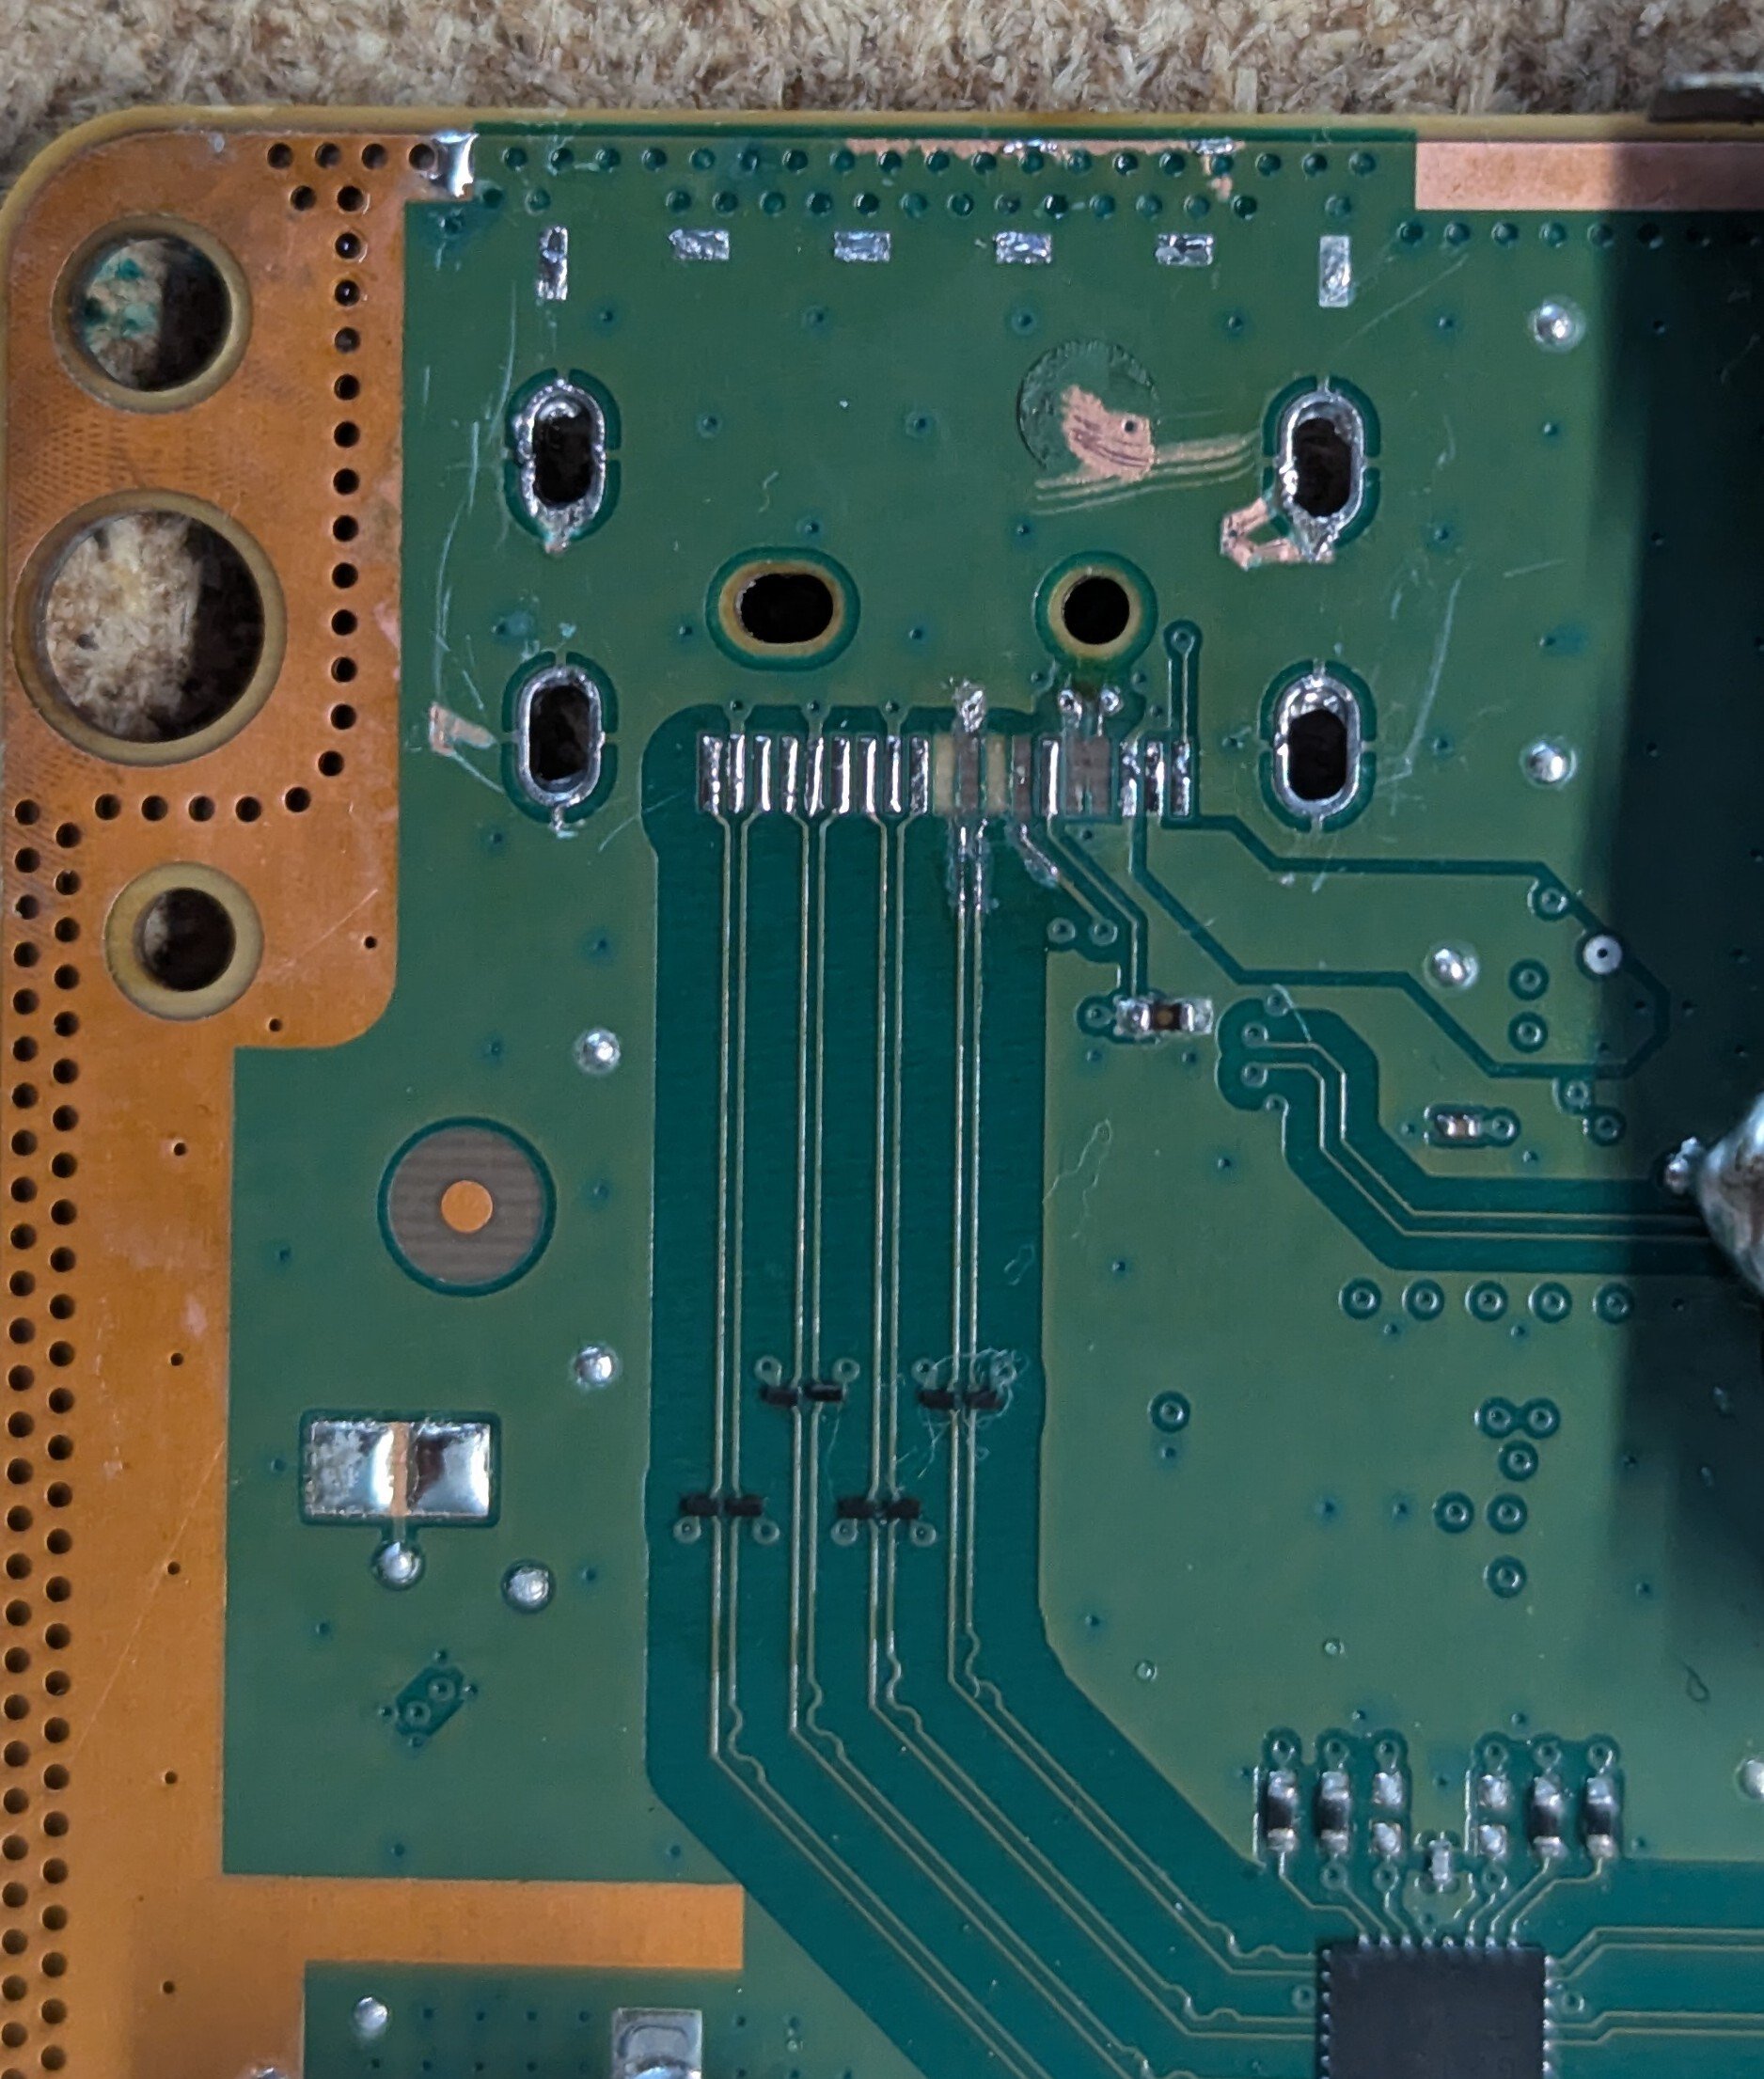
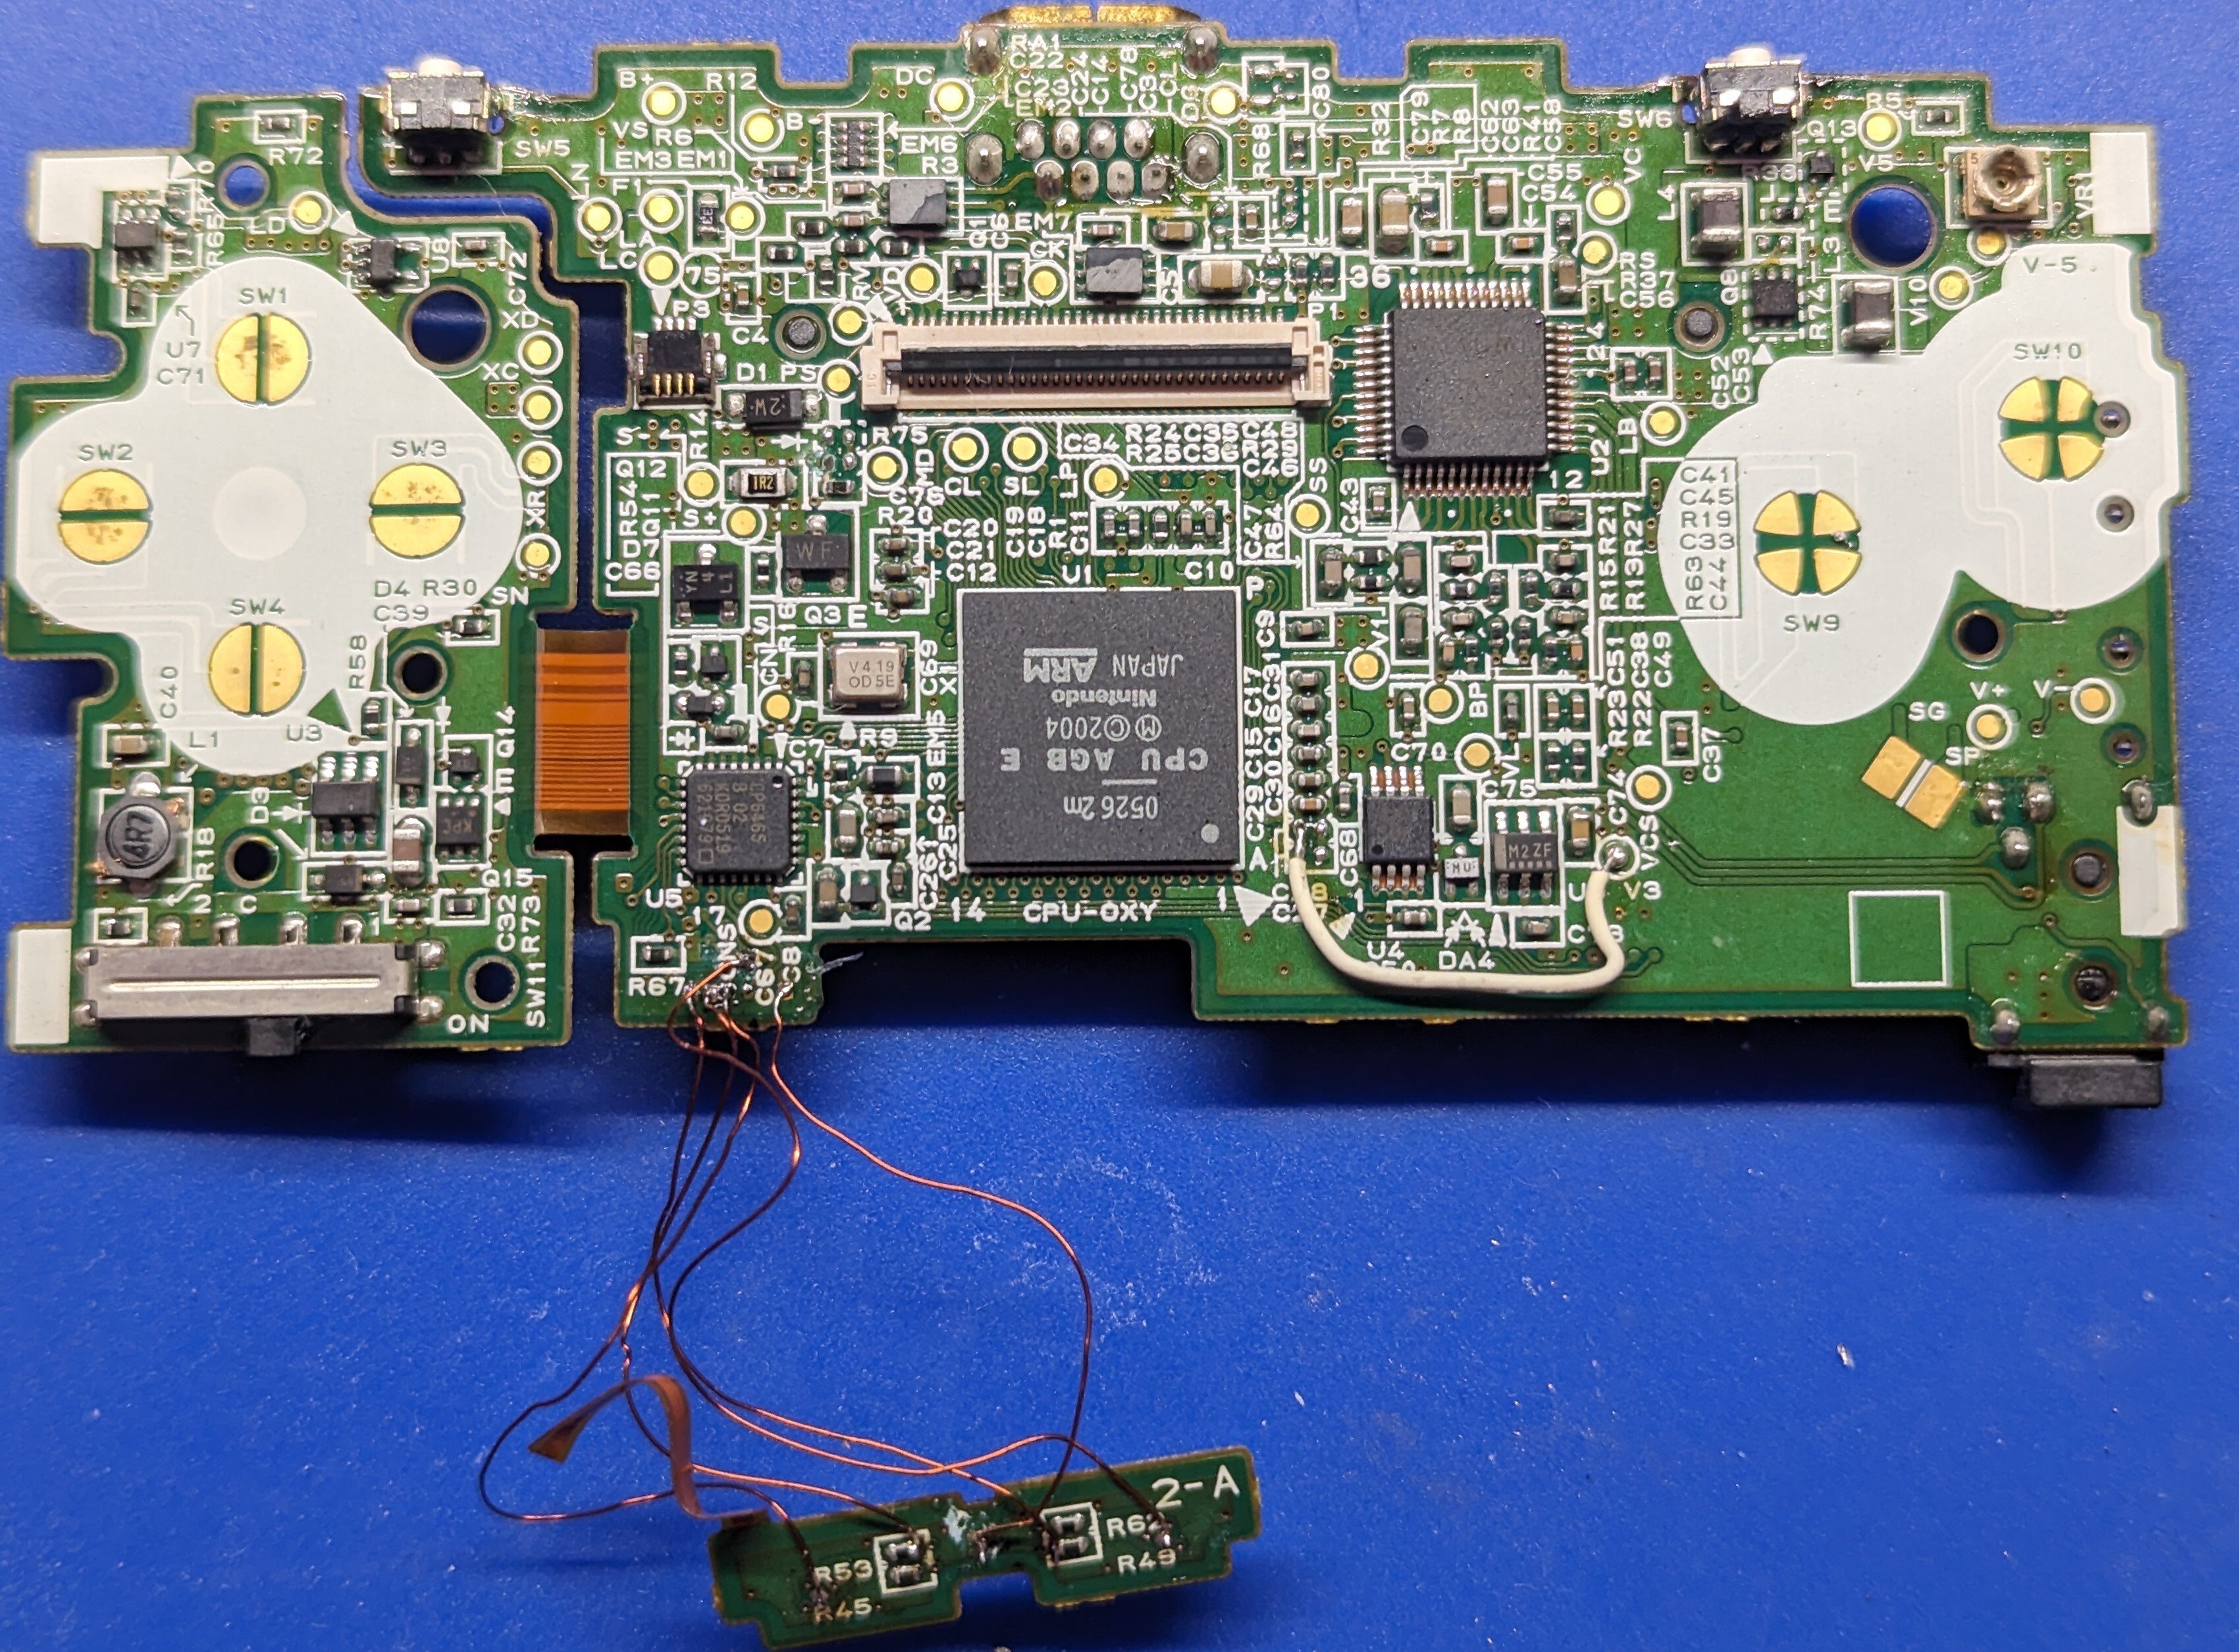
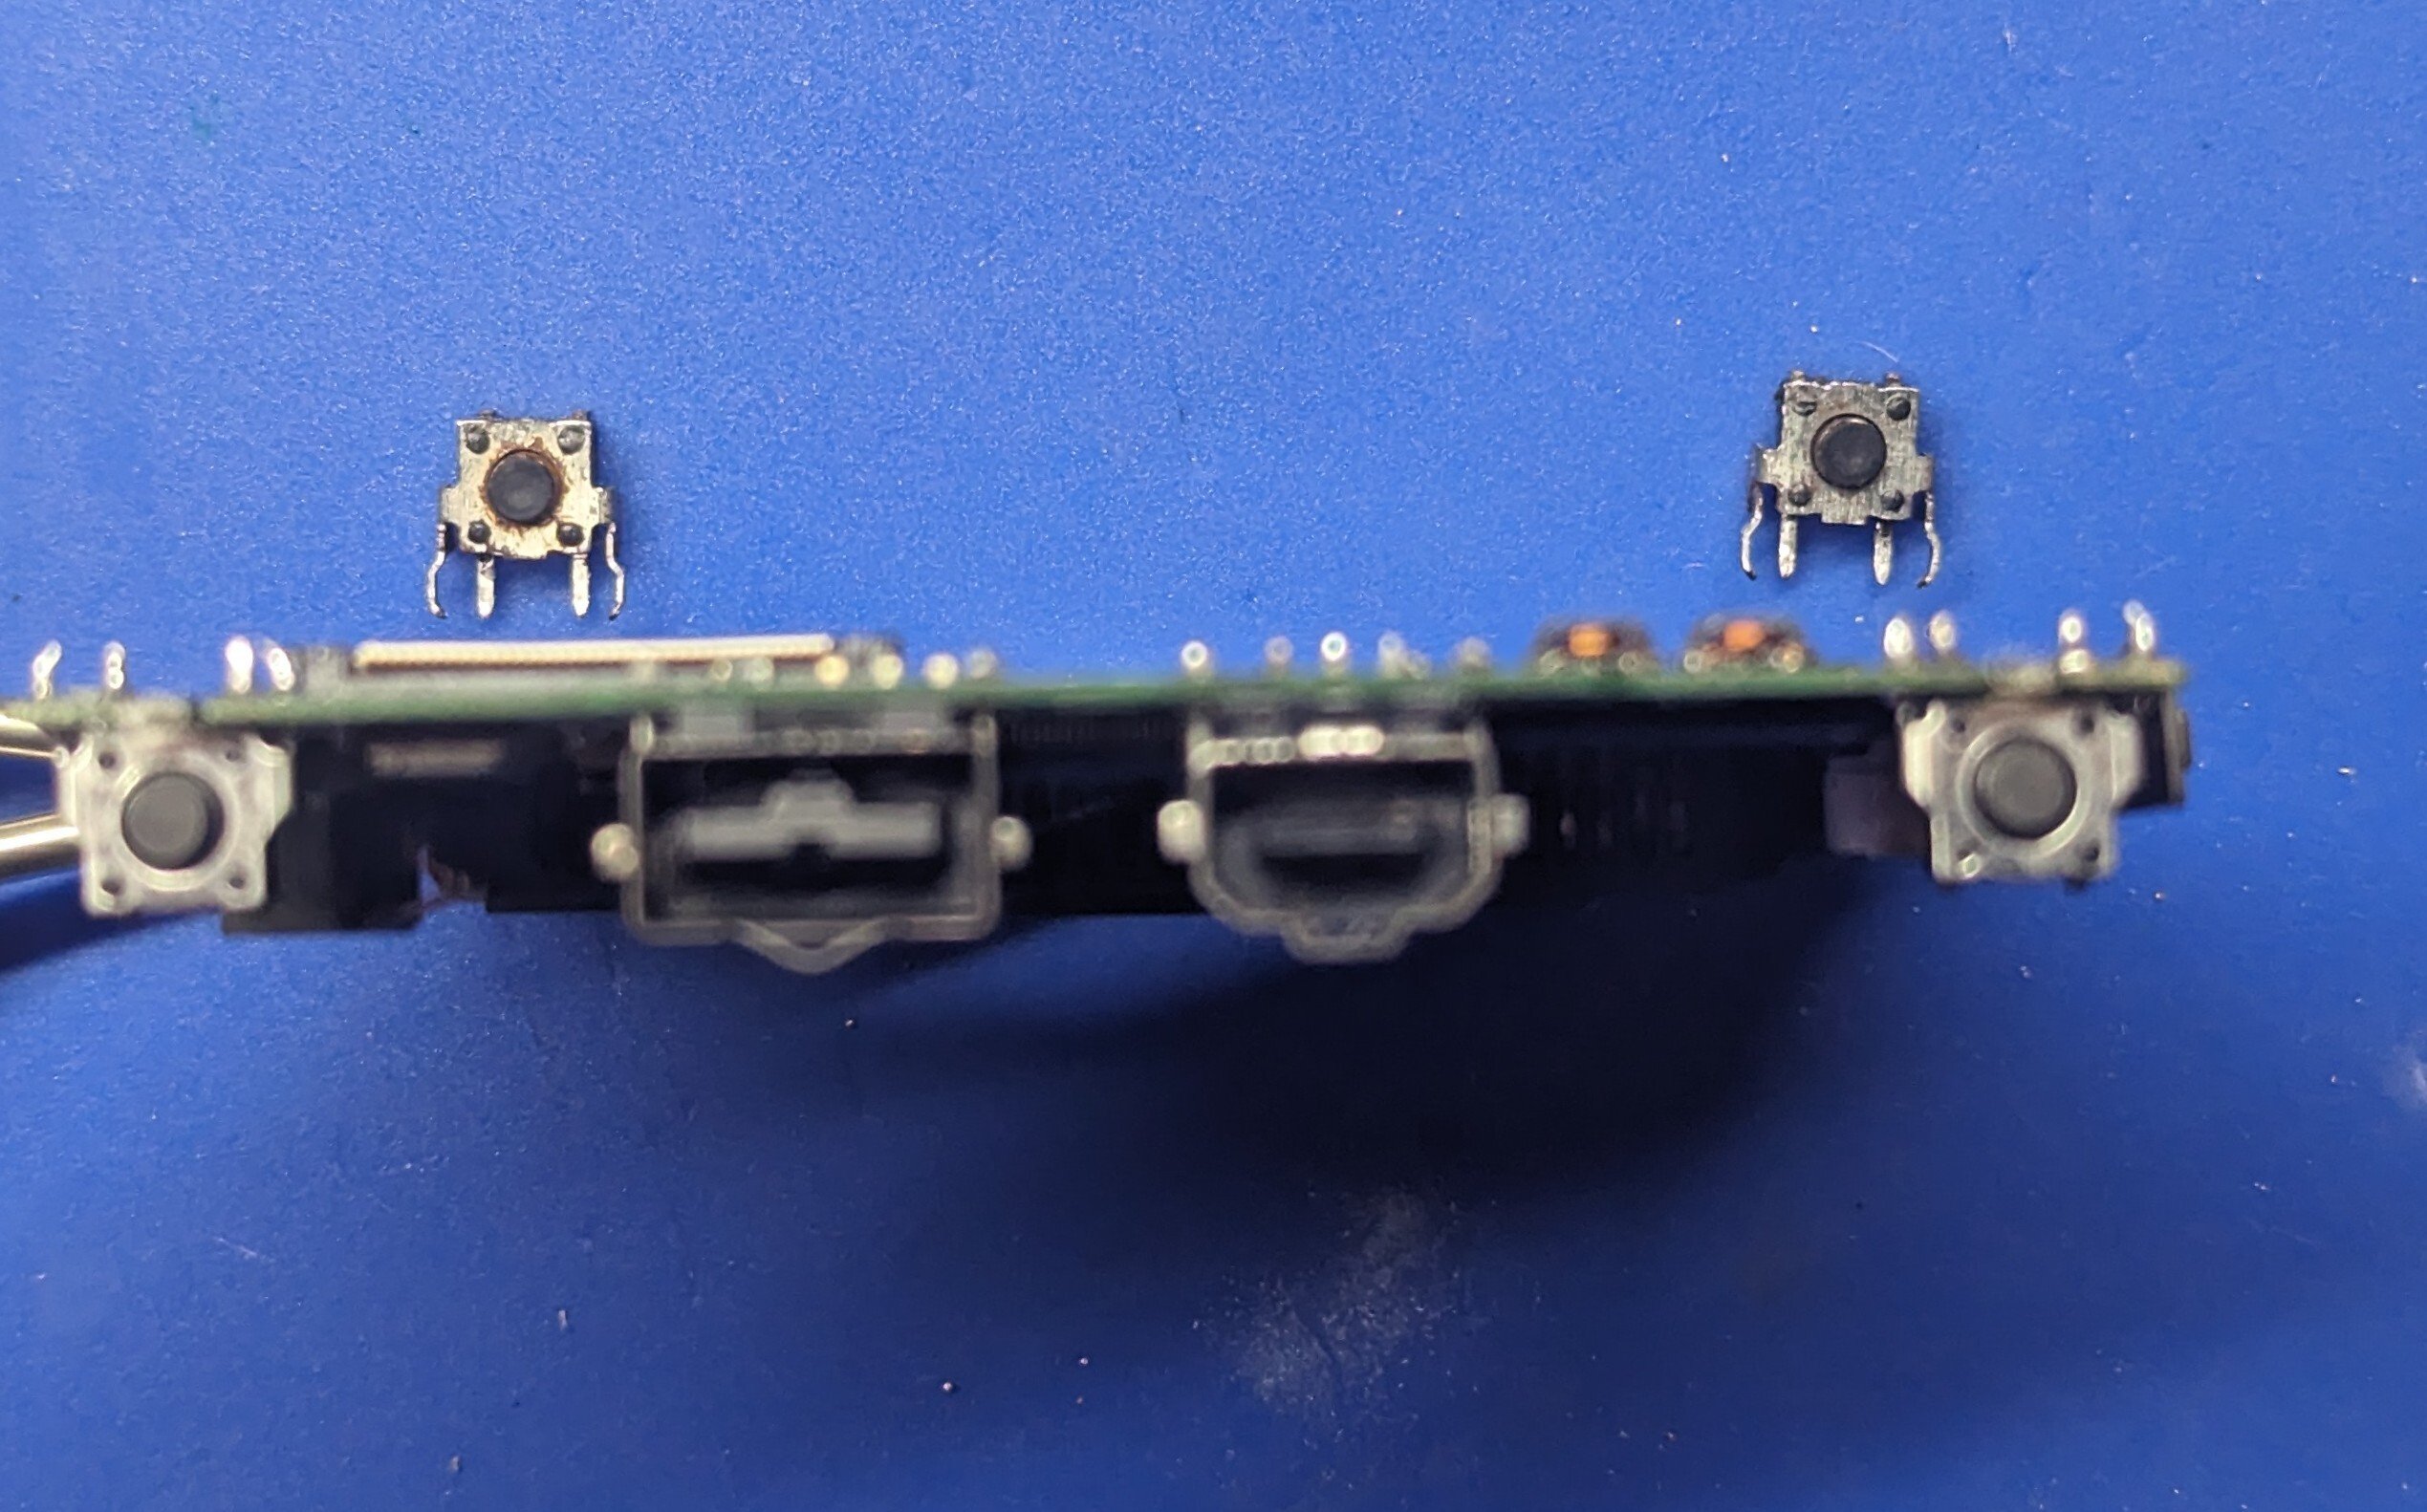
My hand slipped while disassembling the system (original goal was to replace shoulder buttons and plastic housing). I had to scrape away points on the board and use some 32 awg enameled wire to recreate the connections. Good news is every fits and is back in working order.
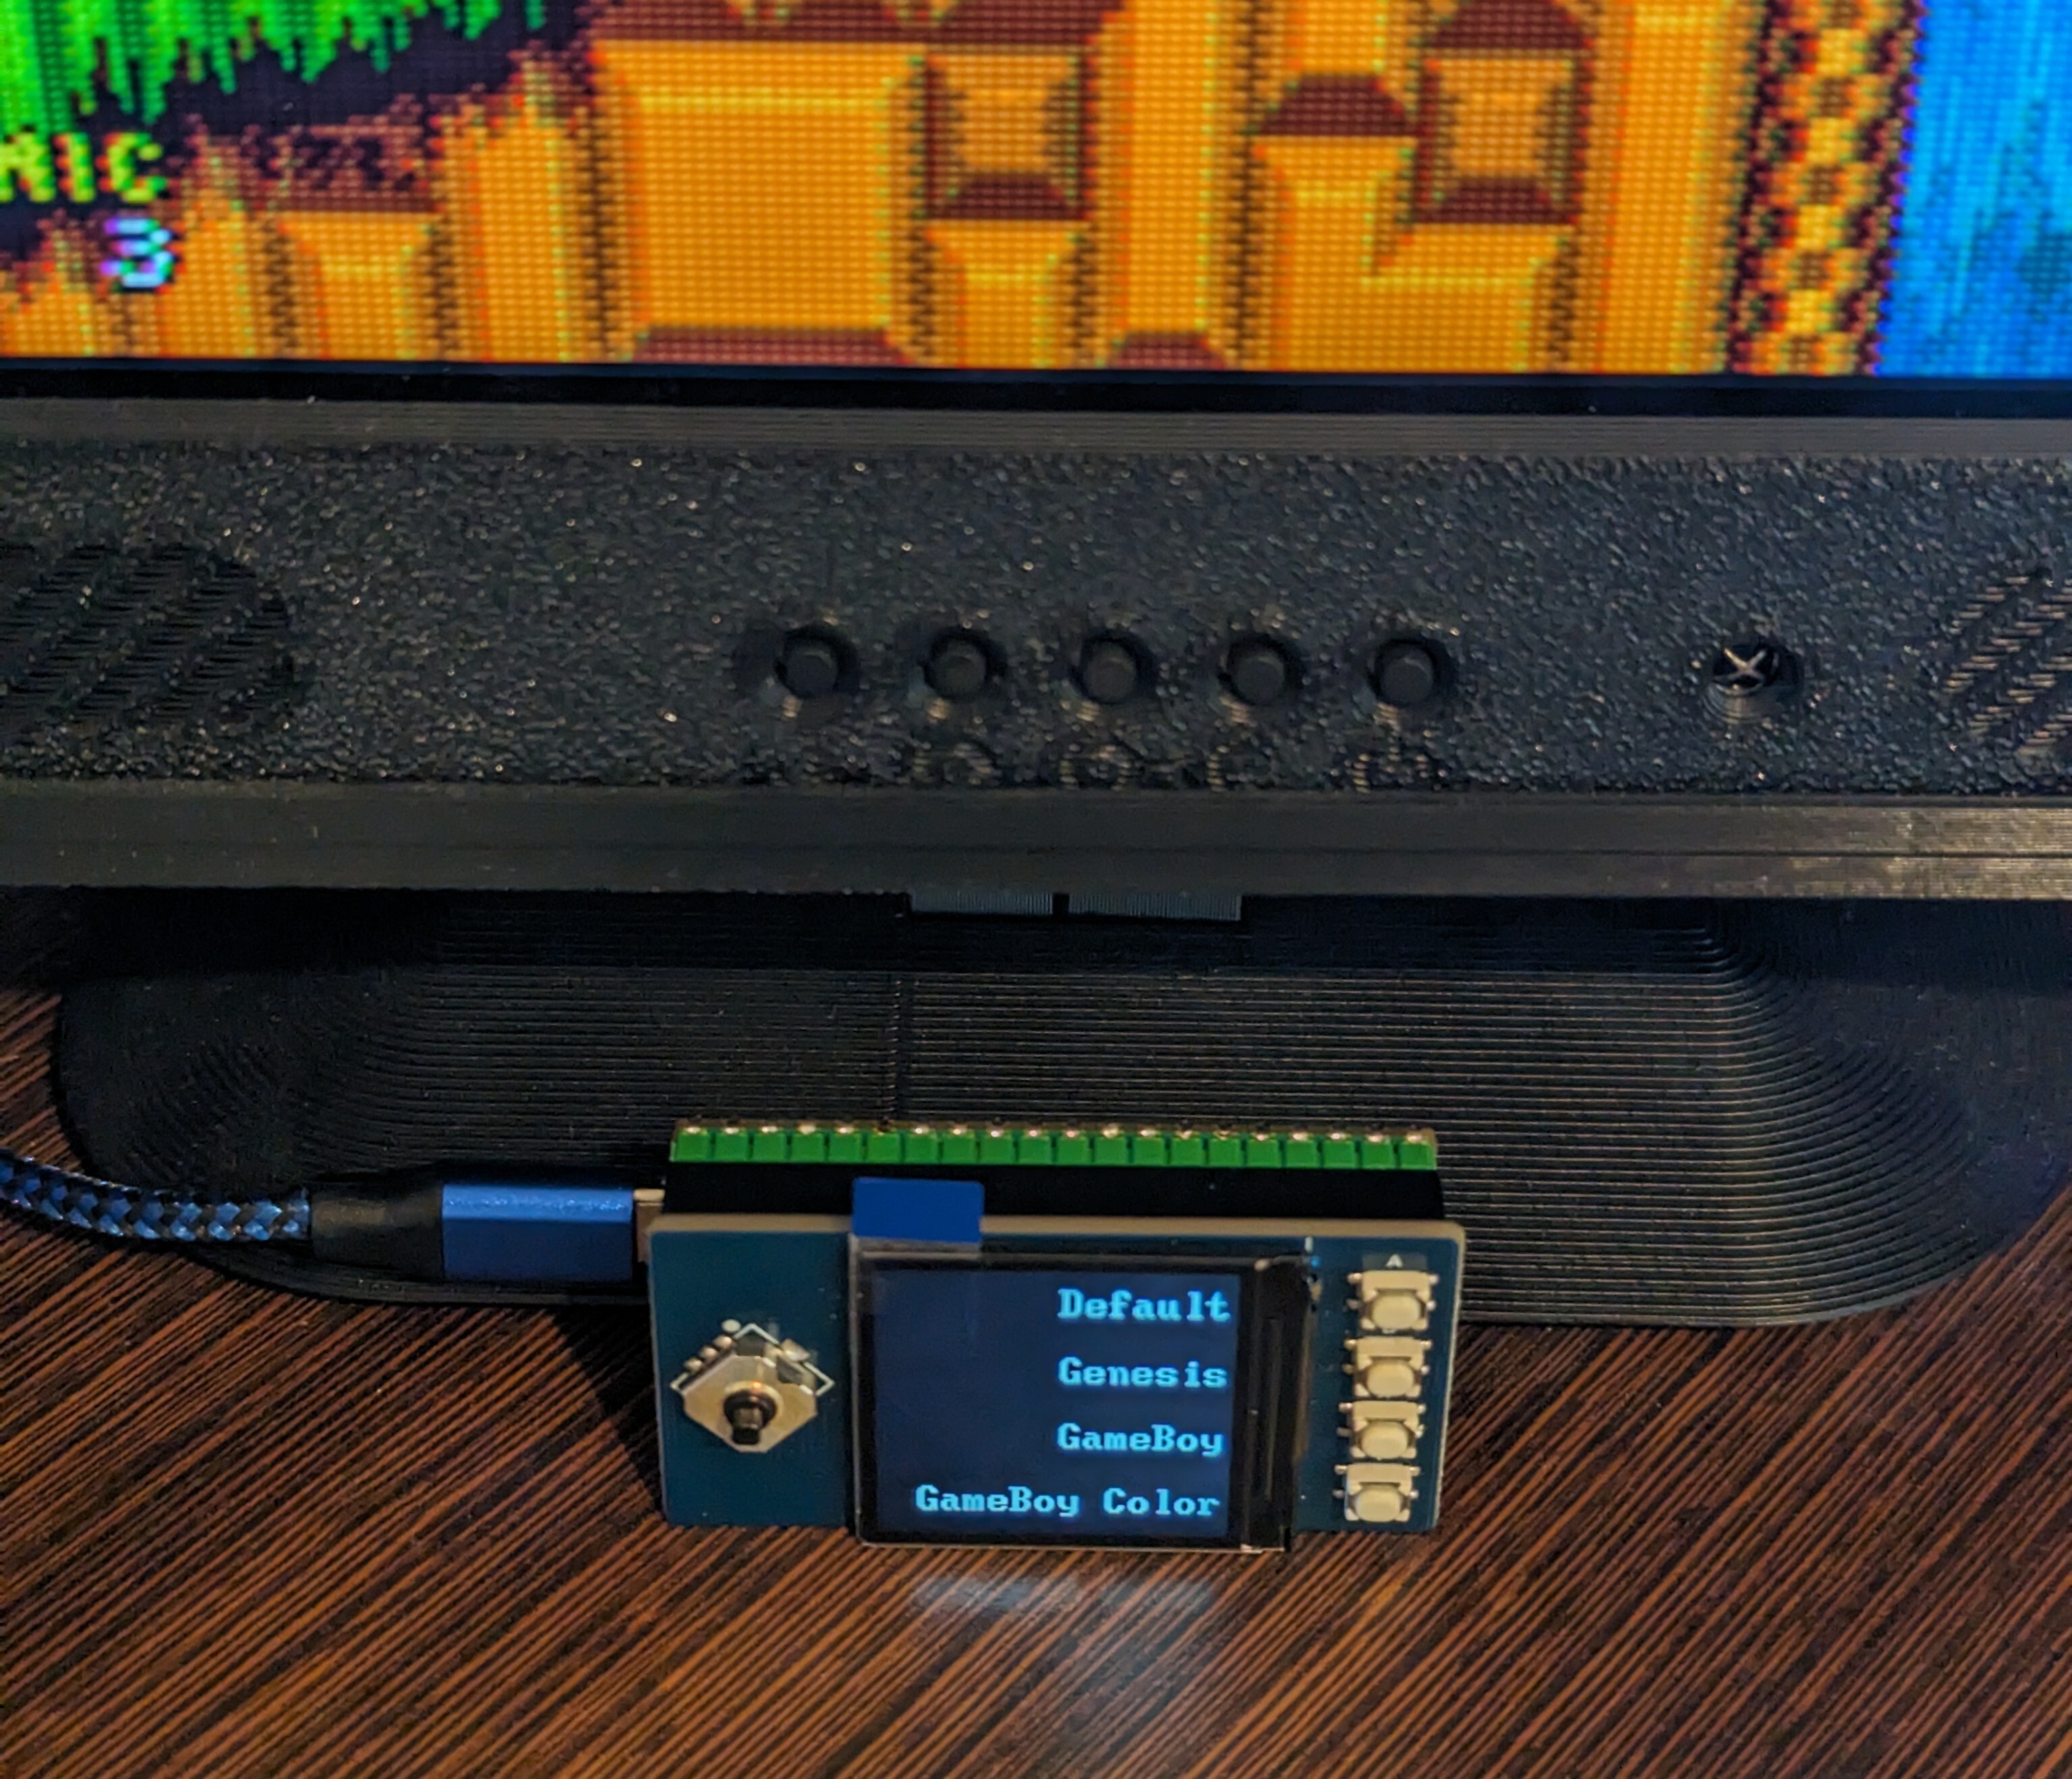
 

I've made the improvements I listed in my previous post. The GitHub link contains a link to the LCD I used in the project and basic instructions.


This is a small project I'm working on for the gbscontrol. It functions as a remote to change saved profiles via wifi using a Raspberry Pi Pico W. With the addition of filters to the analogue pocket dock, I wanted to be able to quickly change presets without having to launch the web UI. When its ready, it will be fully open sourced.

What's working well:

  1. Using the webui to configure gbscontrol hostname and adding wifi credentials.
  2. Loading profiles and scrolling via the joystick and buttons.
  3. Refreshing profiles via joystick press.
  4. Help messages when it can't connect to wifi or load options from gbscontrol

What needs improvement:

  1. More status indicators on the screen. It can appear frozen when it's working.
  2. Make UI more mobile friendly.
  3. Clean up the code base, I don't use python very often and it shows.
  4. 3D printed enclosure, guess I finally have to go beyond tinkercad.
 

Not the actual use case for this extender, but I think it's fun that it works on real hardware.


Had to run the dock through a HDMI to component converter, then into a gbs control to get it to scale correctly. After that the filters look fantastic on this little display.

Wish the Super Gameboy core would be updated so it doesn't crash.


Still not the best at desoldering but these definitely needed to be replaced.


FlippyDrive is an upcoming GameCube ode that will be ~$38 (compared to the gcloader at $105). It will also give you the ability to use the ode with the optical drive in place, getting the best of the gcloader and picoboot.

39
submitted 1 year ago by v1605 to c/retrogaming
 

Added a 3d printed shell and label


This was the first time I've used a stencil and solder paste to build up a pcb. It was so much easier to get all the components aligned and soldered on the board (on the back, there are 38 0603 capacitors which are always time consuming to hand solder). After just had to clear a few bridges and added a little extra solder to U1.

Project link


The project can be found here. It's feature set is comparable to x7 including no reset saving, game id compatibility with hdmi mods, emulators, and a rtc. Can be built for under $100.


Mix of different sticks and wireless options. Blue and grey are both using the hall effect module, green and purple are using grade b steel bowels from steelsticks.

view more: ‹ prev next ›