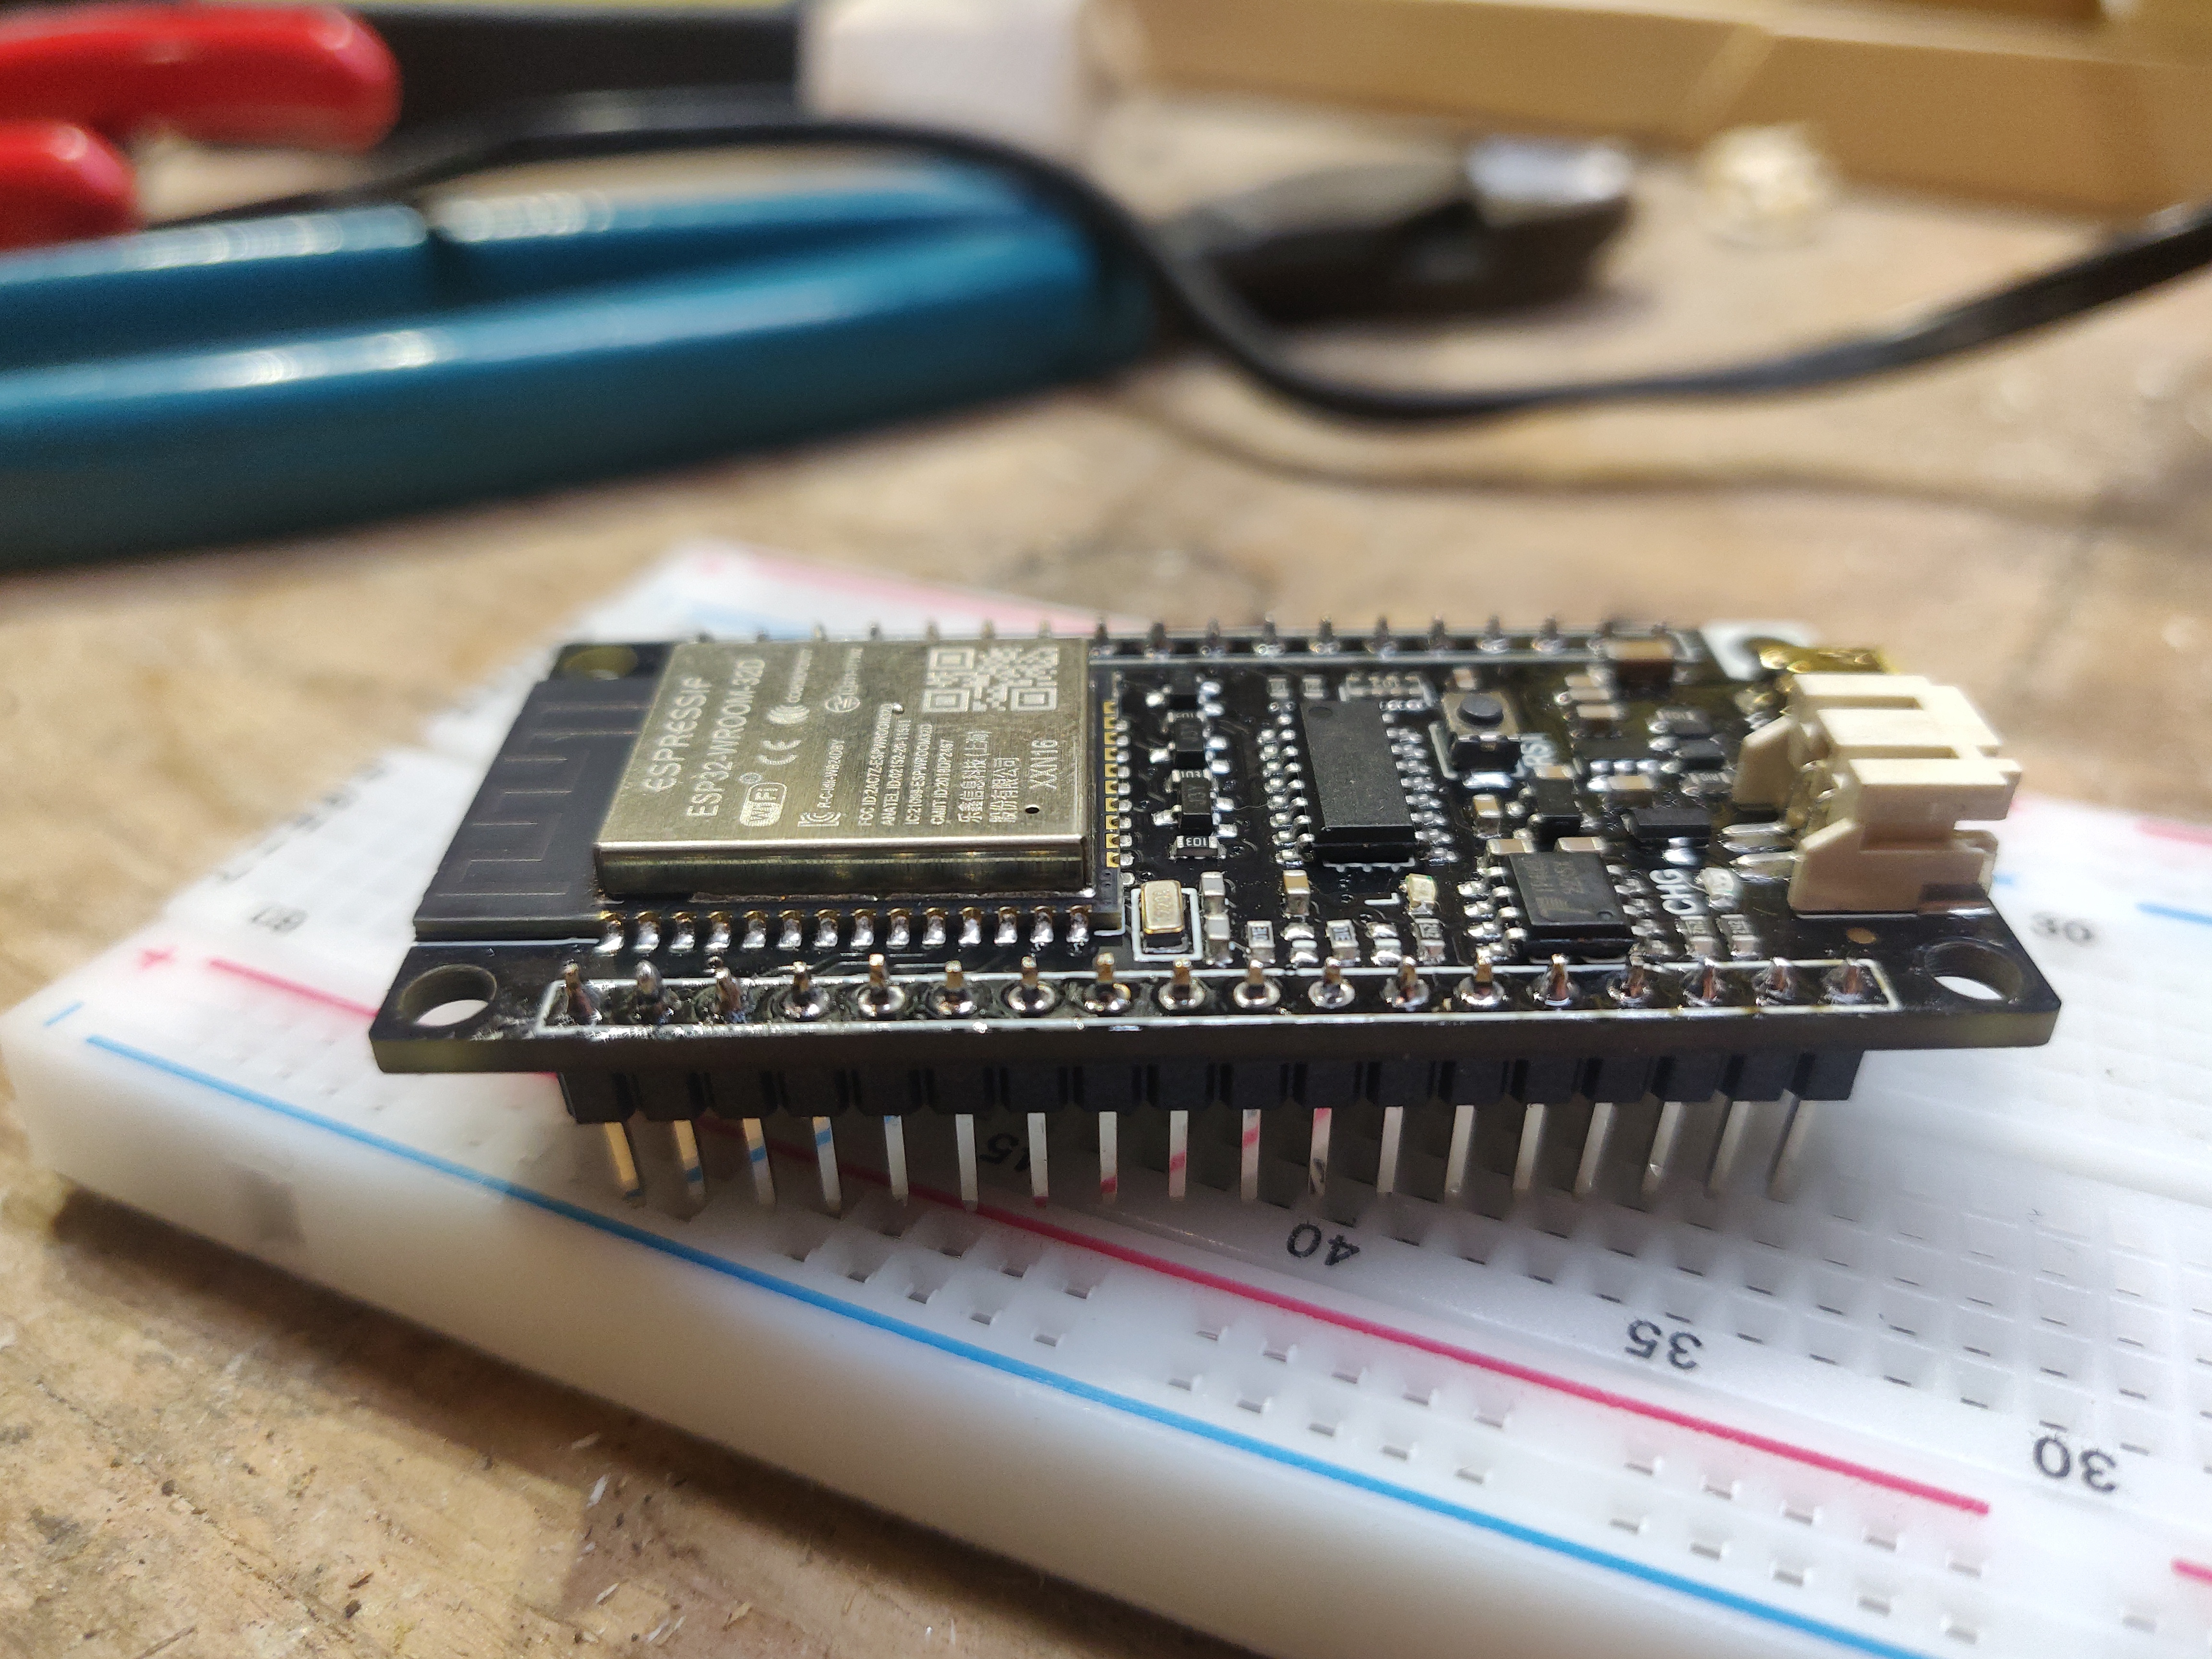
First time soldering anying this small. Would love feedback, or tips
This community is for electronic hobbyists to discuss projects and is focused on soldering. Everyone is welcome from the noob to people who have been soldering as a hobby for decades to people who solder professionally. We'll talk about materials and techniques, equipment, and projects. Everyone is welcome. All questions are welcome. Post photos and ask for help.
RULES:
All Lemmy.ca rules apply here.
Everyone (see rule 98) is welcome.
If you’ve seen a question 100 times answer it the 101st time or ignore it. Even better, write a complete, detailed answer and suggest that the mod(s) pin it to the community.
[Did you actually think there were 98 rules?]
If you present something as fact and are asked to provide proof or a source provide proof or a source. Proof must be from a reliable source. If you fail to provide proof or a source your post or comment may be removed.
Don’t be a dick. Yes, this is a catch-all rule.
The mod(s) have the final say.
First time soldering anying this small. Would love feedback, or tips
I would use a tiny bit more solder, you want em to look like little Hershey kisses. Looks like you didn't have any flux, it makes it easier.
Ah ok. I was worried about using to much, guess I over compensated.
No flux, just resin core solder; was contemplating waiting until I get some, but I am nothing if not impatient.
Hold on, hold on... Did you do all the components? I was just looking at the pins. Top of the board looks fantastic.
100% factory assembled
Lmao! Thanks for your confidence in me!
No, I did not do the top board, just the headers.
Man I wish I could have a first attempt like that.
I'm an amateur, but I found a jar of flux and laying it on real thick made for much better soldering than rosin core solder. You can never have too much flux! Just wipe off the excess when you're done.
Clean it with isopropyl alcohol, wiping it off is insufficient.
Rasta/10 man.
What's the strain?
GG#4, my guy. 🔥🔥🔥
The pin on the far left (I'm calling it pin #1) looks perfect.
Pin 3, 4, 5, 6, 7, 8, 9, 10 are suspect to me, it looks like you didn't apply enough heat to the pin, so the solder isn't sticking to the pin as well.
Pin 14 is pretty good.
Pin 15 bad.
Pin 16, 17, and 18 are good.
Normal solder has plenty of flux built in, and for through-hole soldering IMO its more important to make sure that you get consistent heat application on both surfaces. It looks like you only gave good heat to the board, and rarely gave the right heat to the pins. Remember to heat BOTH elements, solder sticks best when everything gets nice and hot.
Pins are "heavier" than pads, so it may take a little bit longer (ex: 1.5 seconds instead of 0.5 seconds) for them to heat up. You'll get used to the timing as you practice on different objects.
It won't be a big deal because this is just some hobby-electronics thing. This stuff only "really matters" if you're entering a vibration heavy environment or expect the device to be used for like 10-years and need the best joints. Still, its good to get practice with perfect form.
Another very detailed and informative answer! I will for sure name my firstborn dragon tamer.
But srsly, thank you. Very helpful
Hi. Sorry I'm late to the party. I've made a video that I think will be helpful. I'm going to post it as soon as I can get it edited.
Couple of tips. Buy liquid flux (someone has already said this, I think.) Flood the area with liquid flux. The liquid flux helps your solder to flow and it gives you a nice, shiny surface. Have you ever tried to reheat solder and found it very uncooperative forming point and ugly joints? Liquid flux fixes that. Apply heat to the pin and the pad and apply solder to the pin and the pad, not the soldering iron. You need a bit of solder on the iron to form a thermal bridge but you definitely want to apply the solder to the pin and the pad. That way the solder will only melt when the pin and pad are hot enough for the solder to clow properly. You want a nice fillet between the pad and the pin. You don't want a blob but you want the pad covered and the solder to curve up the pin.
Definitely tinned the top beforehand, although I was finding the tip had cold spots, so probably need to change the top. I will definitely check out that vid when I get home. Thanks so much!
Here's the video I recorded of me soldering header strips onto a small board like the ESP you are using.
To clean up your joints, get some liquid flux and flood the joints then reflow them with your soldering iron and add solder if needed.