1
Home Gym
65 readers
1 users here now
Show us your home gym
Can be a decked out garage or an elliptical machine & yoga mat in your living room. Show us how you stay fit at home.
Help each other out. Share your general insights, improvised exercises, product experiences, sales and deals and anything related to working out at home.
Rules
Be good to each other
Racism, sexism, ableism, homophobia, transphobia, or xenophobia will not be tolerated. Be civil & respectful or don't be here.
No gatekeeping
The world of fitness is diverse. We all share a goal in being the very best version of ourselves. Respect the fact that we each have different means to achieve this and support each other.
Keep it in your pants
No porn or sexual content / comments.
Check out
Icon by Emma O'Neil
Banner image by Victor Frietas
founded 1 year ago
MODERATORS
2
cross-posted from: https://sh.itjust.works/post/22165919
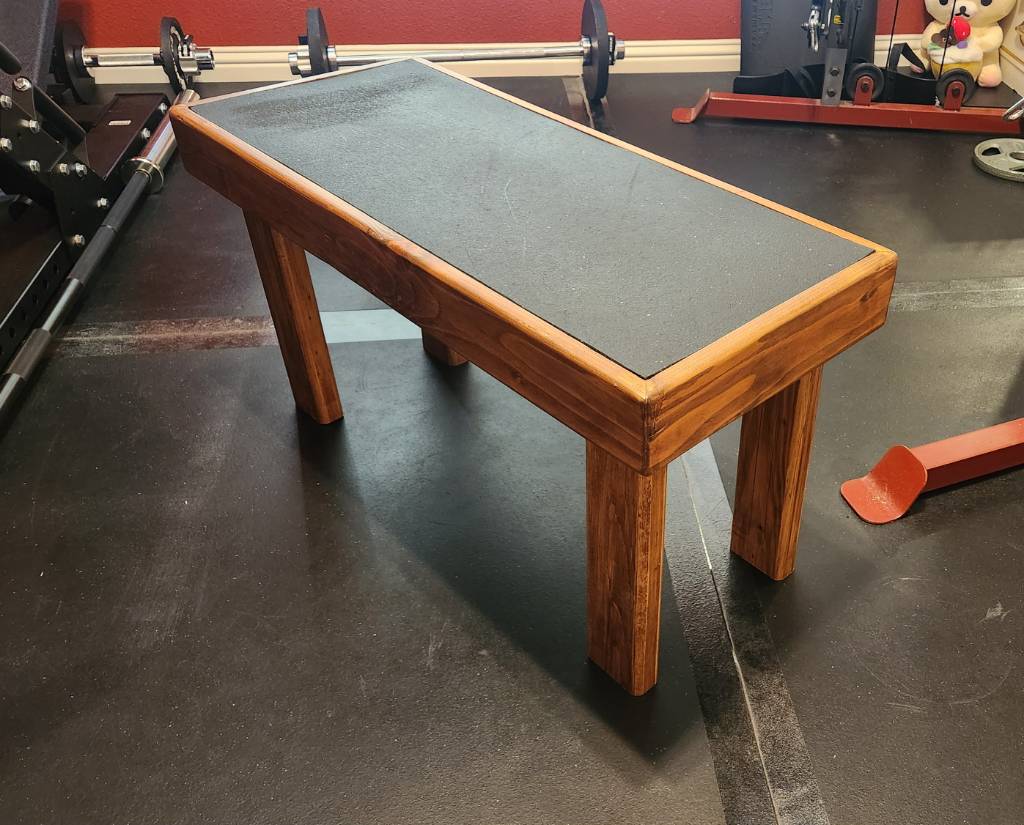
This entry of mine will not match the customary craftsmanship found in this community, but seeing as this was formerly a pile of miscellaneous, warped scrap 2x4 segments recovered from old pallets, I think I've made a reasonable show of things.
This bench is for my homegym, designed to be stood upon, which is why there's a rubber mat inlaid on the surface, a leftover of the gym floor. My design criteria called for even the edge of the top surface to support weight, so the main "box" of the bench uses 2x4 segments mitered (badly) together at 45 degrees, held together with wood glue.
I then routed the inner edge to support a 1/2" plywood sheet, which is screwed into the box. And then the rubber mat is glued down to the sheet, so there are no visible screws.
Finally, the legs are also 2x4 segments, cut so the bench sits 43 cm (~17 inch) from the floor; this is only coincidentally similar to the IPF weightlifting bench standards. I used screws instead of glue, just in case the legs needed to be shortened later.
All edges were rounded over with a 1/2" bit, as the bench is expected to be picked up and moved frequently. And everything stained in cherry and clear-coated.
Some of the annoyances from using scrap included:
- Stripping old paint off. Awful chemicals, awful scrubbing, awful disposal.
- Sanding away twists along the 2x4 segments
- Filling nail holes or arranging them so they don't draw attention
- My lack of experience with clamping and gluing wood that's not dimensionally consistent
If I were to do this again, I'd figure out a way to reduce the amount of routing needed for the inner edge, since I essentially removed 0.75 inch by 1.5 inch of material all around the edge. This took forever, and perhaps a CNC machine would have simplified things, in addition to squaring and planing the surfaces before mitering.
3
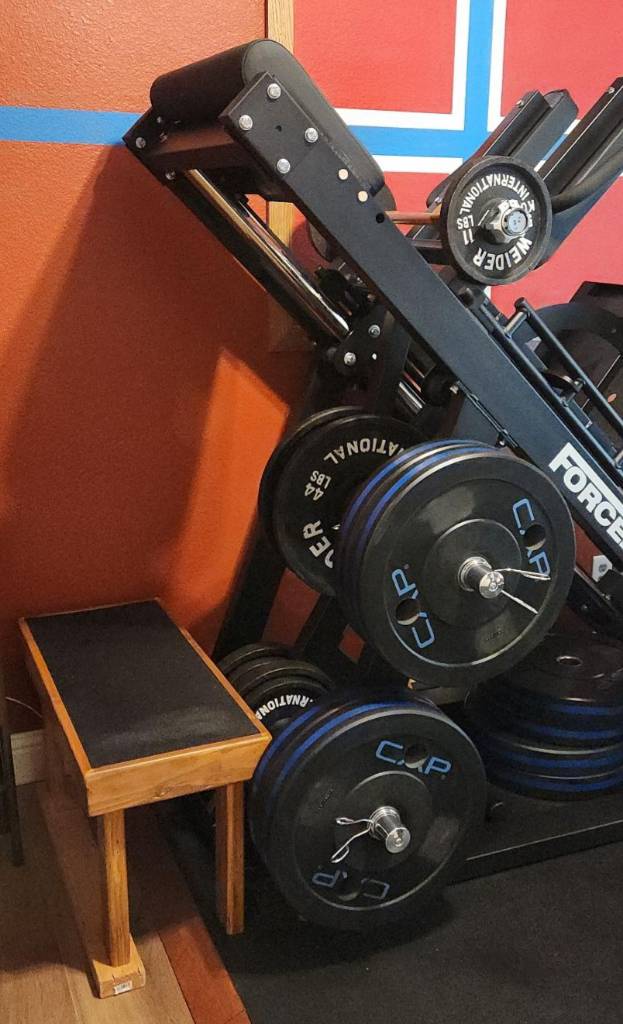
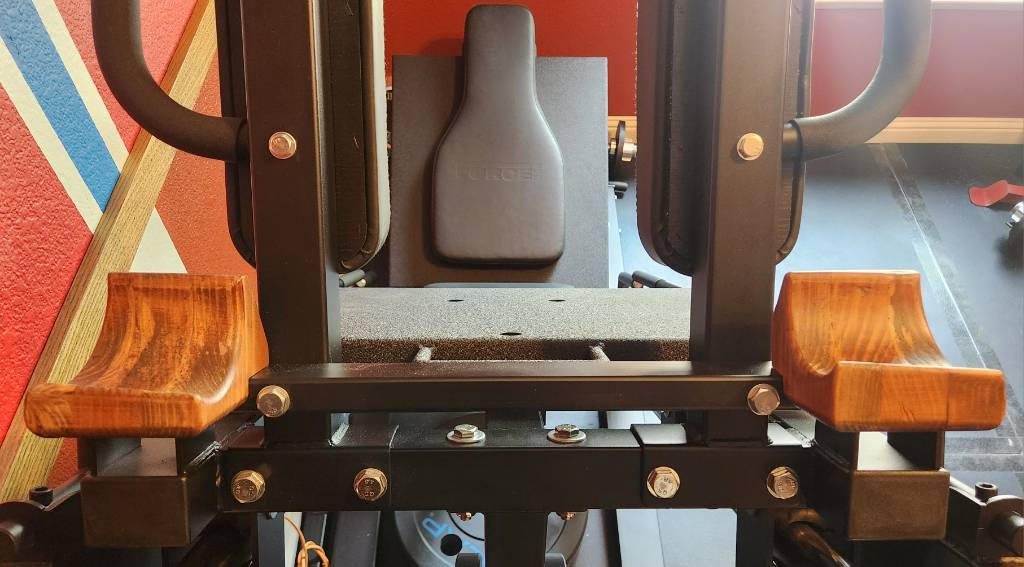
The idea for this strange combination of arm day and leg day came from realizing that my existing leg press and many commercial preacher curl benches both share a 45 degree angle. So in the interest of consolidating floor space, I decided to build a preacher curl bench attachment for my Force USA machine.
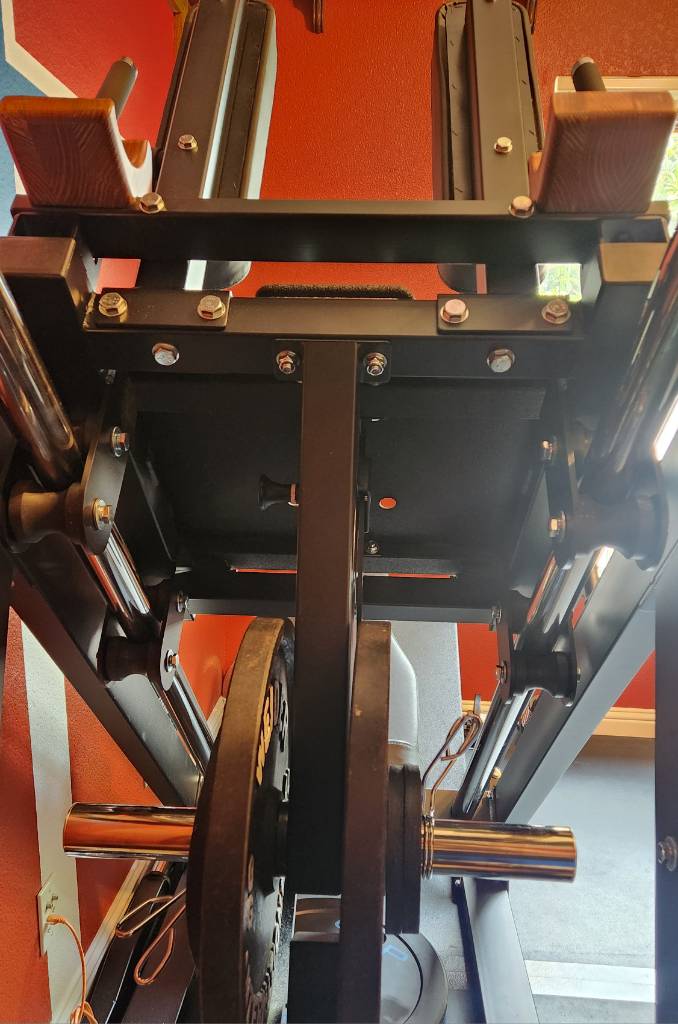
Just like with stripping down the machine to fit against a wall, the goal is to build something which is removable, if I wanted to restore the machine back to factory condition. Conveniently, at the top end of the machine, there are three 11/16 inch (17 mm) holes on each side, meant for resistance band pegs. Likewise, between the frame and the chrome running surface is approximately 1.5" (38 mm).
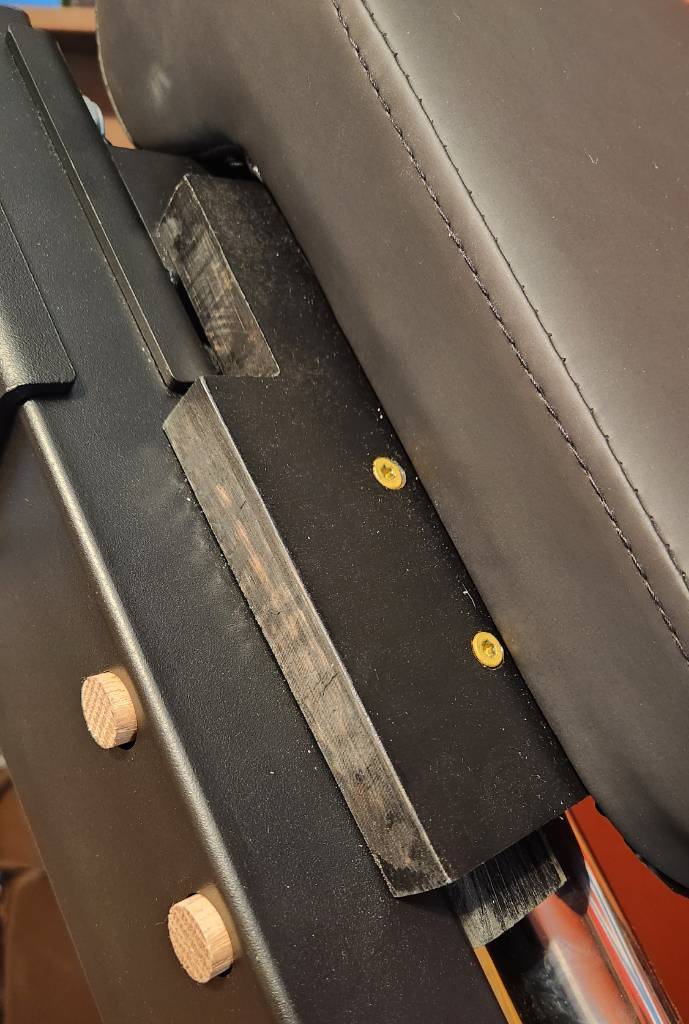
Thus, it made the most sense to cut pieces of 2x4 lumber (actual size: 1.5x3.5 inch) that will sit within the frame, secured by two snug-fitting 5/8 inch (16 mm) wood dowels going through the top-most band peg holes. These side-pieces are held captive by the dowels, although the pieces can still slide inward of the frame, falling away from the peg holes. They're also not really weight-bearing. But they do provide a foundation to build upon.
To form a sturdy and flat base, I then cut some scrap 3/4 inch (19 mm) board that spans the width of the frame, and screwed it down onto the side-pieces using Torx deck screws, notched to avoid protrusions on the frame's top surface. This makes the board weight-bearing, since it rests flat upon the frame; the side-pieces prevent the board from sliding down. And by fixing the width of the side-pieces, the pieces can no longer fall away from the peg holes.
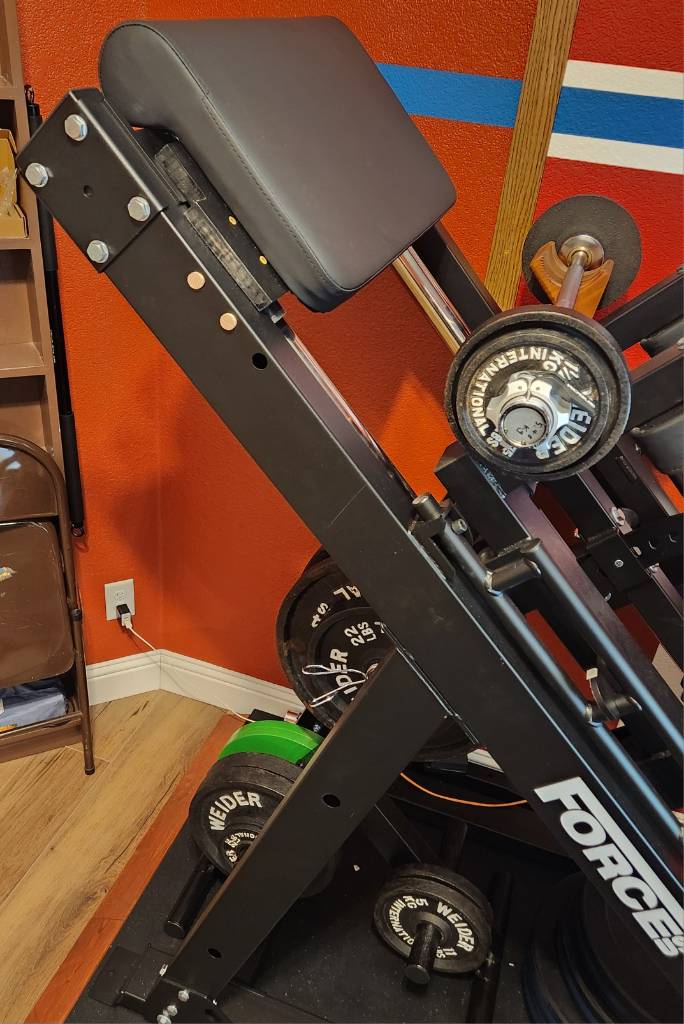
Finally, any preacher curl bench requires a pad. For this, I simply went online and found what existing machines used. Having had a good experience with the parts department at Body Solid for my functional trainer, I looked at their GPCA1 preacher curl station, whose detailed PDF schematics showed a pad that is 600 mm wide, which is perfect for my use!
After $40 + $20 shipping, the pad arrived and I was able to measure the exact distance between its two bottom mounting holes to drill through the board. Once again, Body Solid's documentation described the exact 5/16" wide, 1" long bolts that I would need to mount the pad.
The final result isn't my nicest wood project -- to the point that I just stained it (badly) in black -- but it may have been one of the cheapest so far, using nearly entirely scrap materials except for the pad itself and the bolts. It also wasn't terribly complex and didn't require fairly high precision, unlike the short barbell project.
The whole premise of this attachment is that as an average height American (5 ft 9 inch; 175 cm), my range of motion for the leg press and hack squat simply won't ever push the carriage into the upper part of the frame. So it's free real estate.
But wait: how am I going to use this? The pad is 5.5 ft (167 cm) above the floor. I'd have to be over 7 ft tall (2.2 m) to drape my arms over it. The answer to that will be its own future post.
4
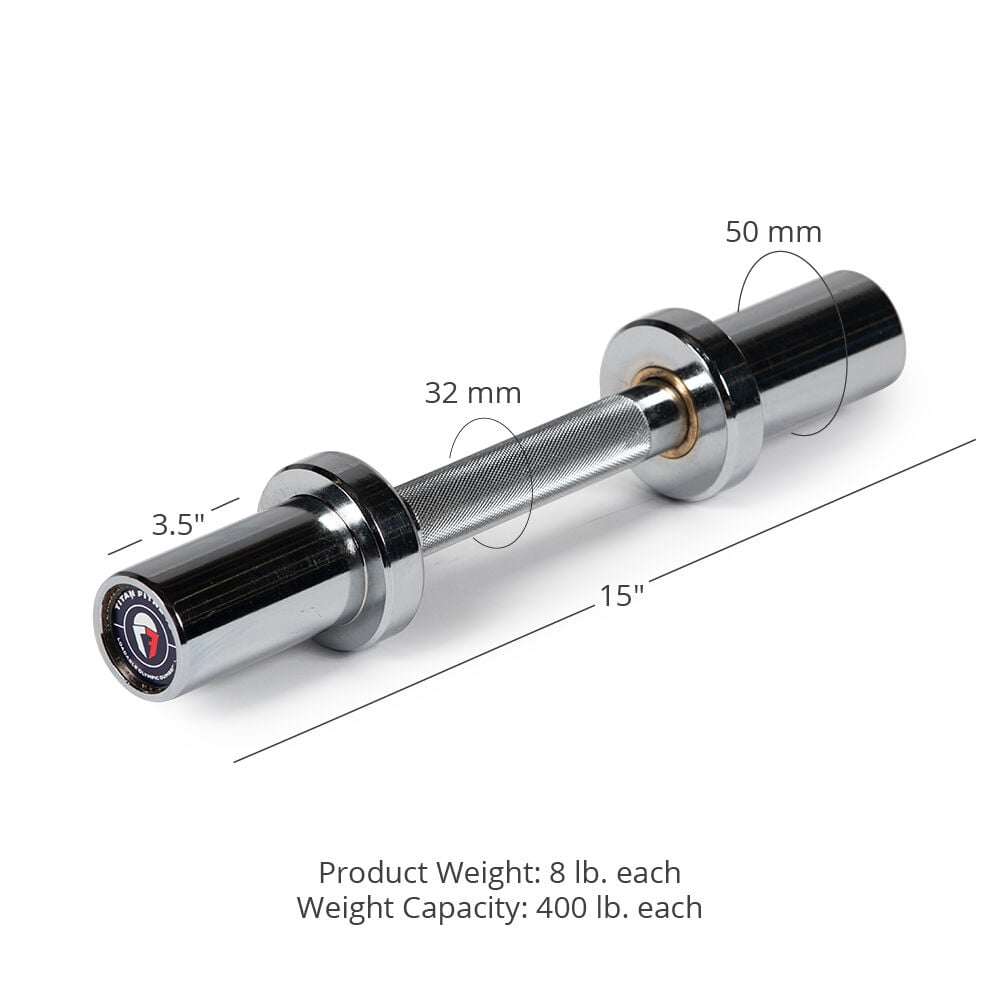
This is the story of how I turned a 15" Titan adjustable dumbbell to be 80 cm (31.5 inch) long. Why? Because I have a space-constrained home gym but still wanted a leg press, and so I had to remove its original barbell.
In its place, I built a pair of wood mounts for a normal barbell to rest upon, covered in that earlier post. However, since this machine is wall-adjacent, such a barbell would have to fit inside the width of the leg press, so about 80 cm. But must also be wider than the spacing from outside-edge to outside-edge of the wood mounts, which is 60 cm.
Such a short barbell -- or long dumbbell -- does not readily exist commercially, with the narrowest one I've seen being 48 inch barbells, which are still too wide. So I decided to build my own, using my spare Titan dumbbell as the base.
To start, the Titan dumbbells are excellent in this capacity, as the shaft diameter is 28 mm -- not 32 mm as the website would indicate -- which is a common diameter, if I am to cut short a cheap barbell to replace this dumbbell's shaft.
In keeping with my preexisting frugality, I purchased a cheap 1-inch barbell, hoping that it adopts the Olympic 28 mm shaft diameter, and not the 29 mm deadlift bar shaft diameter, as the Titan collars have small clearances. Matching neither, I find that this bar is closer to 23 mm, which although will fit into the existing collars, poses its own issues.
Nevertheless, this 7 ft barbell can conveniently be cut in half to yield two 42 inch segments. And then the included bar stops can be loped off, and then the length further refined to 77 cm, thus hiding the marks from the bar stop within the Titan collars, and also centering the (meh) knurling from the cheap bar.
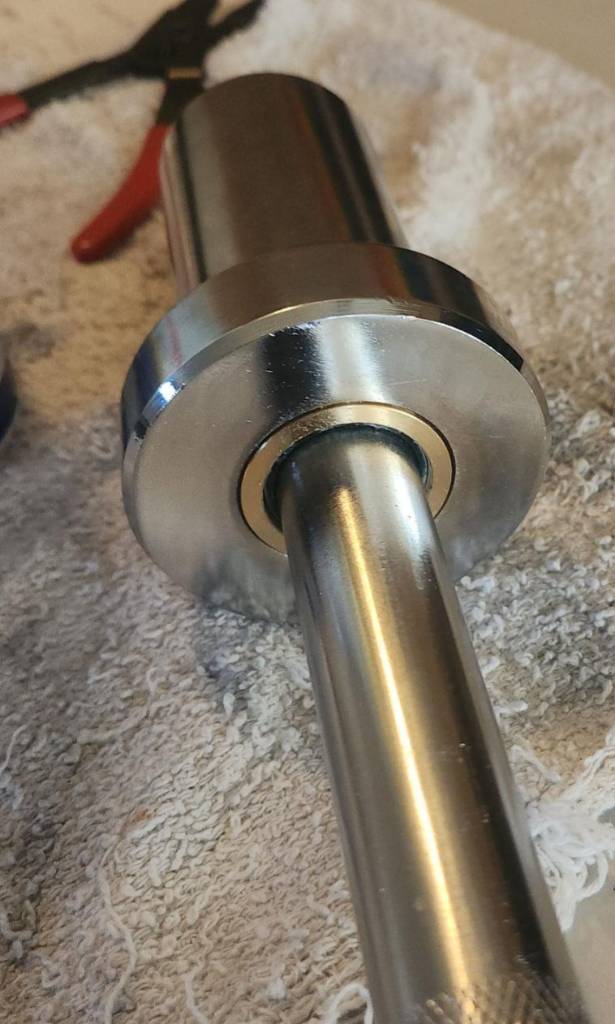
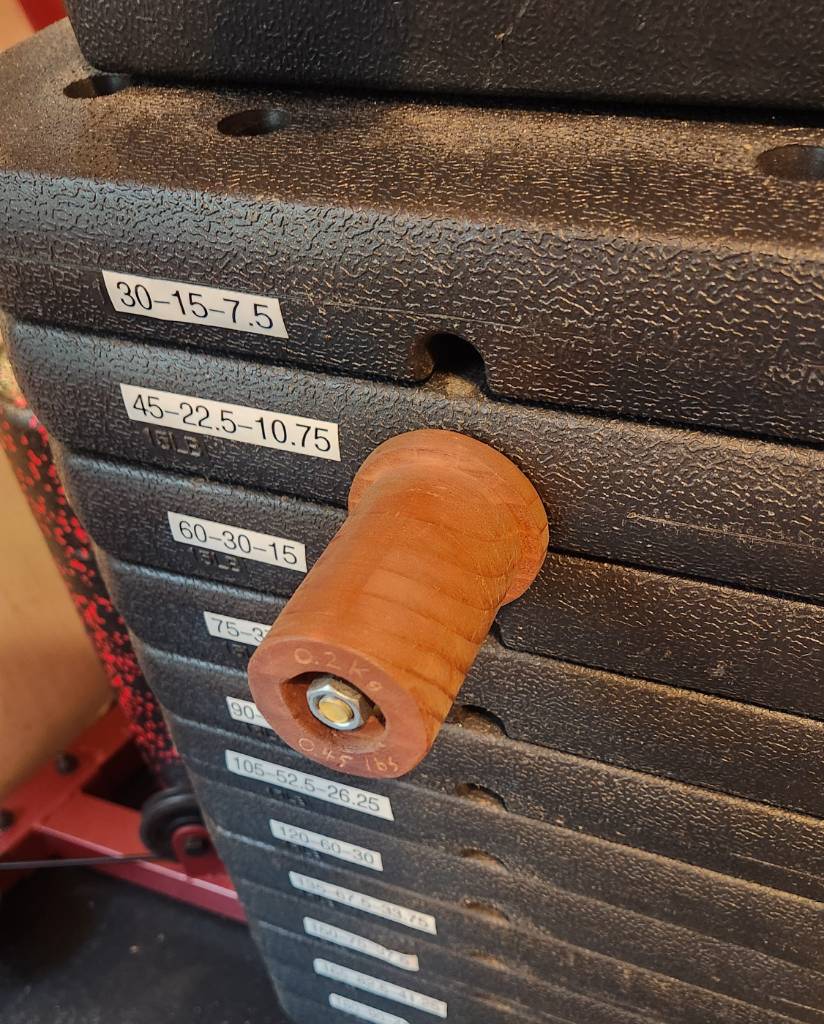
But perhaps a picture will be more explanatory. Here, the original collar is dismantled at the top, showing the original shaft with a groove cut into it, about 1/4-inch from the end. Into that groove would fit two half-rings with an inner diameter of 20.4 mm and an outer diameter of 40 mm. In fact, all the parts inside the collar use 40 mm outer diameter, except the spacer cylinder, which is smaller at 37 mm. All of these parts are held captive within the collar using the C-ring and the geometry of the collar itself.
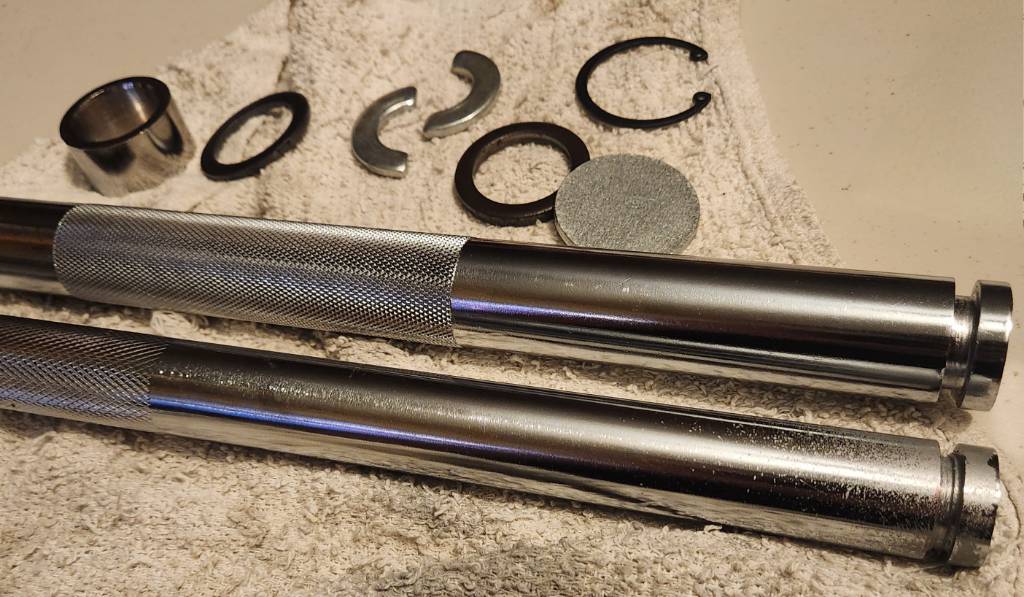
To deal with the difference between the collar expecting 28 mm, and the cheap bar's 23 cm, I designed an ABS 3d printed part in FreeCAD to act as a bushing, upon which the original Titan brass bushing will ride upon. This ABS bushing is held captive by way of its center bulge, which fits within the dead space inside the collar.

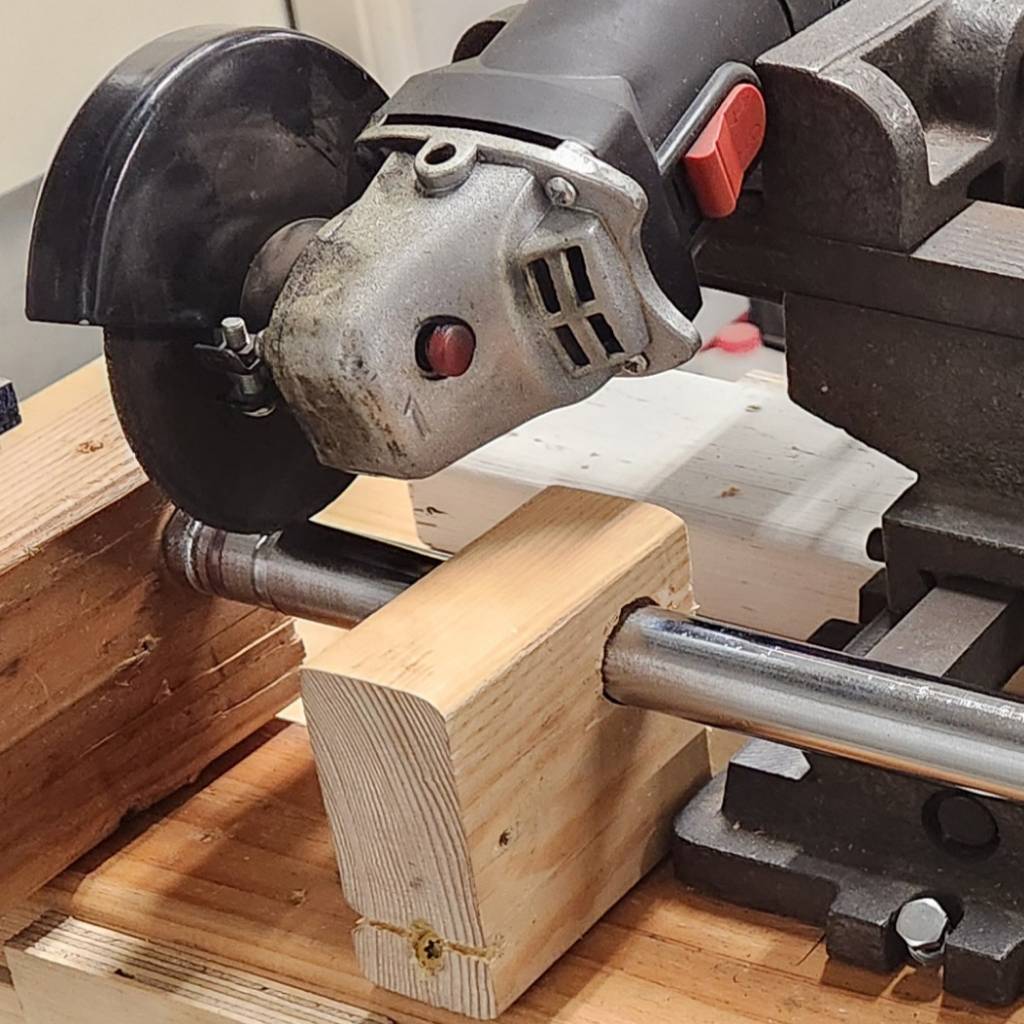
As for how I cut the groove into the end of the new shaft, I still don't own a lathe. So the next best is to mount an angle grinder onto a "cross slide vise" taken from a drill press, with the shaft secured in a wooden jig to only allow axial rotation manually. The vise allows precision control for the cutting wheel's depth, with me pausing frequently to measure how close the groove is to the desired 20.4 mm inner diameter. This is.... not a quick nor precise process. But it definitely works.
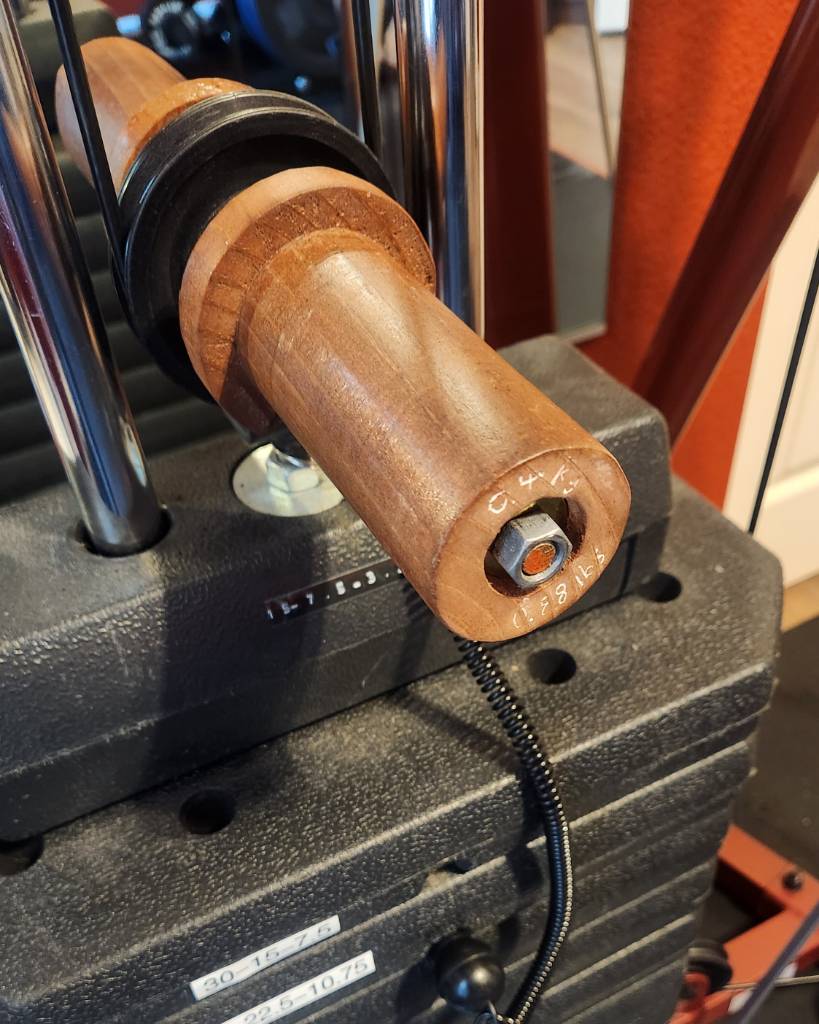
After reassembling both collars onto the new shaft and lubricating with white lithium, the final result is a long dumbbell (or short barbell) with Titan's 3.5 inch collars on the end, with 63 cm of shaft exposed and 80 cm from end to end. The ABS bushing is remarkably smooth against the brass bushing, after some sanding with 180 grit. The whole dumbbell weights 5.48 kg empty.
Here is the comparison with the stock Titan dumbbell. It's pretty amazing how the knurling conveniently lined up. It fits well onto the wood mounts of the leg press.


But why would I do all this just to add a weirdly long 3.5-inch collar dumbbell to a leg press, when it already can accept weights underneath the carriage? I will answer that in a follow-up post.
5
One thing I've always wanted for my space-constrained homegym is a leg press. But even the most compact leg presses occupy a lot of space lengthwise and width-wide. I had my eye on the Force USA 45 degree leg press/hack squat combo machine, because it has so much capacity for me to grow into. So I picked one up and modified it so it can be placed up against the wall.
The primary issue is the barbell that attaches to the carriage (the part that moves up and down). This barbell extends about 45 cm (18 inch) beyond the left and right sides of the machine, taking up stationary space as well as dynamic space when the carriage is in motion. Eliminating that barbell would reduce the width requirement from the bare minimum of 162 cm to 80 cm, assuming the weight storage pegs are also removed.
But of course, the barbell is how the leg press is loaded, with 34 cm on each end for Olympic-spec plates. It also provides some structural stability for the hack squat shoulder pads, where they attach to the carriage. However, dangling underneath the carriage is a much-smaller space for loading plates, with 20 cm on left/right for plates.
As an aside, this is a fairly substantial machine that arrived on a pallet, taking a few hours to assemble. The build quality is exemplary, and everything about it evinces durability and stability.
My approach was to remove the original barbell, loading only the under-carriage bar. To retain structure, I cut 1"x2" rectangular steel tube to the width of the carriage (59 cm), capped the ends, and drilled holes to reuse the same bolts as the original barbell. The reason for 1"x2" is because the backrest for the hack squat requires clearance; the stock barbell solved this by bending around that area, whereas 1x2 just barely clears the backrest, and that's good enough for me.
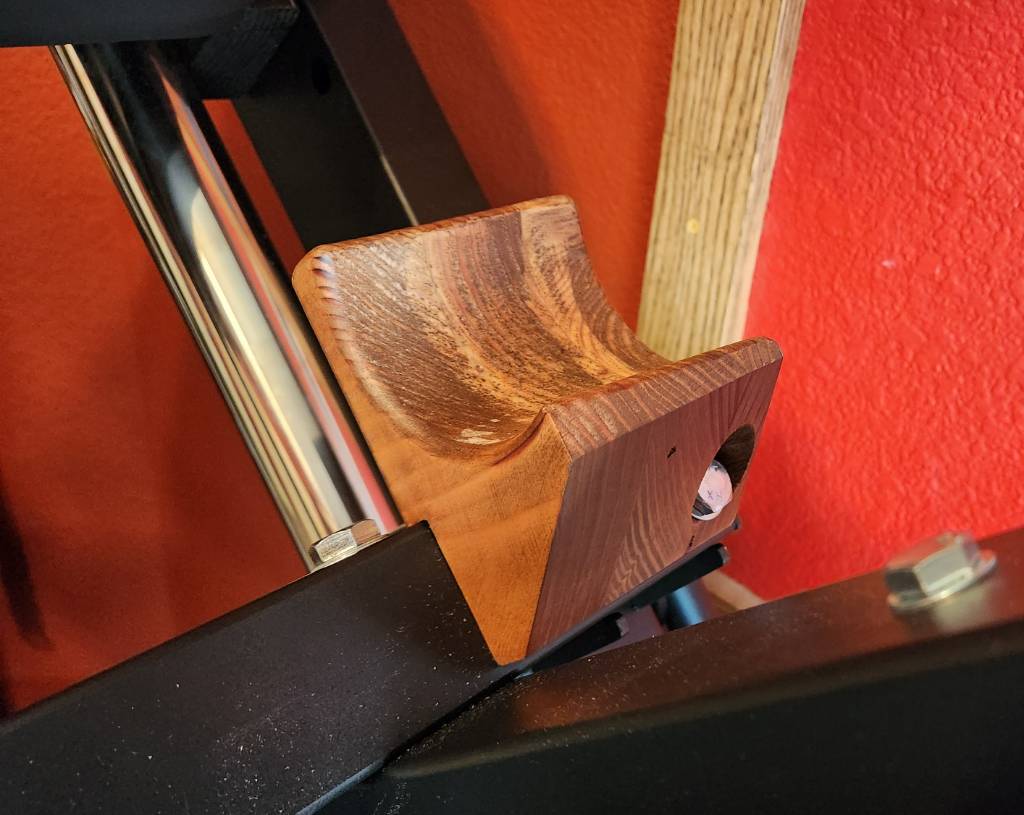
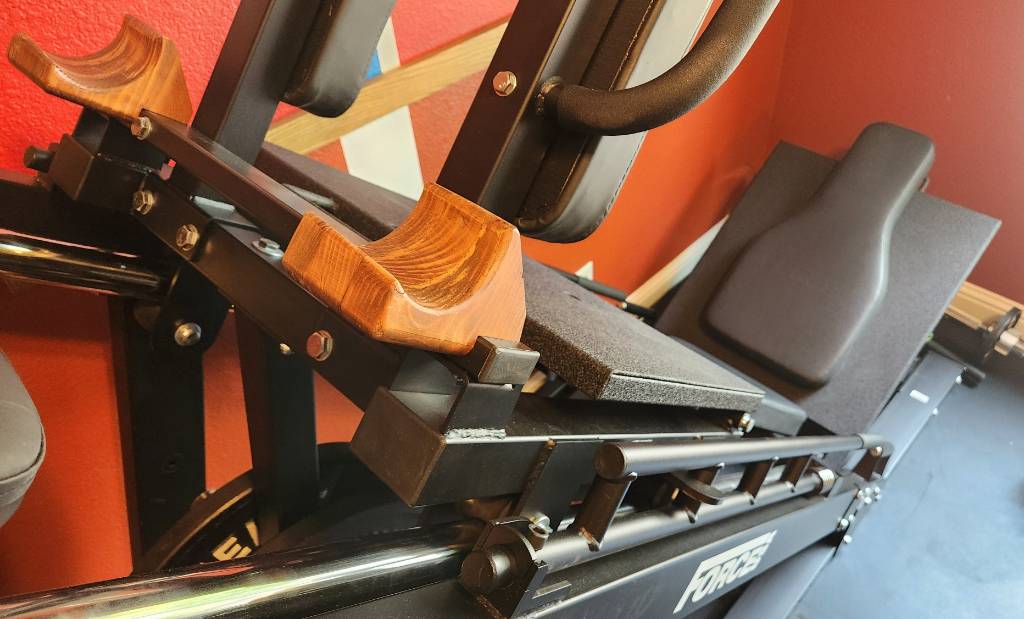
Later, I added a pair of wooden mounts where a conventional barbell can be rested. This is not my proudest woodworking achievement, but it's certainly the most unconventional. Each mount is made from three layers of reclaimed 2x6 lumber (from a bed frame) glued together, then a 3.5-inch diameter hole bored through axially, then sanded, stained in cherry, and finished with Polycrylic clear coat for durability. I'll explain the point of these mounts in a different post.
The result of all this is a leg press that needs only about 1 meter by 2.4 meter (39" by 96") of floor space, and that's including weight storage pegs on the side away from the wall, plus space to swing the safety stopper bars in/out of place. And everything can be reverted back to the factory configuration.
The caveat is that I'm consigned to the 40 cm total barbell space under the carriage. To maximally load this machine, I would need to invest in thin iron plates, which apparently only are made to precise values, and are thus expensive. Examples: Rogue calibrated KG plates, and Hansu Power calibrated plates, both of which are 22.5 mm wide for 20 kg plates. Sixteen such plates would make 320 kg (700 lbs), and I'd be thrilled if I could get there one day. The tradeoff is reasonable to me, minimizing floor space today in exchange for requiring expensive plates in the future, until I upsize my space.
6
With the exception of the weight stack for my functional trainer and its change plates, I wanted all my subsequent equipment to be metric. To that end, I saw some cheap 45 lbs CAP bumper plates, and figured that I could make them into metric with not too much effort.
Some rough math prior to purchasing suggested that these plates -- with a width of 68 mm -- could be slimmed down from 20.4 kg (45 lbs) to nearly 20.0 kg, by boring two 2" holes (51 mm). To keep balance, the holes should be on on diametrically opposite ends. And should be neither too close to the edge, nor too close to the center, since the plate still needs to absorb a drop without deforming. That the bored holes are 51 mm is a fantastic happenstance, nearly identical to the center hole for Olympic-spec plates.
Examining each plate before drilling, I found that the silkscreen letter A in "CAP" is well-centered diametrically, although it doesn't line up with the matching logo on the back side. Also, since these are cheap CAP plates, the initial weight tolerances are pretty poor. 45 lbs should be 20.41 kg (2 sig figs), but my first four plates registered at 20.58, 20.51, 20.64, 20.56. That's nearly an extra half pound!
To drill the holes perfectly plumb, I did the work on a drill press using a 2-inch hole saw. Because the saw wasn't deep enough to go through the full width in one pass, I started with a 1/4-inch (6 mm) pilot hole straight through the tip of the letter A in "CAP". Then I drilled from both sides with the hole saw until a ~200 gram rubber core fell out. Repeat for the second bore.
To finish, I took some sandpaper to remove the old "45 lbs" markings, then used my label maker to affix new values. All plates are still high, but ranged from 20.030 kg to 20.105 kg. Not too shabby, I think.
In a happy coincidence, the position of these bored holes is perfect for one's thumbs when grasping the plate like a steering wheel, making it easier to pick up when laid flat on the floor. I also added a strip of blue electrical tape around the perimeter to make it easy to identify these as 20 kg.
In the end, I got the cheap metric plates I wanted, and it came with a usability improvement as well. I've not dropped these yet, so time will tell how they hold up.

7
While writing a comment on a different community, I figured I would post my homemade plate-bearing pegs here. These were made for my Body Solid BFFT10R functional trainer's weight stack, to allow loading 50 mm Olympic fractional plates.
This first one is a simple wooden peg made from a scrap 4x4 block, turned on a router -- because I don't own a lathe -- and with a threaded rod (3/8-inch; 10 mm) through it. The rod is mild steel, but that caused some minor bending when loaded with a 15 lbs plate.
So for my second and more permanent attempt, I attached two back-to-back pegs directly to the weight stack's center point, using a Grade B7 threaded rod, in lieu of the original bolt that was there. This helps keep the weight stack balanced front-to-back, makes it run more smoothly, and there's a reduced risk of the plate slipping off.
8
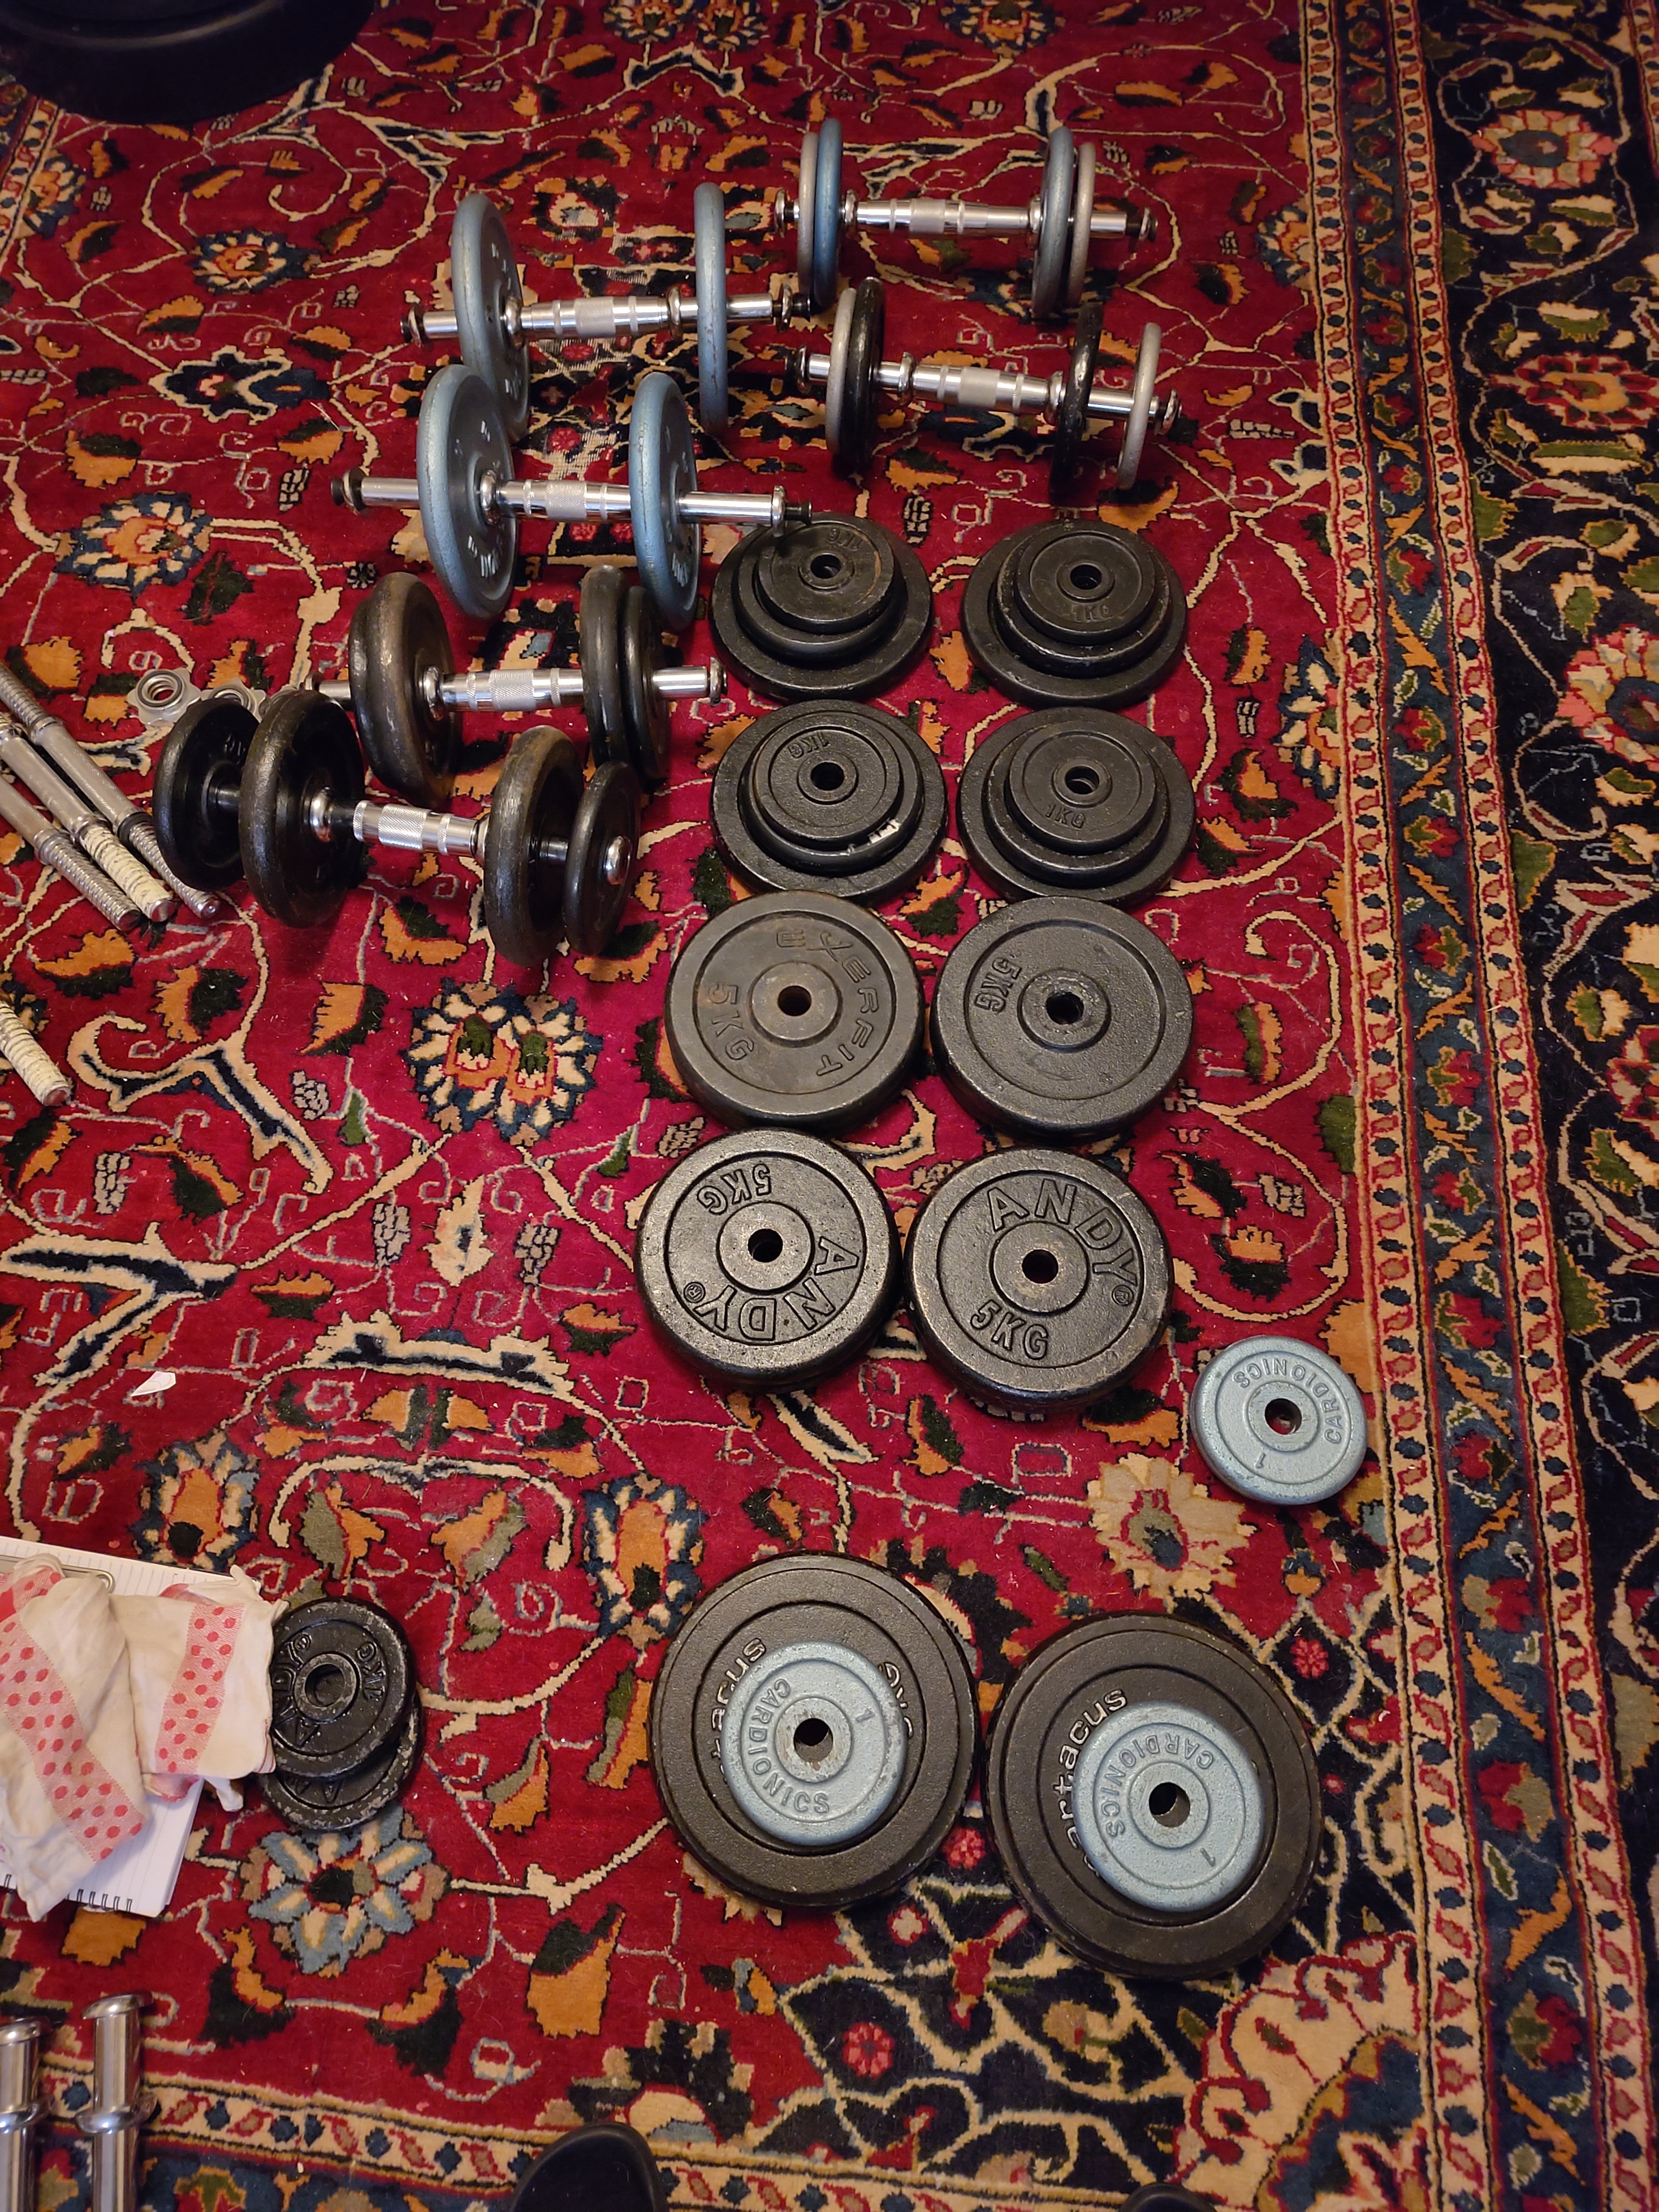
Did a great deal on weights for my dumbbell. Also bought 10 pairs of dumbbell handles.
9
10
(Managed to sort out embedded images, had to compress them first)
Welcome to my shitty, dusty garage gym.
Practically all of my kit is from Mirafit and Fitness Superstore (UK). Primarily focused on weightlifting & bodybuilding.
Power rack:

Mirafit M100 Half Power Rack with Cable System.
It's served me well over the last three years but I'm honestly surprised it hasn't fallen apart. It's no longer up for sale through Mirafit or third party retailers, and I can see why. Mirafit use OEM designs and stick their name on it. If you see a half power rack like mine, maybe stay away from it:

The M100 half rack has a lower weight capacity (200KG) than the full M100 (250KG) due to its design. You'll observe a concerning sway with three or more plates a side. It has miraculously survived 180 KG back squats and rack pulls though it's definitely not something I could wholeheartedly endorse as a power rack alone. I went for a half rack at the time due to spatial constraints i.e. not having to delicately manoeuvrer a barbell in the confined garage space I have available.
It did come with some bells and whistles, notably the plate-loaded cable / pulley system (with a couple attachments) and incline bench. Power racks with integrated cable systems can be exceptionally versatile provided you have the gear to supplement them:
- Lying ham curl with a chain, ankle straps and an incline bench:

- Seated leg extension with a chain, ankle straps and squat box:

- Cable pull-down if you have a crossbar to keep you in place:

Made some minor alterations to the rack:
- Cut away some metal on the lower pulley housing preventing the lower cable from moving freely
- Cut the wide bar cable attachment to actually fit within the confines of the rack (it was actually too wide before?!)
- Picked up some after-market J-hooks to supplement the included barbell holders
- Plate storage system (though it's in-line with the barbell(?!); if you don't walk the bar back enough, you'll hit it when you squat):

I've gotten a tremendous amount of utility of this package as a whole, though it's let down by the overall flimsiness of the rack. If anyone could recommend a newer, sturdier half rack + cable system, I'd love to hear about it. Mirafit's newer half-rack designs (or whichever OEM they use) are much better, but tend to lack the pulley system option.
Incline Bench:

Mirafit M150
Decent enough incline bench with a small footprint. Has a total weight total capacity of 260KG and is fairly affordable on its own. The design of this bench makes it somewhat unsuitable for barbell hip thrust from the side, as it has only three 'feet', but generally feels stable for most other exercises.
Barbell:

Mirafit M3 7ft 20kg Olympic Barbell (28mm diameter, fine knurl, sprung steel) Lovely bar, no complaints. Generally chalk up for deadlift but it's a pleasure to use either way.
Bodypower 7ft 20kg Olympic Barbell (30mm diameter, coarse knurl) Was a decent bar with a very coarse knurl. Would shred you up but it did its job. I've since handed this over to my cousin.
350KG in plates, bunch of quick release collars
Flooring: ARK Solid Black Rubber Mat CK (With Hidden Handles) X 4 (12mm thick) This was an afterthought and I deeply regret not having them to begin with. Please ensure you have appropriate flooring for your weights area.
Other stuff:
- Olympic dubmmell handles
- Mirafit Squat box
- Spinlock and fixed dumbell pairs
- fuck knows how much in standard (1" diam) plates
- Dumbbell & barbell storage / stands
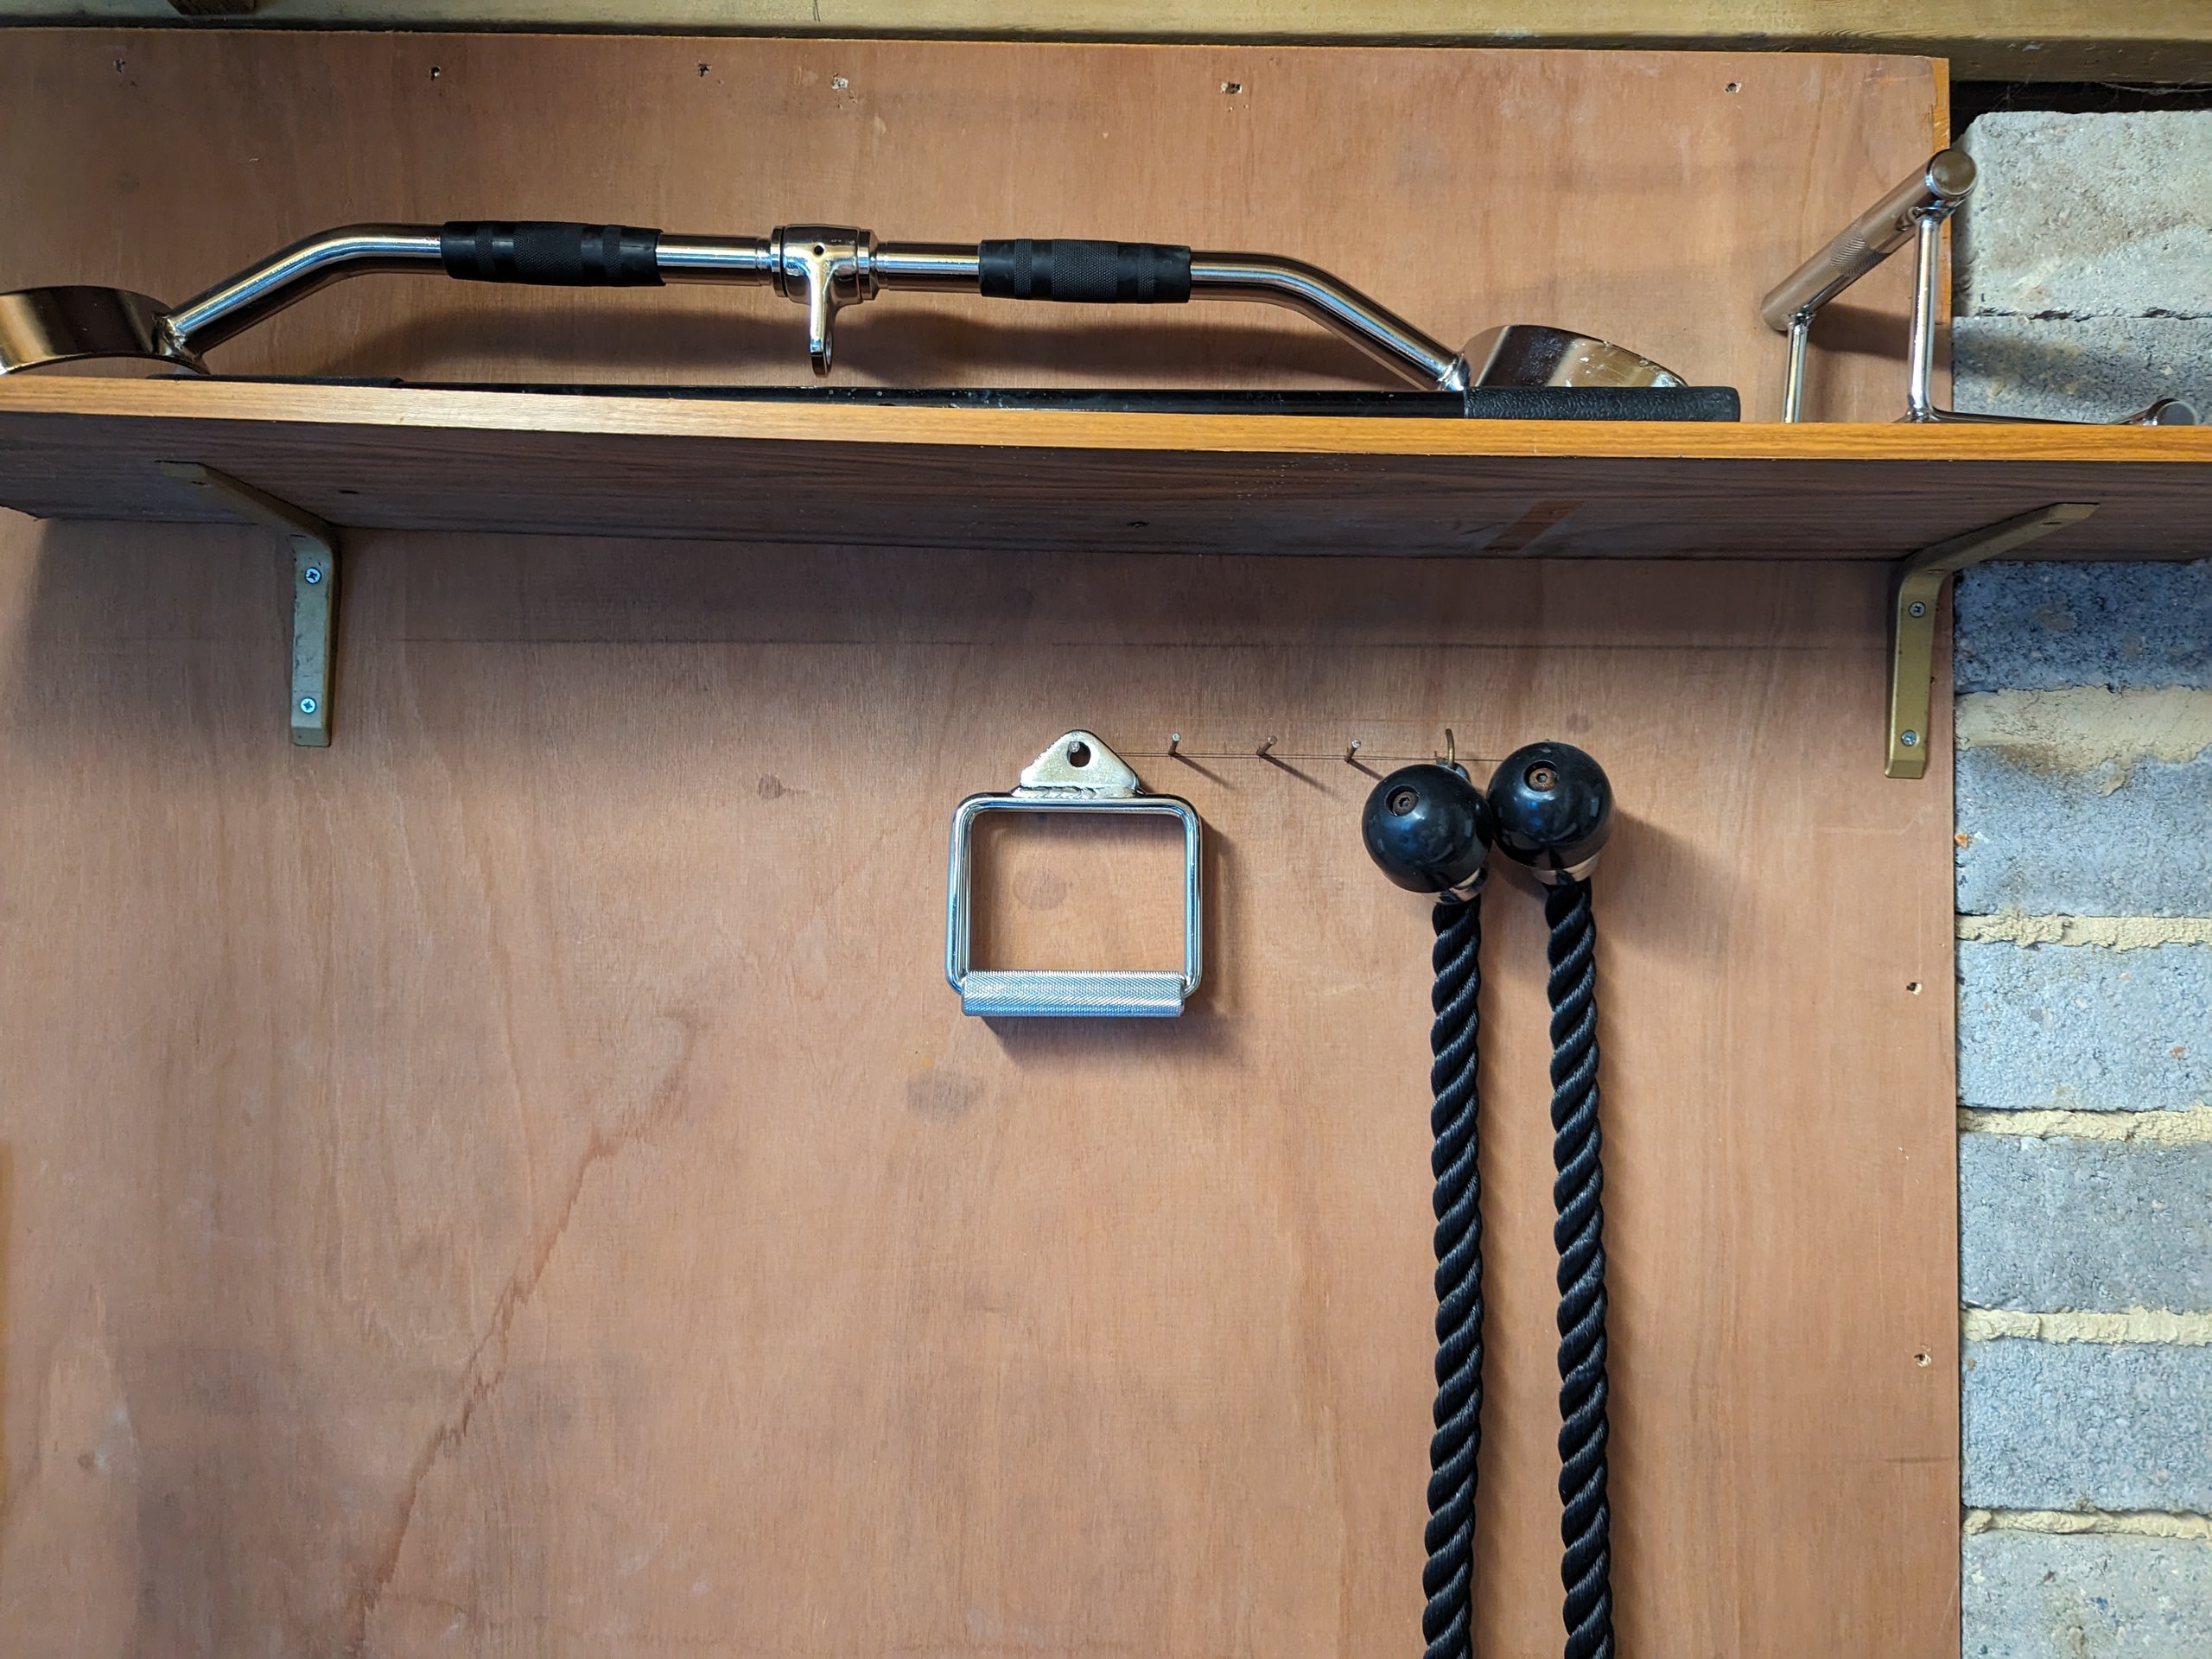
- Additional cable attachments (handles, bars, ropes)
- Chain belt for dips and chin ups
- Some old speakers in the corner


I feel like I'm mostly covered but have made some substitutions. I do more working sets of squat in lieu of a plate-loaded leg press and a few exercises to cover the lack of a hack squat machine, but I haven't been back to a commercial gym since.


11