As requested by /u/funkless_[email protected], this is a walkthrough of how I set up NGINX Proxy Manager with a custom domain to give me the simplicity of DNS access to my services with the security of Tailscale to restrict public access. This works great for things that you want easy remote access to, but don't want to have open to the internet in general (unRAID GUI, Portainer, Immich, Proxmox, etc.)
Prerequesites
- A custom domain (obviously, because that's the whole point of this tutorial)
- A Tailscale account with your devices linked to it
Steps
-
On the server that you want to serve as the entry point into your network, install the NGINX Proxy Manager Docker container (you could absolutely use a different installation method, but I prefer Docker so that's how this guide will be written)
I. For this, I have a Raspberry Pi that is dedicated to being my network entry. This method is probably overkill for most, but for me it works wonders because I have multiple different devices working as servers and if one goes down I can still access the services hosted on the others.
II. I'm not going to go super in detail here, because there is plenty of documentation elsewhere but you install it the same way you would install any Docker container and follow the first time setup
-
Log into your Tailscale account and get the Tailscale IP for the entry device (ex. 100.113.123.123)
-
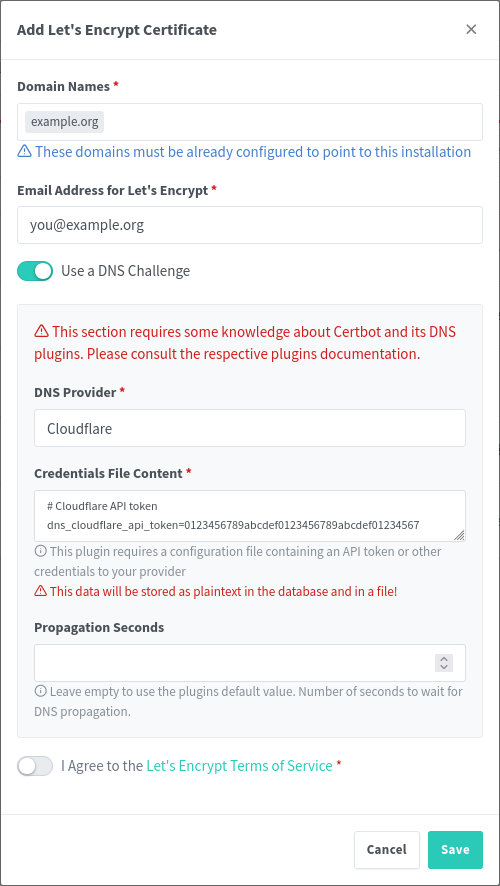
Get the SSL information from NGINX Proxy Manager for your domain
I. Navigate to "SSL Certificates" and then "Add SSL Certificate"

II. Select "Let's Encrypt"
III. Type in your domain/subdomain name in the first box
IV. Enter your email address for Let's Encrypt
V. Select "Use a DNS Challenge"
VI. Select your DNS provider in the dropdown
VII. From here, you're all set for now. We will continue with this later
-
In your domain DNS dashboard, you will need to do a few things (I use Cloudflare, but the process should be more or less the same with whatever provider you use):
I. Set up an A record that redirects the root of your domain (or a subdomain, depending on your configuration) to your Tailscale IP from step 2
II. Set up a wildcard redirect that points back to your domain root. This is important because it will redirect subdomain requests (i.e. service.example.org to your root example.org which then points to the Tailscale IP)

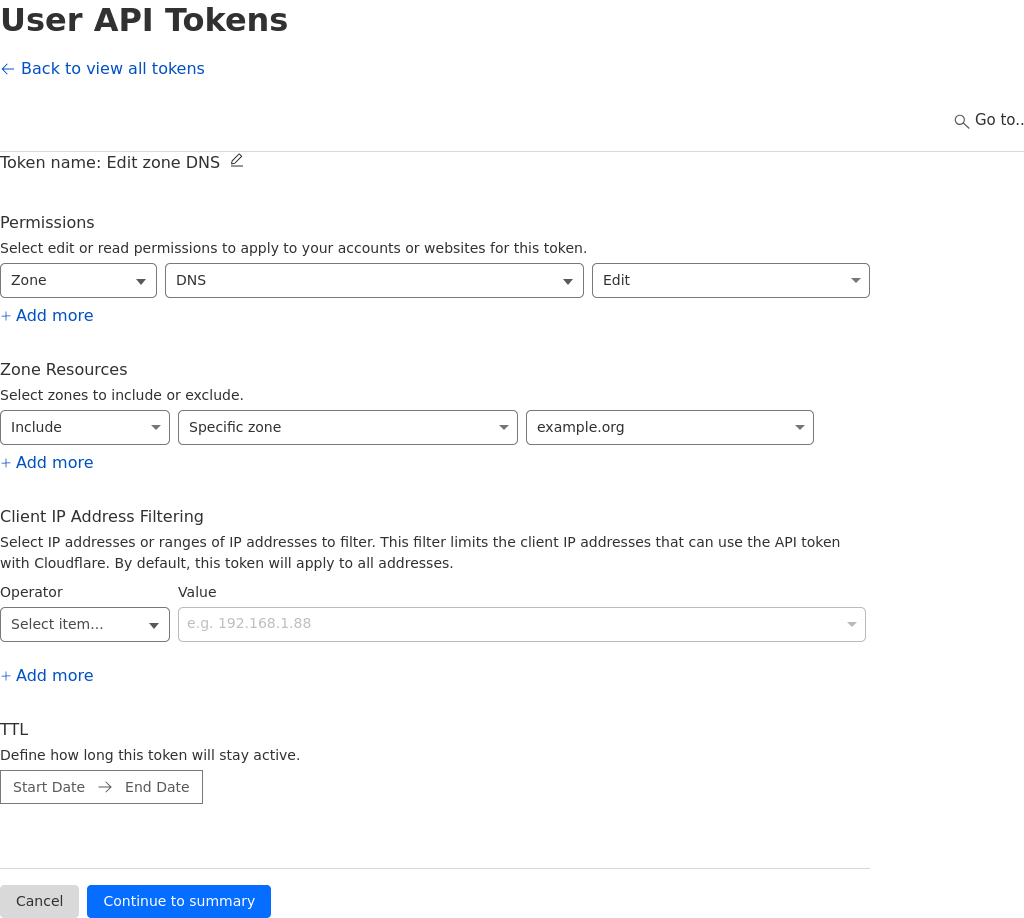
III. (This is going to be dependent on your provider) Generate an API key for NGINX to use for domain verification, this can easily be achieved in the Cloudflare dashboard in the API key section. The key needs to have permissions for Zone.DNS
-
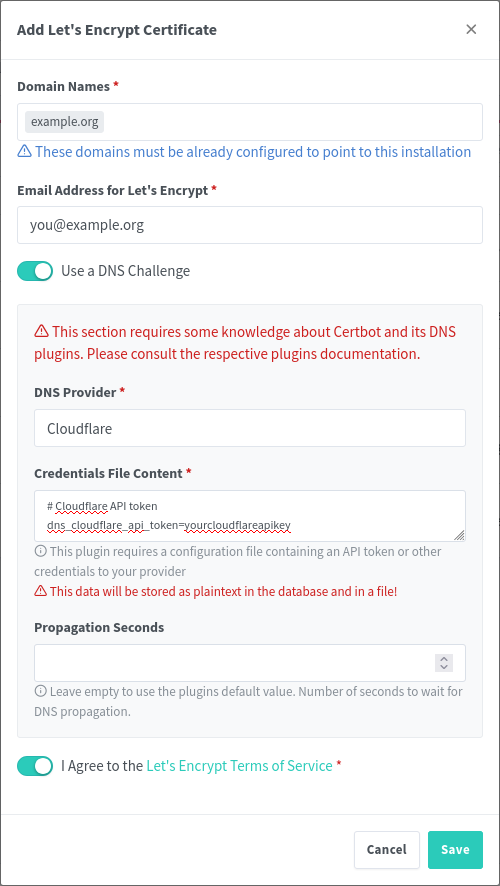
Back in NGINX Proxy Manager, drop in your API key in the text box where it asks for it (you need to replace the sample key).
-
The hard part is done, now it's just time to add in your services!
Here's an example of proxying Portainer through NGINX Proxy Manager:
-
Might be obvious, but open up NGINX Proxy Manager
-
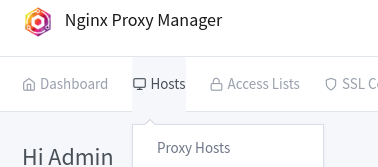
Navigate to Hosts -> Proxy Hosts
-
Click "Add Proxy Host"
-
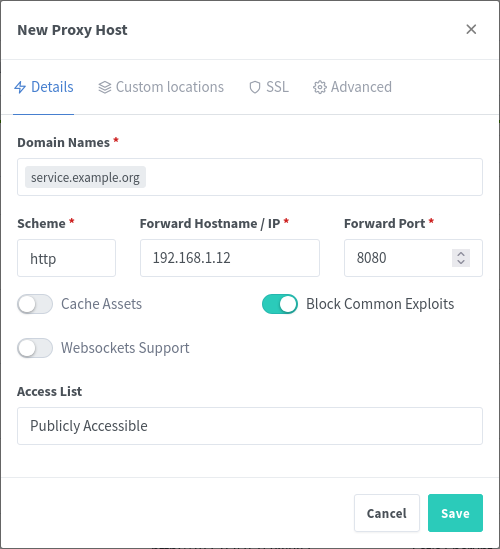
Type in the URL that you want to use for navigating to the host, I prefer subdomains (i.e. portainer.example.org)
-
Type in the IP address and port for the service
I. Here's the neat part: because NGINX is running in Tailscale, you can connect to both other services in your tailnet or other devices running in your network that don't necessarily have Tailscale running on them.
II. An example of this, would be if you have two houses (yours and your friends), where you have services deployed at both locations. You can have NGINX reach out through Tailscale to the other device and proxy the service through your main network without needing to set it up twice. Neat, right?
III. Conversely, if you have a server running in your network that you cannot install Tailscale onto (for support reasons, security reasons, whatever), you can just use the internal IP for that device, as long as the device NGINX Proxy Manager is running on can access it.
-
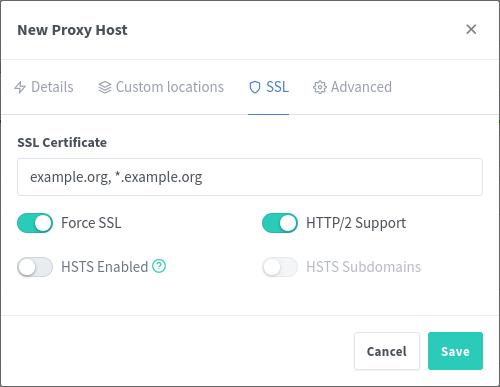
Navigate to the SSL tab of the window, and select your recently generated Let's Encrypt certificate
-
And you're done
Now, you can connect your phone or laptop to Tailscale, and navigate to the URL that you configured. You should see your service load up, with SSL, and you can access it normally. No more remembering IP addresses and port numbers! I don't personally meet this usecase, but this solution could also be useful for people running their homelab behind CGNAT where they can't open ports easily -- this would allow them to access any service remotely via Tailscale easily.
EDIT: The picture formatting is weird and I'm not really sure how else to do it. Let me know if there's a better way :)
Great write up, thanks. For video learners, Wolfgang does a good step-by-step on YouTube