Home Improvement

9262 readers
1 users here now

Home Improvement

founded 2 years ago
MODERATORS
51
49
submitted 9 months ago* (last edited 8 months ago) by [email protected] to c/homeimprovement


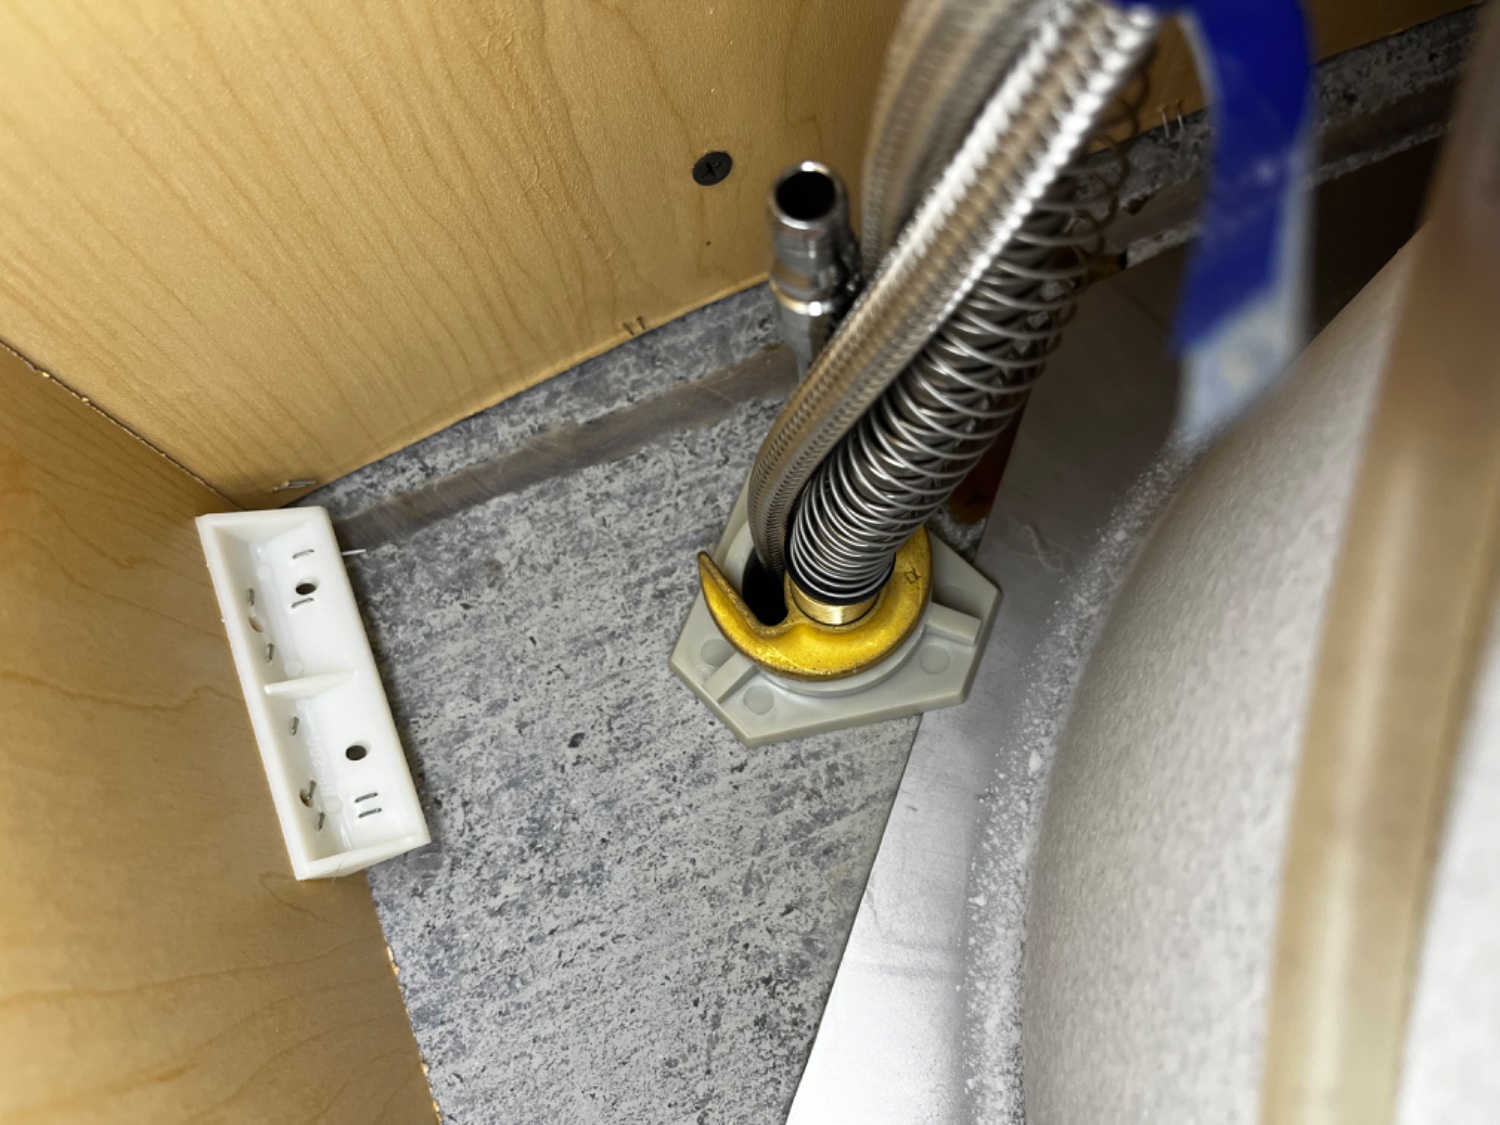
I am not familiar with this bronze colored nut that is holding my current Grohë Ladylux kitchen faucet to the counter. Does anyone know the best way to remove this? Thanks very much in advance!

EDIT: I figured it out. You CANT unscrew the bronze colored piece from below. You have to Disassemble the upper part and then there's an internal threaded bit in the upper part that you have to unscrew. The guy in the video whips out some special tool that hasn't been seen or mentioned before in the video and uses it to unscrew the interior threads. I don't have that magical tool, so I just used pliers. https://www.youtube.com/watch?v=HRZ1QOinJsE

52


Renovating the bathroom and found these dark patches in the joists and roof lumber surrounding the old vent pipe. The PVC part is new.

Anything bad here? Anything we need to address?

53


General info: Looking to get current attic ventilator fan replaced. The attic is about 1400 sq. ft. Current attic ventilation fan is a foot from the ridge of the roof. Live in USA.

Handyman wants: To install two 1500 CFM fans. Two 120 volt 20amp dedicated circuits, one for each fan. He wants to install the second fan 4 feet away from the current fan. He stated that the attic ventilator fan would need to be replaced within 6 years.

My questions: Would two fans be better than one fan? Would I need two 120 volt circuits to run two fans? Is there an attic ventilator that has a user replaceable fan?

Thank you in advance for any help.

54
61
submitted 9 months ago* (last edited 9 months ago) by PrincessTardigrade to c/homeimprovement


It's on everything, my fingernails are glued to my skin underneath, I hate everything and most of all I hate spray foam.

Thanks for letting me rant. I normally read instructions before using a product and now I'm avoiding the room where it's on everything... How fucked am I?

Update: We've cleaned most of it up from the room... Our hands, not so much lol. I appreciate the advice and support, hopefully y'all got a good laugh on our behalf :)

Ps. It works great as a diy wax for hairy arms!

55
58
submitted 9 months ago* (last edited 9 months ago) by Grogon to c/homeimprovement


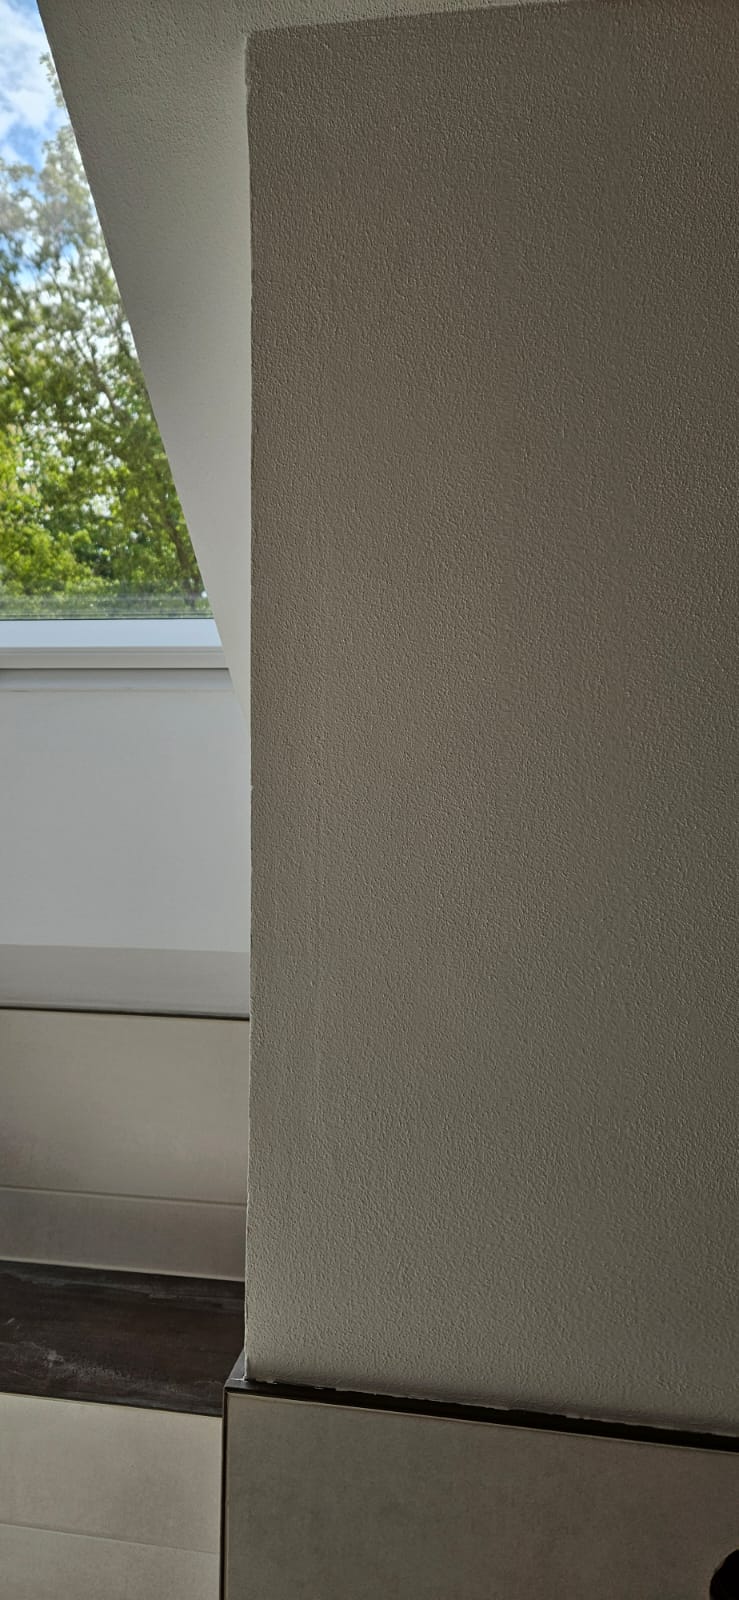
Okay, my first ever drywall and I know what I did wrong. I just didn't think that small indifference would make it look obviously bad.

But here it is, I will do it different on the rest of the walls but I'm just gonna leave it for what it is: me acting like someone who can do drywalls and wanted to save money lol

Didn't do the bottom part yet so I am def not done but holy moly...

How bad can someone mud? Me: Hm My wife: "Well atleast it's done. Not good, but done and we saved money for vacation"

What makes it even more hilarious is that in my mind I was sure if I use paint that has sand in it it's gonna cover that LOL. Fail....

56
12
submitted 9 months ago* (last edited 9 months ago) by [email protected] to c/homeimprovement


So I was using a wood sealer (https://www.amazon.com/dp/B01AQTX3XU) on my newly built catio. Unfortunately I didn't notice how much I had sprayed on the adjacent window.

Now I have cloudy/foggy windows (https://imgur.com/a/TKD9wim). I've tried cleaning them with:- - - -

  • water via the hose directly on the window.. very little progress
  • windex.. very little progress
  • dish soap followed by host.. very little progress
  • vinegar.. very little progress

Any ideas for what might get this stuff off easily?---

57


Looking for help in solving a problem where the lower door hinge pin on my entry door keeps creeping up and causing the deadbolt to become slightly misaligned making it more difficult to lock. Reading online, I keep coming across suggestions of tightening a screw that’s supposed to lock the pin in place but my hinges don’t seem to have that screw.

Anyone have any other ideas on how to fix this problem?

58


Currently installed is a recent (about 10 years) Harbor Bay 5 blade ceiling fan with 44" blade diameter.

In a box I have a recent (about 10 years) Harbor Bay 5 blade ceiling fan with 52" blade diameter.

Yes, the large blades will run the motor harder.

Would these two fans likely use the same motor, so that I can just swap the larger blades and leave the current motor? Or is there a high chance the motors are sized specific to their blades, and I would need to fully swap the motor to use the larger blades?

The blades appear to use the same connection.

59


Hi folks,

I want to refinish and paint my kitchen cabinets, but before touching the doors I want to ask opinions on how to repair this peeling on edges of 3 cabinets. Looks like steam from the range and kettle did this.

I was thinking to trim off the excess bit that has peeled and expanded, then sand down and fill with wood/general filler before painting with bullseye 123. Is there a better approach?

60


I'm pretty new to this. I was considering replacing it with something else because it leaks slightly from the valve if it gets moved around at all, but I don't know what this connection is to start with. It goes to a dishwasher.

61


I am currently redesigning my kitchen in a 1930's Midwestern USA house. The kitchen has a decent floor area but the floor plan is oddly restrictive.

My space next to the sink is such that I can either have a standard 24" dishwasher next to the sink and a slightly weird cabinet adjacent to it, or I could have an 18 inch dishwasher at 45 degrees flanked by two small but reasonably sized cabinet doors (or drawers), although the 45 degree plan would dictate a somewhat shallow custom counter depth on the flanks (like 18-20 inches).

I think I would be more proud of the accomplishment of building the angled design, and I think the ergonomics would be optimal.

But I'm not sure about the smaller dishwasher. I have never used a smaller one. It seems like it would be enough for my small family and still plenty helpful for gatherings.

62


This is not the first time I've ranted about the previous owner's wiring jobs, though I think they were on the other site (and I had a different username there).

His greatest hits include:

  • Above a drop ceiling in the basement, a wire that went into a metal box without a strain relief, so it eventually wore through (for whatever reason) and started shorting out. Since it was above the drop ceiling I had no idea why that breaker would occasionally trip, then reset without complaint. Also, there are other things on that circuit, but the offending wire was only live when the light switch in the room was on, so it was harder to diagnose. It wasn't until we demolished the room that we found the problem...black marks on the box and wires and all.

  • A duct fan to route heat from the pellet stove into the master bedroom...with the wiring completely enclosed in the ceiling, with no access to the box. Said duct fan has started making noise, so I'm going to have to cut that ceiling open and replace it, and I'll probably install one of those spring-loaded covers so there is access in the future.

  • A fascinating wiring job in the shed that is unnecessarily complicated and certainly a violation of the code on how many conductors can be in a box. I'm going to fix that some time this spring. This is actually a REALLY great one, so maybe I'll post it as a comment.

On to today's hilarity. A few weeks ago I noticed the UPS for my computer in the basement had a red light on the back warning of a wiring fault. I never noticed it before, or I did and forgot, and it's not very bright, so you almost have to be looking for it to see it. Well, I got out one of those testers that you plug in, with three lights that diagnose the issue, and it showed no ground. Odd.

I checked the other two outlets on the same wall, the one closer to the panel tested fine, but the one on the other side of the outlet in question also showed an open ground.

Today I dug in to find out what was up. It turns out the ground was cut on both wires in the outlet the computer was using (supply from the previous outlet and the wire to the next outlet). It was not connected to the metal box or the outlet.

WHY WHY WHY? Why did he do this? I can't fathom why you'd do this.

I replaced all three outlets on that wall with new ones and made sure the grounds were connected. Nothing really wrong with the original outlets and covers, but they were old and beige, and I like white.

Years ago I found an outlet in our closet that only had two prongs, no ground. The house was built in 1987, well after three prongs were standard. With some trepidation - what am I going to find here? - I opened it up and found that...there was a good ground there (to my relief) but he apparently just decided to use a two prong outlet. WHY? He had to have gone to special effort to find a two prong outlet to install. (Actually it is theoretically possible that was done by the builders, but everything else in the house is three prongs, and I can't believe it would have passed inspection.)
63


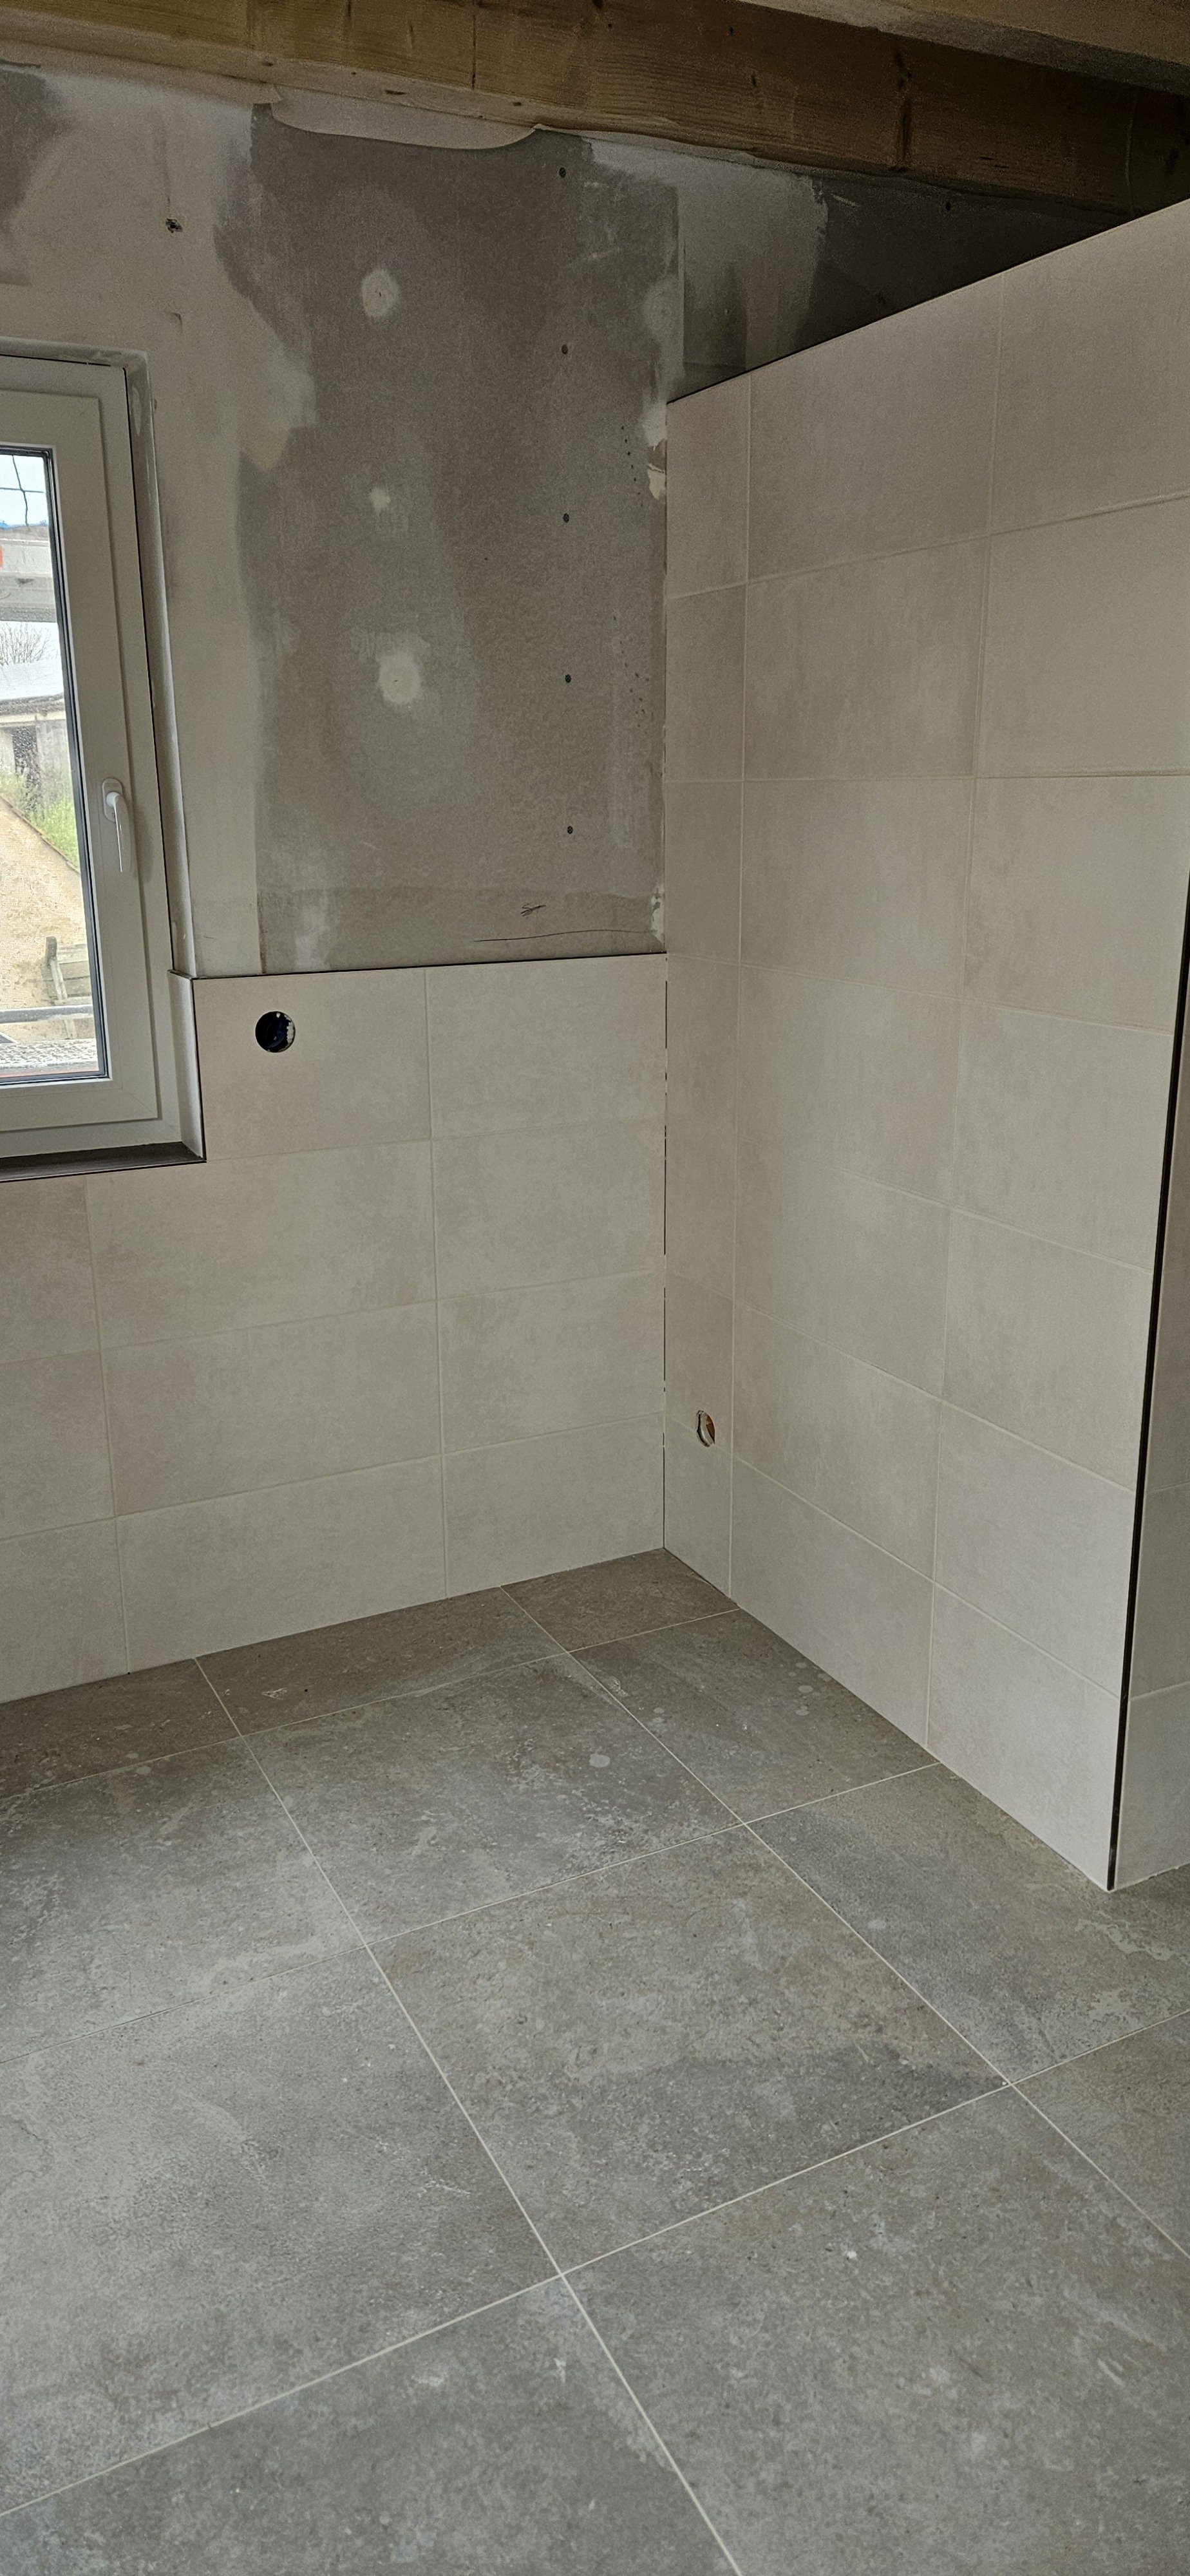
Hey... I bought tiles a year ago and they looked good in the store.

Please dont junge they dont lign up with wall tiles. Wall has 30x60 inch and floor 59,5x59,5 so I couldnt lign them up properly.

Are the colors from floor and wall "Okay" or should I find new wall tiles? Maybe it looks different when lights are installed and wall above is white and not just plasterboard grey?

What you all think?

64


I have recently moved to this place, and before winter I went to install trvs on the water circulated radiators in order to have some more control over the temp (there used to be manual valves).

Now that the colder days are about to end, I have a question on how would be the best (or recommended) way to maintain those valves when not used. I have read that the thermic piece on the valve may get stuck after a long period of no use, so I am wondering if it would be best to have the valve fully closed (if it gets stuck, should it loose after the circuit warms up again?), or to leave it fully open (so it looses by closing it when needed),

I am from a more tropical climate country where heating in winter is not really necessary, so I am a total strange on how these things should work. All advice is welcome.

65


This corner of the shower seems to be having some mold issues from regular use. Water seems to be collecting in that spot after a shower and doesn't seem to be draining properly. Is there anything I can do for a permanent fix?

I've tried keeping my bath fan on for an hour after the shower and don't want to have to squeegy it after each use.

66
33
submitted 10 months ago* (last edited 10 months ago) by clearedtoland to c/homeimprovement


Our laundry room sink has this bizarre attachment to to the back of the drain line clean out. It would almost seem like it was or is supposed to be a vent. Recently it’s started to give off a foul sewer smell when our washing machine rinses.

Can I safely plug it? Maybe remove it if I can manage to pry it off? When I asked our plumber what it was, he just smirked and said it was a “crazy thing.”

67
105
How do I fix this? (programming.dev)
submitted 10 months ago by [email protected] to c/homeimprovement
 
 
68


cross-posted from: https://lemmy.crimedad.work/post/63959

cross-posted from: https://pixelfed.crimedad.work/p/crimedad/675140687607015636

The flowerbeds in front of my house could use some work.

I'd like to replace what I've got with some colorful plants, but I'm not sure what to pick that's appropriate for the environment or even what sort of design guidelines to follow that will lead to a handsome result. Would anyone care to offer some suggestions? This side of the house gets plenty of sun and faces South. The location is in Essex County, New Jersey.

#gardening #landscaping #design #diy

@[email protected]

69
60
submitted 10 months ago* (last edited 9 months ago) by [email protected] to c/homeimprovement


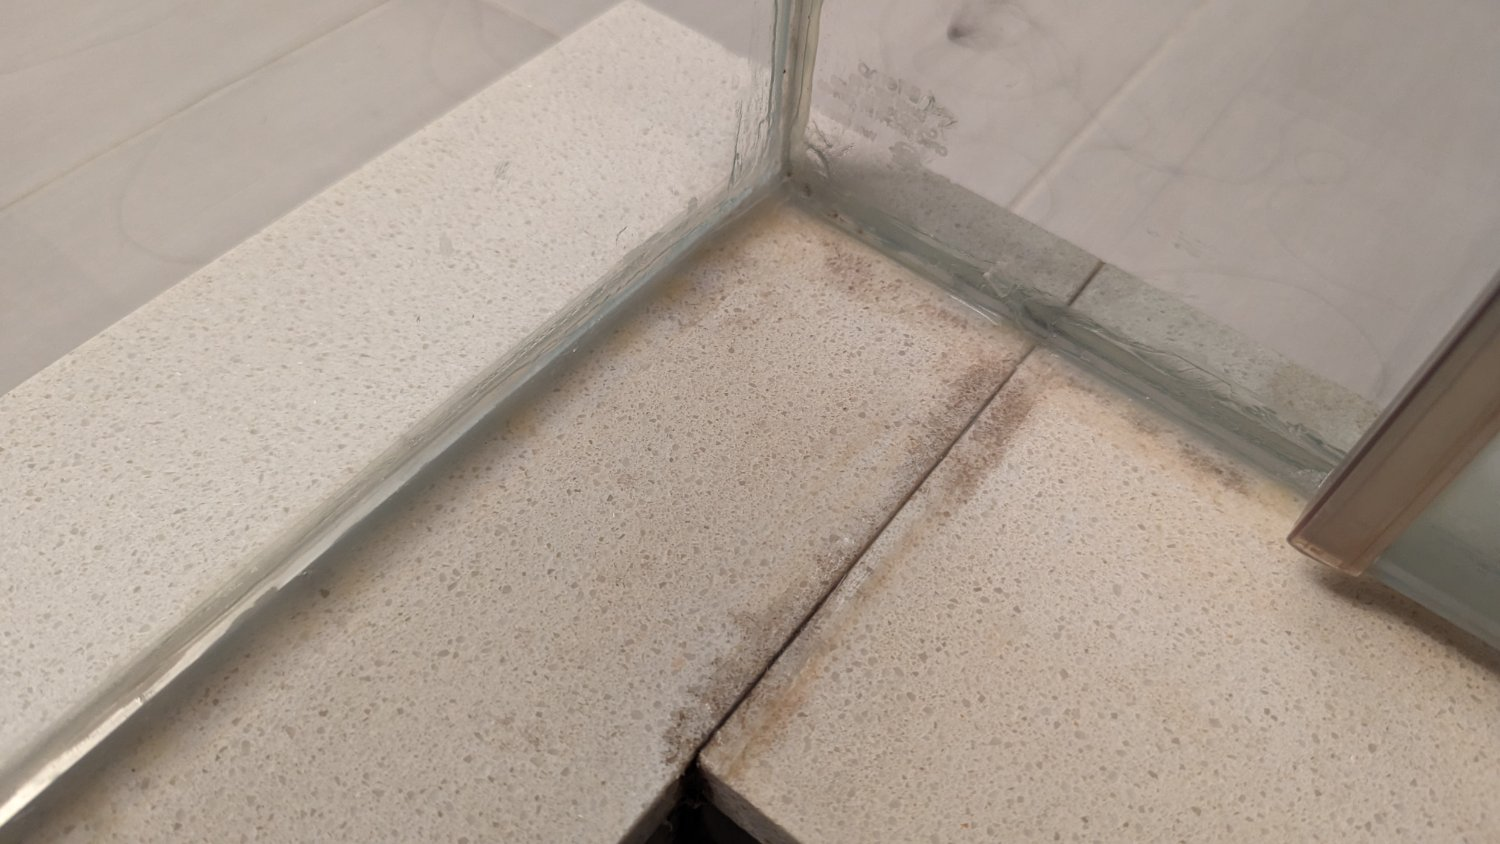
We have a standing shower with a strange leak. It was built with a small tiled wall/step that the frame-less glass shower wall panel sits on. I noticed water pooling outside the door after a shower. At first I thought it was the door seal but upon closer inspection it is coming out of the grout. See pics (right where the arrow is pointing). The shower was already in the house when we bought it so I don't know anything about how it was constructed.

How should I proceed trying to fix this leak? Do I need to re-do the grout? Should I just use grout sealer? Any help appreciated.

Update #1: Thanks for the help everyone. Do ya'll have any thoughts on where the water could be entering from? The silicone caulking was recently redone. My thought was that I have a hairline crack along the grout somewhere that is allowing water to wick in and and along to the outside.

Update #2: It's Fixed! Thanks everyone for the suggestions and advice. My working theory was that water was wicking down under the bottom frame and finding its way into the frame attachment holes. This appears to be what was happening. I ended up pulling out all the caulk around the inside of the shower on that side and replaced it with fresh silicone. That seems to have done the trick. Bingo, no more water on the ground!

70


It took longer than I wanted, but my son's room is done! Many thanks to the folks here who shared their thoughts on wall repair and LED strips. This project took longer than I wanted, but every step was done right.

Most people who make geometric mountain walls seem to use boards at 45°, but that would have looked awful with the 36° ceiling slope. Matching the cut angles was much harder this way - lots of math and some jigs on my miter saw - but I like this look more. It feels more like the White Mountains where we vacation as a family

The Pinterest examples my wife sent me for inspiration all out up the boards with construction adhesive. These are put up with 2.5" finishing nails into studs, filled, sanded, and caulked before painting. This feature is permanent, but it can be removed like any trim without tearing down the drywall as well.

I had the notion to hide an LED strip in the upper mountains to create a sunrise effect. The actual lights are much more subtle than it looks in the pictures. I wish I knew how to get better photos of LED setups. Of course he can make the LED strips do rainbow zoomies and other such delightful nonsense because he is 11.

Our goal was to make something that will appeal to him now and as he gets older. I think we hit the nail on the head with that, but we will see in time.

Thank you again to everyone who shared their thoughts as I built this.

71


Hello all,

I bought a house a few months ago and am planning out improvements and such. When I had the house inspected, we discovered that this mysterious door in the basement was actually the entrance to a former bulkhead that was renovated over (a laundry room and small mudroom were built over it).

It's basically concrete walls/foundation with some exposed studs and beams along the top, some loose insulation and such, and then a set of concrete stairs connecting to the foundation/walls. My realtor suggested turning it into a wine cellar kind of thing, but I would prefer to use it as a lumber storage area for a side business I'm trying to build. To do so, however, I would need to remove the concrete stairs.

Can I just remove them (with power tools) without any damage to the foundation or structural integrity? Should I have someone come check it out first and make sure it's safe? It's wasted space currently, and I'd prefer to be able to use more of the space if possible.

Thank you for any advice/tips/etc!

72
54
submitted 11 months ago* (last edited 11 months ago) by EssentialNPC to c/homeimprovement


My project is going slowly, but I finished building and painting the feature wall in my son's new bedroom. Now I just need to install and program the LED strip along the top!

My wife got the idea to do a geometric mountain feature wall from Pinterest. I am really happy with this outcome and feel I did a better job than the influencer DIYers who did similar projects that inspired this one. Giving the mountains a 36° slope to match the roof line was a pain in the butt, but the end effect was worth it.

Thanks to everyone here who helps with thoughts on patching wall cracks and LED lighting methods. I'll share photos of the full room once it is complete.

Edit to add: The wall is actually a mildly dark blue-green. Between bad natural light and my phone's camera's limitations, this is the best I can get for now. The mountains are not actually black.

73


cross-posted from: https://beehaw.org/post/12265699

If you are looking for a new obsession

This video is a deep dive into HVAC systems, but each of his videos are pretty interesting and about different topics.

74


The flippers who installed the plastic shower liner only cut the faucet handle holes big enough for the stems and I need to replace the cartridges. I used a jab saw for one but that sucked, what kind of Dremel bit can I use?

75
103
submitted 11 months ago* (last edited 11 months ago) by Grogon to c/homeimprovement


Hey!

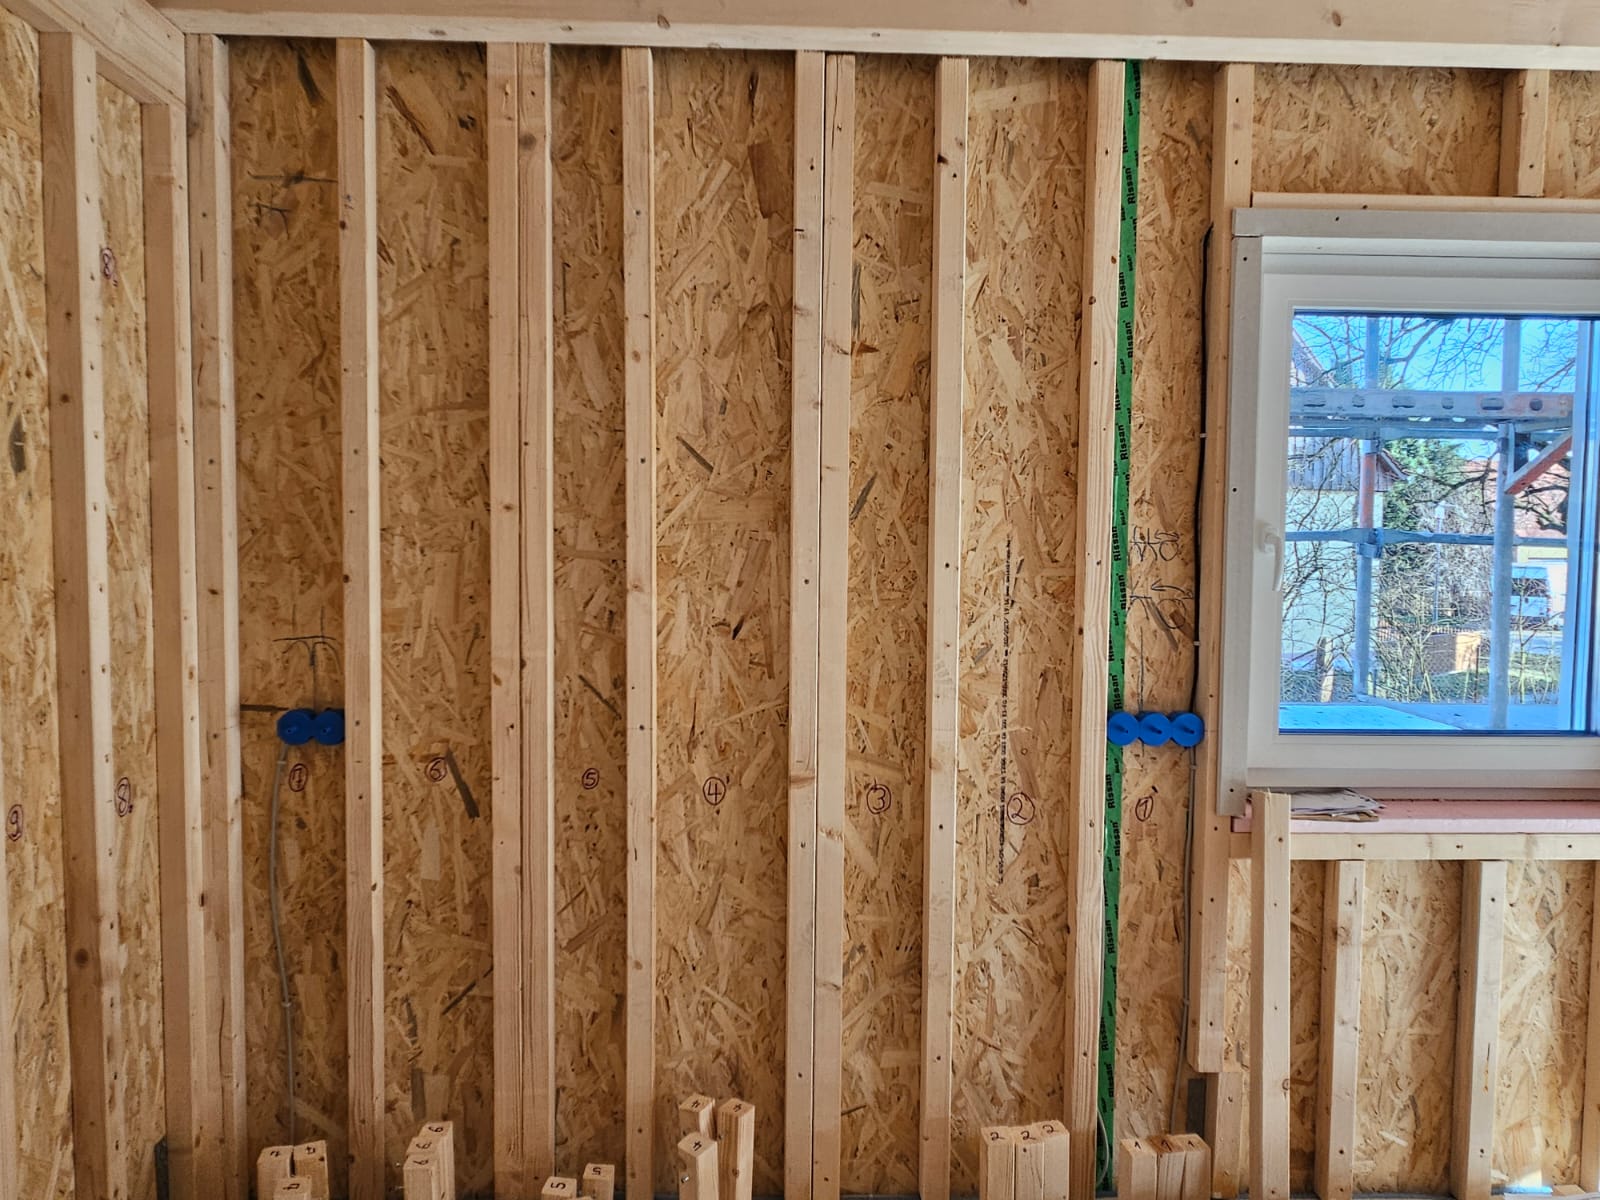
Currently doing drywall myself and I am using 6x6 cm squared timber around my outside walls.

The problem is they aren't as stable as the other walls inside the house because of the 6x6 cm squared timbers that are about 30cm distance from each other.

I will screw my plasterboards on the squared timber and only one plasterboard, not two.

I have two pictures of what my construction looks like from far and one from close.

Maybe someone can give me advice before I install the plasterboard onto it.

The only problem I currently see is finding the subconstruction once I put the plasterboards back on. But other than that, if I find them can I install the cabinets safely?

view more: ‹ prev next ›