ErgoMechKeyboards

5597 readers
110 users here now

Ergonomic, split and other weird keyboards

Rules

Keep it ergo

Posts must be of/about keyboards that have a clear delineation between the left and right halves of the keyboard, column stagger, or both. This includes one-handed (one half doesn't exist, what clearer delineation is that!?)

i.e. no regular non-split¹ row-stagger and no non-split¹ ortholinear²

¹ split meaning a separation of the halves, whether fixed in place or entirely separate, both are fine.
² ortholinear meaning keys layed out in a grid

No Spam

No excessive posting/"shilling" for commercial purposes. Vendors are permitted to promote their products/services but keep it to a minimum and use the [vendor] flair. Posts that appear to be marketing without being transparent about it will be removed.

No Buy/Sell/Trade

This subreddit is not a marketplace, please post on r/mechmarket or other relevant marketplace.

Some useful links

founded 1 year ago
MODERATORS
1


1137 days later it's finally here!!

2


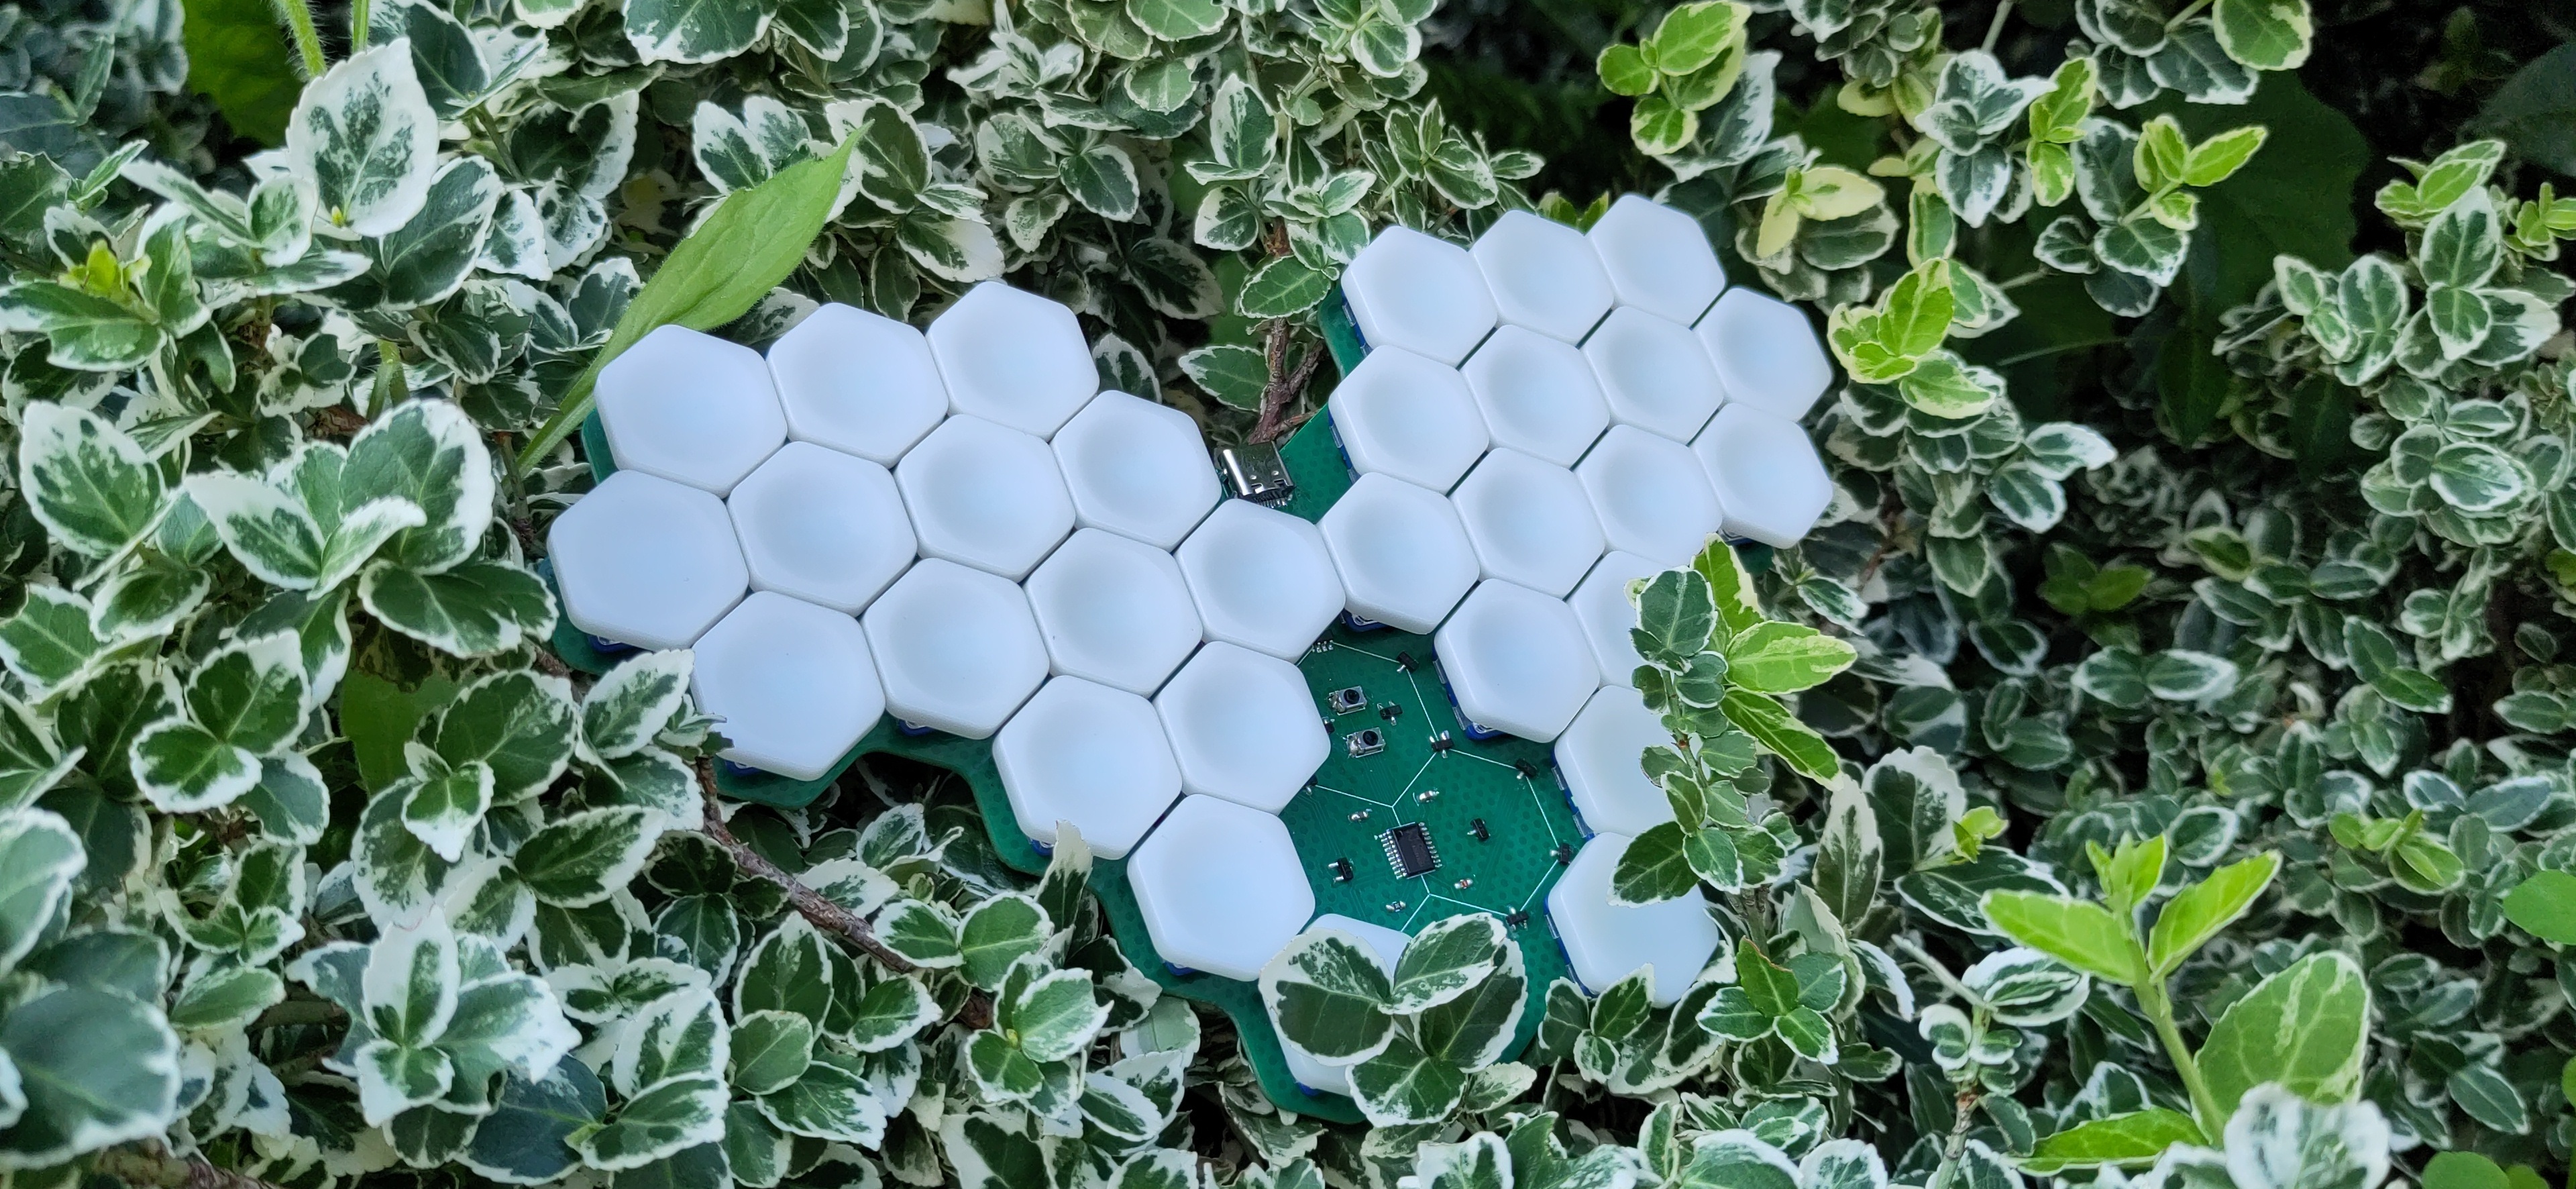
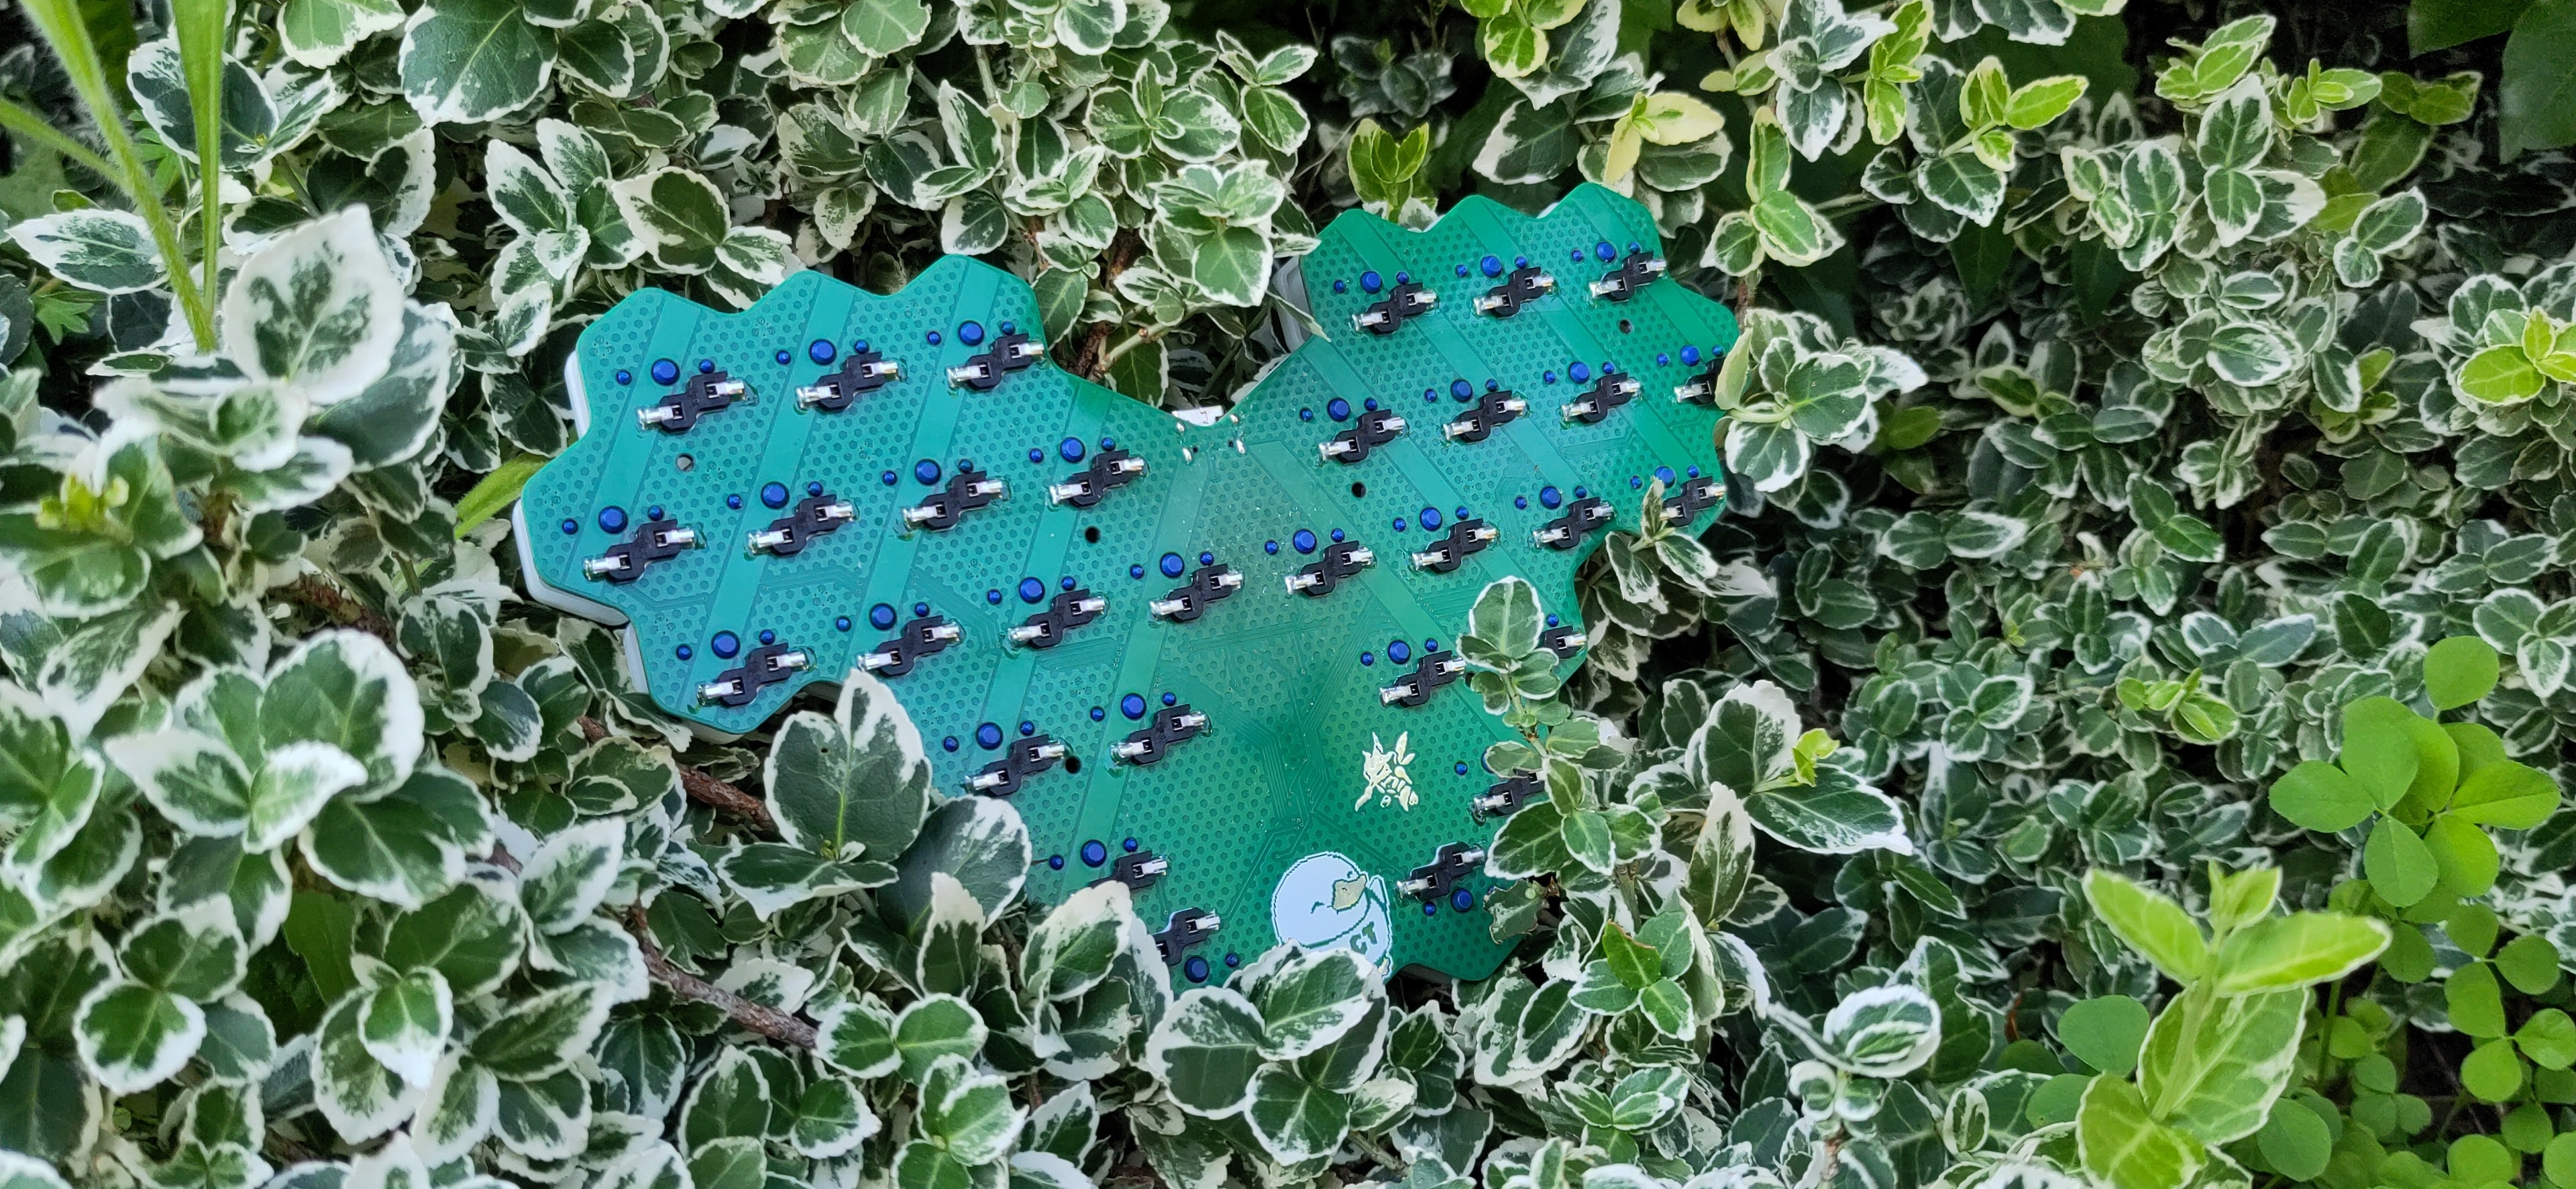
I designed a small 30% keyboard based on hexagonal keycaps. The source files can be found on github. It runs the FAK firmware.

3


I am living in Germany and I need some Keycaps, which are not expensive. They don't need to be special, they just need to... work.

4


If you have been using an ergonomic mechanical keyboard for more than year, let us know which keyboard it is, and whether you plan to keep to keep using it for at least another year or if there's another keyboard you are considering trying instead.

5
6


Hello all,

After trying to find good choc v1 compatible keycaps, I found some STLs on GitHub for some Chicago Stenographer ones.

My 3D printer is just an A1 mini (can only print PLA and PETG - maybe TPU?). Do you think it’s a good idea to use PLA for keycaps?

Have MBKs right now on my Chocofi but was hoping for something more sculpted to get a little less fat finger typing.

I know most people order Nylon SLS prints from online but since I already have a 3D printer I was hoping to avoid that.

Bad idea?

7
 
 
8
9


Hey there everyone, I'm currently building a Lily58Pro, So far things have been going great, I'm at the point now where I need to flash the firmware, This is totally new territory for me and I'm hoping the community here can shed some light on a few concerns of mine.

The kit I ordered came with 2x 0xCB Helios controllers, Which appear to be RP2040 based. The official build guild is using ATmega32U4's.

The firmware page from the site I got my kit from just links to a single .uf2 file, I'm probably overthinking this whole thing but shouldn't there be a left and a right side? Or do I just put the controllers into bootloader mode and throw the uf2 file on each one like a regular Raspberry Pi? Or do I need to flash these with QMK? Just a little confused, and probably vastly overthinking this.

10


I’m joining the split keyboard group by building a piantor. I have the pcbs already and they’re lead free coated and I will use lead free solder on the components.

I’m a bit worried though as I used a borrowed split and I noticed I keep touching the soldering in the microcontroller quite a bit and the build I was going for was a bare one where we just put rubber feet directly in the pcb so there’s no case or anything.

I tend to rub my eyes and bite my nails quite a bit during the day. I was wondering if it’s safe enough on lead free solder or if this is something I should completely avoid.

Any suggestions in case I should avoid it entirely. I reckon the worst place would be the top of the pcb maybe I can use some hot glue where the solder is but I have no idea if it’s hard to pull it off later if I need to review/resolder.

This is my first project and I haven’t done anything like this before, so even the flux I’m kind of unaware how to clean, solder comes with it right, do I need to wipe it somehow or use isopropyl alcohol and wipe with maybe a paper towel?

Sorry about being a complete noob. I searched around but most people are concerned about the lead solder not lead free like me.

11
 
 
  • Mekanisk Klippe case in Ultramarine
  • cinereus he PCB with assembly by JLC
  • FR4 plate in JLC Blue (missing Ultramarine’s hint of green)
  • Gateron Melodic switches
  • MTNU Susu keycaps
  • running Vial firmware
  • a BIG thanks to Noah Kiser’s PCB design videos and JLC’s PCB fab and assembly services
12
101
Nocturnal Rufous (lemmy.world)
submitted 1 month ago by pixelprimer to c/ergomechkeyboards


Less keys = better right?

13
14
15


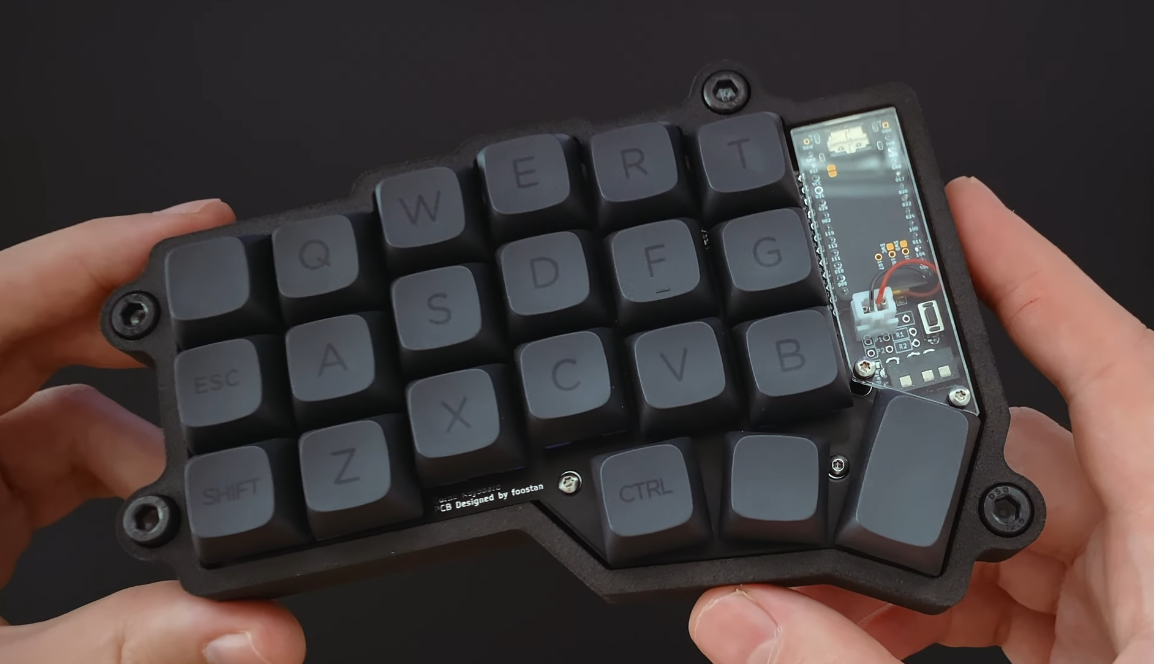
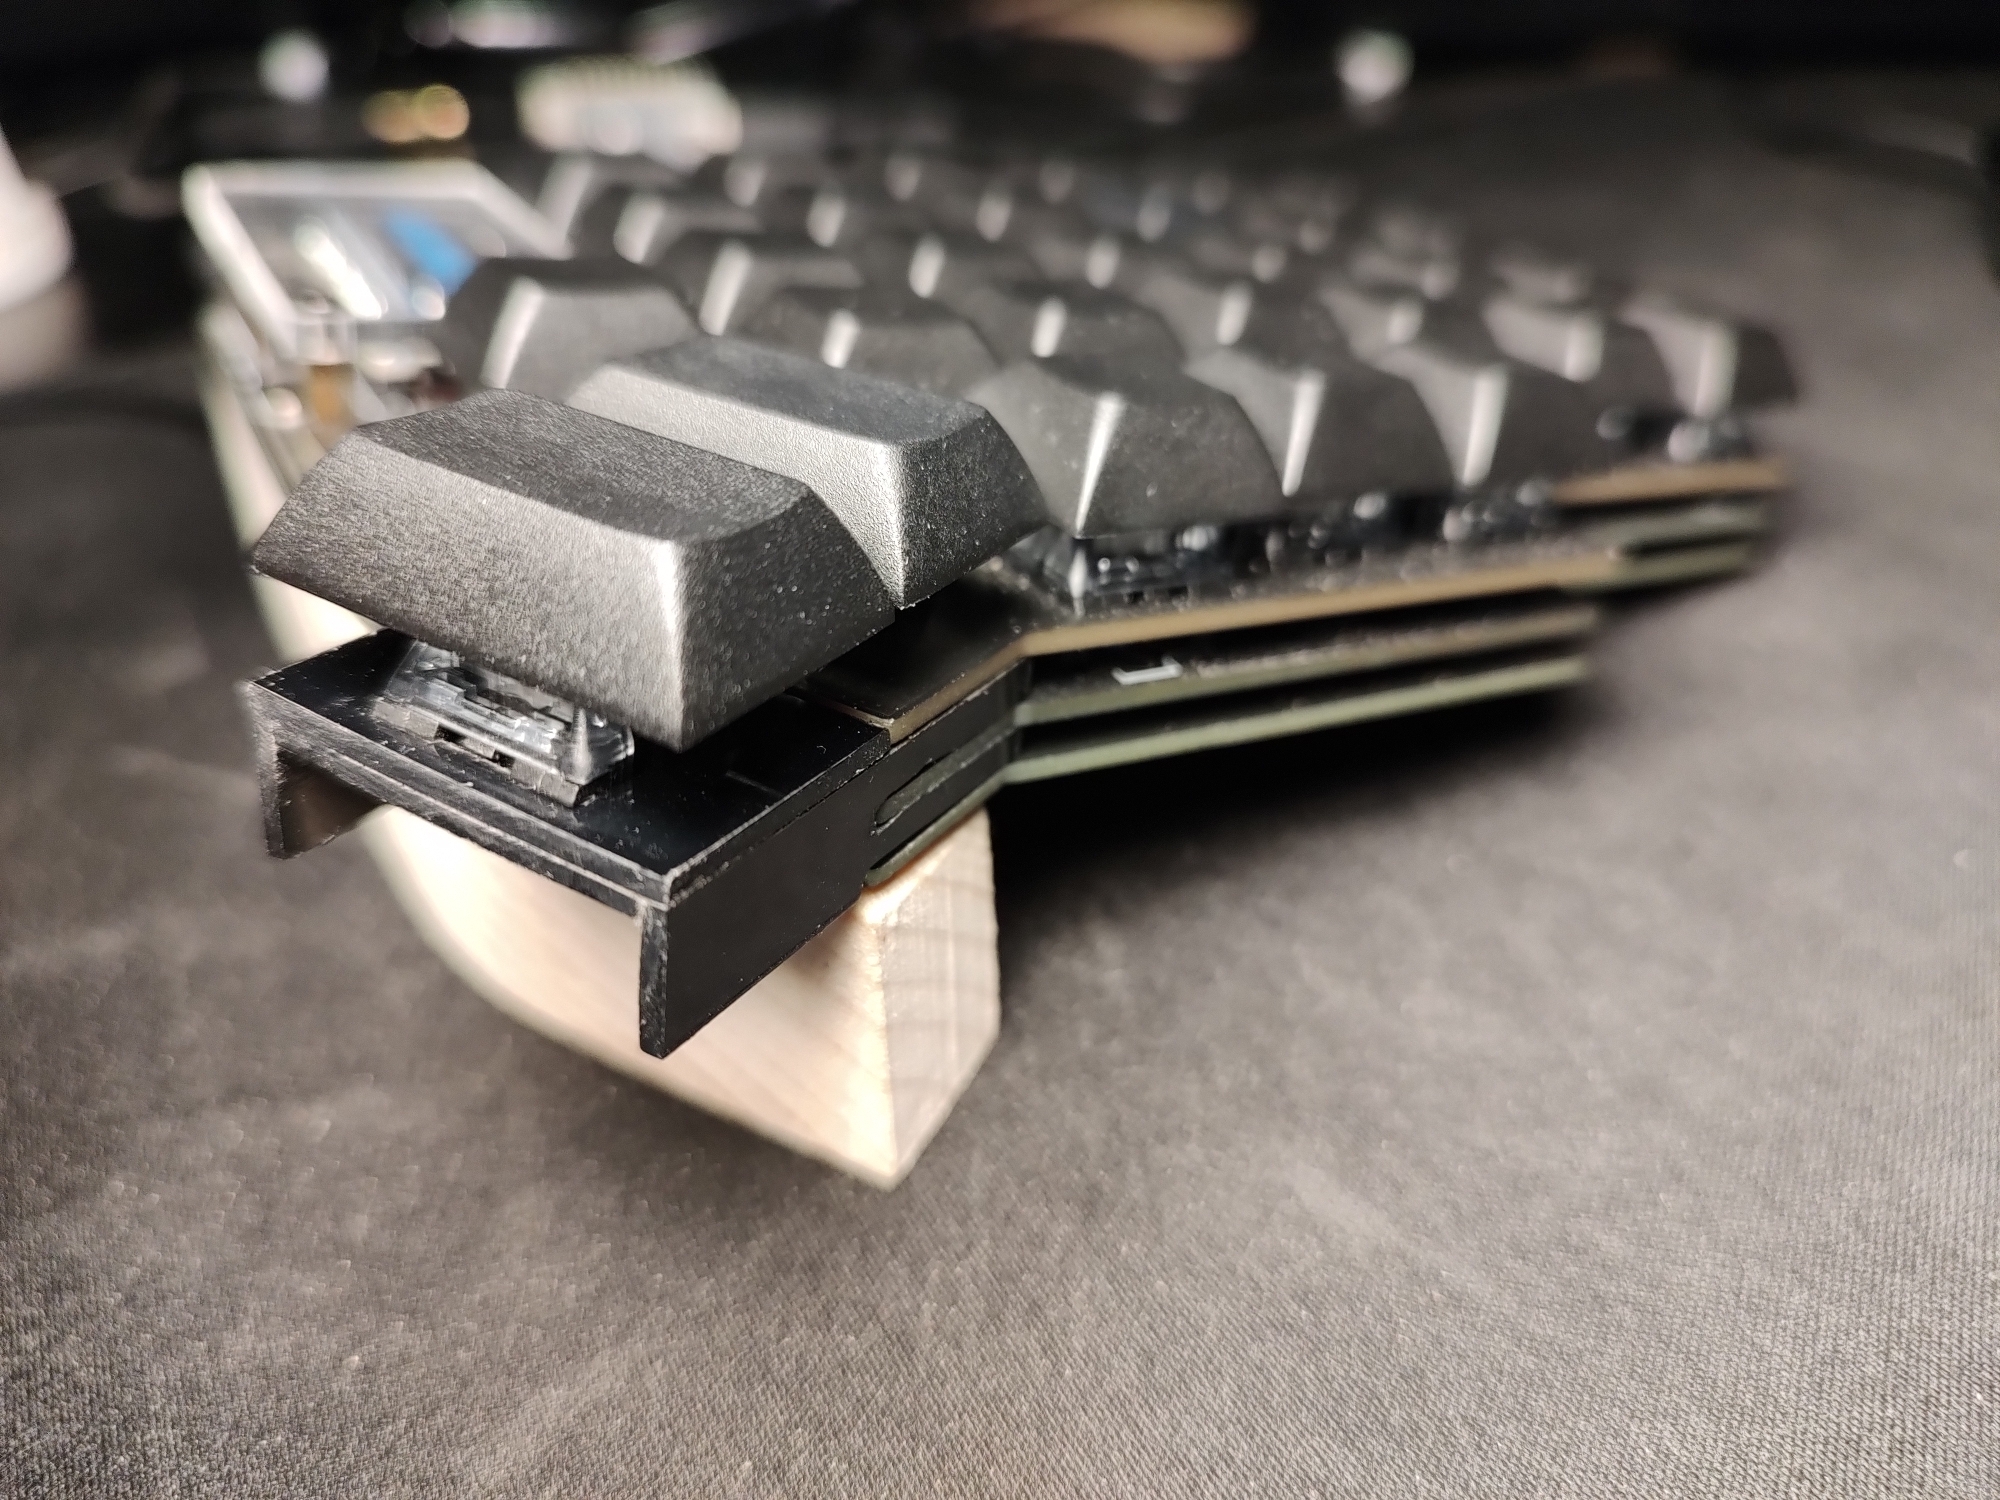
Sorry for the crap photos - I just wanted to share these extra keys I added to my Lily58.

I noticed there was a gap in the matrix so I tacked a spare hot-swap socket to the pads on the back of the PCB. That worked with minimal modification to my QMK set-up. I couldn't really use it dangling off some wires so I set out to make an extension that would slot in and be retained by one of the standoffs. I don't have a laser cutter or 3D printer so I just hacked these out of a sheet of ABS plastic following a printed template and glued them up. They're nice and solid and line up really well, despite being rather rough around some of the edges.

I'm finding the 1.5U keys a bit confusing at the moment, swapping them out for 1U keys makes it a bit easier to home my thumbs. These are certainly much easier to access than the outermost keys on the lower row or the keys below the display. I'm thinking they need to be called Lily Pads.

16


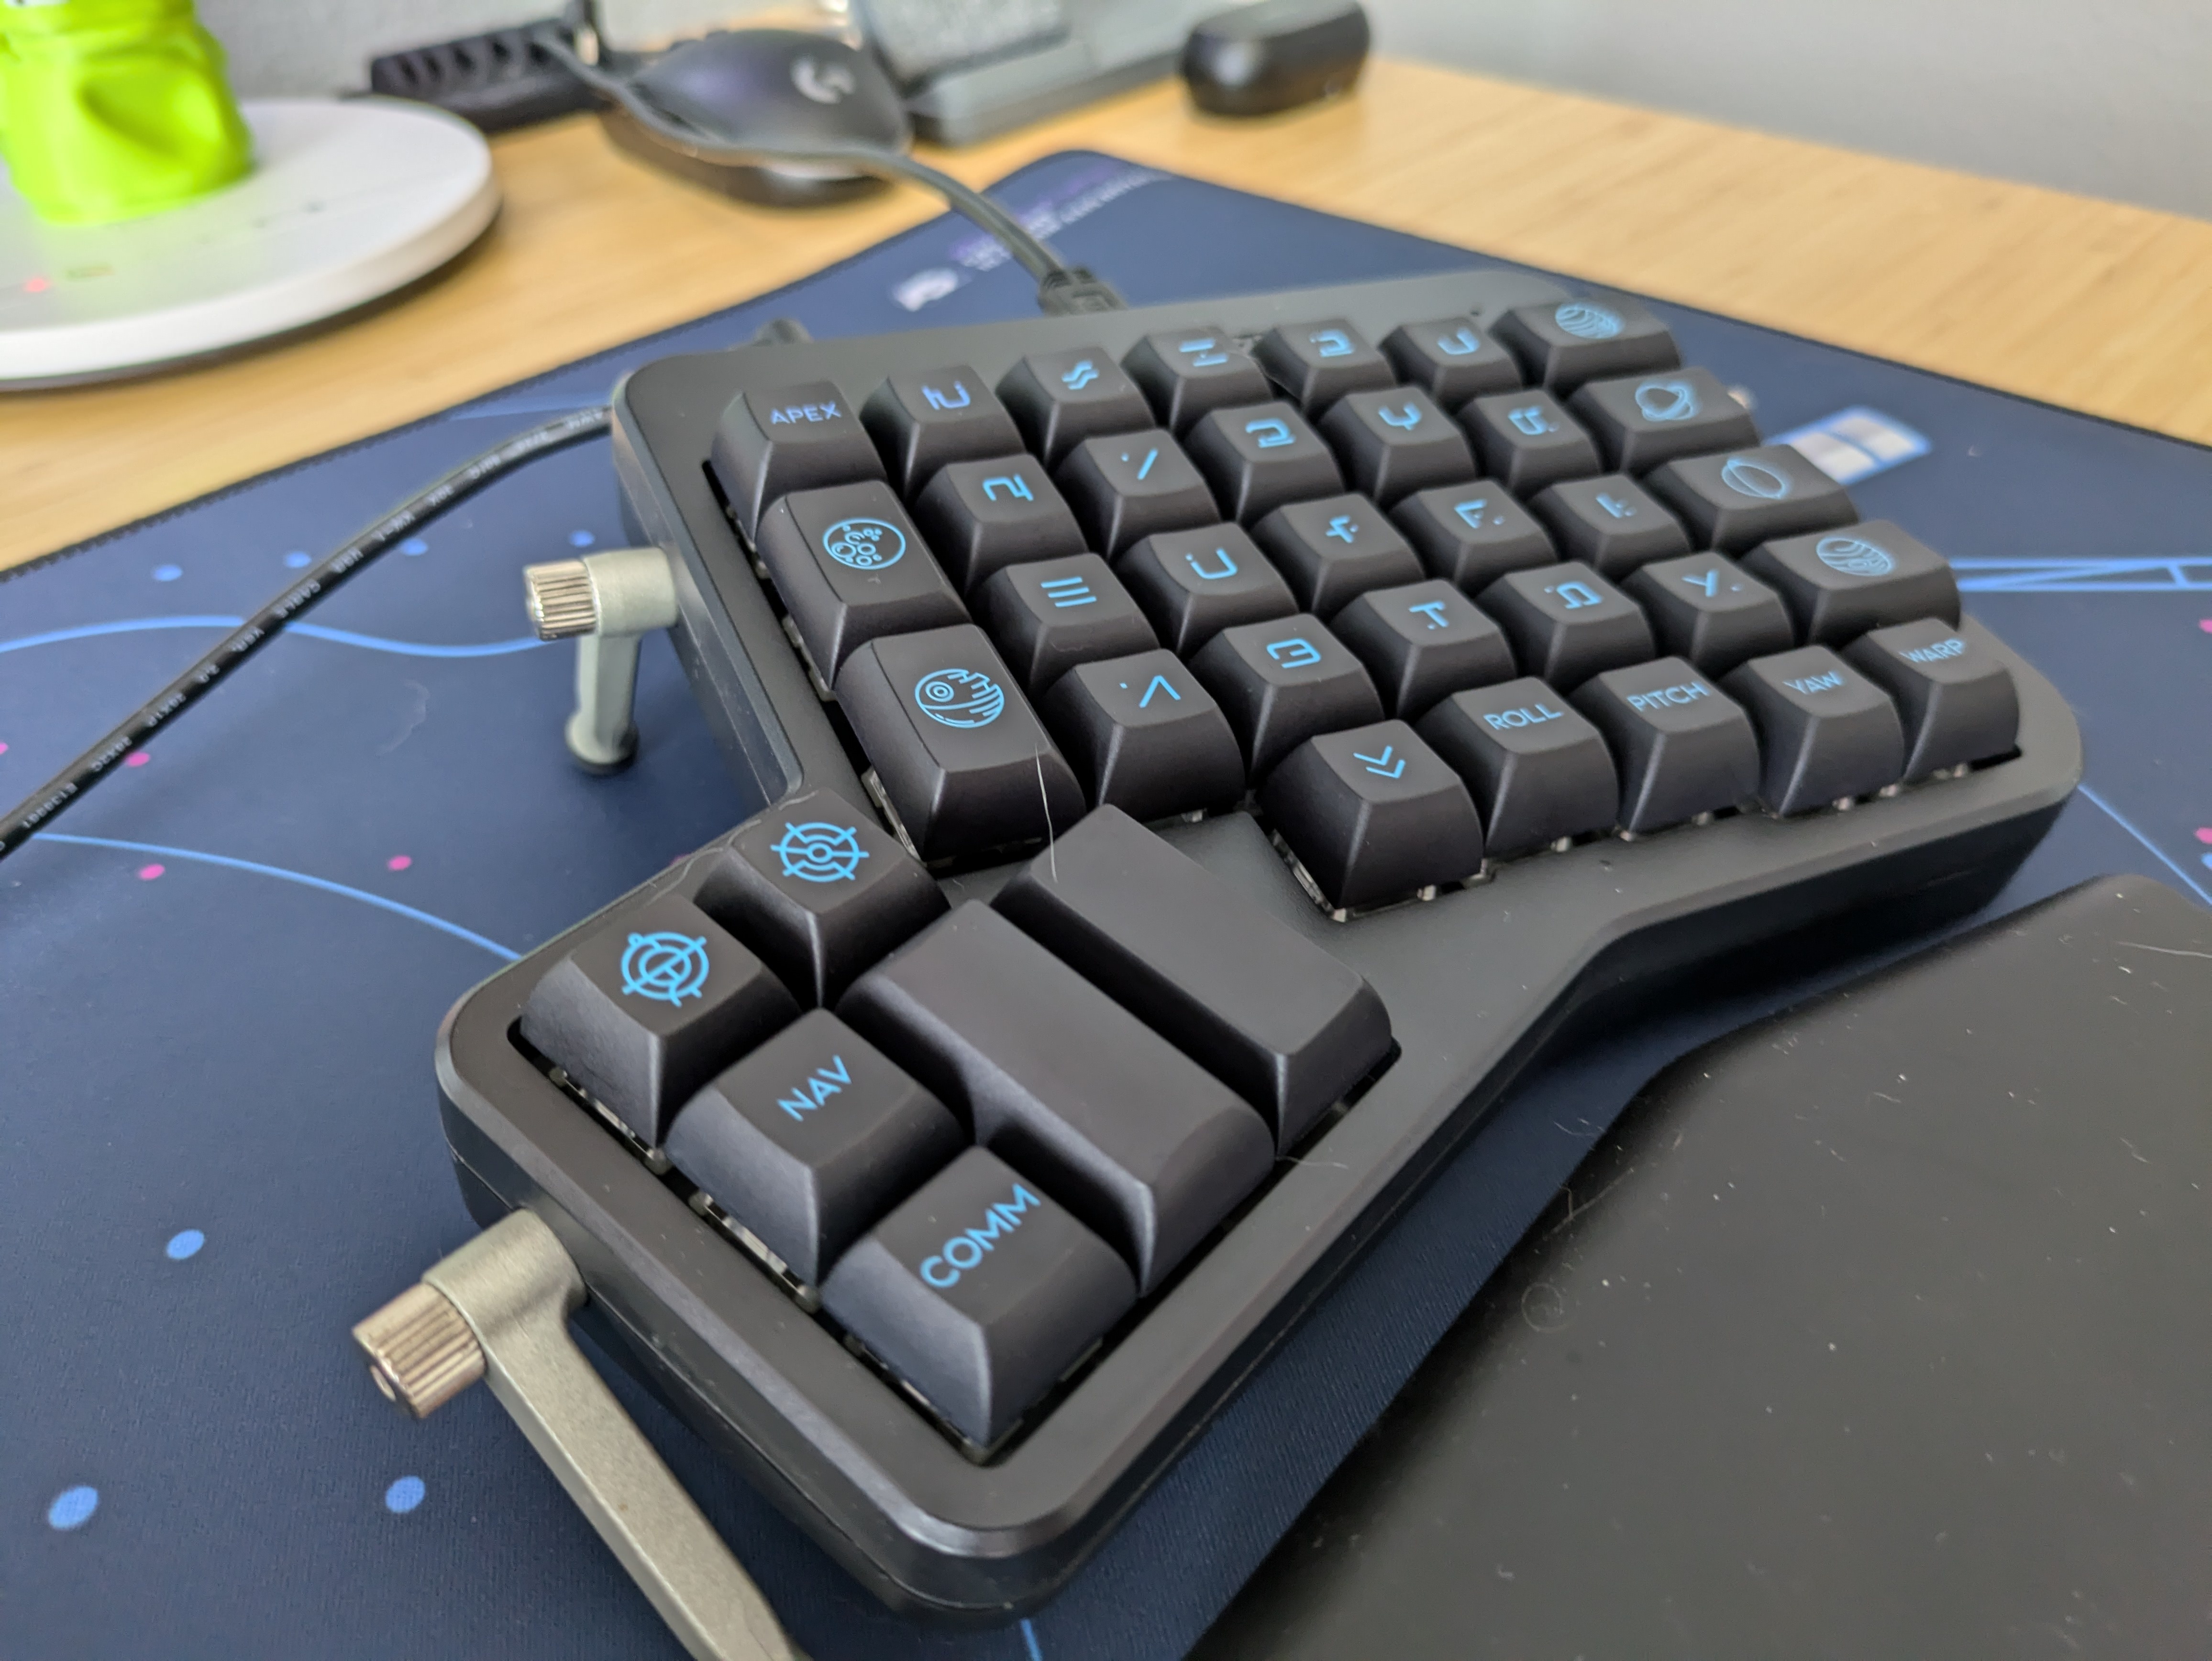
Hi all, I recently got into the world of ergo mech by borrowing a friend's old Iris v2, and I really love how powerful and customizable things can be with QMK firmware.

Recently, my old n52te has started to show signs of age after a dozen or so years of abuse. If you're not familiar, they look like this:

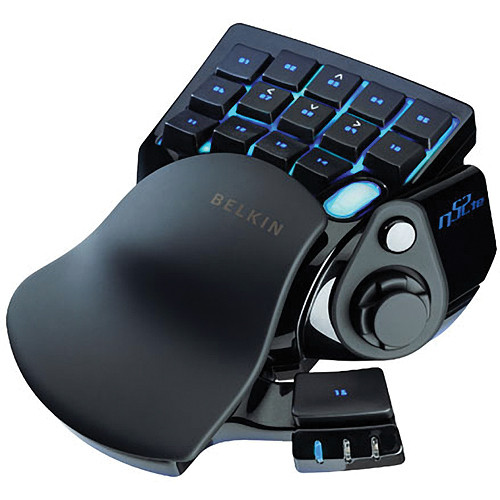
There's definitely stuff that could be improved on--just being able to build your own firmware for it would be amazing. Having one or two more thumb buttons for layers would be sweet as well.

The community of ergo mech keyboard builders are doing some super cool things with 3d printed builds and all kinds of neat stuff. Since I've just been dipping my toes in, my question is: does anyone know of any good replacements for my n52te? Is this something anyone has tried tinkering around with?

Thanks!

17


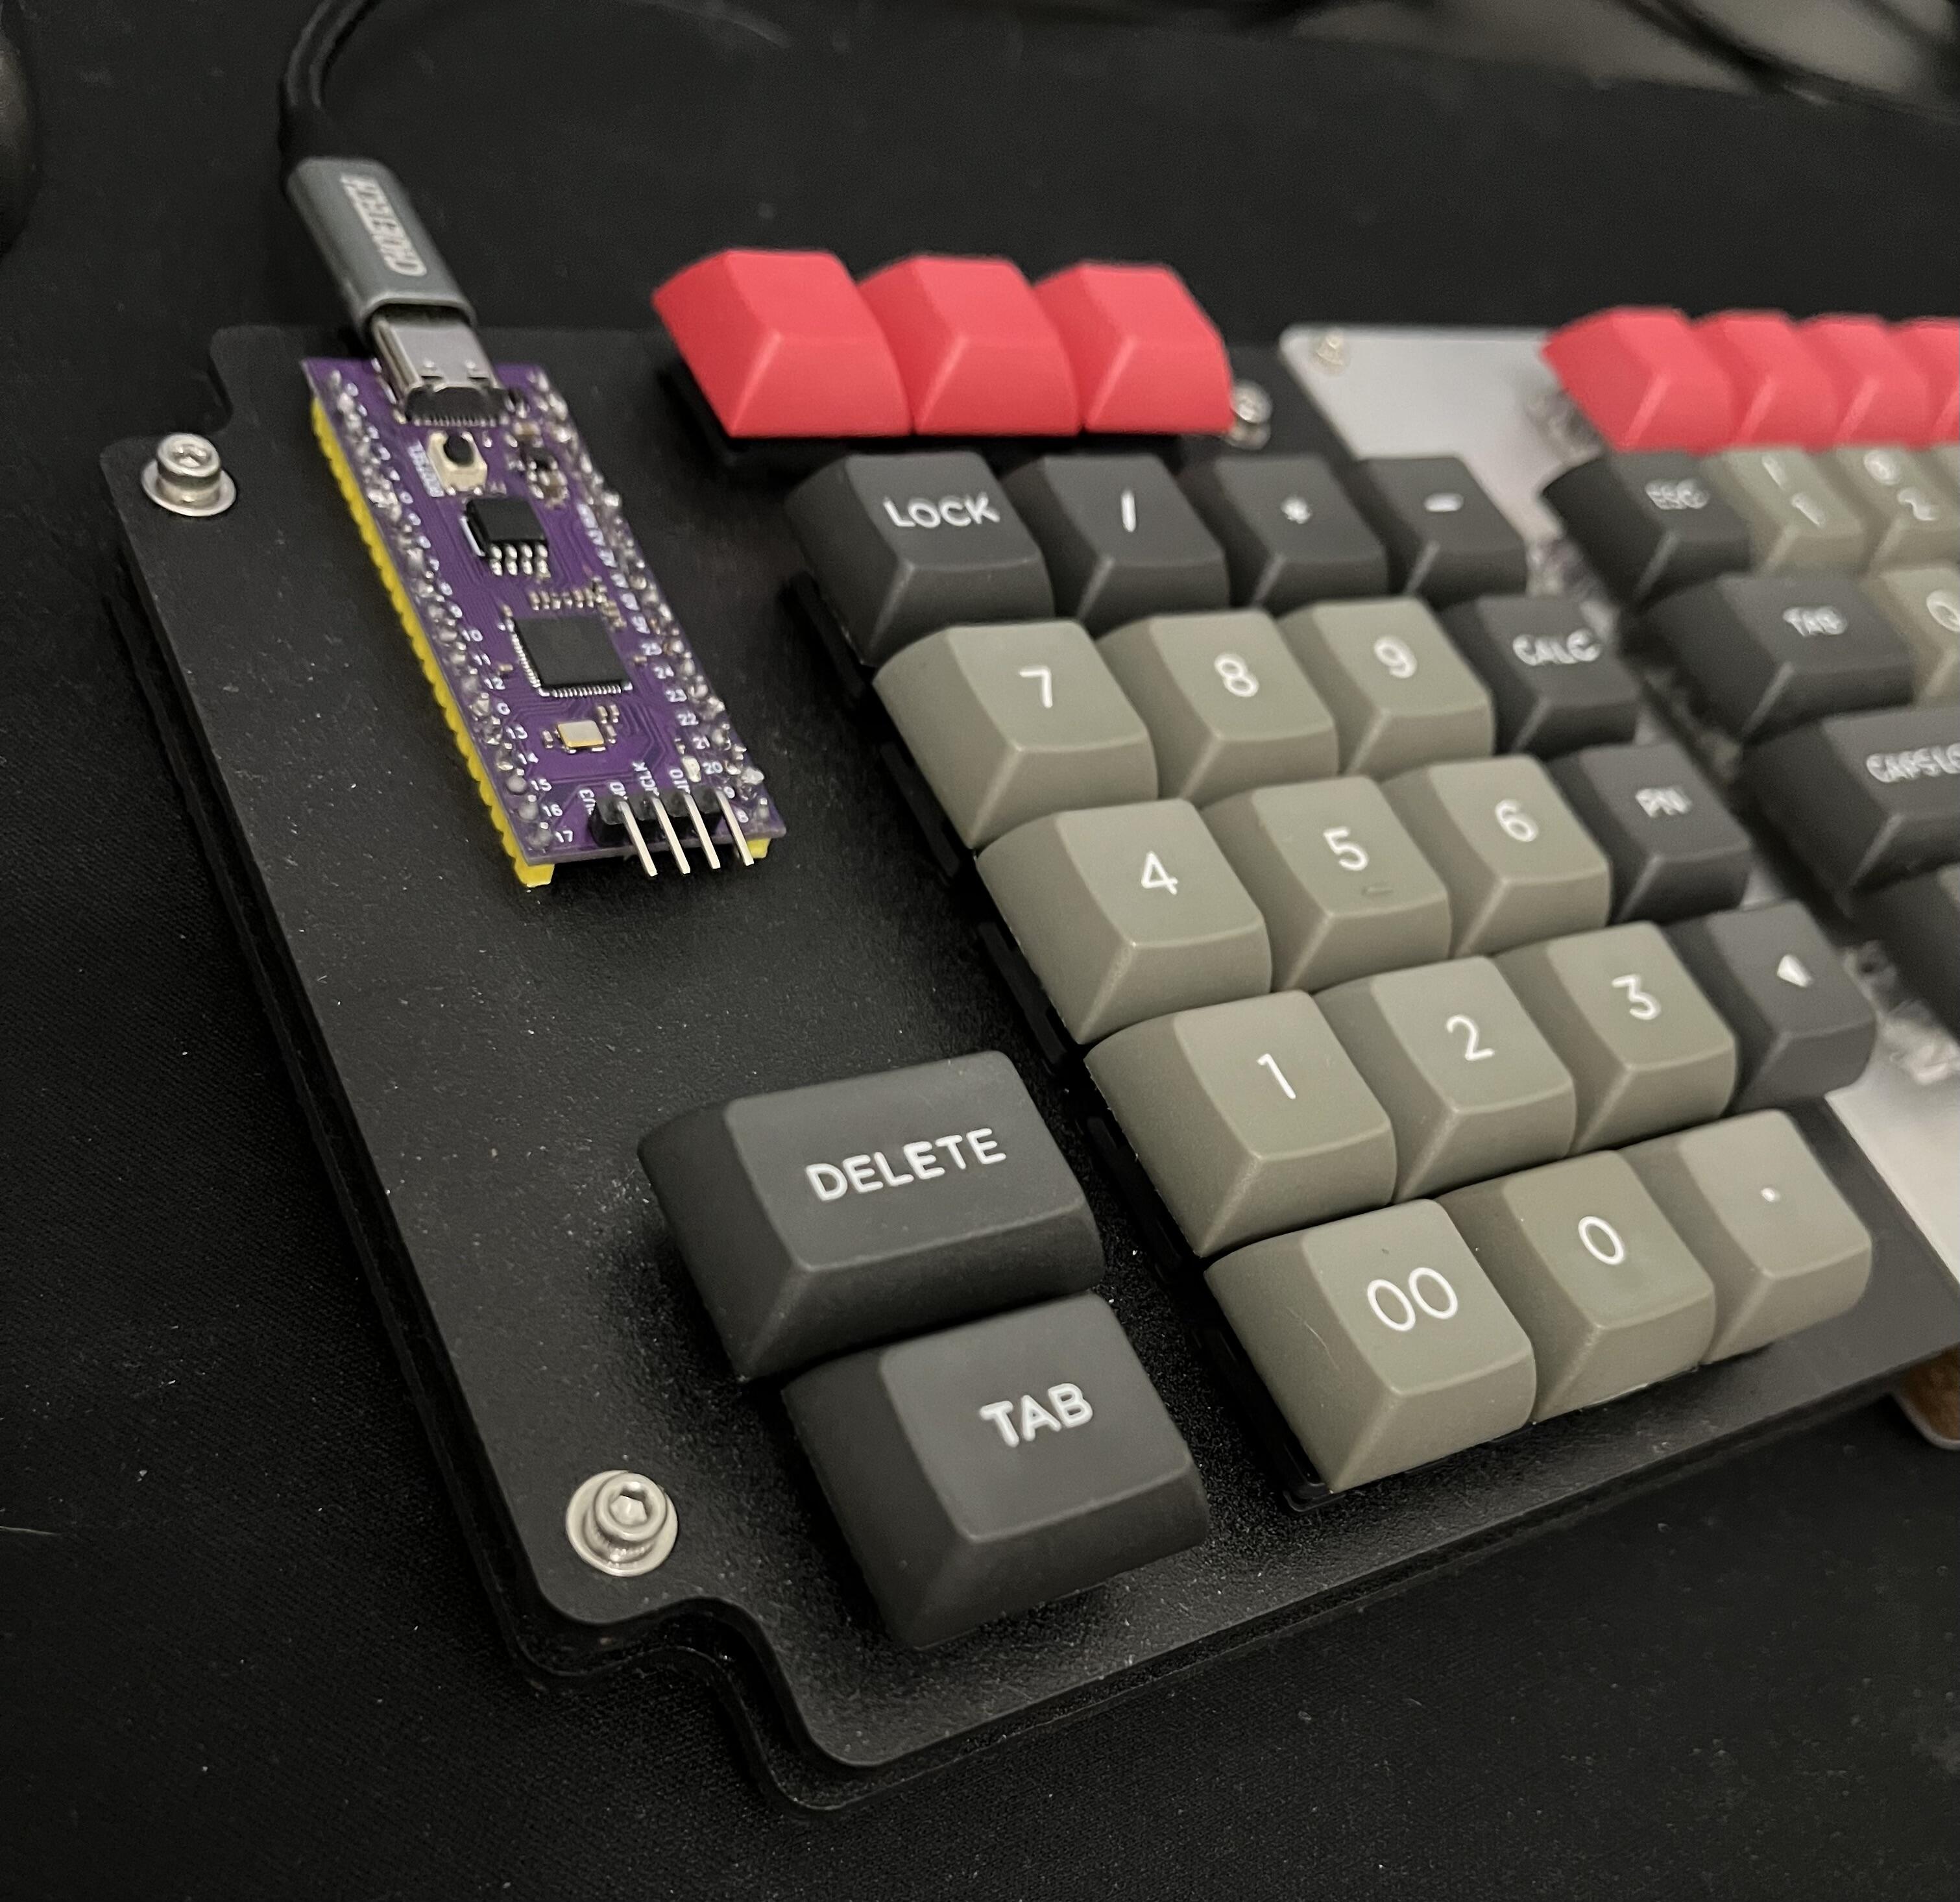
The primary motivation behind v2 was to simplify the build process by ditching the XIAO/Shift Register for an integrated STM32 microprocessor. The only parts that need soldered are the hot swap sockets.

Features

  • 36 key unibody split
  • Choc spaced, column staggered, splayed
  • Cirque touchpad support
  • Integrated microprocessor
  • Built in mounting standoffs
  • Preflashed with VIAL

Kits include all required hardware except switches, keycaps and case.

Base Kit - $50

Cirque Kit - $65

Printed Cases are available in every color - as long as the color is purple or black.

Black ABS - $35

Purple ABS - $35

Purple Sparkle PLA - $25

Matte Black PLA - $25

18


So, I figured y'all would be the best people to ask. I make fairly traditional row-staggered hand-wires, but I like them to be stabilizer-free, due to my home tooling limitations and a realization that they work fine. They also avoid one of the biggest pet peeves across the various niches of keyboard people. What is the easiest and cheapest way to come by a handful of convex keycaps at 1.75u and under, to use as spacebars? I can make a lot of different combinations work, so "mix kits" in Cherry or MDA or XDA seem the most likely to be useful, but I'm not sure.

With the sole exception of the Enter key (which at 1.75u will need to be labeled CapsLock or Control for most keycap sets), most keys can be sourced by being a little careful with which sets you get, even in sculpted profiles. Numpads require a bit of care too, as many don't have the two to occupy a "split plus", but they'll usually have something usable for that, as well as a shrunken Enter.

I can find blank keycaps easy enough, and they work pretty well for XDA, but other profiles can get a little uncomfortable on the thumb, and only some benefit from being turned around.

19
 
 
20


We're a mechanical keyboard shop that's specialize in aluminum case for ergomech.

The Sofle v2 with aluminum case is one of my proudest builds and here is the link so you can have a look and if you are interested, you can snatch one for yourself: https://ergomech.store/shop/sofle-v2-enclose-case-16

If you like some blinking, then here is the Sofle RGB for you: https://ergomech.store/shop/sofle-rgb-enclose-case-13

If you like it small, then we got you covered with the Corne: https://ergomech.store/shop/corne-cherry-aluminum-version-early-bird-419

Those are the most popular open source keyboard designs that we've seen, but how about something that only we have?

Sofle Hybrid: https://ergomech.store/shop/sofle-hybrid-aluminum-version-exclusive-403

Neodox: https://ergomech.store/shop/neodewtco-neodox-enclosed-case-version-exclusive-52

As you can see, we got you covered from the smallest to the largest boards.

Oh one last things, we in Vietnam is celebrating Labor Day on the first of May, and to share this with you guys, we're having 15% discount when you use this code: LABORDAY

21


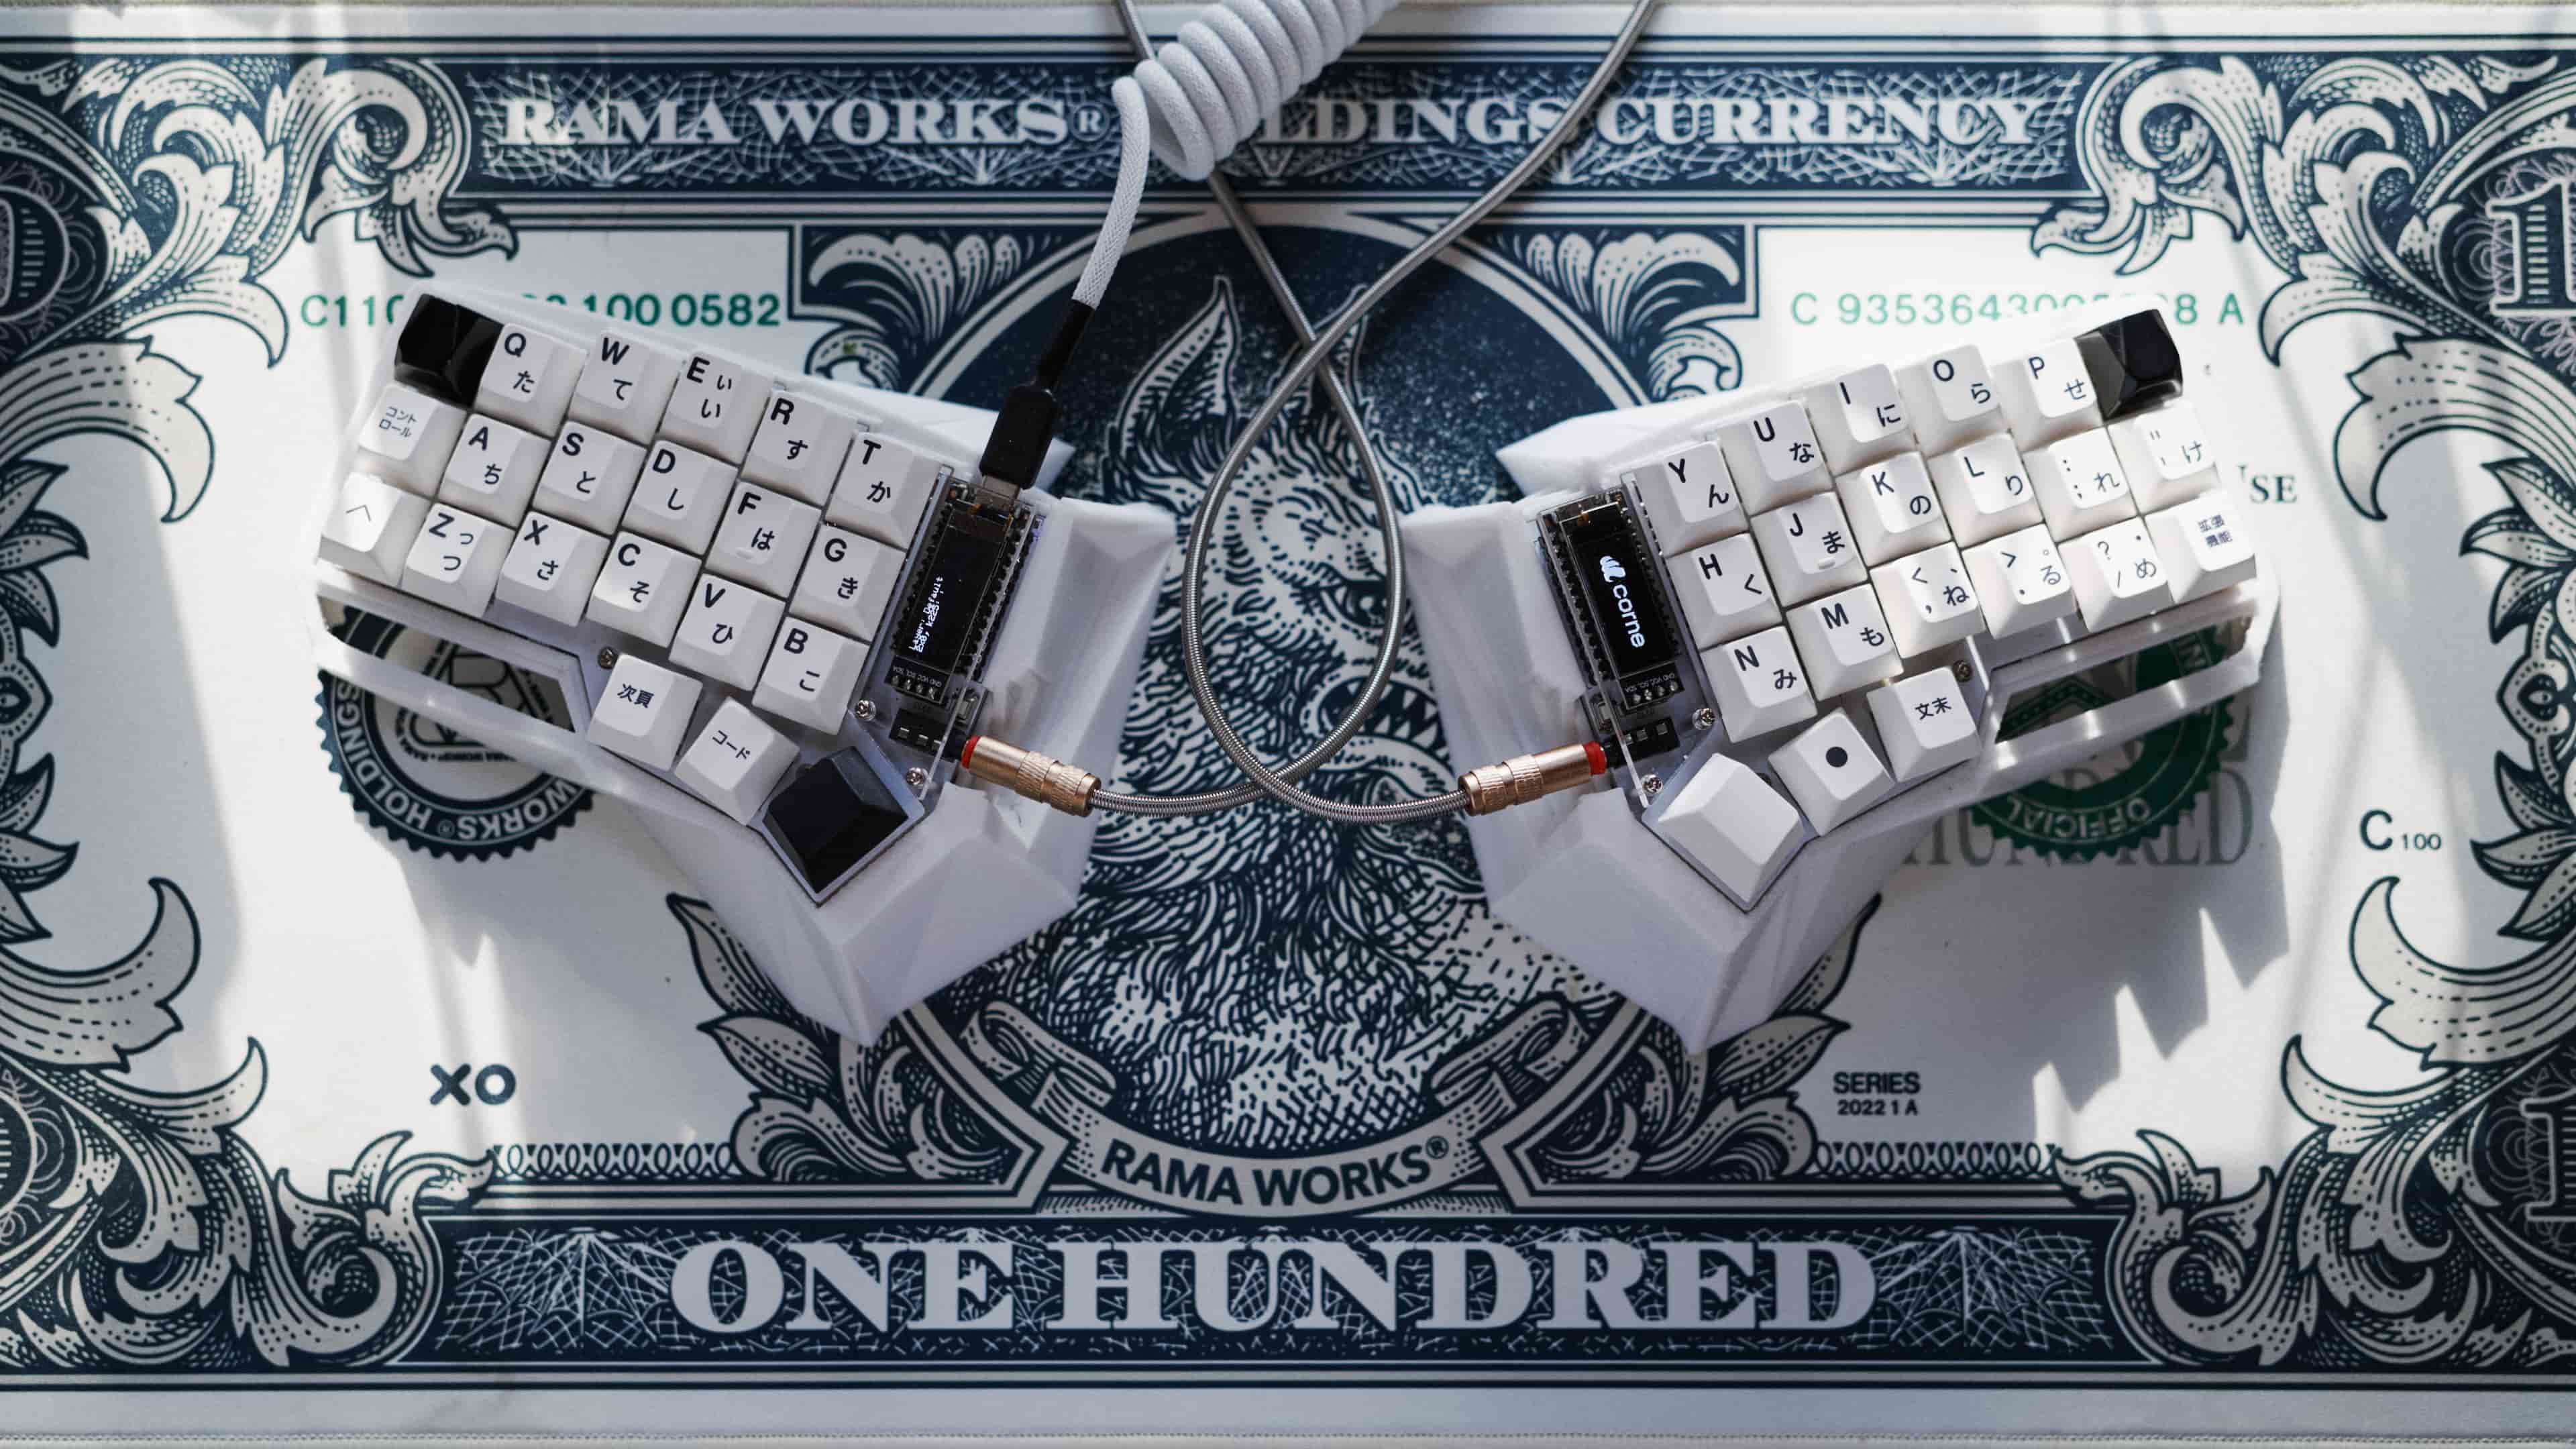
open source, files on Codeberg

this was a big learning experience, first time doing a proper PCB instead of using yet another Pro Micro equivalent – this would not have been possible without Noah Kiser’s tutorials on Youtube, all the work that went into QMK and Vial, and the ease of JLC’s assembly service (no way I was ever going to solder an RP2040)

shocked and giddy with how easy the whole process was – plugged in the fresh PCB and it went straight into bootloader mode – uploaded the *.uf2 and it worked first time!

  • symmetric split-ergo style layout (6 × 3 + 3)
  • katana stagger
    • personally find this works really nicely and keeps the feel of an ortho or columnar board
  • fits into Minivan case (12.75u × 4u)
  • attempt to use as many existing mounting holes as possible (6/7)
    • main issue was maintaining symmetric layout with two mounting points in bottom row
    • personally find the resulting odd gap to be uncomfortable
    • if I do an update, I would remove the awkward spacing and slide the whole bottom row to the left a smidge (resulting in an uncomfortably-asymmetric symmetric layout)
  • learning to use JLC’s PCB assembly instead of a Pro Micro equivalent
  • providing a proper Vial firmware
    • (default layout is based off Reviung41 layout)
22
24
submitted 2 months ago* (last edited 2 months ago) by wjrii to c/ergomechkeyboards


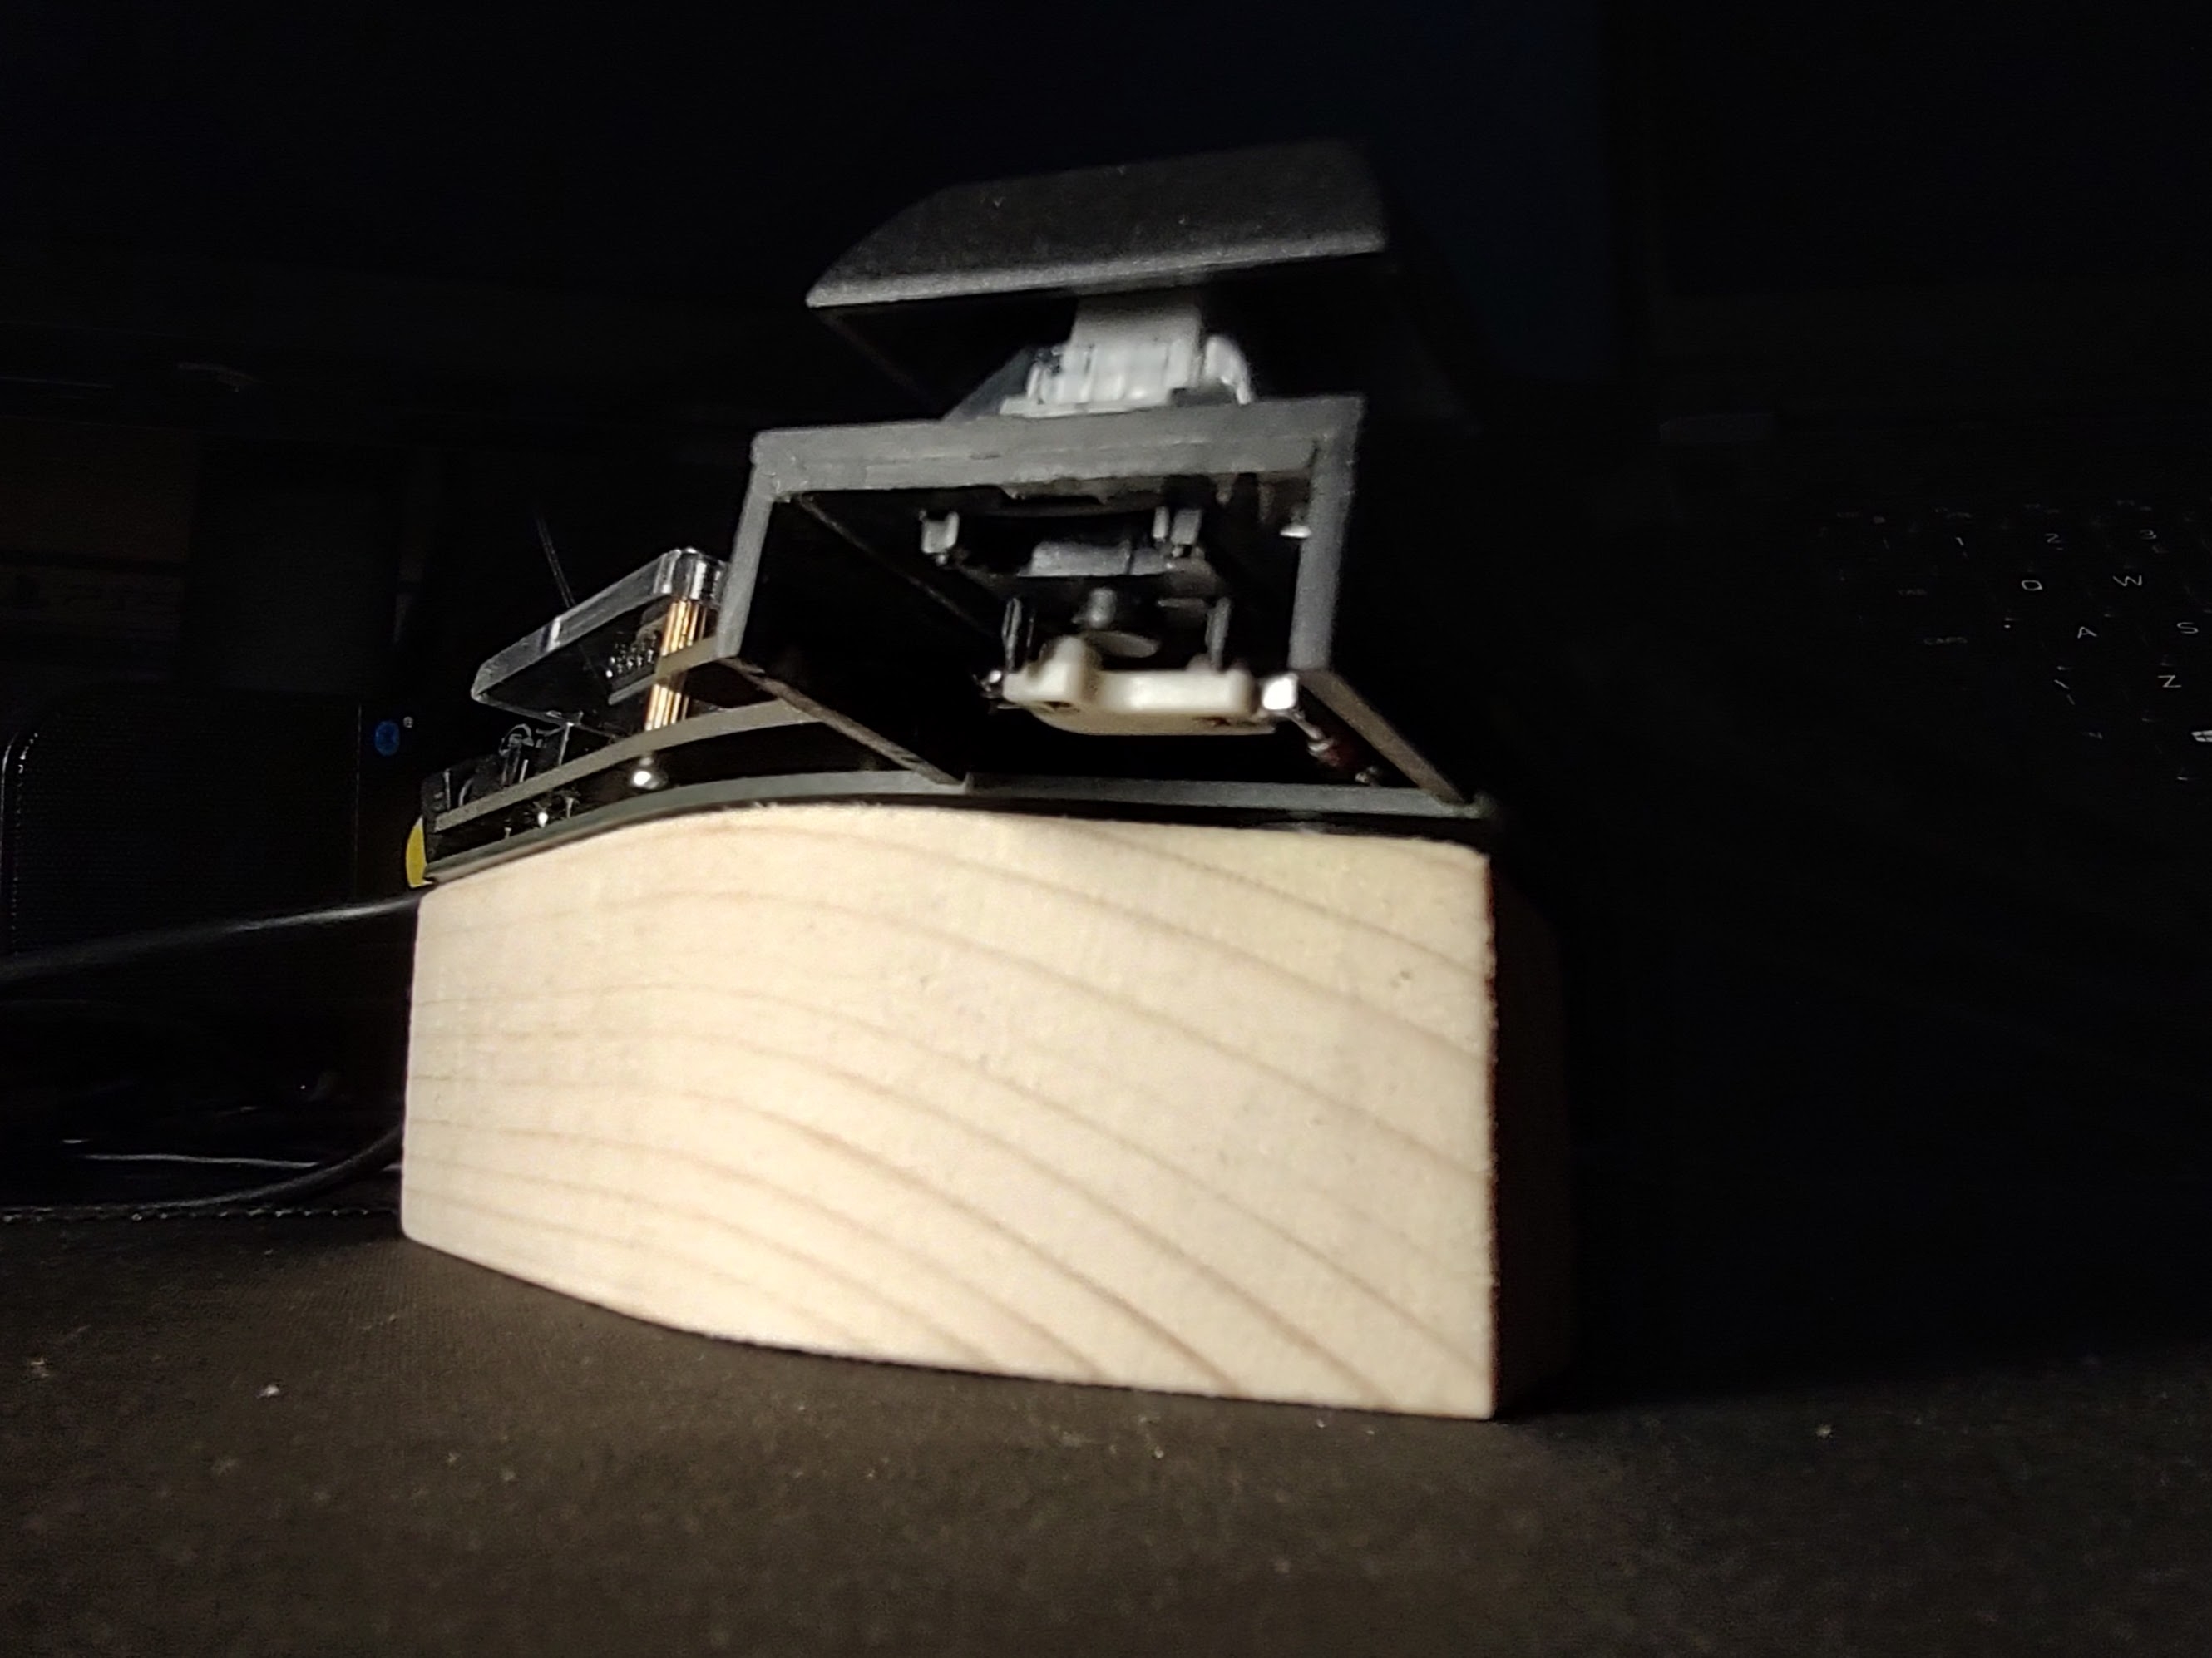
Okay, it's a numpad. However, if you happen to have access to a gantry-mounted diode laser engraver, it should be able to cut through cheap and readily available 3mm Masonite without much trouble (my 5w Comgrow took two passes). A couple of coats of textured spray paint gives a surprisingly nice finish, and mounting the MCU on top left me with a 12mm thickness for the main body, not counting the MCU and before feet, switches, and keycaps. This numpad came in at about 30mm "desk to finger" with no additional efforts to keep it low profile. I'm not doing anything new here, just confirming that it doesn't have to be insanely difficult or expensive to do a DIY ortho-split.

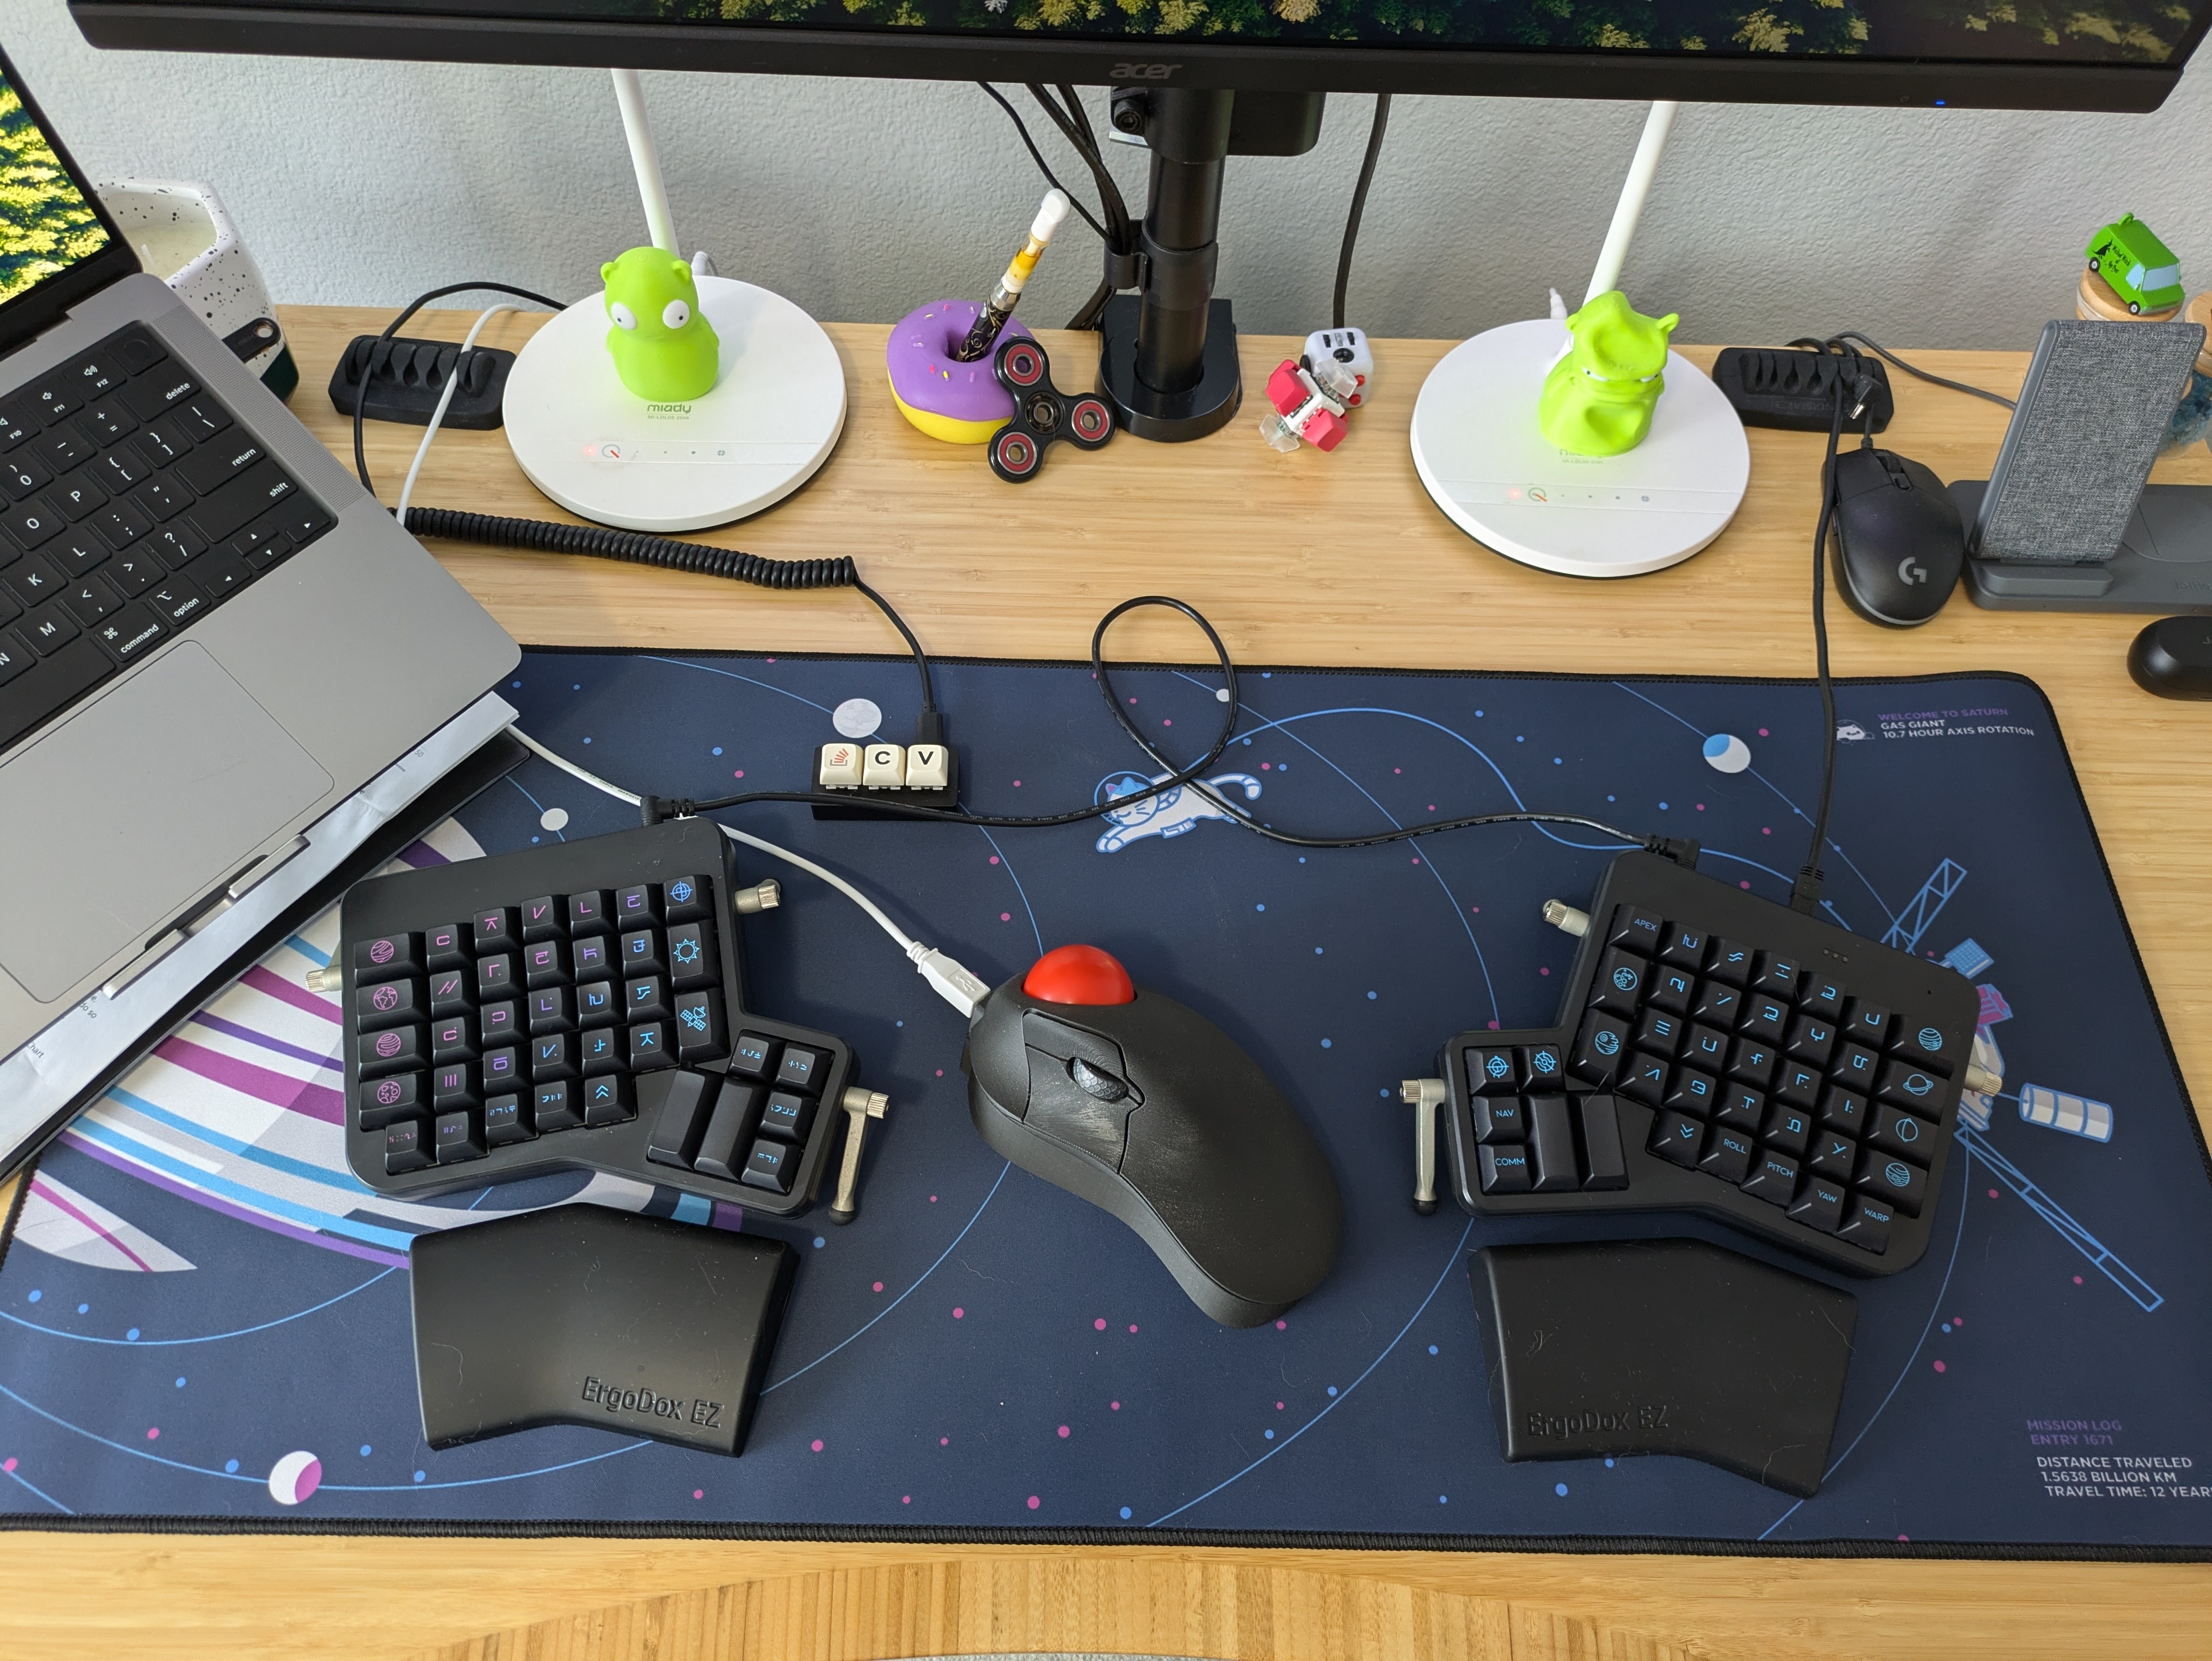
I don't have any RSI issues right now, nor am I particularly motivated to change how I type, but ergo mechs are one of my favorite parts of the hobby to follow, and I even made a pretty rough one once. As an aside, I gotta stop taking oversaturated iphone pictures in the office I share with a dander-factory of a cocaktiel. I look like 37% grosser than I really am.

23


Howdy!

I have a keeb.io cepstrum split board that I'd like to travel with when I head into the office. Anybody have good experiences with a carrying case they could recommend? My cepstrum is 8 inches / 20.5 cm by 4.5 inches / 11 cm for reference.

24
25


This one pushed the limits. It's a little over-the-top for a wireless build but it's alive and thocking.

This is a 4x6 whole matrix Dactyl Manuform. The case is printed in translucent smoke resin with an acrylic coating.

It's fully wireless running some of the latest ZMK features. Here's the list:

  • Trackball support with a PMW3610 sensor utilizing inorichi's new driver and the in-development pointing device setup (it's imminent). It has precision and drag scroll modes enabled on Raise and Lower layers.
  • Two Nice!View screens running their standard ZMK widgets -- battery status, connection status, WPM graph, device connection, and current layer.
  • Both standard EC11 and wheel-style EVQWGD001 rotary encoders. Volume up/down, page scrolling, and RGB controls on Raise.
  • Full hardware per-key RGB running ZMK's Underglow configuration. (ZMK doesn't yet support true per-key RGB.)
  • Four layers with support for the Nick Coutsos' ZMK keymap layer editor

It's all running on a pair of PillBug nRF52840 controllers from MechWild and powered by a couple of thick 18650 LiPo batteries. I used Skree Claw flexible PCBs from TheBigSkree for the right and left key matrices which worked out really nicely using his Translator breakout.

Oh, and those are Kailh Purple Pro switches, if you were curious.

It's a lot. It's pushing and/or exceeding the limits feature-wise, power-wise, pin-wise, and memory-wise. But it's alive. The right side PillBug is very nearly maxed out. There were foibles along the way and one or two (or ten) bang-head-on-desk moments, but it all came off in the end.

So.

We're having a light snack of a sale this weekend to celebrate the success of this build. Get 5% off any order with code WYLD_LIGHT_SNACK. Ends midnight, March 31st.

Full Dactyl Manuform Builds (wired and wireless) https://wylderbuilds.com/shop/p/dactyl-manuform-build

DIY Dactyl Manuform Build Kit https://wylderbuilds.com/shop/p/manuform-diy-kit

Resin Dactyl Manuform Case Prints https://wylderbuilds.com/shop/p/dactyl-manuform-resin-print

PLA Dactyl Manuform Case Prints https://wylderbuilds.com/shop/p/made-to-order-dactyl-manuform-cases

If you'd like to try a Dactyl Manuform case on for size, we sell "sizing prints" of our C stock keyboard cases so you can actually try a case in hand to gauge how it feels.

https://wylderbuilds.com/shop/p/hand-size-print

Cheers!

Andy @ Wylderbuilds

view more: next ›