Jamin

joined 1 year ago
MODERATOR OF
 

Chinese PC manufacturer CWWK has released an interesting Mini PC design that mainly seems to be composed of an elevated heatsink and a sideways, open PCIe x8 slot. The CWWK Mini PC, spotted by Liliputing, is dubbed the "Magic PC" by its maker and has garnered attention for its unique design.

Of note before proceeding is that the gap created by the stand at the bottom is the only protection provided for the motherboard beneath the heatsink, and of course, any PCIe extensions will also need to live in the open air. You'll want to take some precautions with your setup and environment if you plan on running just about anything this way. Liliputing recommends the usage of some kind of stand beneath any expansion cards you mount to this thing, and we agree with that assessment.

That said, the device certainly looks pretty unique and could end up turning out to be a fun pet project. It comes in Green, Black, and Blue color variations. You can also choose to buy it in a "barebones" configuration with just the chassis, motherboard, and CPU, if you have your own compatible RAM/storage/etc to use with it.

Additionally, you have three Intel 12th Gen Alder Lake CPUs to pick from (relevant AliExpress listings linked below):

RECOMMENDED VIDEOS FOR YOU... Intel N100 CPU — Starts at $214 for a barebones kit. The N100 is a 4-core, 4-thread 12th Gen CPU with a TDP of 6 Watts and a max clock of 3.4 GHz. Intel N200 CPU — Starts at $261 for a barebones kit. The N200 is a 4-core, 4-thread 12th Gen CPU with a TDP of 6 Watts and a max clock of 3.7 GHz. Intel Core i3-N305 CPU — Starts at $320 for a barebones kit. The Core i3-N305 is an 8-core, 8-thread 12th Gen CPU with a TDP of 15 Watts and a max clock of 3.8 GHz. As far as other specs go, the CWWK Magic Computer can be outfitted with up to 2TB SSD storage and up to 32GB of DDR4 RAM. The maximum RAM speed supported by any of the CPUs listed above is 4,800 MT/s, though the board itself apparently supports up to 5,600 MT/s.

If a mini PC design like this interests you, we recommend checking out the original listing. Beyond the details we've discussed here, there are some nifty graphics included showing different ways to use the PCIe slot, as well as an optional fan attachment for those who don't trust passive cooling like that.

Before you get too ambitious with this one, though, be mindful that that PCIe slot everyone's been talking about is only a PCIe Gen 3 x8 slot... restricted to x4 bandwidth. If you want to go mad with power and plug a GPU into this one, be sure that it's still a low-power design that can function on x8. Just as a general rule of thumb, don't expect to play anything above 60 FPS on this, regardless of the attached GPU— the bandwidth limitations are simply too severe for most modern cards to enable high frame rates.


Asus makes gaming PCs. And Asus makes mini PCs. And now that the company has largely taken over Intel’s NUC line of compact computers, it’s bringing those two things together with the launch of the first ROG NUC compact gaming desktop.

The little computer has a 2.5 liter chassis that houses up to an Intel Core Ultra 9 Meteor Lake processor, up NVIDIA GeForce RTX 4070 graphics, and enough cooling power to allow those components to consume more power than they would in a laptop for better sustained performance.

For example the Intel Core Ultra 7 155H and Core Ultra 9 185H processors that are available in this little computer are designed to be 45-watt chips made for laptops and mini PCs. But Asus says they can run at up to 65 watts in the ROG NUC. And the company uses 115-watt NVIDIA GPUs for the little computer, but allows them to run at up to 140 watts.

The ROG NUC measures 270 x 180 x 50mm (10.6″ x 7.1″ x 2″), and features RGB lighting, because… gaming. But it also has a more console-like design than a typical business-professional 4×4 NUC system, but it’s got a reasonably flexible design: you can lay it down horizontally or prop it up vertically with the help of a stand.


MiniPCs is a community dedicated to small form-factor computers. It’s a place for enthusiasts, hobbyists, and professionals to discuss mini PCs, share builds, ask for technical advice, and stay updated on the latest in compact computing technology.

Features:

  • Showcase and reviews of mini PC.
  • Technical support and troubleshooting advice.
  • Updates on new releases and trends in mini PC technology.
  • Discussions and Q&A about mini PCs.

[email protected]

https://lemmy.world/c/minipcs

35
submitted 11 months ago* (last edited 10 months ago) by Jamin to c/minipcs
 

Welcome to MiniPCs a community focused on small form factor computing. Here, we aim to provide a supportive network for everyone interested in mini PCs - whether you're building your first system, seeking to upgrade your existing setup, or simply fascinated by compact technology.

Our Community Offers:

Support and advice for both new and experienced mini PC users.
A platform to share and discover the latest in mini PC technology.
Insightful discussions about the successes and challenges in building and using mini PCs.
A place to connect with others who share your interest in compact computing.

Community Guidelines:

Keep all posts and discussions safe for work.
Treat fellow members with kindness and respect.

We're excited to have you join us on this journey into the world of mini PCs. Whether you're here to learn, share, or connect, we look forward to your contributions and discussions.

Welcome aboard!


The MS-01 is equipped with the high-end Intel 13th Generation Core i9-13900H and Core i9-12900H processors. It provides 14 cores (6P+8E) and 20 threads, along with a 24MB L3 cache. The maximum clock speeds reach 5.4GHz and 5.0GHz, respectively.

Featuring integrated Intel Iris Xe Graphics with maximum frequencies of 1.5GHz and 1.45GHz, it delivers exceptional performance for a smooth and responsive experience.

Here are the specs: MiniWorkStation MS-01 CPU

Intel® Core™ i9-13900H

14 cores/20 threads (24M cache, up to 5.40 GHz)

Intel® Core™ i9-12900H

14 cores/20 threads (24M cache, up to 5.00 GHz) Graphics

Intel® Iris® Xe Graphics (Graphics frequency 1.5GHz/1.45GHz) Memory

DDR5-5200MHz Dual Channel (SODIMM slots x2, up to a total maximum of 64GB) SSD

M.2 2280 NVMe SSD slot (Alt U.2) (PCIe 4.0 x4) x1

M.2 2280/22110 NVMe SSD slot (PCIe 3.0 x4) x1

M.2 2280/22110 NVMe SSD slot (PCIe 3.0 x2) x1 Memory expansion

1* PCIe 4.0 x16 slot (Half-height, single-slot, supports up to PCIe 4.0 x8 speed) Wireless connectivity

M.2 2230 Wi-Fi support (Wi-Fi 6, BT5.2) Ethernet

① 10Gbps SFP+ LAN ×2

② 2.5Gbps RJ45 LAN ×2 Video output

① HDMI 2.0 (4K@60Hz) ② USB 4 (8K@30Hz) x2 (Note: Recommended cables - HDMI to HDMI / USB-C to USB-C) Audio output

HDMI x1 / 3.5mm combo jack x1 Power supply

DC 19V (including power adapter) OS

Windows 11 Home Size

196×189×48mm Peripheral interface

10G SFP+ ports x2

RJ45 2.5G Ethernet ports x2

USB3.2 Gen2 Type-A ports x2

USB3.2 Gen1 Type-A ports x2

USB2.0 Type-A ports x2

USB4 ports x2 (Alt PD)

HDMI x1

3.5mm combo jack x1

https://www.servethehome.com/minisforum-ms-01-launched-10gbe-mini-pc-first-look/


Planning on giving away most of this. For our family of three we grew way too much. Turning some of this into Salsas and a special Pico de Gallo Salsa that’s made from lemon cucumber, tomato, corn, peanut, red onions, cilantro, jalapeños, lime juice, and salt.


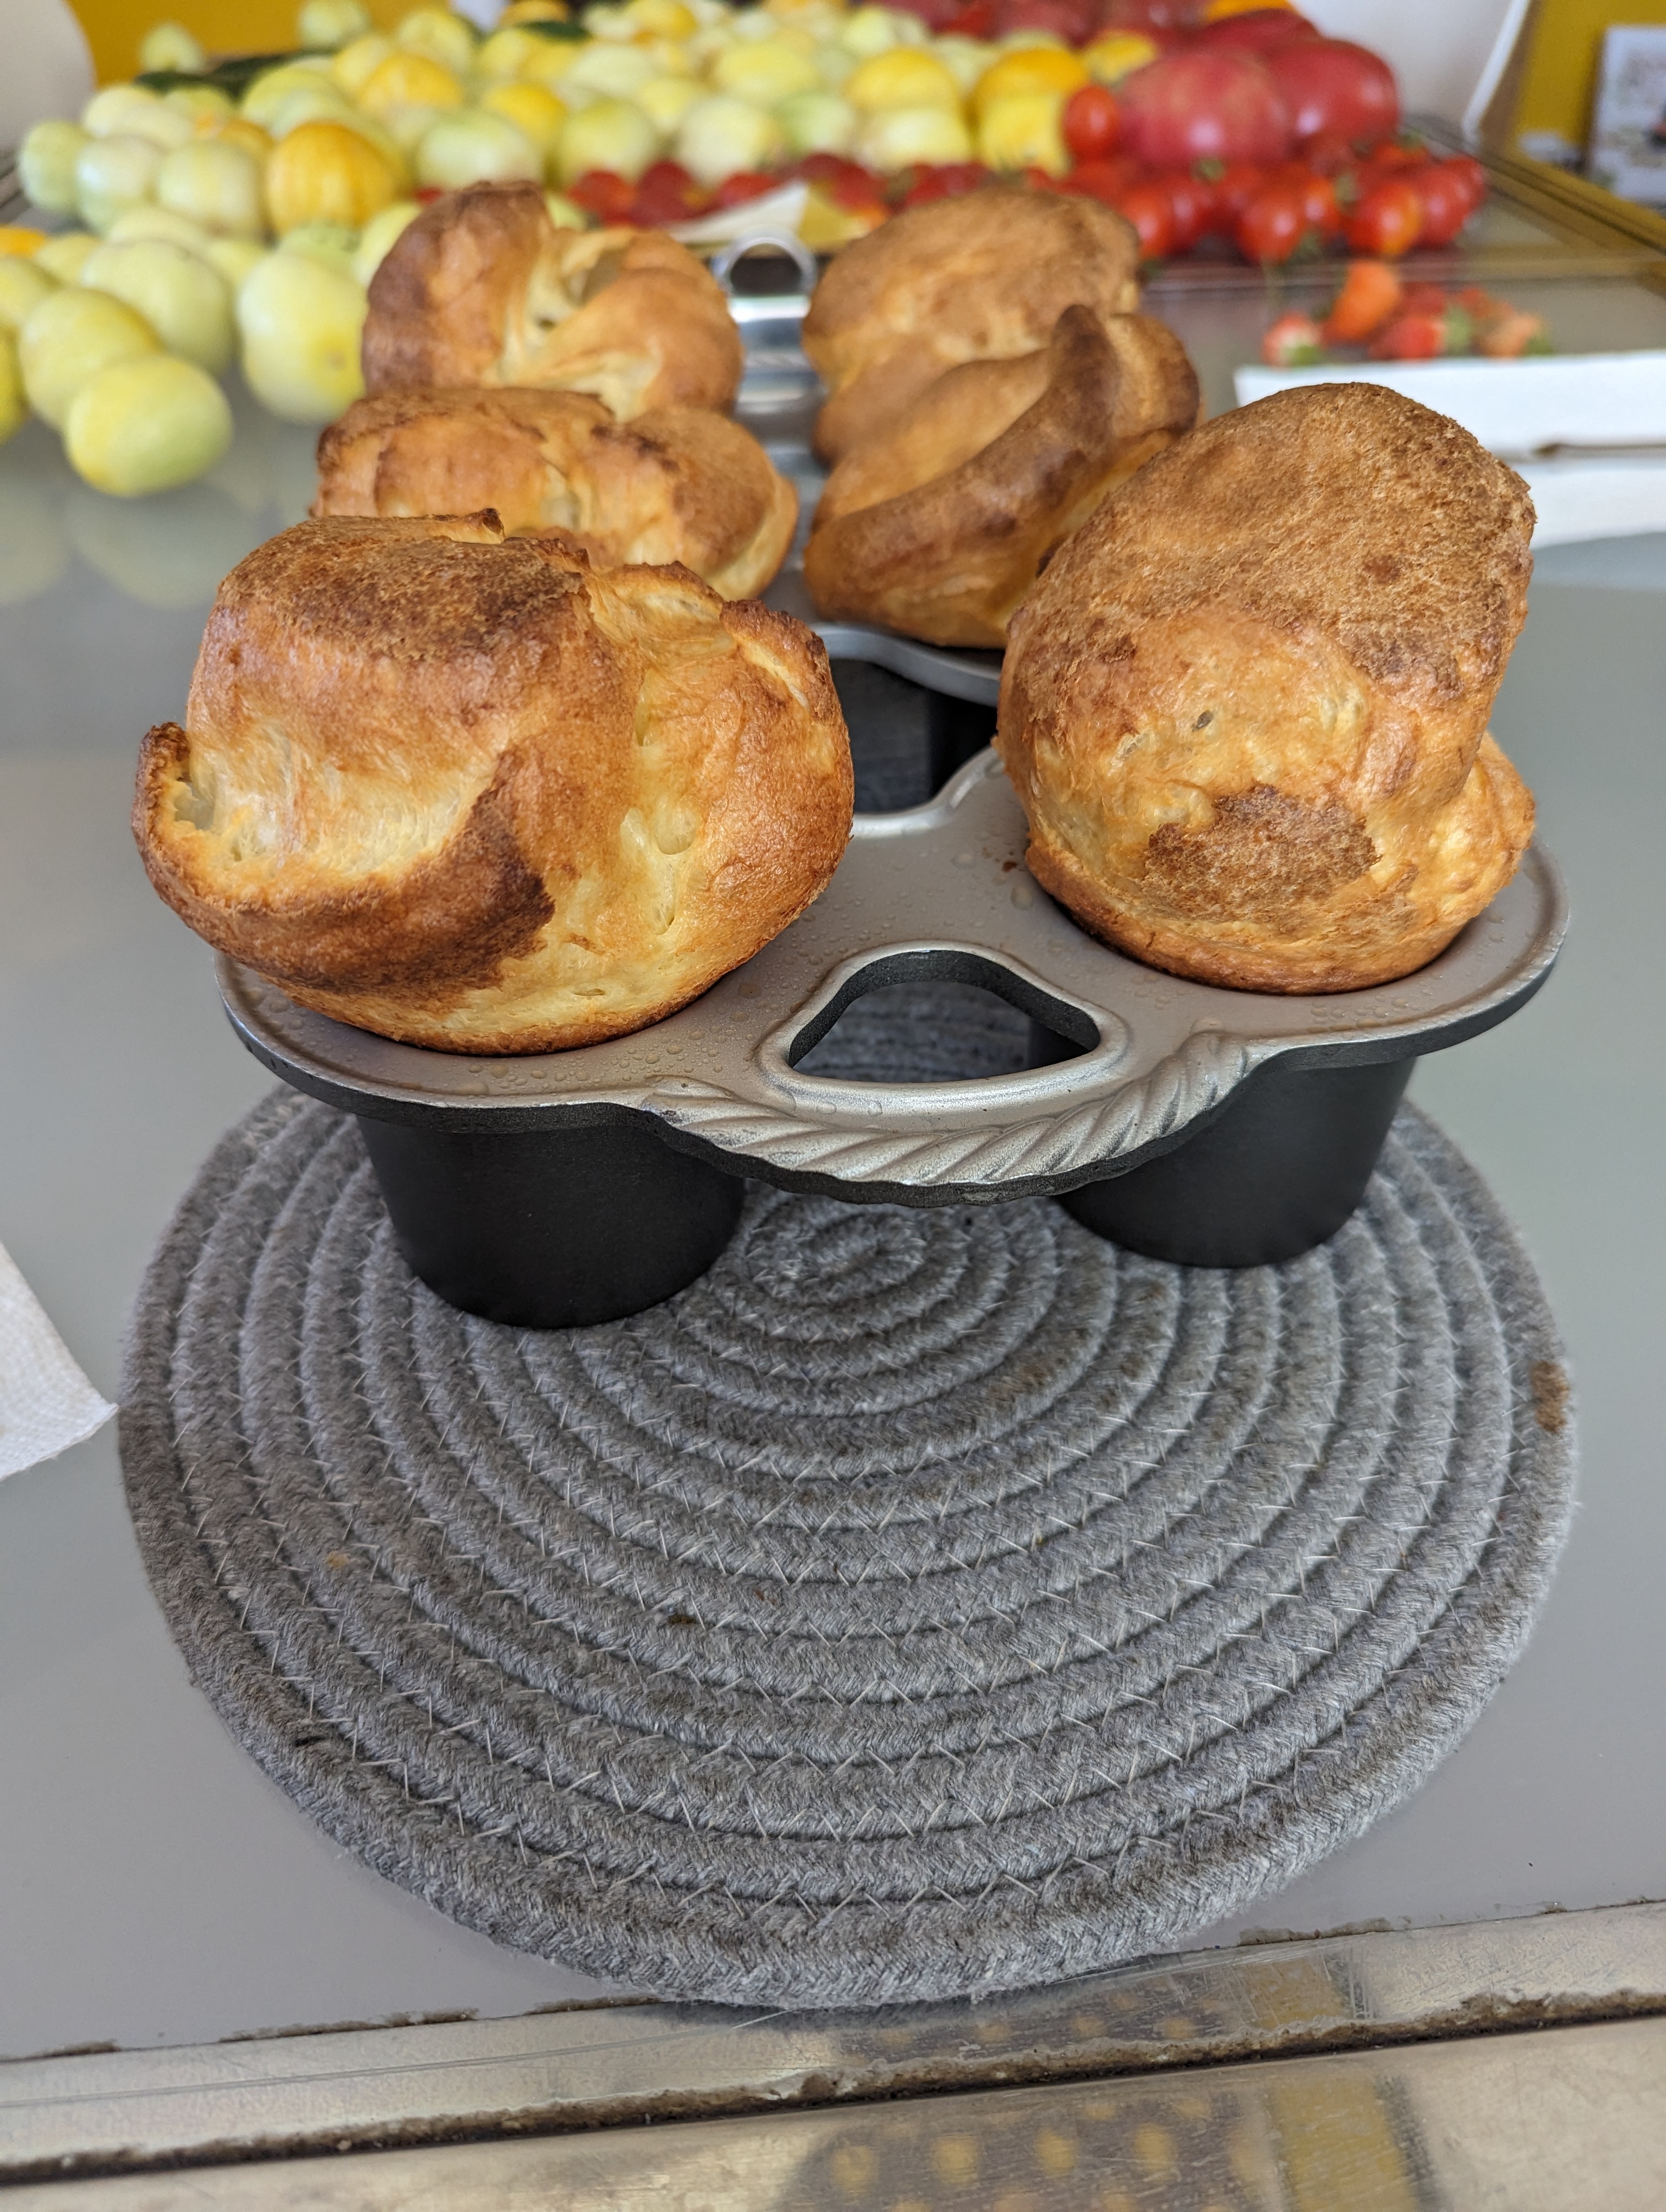
Here is the recipe:

Ingredients: 4 large eggs 1 1/2 cups milk 3/4 teaspoon salt 1 1/2 cups all purpose flour 3 tablespoons melted butter

Instructions:

-Warm the eggs by placing them UN-CRACKED in a medium bowl and cover with hot water (as hot as your tap will go). Let them sit for 10 minutes.
-Preheat the oven to 450°F and move the oven rack to a low position (to prepare for huge popovers!). Grease the popover pan thoroughly inside each cup as well as around the top edges.
-With your whisk, beat together the eggs, milk and salt until they are combined. The yolks should be completely blended in.
-Add the flour and whisk until the mixture is frothy and all large lumps are gone. Then quickly stir in the melted butter.
-Divide the batter between the prepared popover cups. They should be about 3/4 of the way full.
-Bake the popovers for 20 minutes and then reduce the heat to 350°F. Bake for another 10 or 15 minutes. The popovers will be very golden brown.

*Do not top off the cups! ONE POUR to 3/4 full. Topping off can prevent a full rise. 
  • If you can help it DO NOT OPEN THE OVEN!

Serve immediately and enjoy them warm!

view more: ‹ prev next ›